Entries by Linda Paterson

Choc Cross Buns

Some people following GAPS in the early stages should avoid sweets all together as honey and cocoa powder can prove to be problematic for people with IBS or chronic diarrhoea. This recipe can be made when all signs of digestion have improved and the patient has been on the GAPS diet for approximately 12 months […]


Print Recipe


Choc cross buns

Votes: 0
Rating: 0
You:
Rate this recipe!

Servings


Ingredients
Equipment

Choc Bun Ingredients

Choc Bun Topping Ingredients

White Chocolate Cross Topping Ingredients

Servings


Ingredients
Equipment

Choc Bun Ingredients

Choc Bun Topping Ingredients

White Chocolate Cross Topping Ingredients

Votes: 0
Rating: 0
You:
Rate this recipe!


Instructions
Cake Mixture Instructions:
  1. Preheat oven at 150◦C

  2. Place pitted dates in a saucepan on the stove with a tablespoon of ghee and heat on a low temperature until they soften. (if you have a thermomix, you can do this for 5-7 minutes).

  3. Place softened date mixture in the blender (or thermomix) and blend dates into a paste. Add remaining ingredients and blend at a high speed until the mixture resembles a chocolate cake mixture. The mixture should hold a firm smooth consistency.

  4. Grease and prepare cupcake tins or use bleach free patty cake papers to pour the mixture into. Cook for 40 – 50 minutes at 150◦C

  5. Test the cake buns with a fork before you take it out of the oven and when ready, remove cakes from the oven and let the cakes cool on a cooling rack. When cooled, take them out of their wrappers or leave them in for character.

Topping Recipe Instructions
  1. Simmer some water on a low heat in a saucepan and place a glass bowl over the simmering water. Add the cacao butter to the glass bowl and melt the cacao butter completely. (CAUTION: Keep the heat at a low temperature so that the steam does not cause any water residue within the glass bowl and make sure all your utensils and materials do not have any water on them because any water contaminating the mixture will cause lumps and clumps and spoil the smooth chocolate result).

  2. Once melted, turn off the heat and add the cocao powder gradually whilst stirring continuously with a bone dry whisk until mixed well with no lumps. Add vanilla seeds, honey and vanilla essence and continue to whisk until smooth.

  3. When the mixture is lovely and smooth it is ready for the choc bun dipping. HINT: It is a good idea to have put the buns in the fridge for a while because the chocolate will harden on the top of the bun faster like ice magic. Simply dip the buns in the chocolate and place on a tray with baking paper and place in the fridge for 15 minutes.
    Any leftover chocolate can be poured into chocolate molds to make chocolate treats.

White Chocolate Cross Topping Instructions
  1. Simmer some water on a low heat in a saucepan and place a glass bowl over the simmering water. Add the cacao butter to the glass bowl and melt the cacao butter completely. (CAUTION: Keep the heat at a low temperature so that the steam does not cause any water residue within the glass bowl and make sure all your utensils and materials do not have any water on them because any water contaminating the mixture will cause lumps and clumps and spoil the smooth chocolate result).

  2. Once melted, turn off the heat and add the coconut flour and honey gradually whilst stirring continuously with a bone dry whisk until mixed well with no lumps. Add vanilla extract and continue to whisk vigorously whilst you gradually and slowly add the coconut oil.

  3. Use a syringe to dispense the cross on the buns and refrigerate for the cross to harden. Make sure to work quickly or keep mixing in between batches to ensure the oil does not start to separate in the mixture.

  4. Any left over white chocolate can be poured into chocolate molds to make chocolate treats.
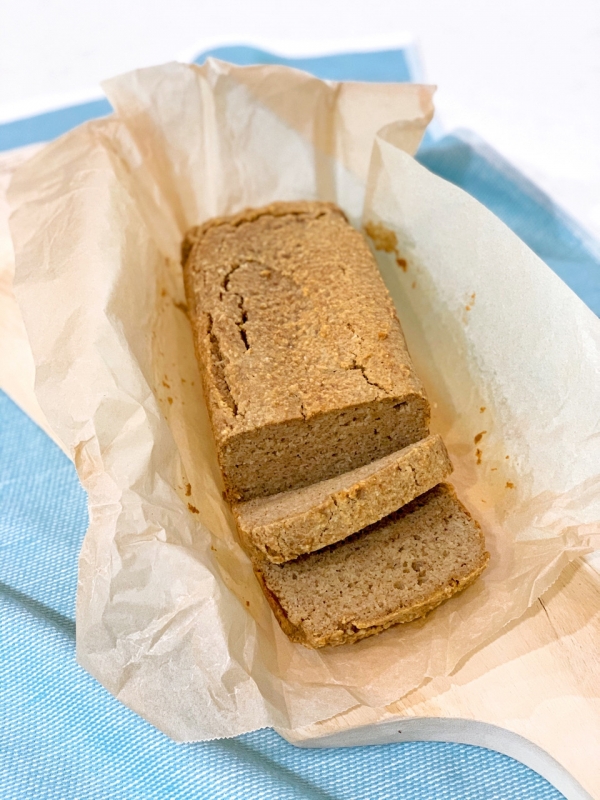
Banana Bread

Print Recipe Banana Bread Votes: 2 Rating: 4.5 You: Rate this recipe! Course Baking at home Cook Time 50-55 Minutes Servings MetricUS Imperial Ingredients 2 1/2 Cups Organic blanched almond flour1 TSP Pure Bicarbonate of Soda1 TBSP Yoghurt Optional5mL Lemon juice Freshly Squeezed2 Ripe Bananas Mashed2-3 TBSP Organic Raw Honey Optional – Bananas are sweet […]


Print Recipe


Banana Bread

Votes: 2
Rating: 4.5
You:
Rate this recipe!

Cook Time 50-55 Minutes

Servings


Ingredients

Cook Time 50-55 Minutes

Servings


Ingredients

Votes: 2
Rating: 4.5
You:
Rate this recipe!


Instructions
  1. Line bread tin with baking paper (bleach free baking paper) & preheat oven to 150⁰C.

  2. In a small bowl or jug, beat eggs, vanilla essence, honey and butter/ghee.

  3. In a large mixing bowl add almond flour, mashed bananas and egg mixture and blend until all ingredients are mixed well and bananas have blended into the mixture.

  4. Place the yoghurt on top of the mixture and then sprinkle the pure bicarbonate of soda on the yoghurt. Finally add the lemon juice on top of the bicarbonate of soda and blend with the mixer quickly. The bicarb needs a sour ingredient to activate or the bread won’t rise and the lemon juice and yoghurt will help with this.

  5. When combined, quickly pour it into the bread tin and place in the oven.

  6. Bake the bread on 150⁰C for 50 – 55 minutes and then remove from the oven. Remove the loaf from the tin by pulling it out with the sides of the baking paper and allow it to cool on a cooling tray.

Completely Raw Kingston’s

  Just like a Kingston only better!! This recipe is always a big pleaser to our visitors.  Not only is it wonderful for our GAPS tummies, our guests love it too!  Yes it looks and tastes just like a kingston Cookie with the exception of no added sugar and other ingredients we wish to avoid. […]


Print Recipe


Completely Raw Kingston's

*Tools needed: Dehydrator, thermomix (or steel blade blender/food processor)

Votes: 1
Rating: 5
You:
Rate this recipe!

Prep Time 30 Minutes
Passive Time 24 Hours

Servings


Ingredients

Prep Time 30 Minutes
Passive Time 24 Hours

Servings


Ingredients

Votes: 1
Rating: 5
You:
Rate this recipe!


Instructions
Preparation
  1. Boil water and pit dates

Choc Frosting
  1. Pit the dates and warm them in the oven at 150 degrees C for 5-10 minutes to soften them and make them easier to work with. Sometimes it is easier to double the ingredients so that the blades have more to work with and you can save the left overs for another recipe like a cake frosting and store it in the fridge. This frosting will keep for up to 6 weeks.

  2. Place all Choc Frosting ingredients in a high-speed blender or thermomix.

  3. Blend all ingredients in your high-speed blender. The ingredients can be a little finicky to blend, so start at a slow speed and increase speed slowly.

  4. With this step you need to be patient and keep blending on low to medium for a very long time to get a velvety consistency. You will see that this frosting creation is more of an art than a matter of combining ingredients. This is one of those recipes that really makes use of the power of a high-speed blender. If you feel that the blades are just spinning but aren't actually moving all of the frosting around, turn the blender off and make an air pocket down the side of the blender with a spatula to expose the blades. Remove the spatula, replace the lid, and start blending slowly again. You may need to do this several times and add tiny amounts of the water gradually and slowly to get the right consistency. You can achieve a very smooth result if the dates have been warmed gently in the oven for 5-10 minutes and continue to baby the blending process constantly running the spatula down the sides making sure all the ingredients are mixing and blending well. Be sure not to add too much water. You do not want to make the mixture runny, the ideal consistency is a thick paste like a nut butter.

  5. You'll know it's ready when you see no bits of dates in the mixture and all you can taste is velvety chocolate consistency.

  6. This raw chocolate icing is ready to use as soon as you pour it out of the blender

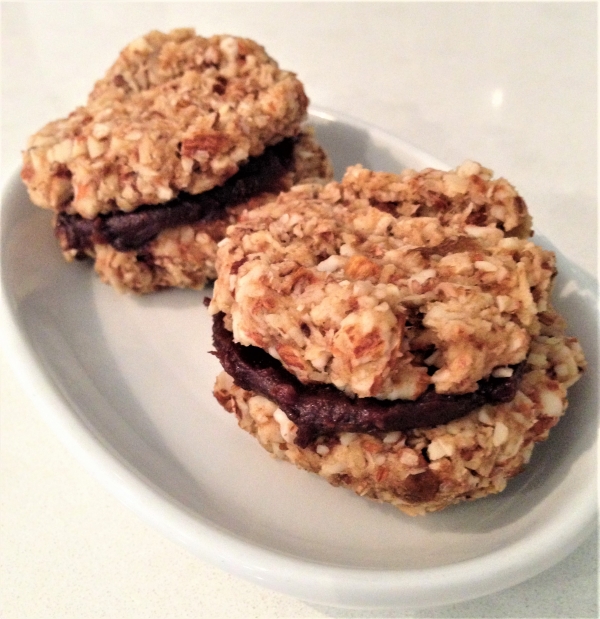
    When the Cookies have cooled smear the chocolate frosting on the flat side of the cookie with a knife and press another cookie on top squeezing the chock frosting in the middle. 
    Store in an air tight container.
    Enjoy!

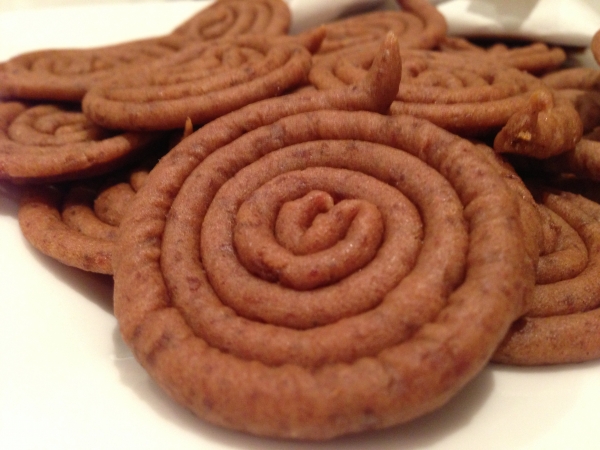
Liquorice Wheels

Adapted and inspired by the craft of Amy Sue, these delightful liquorice wheels taste like the real deal and send your kitchen into a frenzy with the adorable liquorice aroma that sets your patience to the test.  With another dehydrator recipe, you will be left with your mouth watering whilst these nutritious treats take time […]


Print Recipe


Liquorice Wheels

Votes: 0
Rating: 0
You:
Rate this recipe!

Prep Time 40 Minutes
Cook Time 12 Hours

Servings

Prep Time 40 Minutes
Cook Time 12 Hours

Servings

Votes: 0
Rating: 0
You:
Rate this recipe!


Instructions
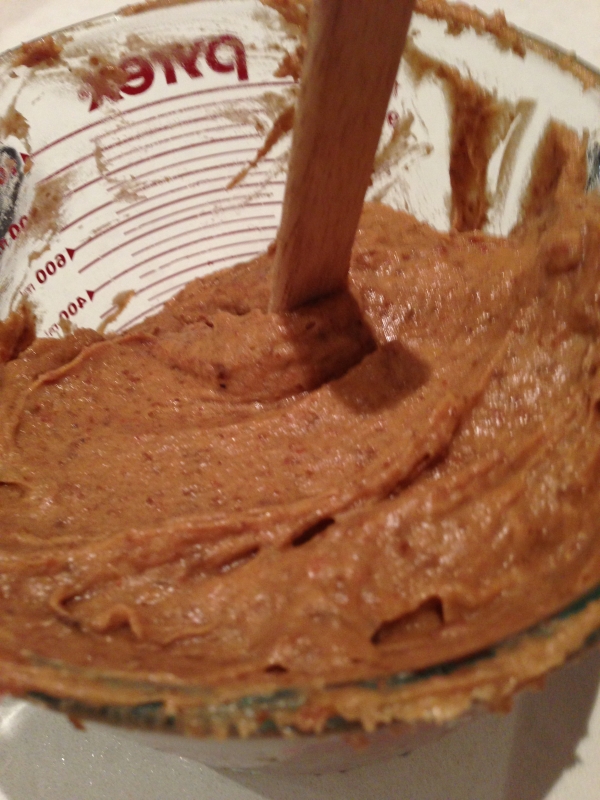
  1. Prepare 3-4 dehydrator trays with teflex sheets and put them aside.

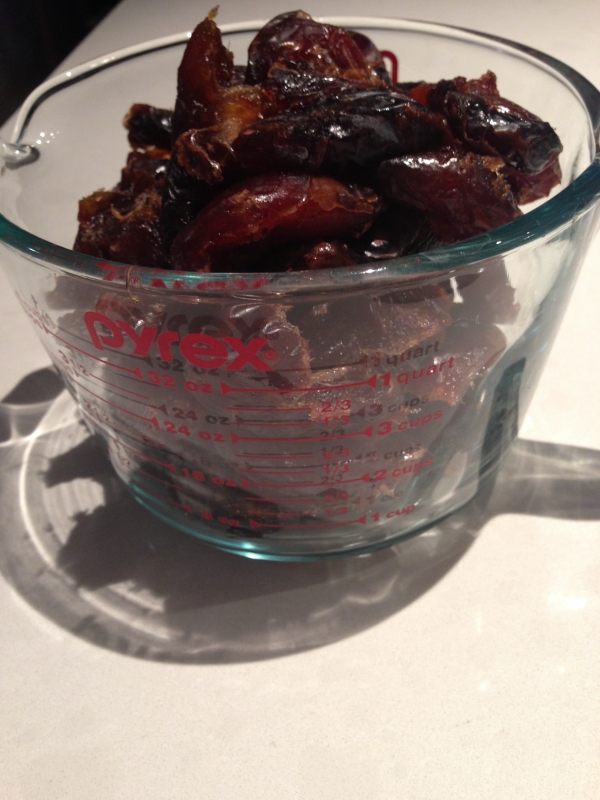
  2. Remove the pits from your dates (this is easier when they are at room temperature).

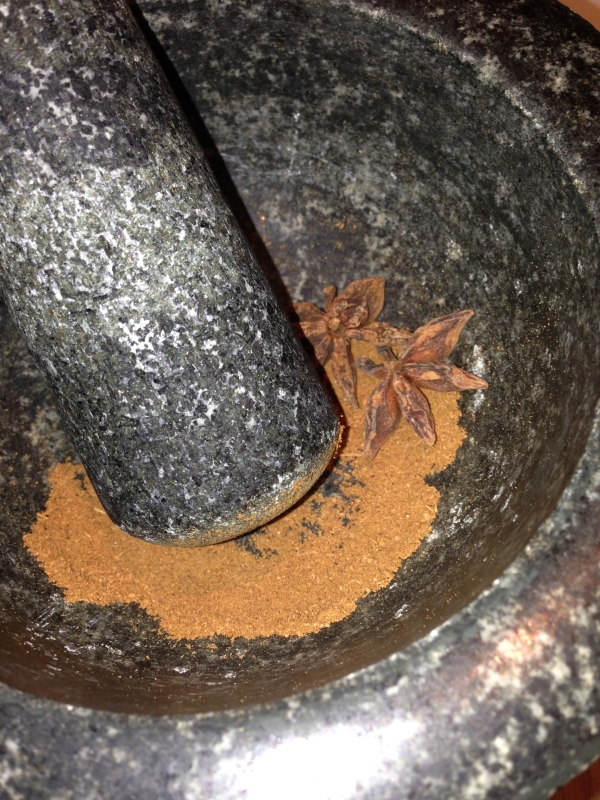
  3. Grind your star anise with a mortar and pestle to a very fine powder (or use anise spice ready prepared).

  4. Add the dates to the food processor or thermomix and add the water and vanilla extract. Process the dates until they form a smooth paste. You may need to run a spoon down the sides a few times to ensure there is an even blend during the processing. When a smooth paste has formed, add the ground anise spice and briefly blend again to ensure it is all mixed evenly.

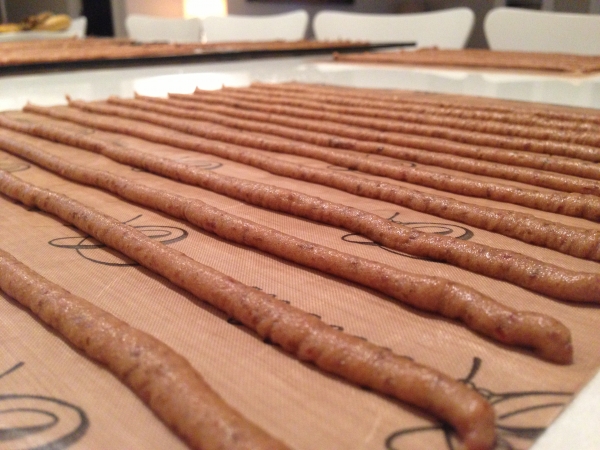
  5. Add the paste into a piping bag to create long smooth tube like lines. Keep the nozzle end close to the sheets to avoid creating wiggly lines. You may need a little practice first to see what I mean but don't worry if they are not perfect, they are still going to taste great and once they can be smoothed out slightly during the coiling process.

  6. Place the trays in the dehydrator at 115 degrees for approximately 12 hours or until they are ready for shaping but not completely done. Make sure you do not over do it. Some may need to dehydrate less than this and others may need to dehydrate a little longer.

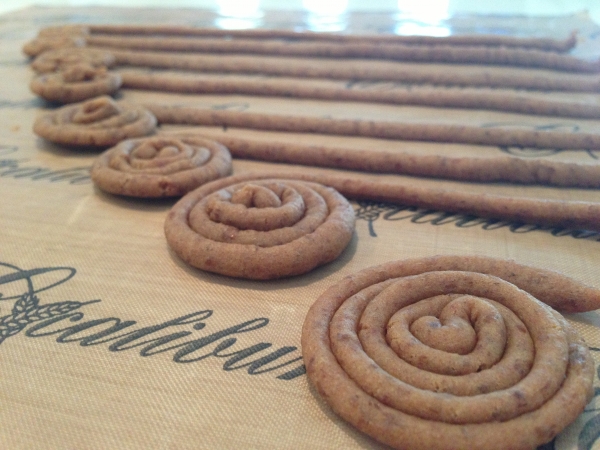
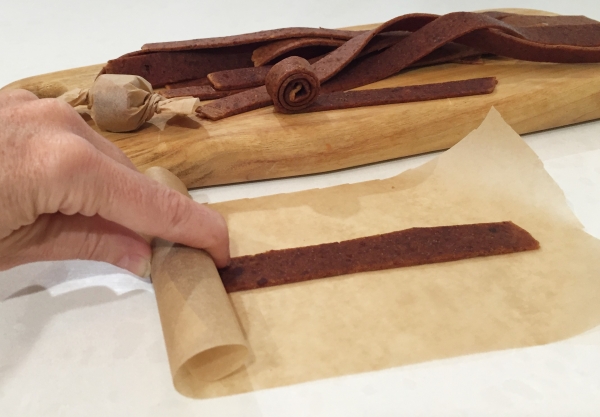
  7. When the liquorice is pliable enough to shape into coils, gently roll them on the dehydrator sheet to un-stick them from the sheet. Start shaping your coils by starting from one end continue to curl them flat on the dehydrator sheet. (They are a little easier to do this if you take the sheet off the tray and lay the sheet flat on the bench).

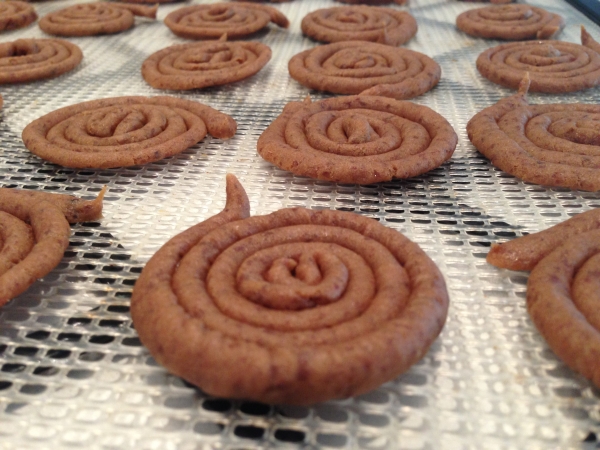
  8. When the coils are tightly bound, place them onto the dehydrator mesh sheet (without the teflex sheet) to complete the drying process at the same temperature for another 8 hours. The time may differ at times requiring more or less time on different occasions. You know they are ready when they are dry and not sticky.

  9. Don't over dry them to the point that unwinding the coil causes the wheel to break.

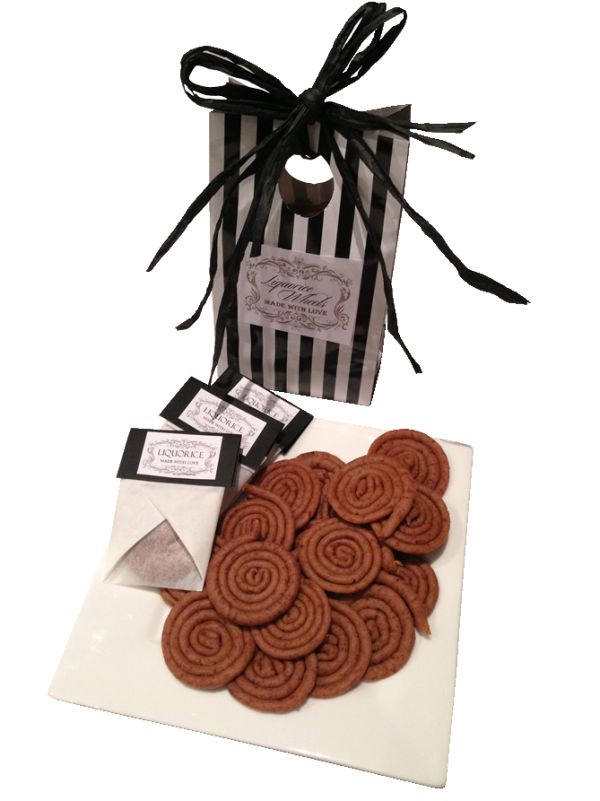
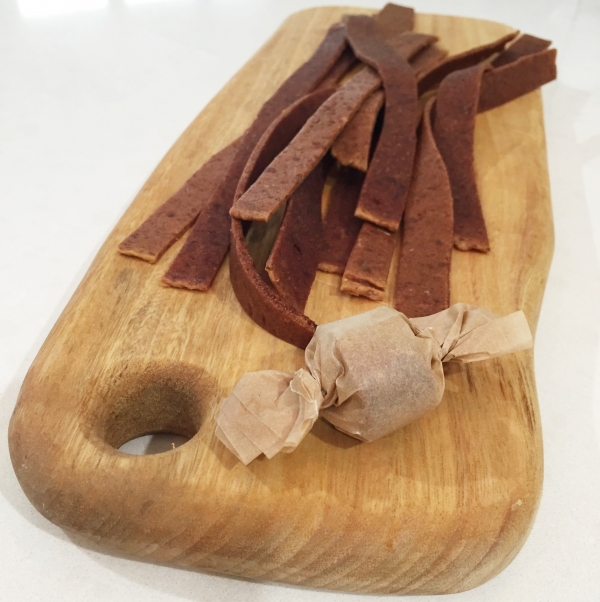
  10. Individually wrap your liquorice wheels in baking paper and pin with a staple. If you want to get fancy, you can add your own label and put them in a special bag to give as a special gift made with love.

  11. Alternatively you can make the same recipe in one flat leather slab and cut them with scissors and roll them up. I call these Liquorice Leather Rolls. These take much less time and are easy to wrap and roll. 🙂

Coconut Vanilla Fudge

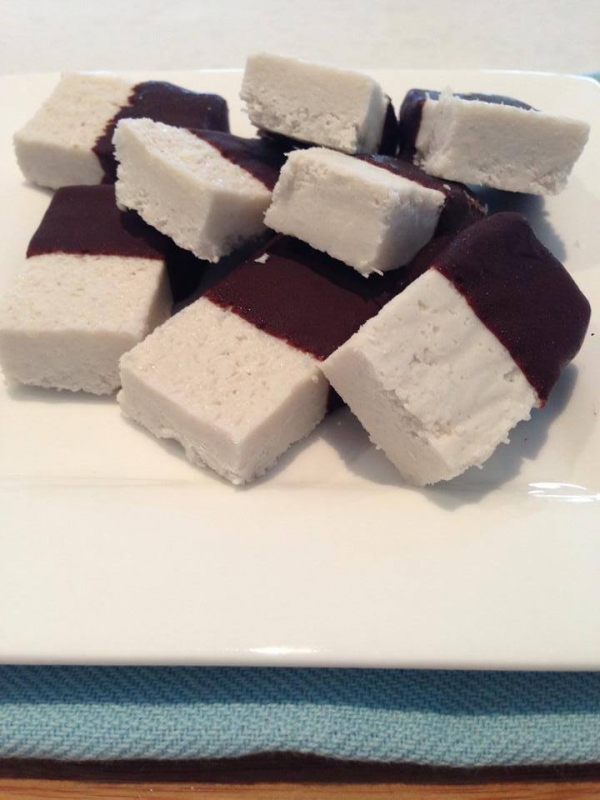
This recipe will show you how to make your own sensational additive free chocolate. CONTAINS NO nuts, dairy, sugar, eggs or other additives.With a soft fudge coconut cream and vanilla flavoured centre, slightly coated in homemade dairy free chocolate, these old family favourites will be consumed quickly in our home. You can make them rough […]


Print Recipe


Coconut Vanilla Fudge

This recipe is appropriate for people who are following the full GAPS Diet and who do not have serious digestive issues.

Votes: 1
Rating: 5
You:
Rate this recipe!

Prep Time 35 Minutes
Passive Time 45 Minutes

Servings
Slices


Ingredients
Coconut Cream Filling

Choc Coating

Prep Time 35 Minutes
Passive Time 45 Minutes

Servings
Slices


Ingredients
Coconut Cream Filling

Choc Coating

Votes: 1
Rating: 5
You:
Rate this recipe!


Instructions
Cococnut Cream Filling
  1. Mix all coconut meat ingredients in a saucepan on medium heat until all ingredients is well combined and melted and then mix in a food processor to grind the dessicated coconut a little finer.

  2. Line a 8×6 inch dish with bleach free baking paper and pour the ingredients into the dish and push down flat.

  3. Place the coconut meat mixture dish into the freezer and leave for 4 hours or overnight.

  4. When the mixture has set hard, pull the sides of the baking paper up to pull out the coconut mixture out of the dish and place it on a chopping board. With a long sharp knife, carefully cut the coconut fudge middle meat into even squares.

  5. Place the squares into a container with a lid back into the freezer for preparation for the chocolate coating step.

Choc Coating
  1. Simmer some water on a low heat in a saucepan and place a glass bowl over the simmering water. Add the cacao butter to the glass bowl and melt the cacao butter completely. (CAUTION: Keep the heat at a low temperature so that the steam does not cause any water residue within the glass bowl and make sure all your utensils and materials do not have any water on them because any water contaminating the mixture will cause lumps and clumps and spoil the smooth chocolate result).

  2. Once melted, turn off the heat and add the cocao powder gradually whilst stirring continuously with a bone dry whisk until mixed well with no lumps. Add honey and vanilla essence and continue to whisk.

  3. When the mixture is lovely and smooth it is ready for the coconut meat fudge dipping.

Coating with chocolate
  1. Take the chopped coconut meat squares from the freezer and place one square on top of a fork.

  2. Dip the square into the chocolate so that it covers only half of the slice. (you can cover the entire slice if you want to and this can be done by dropping it into the choc mixture and then lifting it with the fork from the bottom and let the excess chocolate drip off.

  3. The cold coconut squares will start to harden the outer layer of chocolate as you lay the squares down onto some bleach free baking paper on a tray to set.

  4. Place the choc covered squares into the fridge for 10 minutes to set. These are reasonably stable at room temperature.


Recipe Notes

OPTIONAL: You may wish to add a teaspoon of organic mint flavour to the mixture if desired.

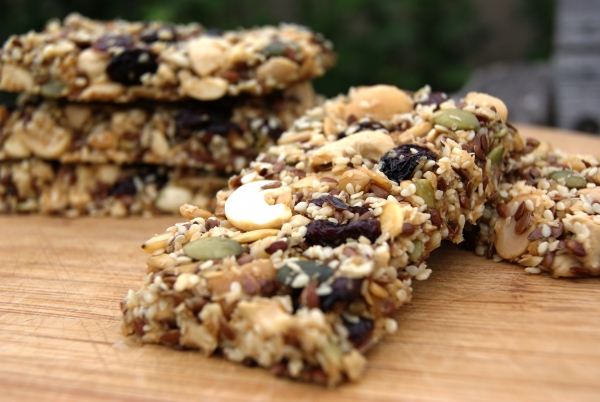
Crunchy Nut Seed Fruit Combo Bites or Bars

This recipe is a favourite and can resemble a crunchy nut and seed fruit bar or equivalent bite sized snack. When I make the bars, I tend to spread the ingredients into a thickness similar to a museli bar but when I like to make smaller bite sized pieces, I spread the ingredients further to […]


Print Recipe


Crunchy Nut Seed Fruit Combo Bites or Bars

Votes: 1
Rating: 5
You:
Rate this recipe!

Servings


Ingredients

Servings


Ingredients

Votes: 1
Rating: 5
You:
Rate this recipe!


Instructions
  1. You may wish to lightly grind some of the nuts to break them up a little but they can be left as they are

  2. Soak all seeds and nuts overnight and rinse them under filtered water in a sieve

  3. Combine and mix all ingredients with your hands or a big spoon in a bowl

  4. The flax seed may need a little more draining in a sieve before you add them to the remaining of the ingredients. These will work as a binding agent to keep all your ingredients together.

  5. When all is combined simply spread the ingredients on a dehydrator sheet (1 cm thick) and Dry at 135 degrees F or 57 ◦C for 20-24 hrs

  6. You may dehydrate for longer if you want a crispier result or intend to make thicker nut/seed bars

  7. When completed, simply break into bite size snacks or cut specific portions with a knife. You may also wish to break it up further to make a muesli mix for breakfast with your yoghurt.

  8. You can explore any nut fruit and seed combo that you desire. Enjoy!

Chicken Vegetable Pie

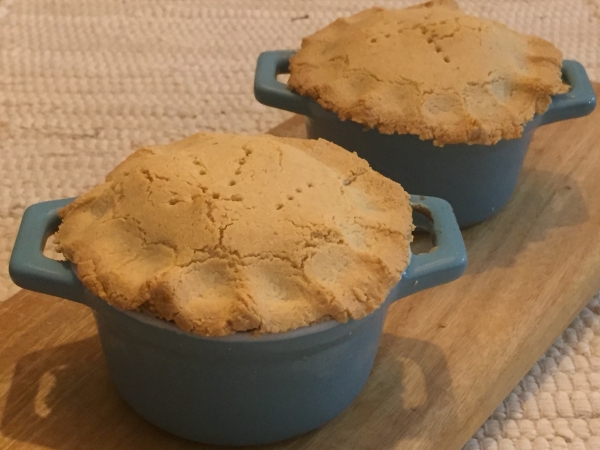
You will need 4 mini pie pots (size 4cm width opening from the top) This is a delicious meal on it’s own, served with a salad and fermented vegetables on the side.  It is a great winter warmer for all the family. Print Recipe Chicken Vegetable Pie Votes: 0 Rating: 0 You: Rate this recipe! […]


Print Recipe


Chicken Vegetable Pie

Votes: 0
Rating: 0
You:
Rate this recipe!

Course Main Dishes
Cuisine Full GAPS Diet

Prep Time 20 Mins
Cook Time 40 Mins
Passive Time 45 Mins

Servings
Pies


Ingredients
Pie Filling

Course Main Dishes
Cuisine Full GAPS Diet

Prep Time 20 Mins
Cook Time 40 Mins
Passive Time 45 Mins

Servings
Pies


Ingredients
Pie Filling

Votes: 0
Rating: 0
You:
Rate this recipe!


Instructions
Pie Pasty Prep
  1. Preheat the oven to 150 Degrees Celsius

  2. Place all pie pastry ingredients into a bowl and kneed with your hands, massaging and squeezing the ingredients until it forms a tight ball. You can also get this effect very quickly if you place all ingredients in a thermomix for 20 seconds on speed 4.

  3. Roll the dough flat so that it is approximately 1cm thick. Cut out sections of the dough to fill 4 mini pie pots (size 4cm width opening from the top) and press them into the bottom and side walls with your fingers. Make sure to leave enough dough to make the lids.

  4. With the remaining pastry and cut offs, roll out the dough again and cut out 4 lids.

  5. Place the bottoms of the pie crust pressed into the pie pots into the oven and cook for 15 - 20 minutes. Place the lids into the fridge for later.

Preparing the Filling
  1. Bring to boil the chicken breast in two cups of chicken stock.

  2. When chicken is cooked, remove the chicken and dice it up into small bite sized pieces for the pie.

  3. In a separate fry pan, saute the onion and garlic.

  4. Chop pumpkin and carrots to small bite sized pieces. Cut the heads from the broccolini and add them to the chicken stock in the pot along with the carrot and pumpkin pieces..

  5. Also add the onion and garlic along with the chicken to the chicken stock.

  6. Add all remaining chicken filling ingredients and bring to the boil and then reduce the heat to a simmer on a low heat for 45 minutes.

Putting it all together
  1. When all ingredients are cooked and ready, remove from the stoce and prepare the pie bottoms for filling.

  2. Evenly scoop the chicken pie filling into each pie pot crust filling.

  3. take the pie crust filling lids from the fridge and place them over the top of each pot. Pinch the sides of the pastry to connect the base of the pie with the pie tops. alternatively you can use a fork to do this.

  4. Spear the tops of the pie with a fork and place the pots on a tray in the oven. Cook for 20 minutes ( or until lightly golden brown) at 150 Degrees Celcius.

  5. Remove and let cool for ten minutes before serving.

Choc Top Minty Moments – Cheesecake Medallions

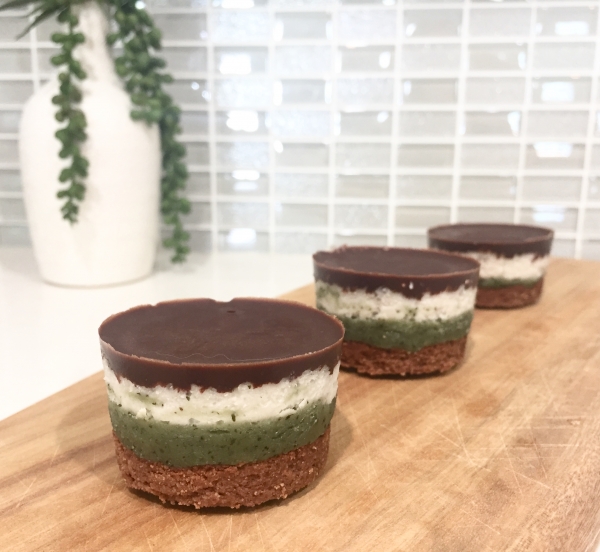
This recipe is an absolute delight if you love chocolate and mint with a splash of coconut cream flavour on a delicious crumbly biscuit bottom.  If you don’t like mint, simply leave that out of the recipe.  Although this recipe is not difficult, it does take some time to prepare but the time taken is […]


Print Recipe


Choc Top Minty Moments Cheesecake Medallions

This recipe is appropriate for people who are following the Full GAPS Diet.

Votes: 1
Rating: 5
You:
Rate this recipe!

Prep Time 1 Hour
Passive Time 40 Minutes

Servings
Cups

Prep Time 1 Hour
Passive Time 40 Minutes

Servings
Cups

Votes: 1
Rating: 5
You:
Rate this recipe!


Instructions
Biscuit Bottom
  1. Pre-heat oven to 150 degrees Celsius for 10 minutes (no hotter)

  2. Mix all ingredients in a bowl with a spoon, followed by massaging all the contents and squeezing the ingredients in your hands where you can feel the mixture starting to stick together. Depending on the consistency of the mixture, add more nut butter or coconut oil if it is too dry or more nut flour if it is too moist. You want to create a cookie dough so keep mixing and squeezing the contents with your hands so that the mixture can form a big ball ready for making smaller balls.

  3. When you have rolled the cookie mixture into a ball on the bench top, pinch a section of the dough and roll the section into a ball approximately 4cm in width. Continue this until you have 20 balls ready.

  4. Place each ball into mini round cardboard baking cups. These will be used as the mold for the entire cheesecake and they should be 5cm wide measured from the bottom.

  5. Press the first layer with your thumb by pushing the ball down flat to make a base in the bottom of the cup ensureing it reaches all the sides with good coverage.

  6. Place the baking cups onto a baking tray and place the tray in the preheated oven at no more than 150 degrees Celsius for 10 minutes, keeping a close eye on them to ensure they do not burn. Almond flour burns easily so do not cook any higher than 150 degrees Celsius.

  7. Remove the tray from the oven after 10 minutes and let the cookies cool for 5 minutes and then place them in the fridge for 15 minutes to cool whilst you prepare the next layer.

Mint Cheescake Layer
  1. Soak cashews in water for 20 minutes and then rince them and drain off the water.

  2. Add Cashews to the thermomix or strong mixer and mix on a high speed to break down the nuts into a flour like consistency.

  3. Add coconut oil and coconut milk to the mixture and continue to blend whilst occasionally stopping to wipe down the sides with the spatula to ensure all the ingredients are blended together evenly.

  4. Add honey, vanilla essence, mint flavour and mint leaves. The mint leaves are optional because they do require a lot of blending and pulsing to break them down into a paste along with the nut and coconut mixture. They do contribute slightly to the flavour and add some colour.

  5. If you wish to add more colour, add the spirulina powder.

  6. Continue to mix and blend whilst occasionally stopping to wipe down the sides with the spatula to ensure all the ingredients are blended together evenly. Keep blending until you establish a nice creamy like texture.

  7. Remove the baking cups from the fridge and add a spoonful of the mixture until all the ingredients is evenly dispersed in each cup.

  8. With the back of a teaspoon, level out the mint layer so that it is reasonably flat and place the cups in the freezer for 15 minutes.

Coconut Cream Layer
  1. Mix all coconut meat ingredients in a saucepan on medium heat until all ingredients is well combined and melted

  2. Remove from stove and mix ingredients in a food processor to grind the desiccated coconut a little finer.

  3. Add a spoonful of the mixture

  4. With the back of a teaspoon, level out the mint layer so that it is reasonably flat and place the cups in the freezer for 15 minutes.

Chocolate Top
  1. Simmer some water on a low heat in a saucepan and place a glass bowl over the simmering water. I like to use a pyrex jug (size measures 4 cups) for this as it works nicely to pour the ingredients later.

  2. Add the cacao butter to the glass bowl and melt the cacao butter completely. (CAUTION: Keep the heat at a low temperature so that the steam does not cause any water residue within the glass bowl and make sure all your utensils and materials do not have any water on them because any water contaminating the mixture will cause lumps and clumps and spoil the smooth chocolate result).

  3. Once melted, turn off the heat and add the cocao powder gradually whilst stirring continuously with a bone dry whisk until mixed well with no lumps. Add honey and vanilla essence and continue to whisk.

  4. Remove the baking cups from the freezer and pour chocolate mixture over the top until all the ingredients is evenly dispersed in each cup to provide good coverage as the top layer. Try not to make the top layer too thick to make it easier to bite into the cheesecake.

  5. Refrigerate for 1hour to set.

  6. When all ingredients have set, you can tear the cardboard paper cups and slowly remove the cheesecake medallions from the cup casing to expose them for serving. I recommend you keep them in the baking cups until you are ready to serve or eat.

GAPS Ginger Cookies

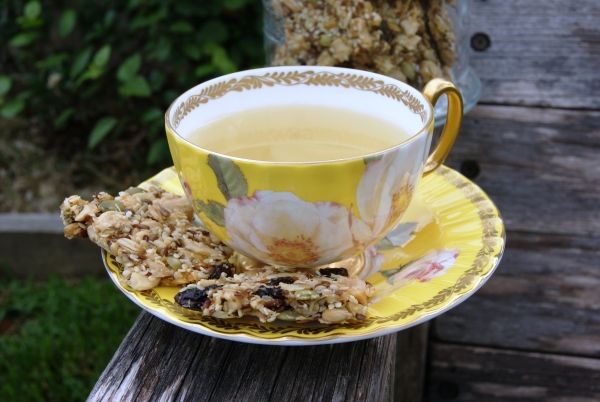
These cookies are not your usual ginger snaps because they are light and airy to bite into.  They are great on their own for a snack but make for the perfect combo with a cup of GAPS Ginger Tea.  If you had your heart set on a crispy cookie that looks just like the one […]


Print Recipe


GAPS Ginger Cookies

This recipe is appropriate for people who have reached stage 6 of the Introduction Diet and the Full GAPS Diet

Votes: 1
Rating: 5
You:
Rate this recipe!

Prep Time 15 Minutes
Cook Time 15 Minutes
Passive Time 7 Hours

Servings
Cookies


Ingredients

Prep Time 15 Minutes
Cook Time 15 Minutes
Passive Time 7 Hours

Servings
Cookies


Ingredients

Votes: 1
Rating: 5
You:
Rate this recipe!


Instructions
Preparation
  1. Preheat oven to 150˚C and prepare one large or two medium stainless steel trays by lining them with (bleach free) baking paper.

Mixing and Baking the Cookies
  1. Add all the ingredients into a bowl (except for the desiccated coconut and bicarbonate of soda).

  2. Mix the mixture with electric beaters or other mixer/thermomix. I used electric hand held beaters for this recipe.

  3. When well combined, add the desiccated coconut and add the bicarbonate of soda last.

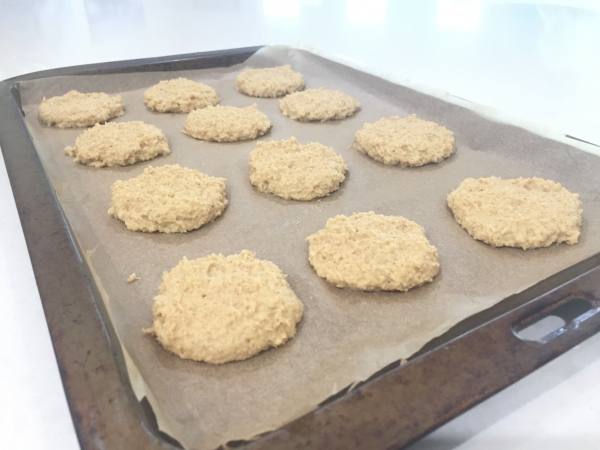
  4. Spoon a tablespoon of mixture neatly onto the prepared lined baking trays and pat gently with the flat of one finger so that the mixture resembles a rounded semi-flat shape.

  5. Place the baking tray into the preheated oven and bake for 15 minutes. Do not be tempted to cook longer than this as the cookies will burn. If your oven tends to cook quickly, you may want to remove them sooner. The edges and tops should be browned but not burnt.

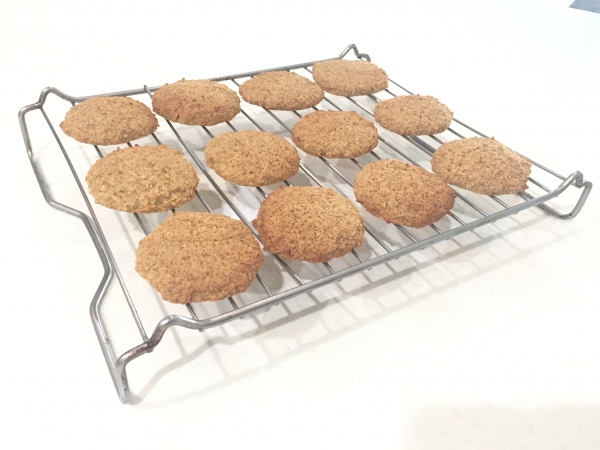
  6. Once removed from the oven, carefully slide the liner off the tray and onto a cooling tray with the cookies still in place. Let them cool this way for ten minutes to allow the cookies to cool. DO NOT try to pick them up as they will be soft and fall apart.

  7. When they are cool to touch and are becoming more solid, remove the paper lining under the cookies so that the bottoms don’t sweat. Allow the cookies to cool for a further 20 – 30 minutes on the cooling tray.

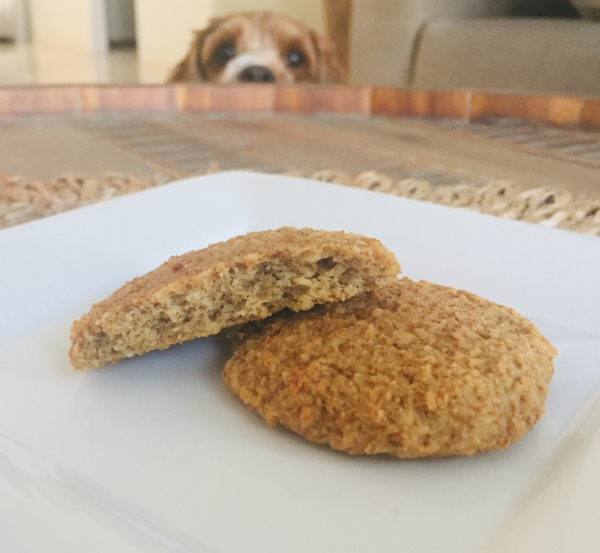
  8. The cookies will be light, airy and soft to eat. If you like them like this, you may store them in an air tight container. They will be soft to eat similar to a cake like consistency. They can be kept fresh for a week


Recipe Notes

The Excalibur food dehydrator is the best on the market.  I have had mine for ten years and it is still going strong. We have a few Excalibur Dehydrator options available at GAPS Diet Australia based on affordability and specification.  If you do purchase one, I highly recommend the one with a timer.  This helps greatly when dehydrating food on an ongoing basis.

View and listen to the cookie crunch video here

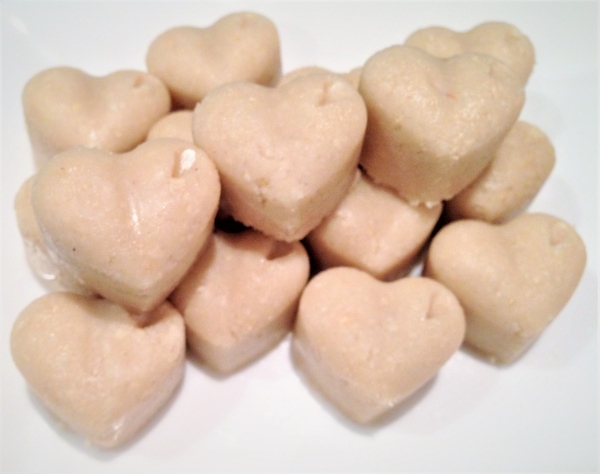
Raw Vanilla Hearts

This recipe is a great white chocolate alternative and is quick and easy to make requiring no baking what-so ever. Print Recipe Raw Vanilla Hearts This is a recipe for the Introduction Diet from Stage 6 onward. Votes: 0 Rating: 0 You: Rate this recipe! Course Baking at home, Deserts, Egg free recipes Cuisine Full […]


Print Recipe


Raw Vanilla Hearts

This is a recipe for the Introduction Diet from Stage 6 onward.

Votes: 0
Rating: 0
You:
Rate this recipe!

Prep Time 10
Passive Time 30

Servings

Prep Time 10
Passive Time 30

Servings

Votes: 0
Rating: 0
You:
Rate this recipe!


Instructions
  1. Place all ingredients into a food processor or thermomix and mix or pulse until all lumps are completely removed and the mixture becomes smooth for moulding

  2. Using heart silicon moulds or any other shape, press the mixture with your finger tips into the moulds until leveled.

  3. Place in the fridge to set. This can take up to half an hour or longer. Simply pop them out and store in the fridge when complete.

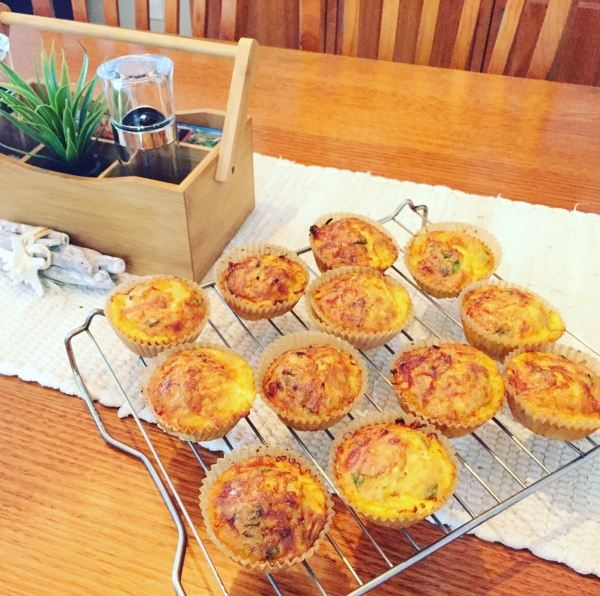
Bacon and Egg Pies

This recipe is great for both school or work lunch ideas.  They are supper easy to make and can be frozen for a later time. They do not last very long in our home and rarely get to the freezer unless I hide them. Selecting the right bacon is important: GAPS does not recommend smoked […]


Print Recipe


Bacon and Egg Pies

This recipe is appropriate for people following the Full GAPS Diet (not intro)

Votes: 1
Rating: 5
You:
Rate this recipe!

Prep Time 10 Minutes
Cook Time 30 Minutes

Servings
Pies


Ingredients

Prep Time 10 Minutes
Cook Time 30 Minutes

Servings
Pies


Ingredients

Votes: 1
Rating: 5
You:
Rate this recipe!


Instructions
  1. Preheat the oven to 175 Degrees Celcius

  2. Dice both the onion and bacon.

  3. Saute the onion and bacon in a fry pan with ghee and set aside.

  4. In a glass bowl, add the eggs and whisk the eggs until well mixed.

  5. Dice shallots and grate the cheddar cheese.

  6. Add the shallots, almond flour, salt and cheddar cheese.

  7. When the bacon and onion has cooled a little, add them to the mixture and mix all ingredients well.

  8. Line a muffin tray with regular 12 sized bleach free muffin cups and spoon the ingredients into all the cups evenly.

  9. Cook in the oven at 175 Degrees Celsius for 30 minutes or until browned on the top.

  10. After 30 minutes, remove from the oven and place on a cooling tray. When cooled, store in an airtight container in the fridge or freeze for later. These defrost easily overnight in the fridge.

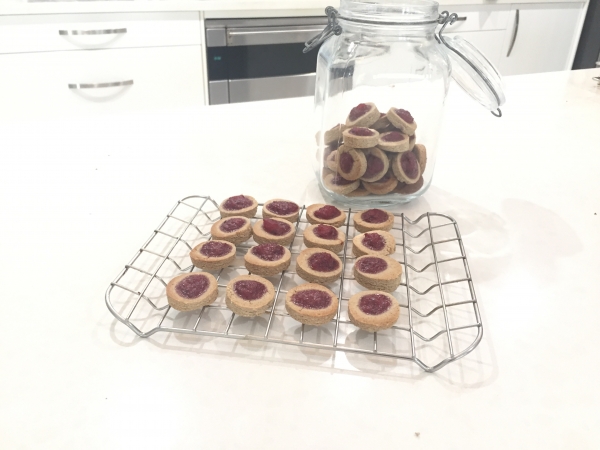
Basic GAPS Cookie Dough

I have been making these cookies for over ten years when my son was 3 and first diagnosed with Autism.  We made little faces on them with all kinds of different emotions.  This was to help with understanding the different emotions and prompt communication when eating them.  My son is now 14 and still enjoys […]


Print Recipe


Basic GAPS Cookie Dough

Suitable from Stage 6 onwards
You can make little faces on these cookies with a variety of different expressions and call them emotion cookies or you can make small gingerbread men for Christmas.

Votes: 0
Rating: 0
You:
Rate this recipe!

Prep Time 10 Minutes
Cook Time 10 Minutes

Servings
Cookies


Ingredients
Jam

Prep Time 10 Minutes
Cook Time 10 Minutes

Servings
Cookies


Ingredients
Jam

Votes: 0
Rating: 0
You:
Rate this recipe!


Instructions
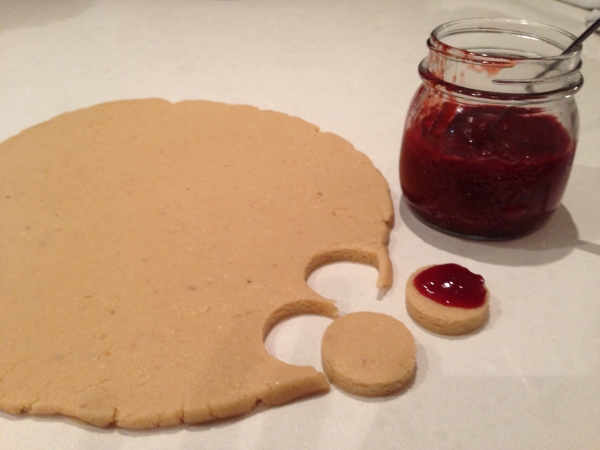
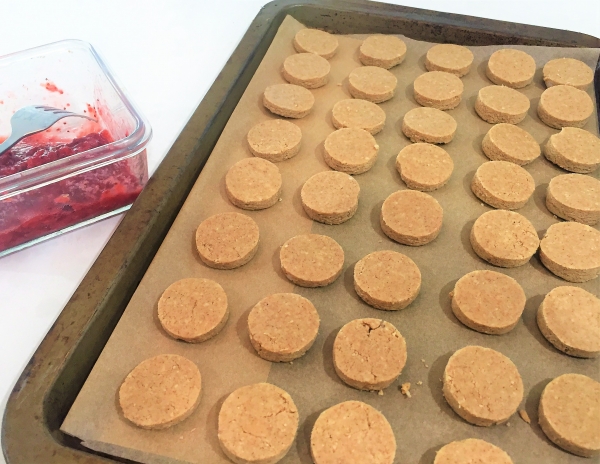
Strawberry Jam
  1. Add all ingredients to a saucepan on a low simmering heat and use a wooden spoon to stir the ingredients whilst applying pressure to the strawberries to squash them into a jam sauce.

  2. Continue to do this for approximately 15 - 20 minutes on a low heat so that the mixture will thicken.

  3. Pour the jam mixture into a jar and refrigerate. This will set when cooled.

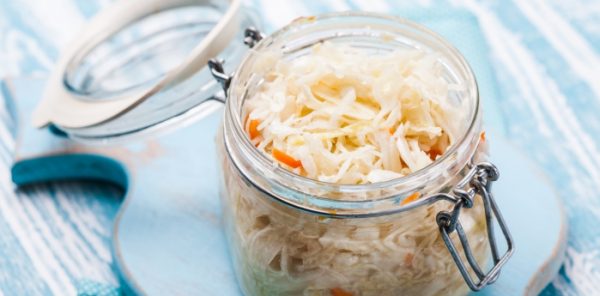
Fermented Sauerkraut Juice

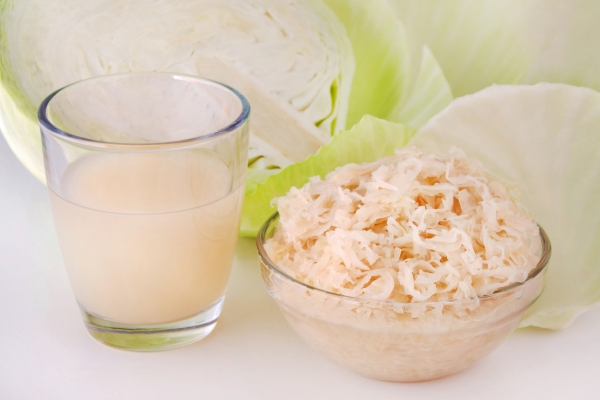
What if you run out of sauerkraut juice on the introduction diet? Sauerkraut juice is a by-product from making sauerkraut.  There is often not enough to cater for the introduction diet stages when you purchase sauerkraut or when you make your own so here is a recipe that will help you keep up with your […]


Print Recipe


Sauerkraut Juice

Votes: 0
Rating: 0
You:
Rate this recipe!

Servings
litres


Ingredients
Juice Ingredients

Servings
litres


Ingredients
Juice Ingredients

Votes: 0
Rating: 0
You:
Rate this recipe!


Instructions
  1. Fresh press your cabbage to make close to a litre of cabbage juice.

  2. And add either a cup of whey dripped from your yoghurt or kefir or use some yoghurt starter or vegetable culture.

  3. A cup of water can be added to top it up.

  4. Ferment the juice on the bench for 24 – 48 hours at room temperature and you will notice it will become slightly carbonated or effervescent. It is good to use a glass container that is sealed tight. Be sure to release any gas build up in the bottle by loosening the jar and tightening it again during the fermentation process.


Recipe Notes

Store in the fridge when fermentation is complete.

GAPS Approved Raising Agents for Baking

The GAPS diet does not allow baking powder or raising agents of any kind apart from pure bicarbonate of soda, otherwise known in USA as baking soda. (Use sparingly for people who have very low stomach acid). Egg whites (albumen) are especially good as a mechanical raising agent and for both soufflé and mousse the […]


Print Recipe


GAPS Approved Raising Agents for Baking

Appropriate for Full GAPS and Stage 6 of the Intro Diet

Votes: 0
Rating: 0
You:
Rate this recipe!

Servings

Votes: 0
Rating: 0
You:
Rate this recipe!


Instructions
  1. Bicarbonate of soda is a pure leavening agent. It needs to be mixed with moisture and an acidic ingredient for the necessary chemical reaction to take place to make food rise. Because it needs an acid to create the rising quality, it is often used in recipes where there is already an acidic ingredient present, such as lemon juice, cocoa, yoghurt or honey. Baking Powder should be avoided as it contains additional non GAPS allowable ingredients.

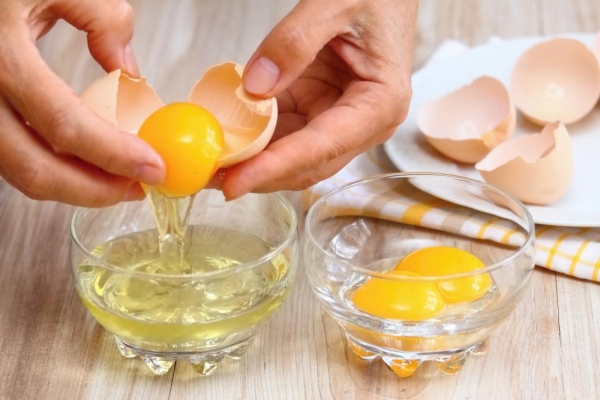
  2. People who have very low stomach acid may need to avoid Bicarbonate of soda for a while and egg whites may be used for an alternative raising agent. Simply whisk the egg whites into soft fluffy peaks before adding to the mix.

Almond Flour Replacement/Alternatives

Almond flour is commonly used in many of the GAPS baking recipes, however these recipes can be substituted with other flours made from seeds. Almond Flour Replacement/Alternatives • Sunflower seeds ground into flour (remember to soak them first for 12 hours) • Pumpkin seeds ground into flour (remember to soak them first for 12 hours) […]


Print Recipe


Almond Flour Replacement/Alternative

Appropriate for the introduction diet from stage 6 onward

Votes: 0
Rating: 0
You:
Rate this recipe!

Servings


Ingredients

Servings


Ingredients

Votes: 0
Rating: 0
You:
Rate this recipe!


Instructions
  1. Sunflower seeds need to be soaked in order to activate them. Once activated they can be dehydrated to remove the moisture and then ground into a flour in the thermomix or food processor.

  2. Pepitas (also known as pumlin seeds) need to be soaked in order to activate them. Once activated they can be dehydrated to remove the moisture and then ground into a flour in the thermomix or food processor.

Coconut Fudge Slice

This recipe is useful as a reward system for children who are fussy eaters on the intro diet, it is smooth and has the texture of chocolate as it melts in their mouth. About 50% of fatty acids found in coconut oil is Lauric Acid which is one of the ingredients found in human breast […]


Print Recipe


Coconut Fudge Slice

This recipe is appropriate for stage one on the intro diet for fussy eaters only.

Votes: 0
Rating: 0
You:
Rate this recipe!

Prep Time 5 minutes
Passive Time 1 hour

Servings
peices


Ingredients
Basic Fudge Recipe

Other Variations

Prep Time 5 minutes
Passive Time 1 hour

Servings
peices


Ingredients
Basic Fudge Recipe

Other Variations

Votes: 0
Rating: 0
You:
Rate this recipe!


Instructions
  1. Place all ingredients into the food processor and blend until all well combined and creamy

  2. line a glass pyrex dish with bleach free baking paper and pour the ingredients into the dish

  3. Place dish into the freezer for 45 minutes to an hour so that it hardens quickly and doesn't separate

  4. Remove from freezer and store in the fridge

  5. Cut small square portions as desired

Berry Birthday Cake (Better than Chocolate Cake)

I was very delighted with the creation of this cake recipe and happy to share it with you.  I have been making it for over 8 years now for my family and perfecting it each time or adding different things to it for variety.  This cake is a treat and should be consumed sparingly which […]


Print Recipe


Berry Birthday Cake

Appropriate for the Full GAPS Diet and when all digestive distress has settled

Votes: 2
Rating: 5
You:
Rate this recipe!

Prep Time 30 Minutes
Cook Time 40 Minutes

Servings
People


Ingredients
Cake Ingredients

Filling

Chocolate Icing

Prep Time 30 Minutes
Cook Time 40 Minutes

Servings
People


Ingredients
Cake Ingredients

Filling

Chocolate Icing

Votes: 2
Rating: 5
You:
Rate this recipe!


Instructions
Equipment
  1. 2 x stainless steel round spring-form cake pans

  2. Food processor or thermomix

  3. Saucepan

Cake Mixture Instructions
  1. Place pitted dates in a saucepan on the stove with a tablespoon of ghee and heat on a low temperature until they soften. If you have a thermomix, you can do this for 5-7 minutes

  2. Place softened date mixture in the blender (or thermomix) and blend dates into a paste. Add remaining ingredients and blend at a high speed until the mixture resembles a chocolate cake mixture. The mixture should hold a firm smooth consistency

  3. Baste the spring-form cake pans with ghee or coconut oil and pour the mixture into the pans. Cook for 40 – 50 minutes at 150◦C

  4. Test the cake with a fork before you take it out of the oven and when ready, remove cakes from the oven and take them out of the spring-form pans as soon as you can. Let the cakes cool on a cooling rack

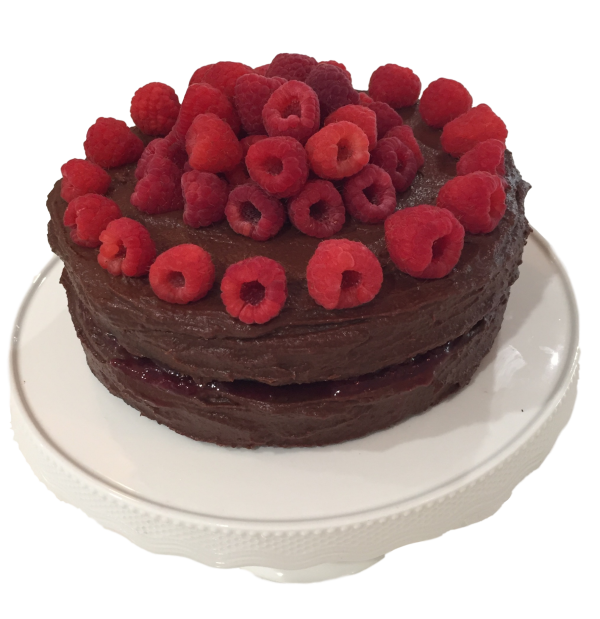
  5. You can place any filling in the middle or on the top of the cake with a little creativity. The berry filling works well as a middle filling for the cakes and the top of the cake works well with sour cream and fresh berries. Alternatively, you can try the cake icing below and use it for the top layer with fresh berries on top as shown in the picture.

Filling Instructions
  1. Combine berries, apples, lemon juice and honey in a saucepan and bring ingredients to boiling point, then turn the temperature down and continue cooking the mixture slowly on a low heat. Stir frequently as it thickens

  2. Place the ingredients in the fridge to set for 4 hours

Chocolate Icing Instructions
  1. Place all ingredients in a high-speed blender. If possible, let them sit in there for a few minutes to soften the dates a little bit.

  2. Blend all ingredients in your high-speed blender. The ingredients can be a little tricky to blend, so start at a slow speed and increase speed slowly

  3. Keep blending for a very long time to get a velvety consistency. This is one of those recipes that really makes use of the power of a high-speed blender. If you feel that the blades are just spinning but aren't actually moving all of the icing around, turn the blender off and make an air pocket down the side of the blender with a spatula to expose the blades. Remove the spatula, replace the lid, and start blending slowly again.

  4. You'll know it's ready if there are no bits of dates and all you can taste is velvety chocolate goodness. This raw chocolate icing is ready to use as soon as you pour it out of the blender

  5. Simply use a spatula to spread the mixture on the sides and top of the cake.


Recipe Notes

Serve with some sour cream, kefir, yoghurt or creme fraiche

How to Blanch Almonds

These instructions will teach you how easy it is to blanch your own almonds.  This means removing the husk.  Whilst it is true that it requires more work, blanching almonds can be easier on the digestive system for severe food sensitivities than simple soaking, however blanching almonds may not be required for everyone. It is […]


Print Recipe


How to Blanch Almonds

Votes: 0
Rating: 0
You:
Rate this recipe!

Prep Time 25 Minutes
Passive Time 1 Hour

Servings
Kg


Ingredients

Prep Time 25 Minutes
Passive Time 1 Hour

Servings
Kg


Ingredients

Votes: 0
Rating: 0
You:
Rate this recipe!


Instructions
  1. Bring a small pot of filtered water to the boil

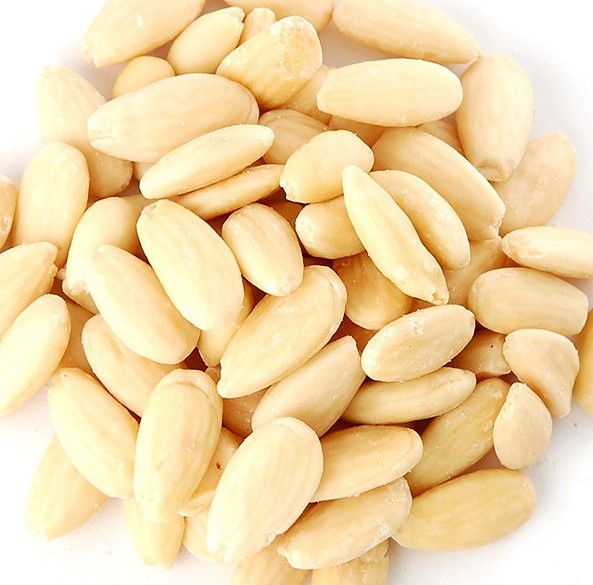
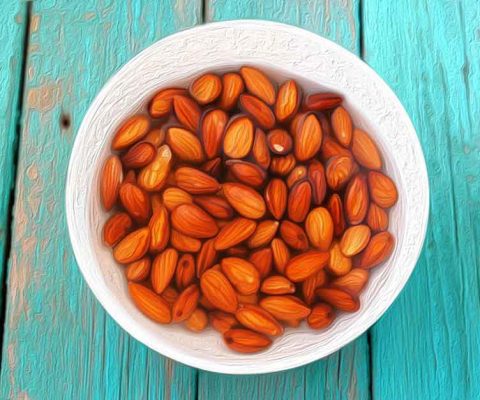
  2. Place your raw almonds into the boiling water and let sit for half an hour. They will swell and appear larger.

  3. Drain the almonds in a colander or strainer and rinse them with cold water to cool them

  4. Blot the almonds dry with a tea towel

  5. Use your fingers to gently squeeze the almonds and loosen the skin from them. They usually just slip right out.

  6. Dry nuts as per activated nut instructions

  7. Store in an airtight container in the fridge


Recipe Notes

Whilst it is true that it requires more work, blanching almonds can be easier on the digestive system for severe food sensitivities than simple soaking, however blanching almonds may not be required for everyone.  It is a preferred method for making almond milk for those who are more prone to food sensitivities as this will completely remove the phytates.  Removing the husks on almonds also make for a nicer homemade almond milk.  It is very unlikely that commercial nut milk producers will have taken the time to activate their nuts or remove the husks, not to mention any additives and preservatives within the product ingredients.

Organic Chicken liver pate

Organ meats are recognised as a ‘top GAPS nutrient dense food‘ and to ensure you are nourishing your body adequately this recipe will allow you to get your daily portions to optimise healing.  Many people having tasted liver on it’s own before (like myself) may feel that it is not on their fabourite go to […]


Print Recipe


Organic Chicken liver pate

Votes: 5
Rating: 4.2
You:
Rate this recipe!

Servings


Ingredients
Soaking Solution
  • 2 Cups Kefir if you have a food allergy to dairy kefir, lemon juice or apple cider vinegar work great too.

Chicken Liver Pate

Servings


Ingredients
Soaking Solution
  • 2 Cups Kefir if you have a food allergy to dairy kefir, lemon juice or apple cider vinegar work great too.

Chicken Liver Pate

Votes: 5
Rating: 4.2
You:
Rate this recipe!


Instructions
Preparation and Soaking
  1. After you have frozen the liver for two weeks prepare your liver by soaking it. Simply add the liver to a glass bowl and pour the kefir over the top making sure it is all covered and place it in the fridge for 4 hours or overnight. This will help to remove any impurities, tenderise the liver and improve the flavor of the liver.

  2. When soaking is complete, wash the liver to remove the kefir with filtered water.

Liver Pate
  1. Heat oil/fat in pan and add onion, celery and garlic and sauté for 1 minute

  2. Add liver and sauté till opaque

  3. Add herbs if selected and let cool

  4. Transfer to the blender and remaining oil/fat and blend till smooth

  5. Transfer to glass container and refrigerate

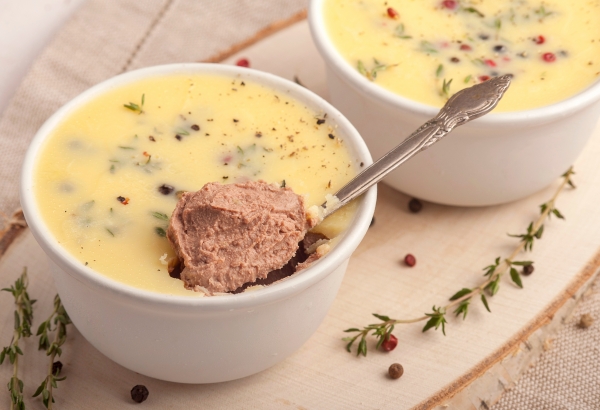
  6. Add melted ghee or lard over the top to create a skin to preserve the colour. Sprinkle a little herbs over the top for garnish if you wish.

  7. Alternatively transfer mixture to ice cube trays and freeze


Recipe Notes

Clinical Notes

Another way to supplement with liver if you do not like the flavour of pate is to freeze it raw and cut them into small capsule sizes and swallow them whole like a capsule.  This way you will not taste the liver as it is swallowed whole.  If you do this option, be sure to freeze the liver for two weeks first.

Activating Nuts/Seeds for Flour

What are Activated Nuts? Activated nuts have been soaked in water and salt for a period of time, which starts off the germination or sprouting process, then dehydrated at a low temperature. Soaking increases the nutrient value of the nuts along with breaking down the problematic compounds that help enhance their digestibility. Nuts and Seeds […]


Print Recipe


Activating Nuts/Seeds for Flour

This recipe is appropriate from Stage 6 on the Introductions Diet

Votes: 0
Rating: 0
You:
Rate this recipe!

Prep Time 2-12 hrs

Servings


Ingredients

Prep Time 2-12 hrs

Servings


Ingredients

Votes: 0
Rating: 0
You:
Rate this recipe!


Instructions
  1. In a large bowl place your nuts or seed of choice.

  2. Dissolve salt in enough water to cover the amount of nuts/seeds you are activating.

  3. Cover with the salt water solution.

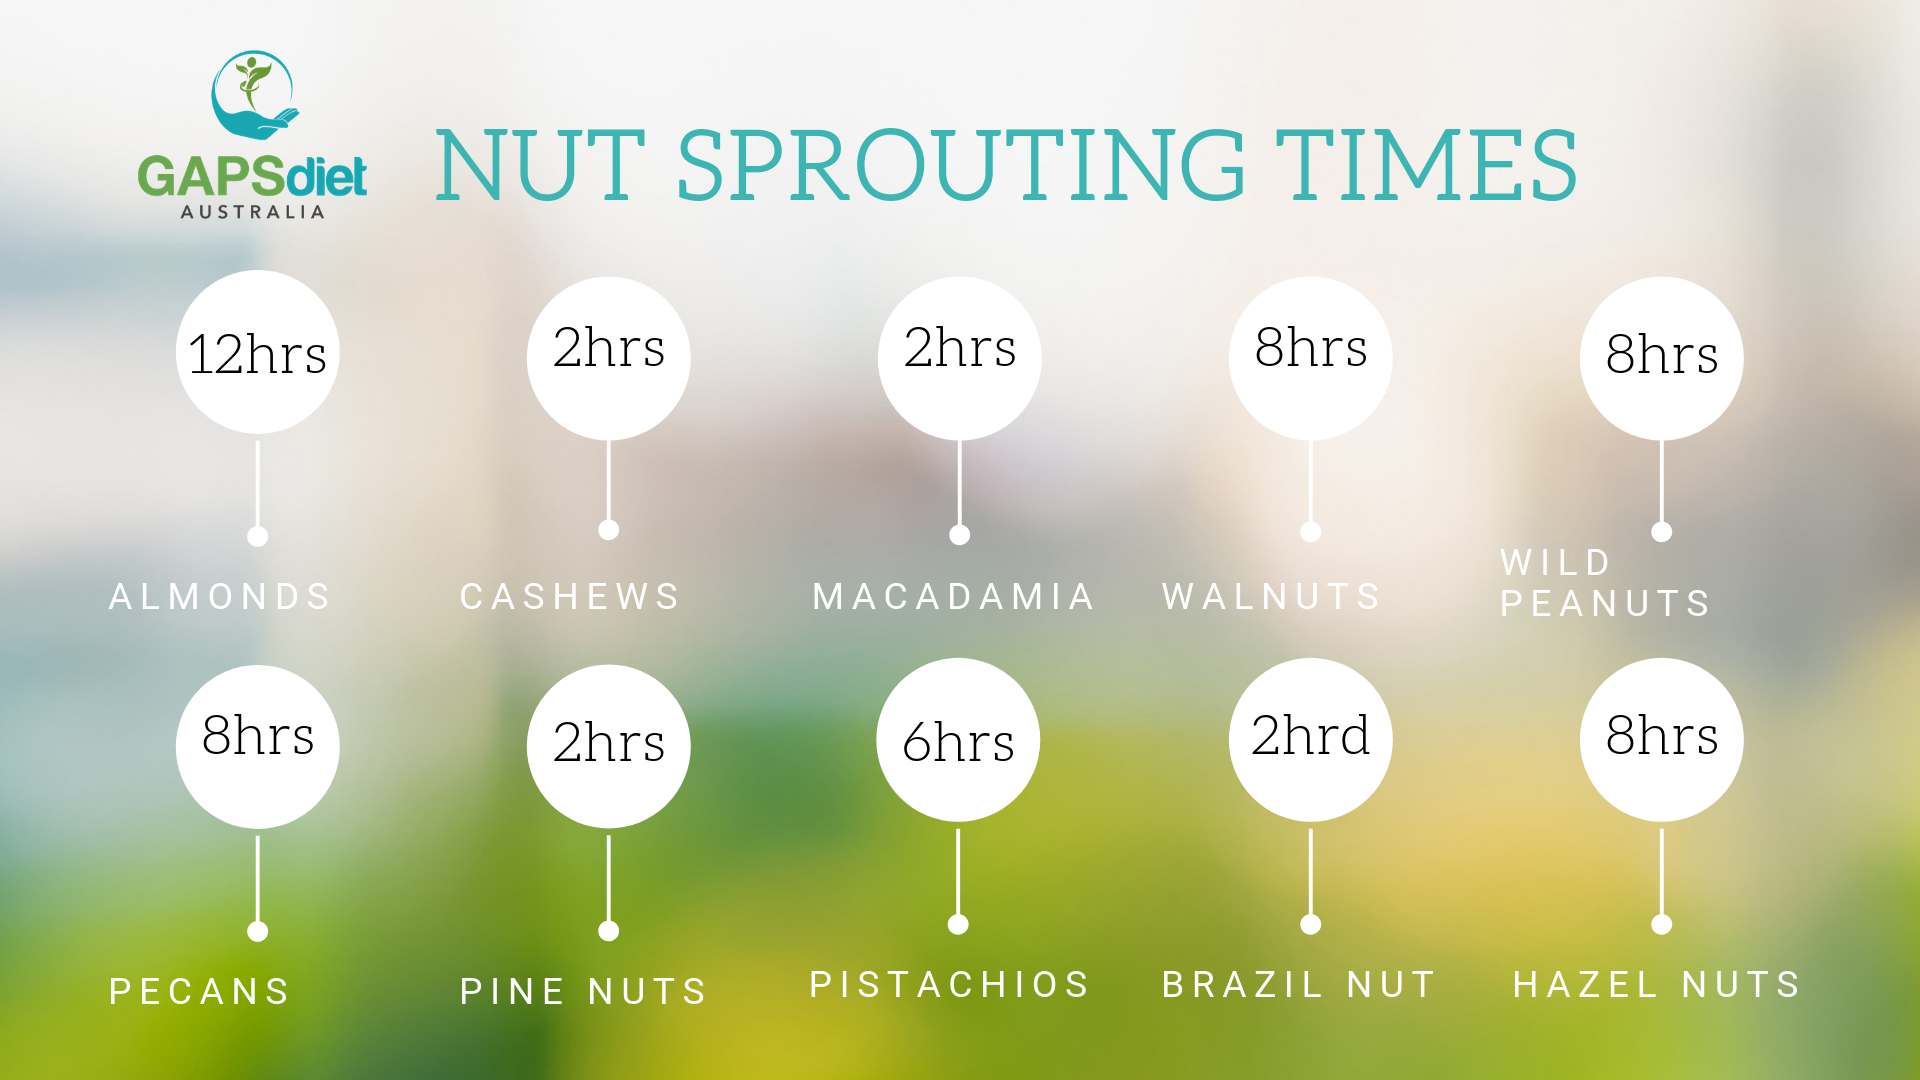
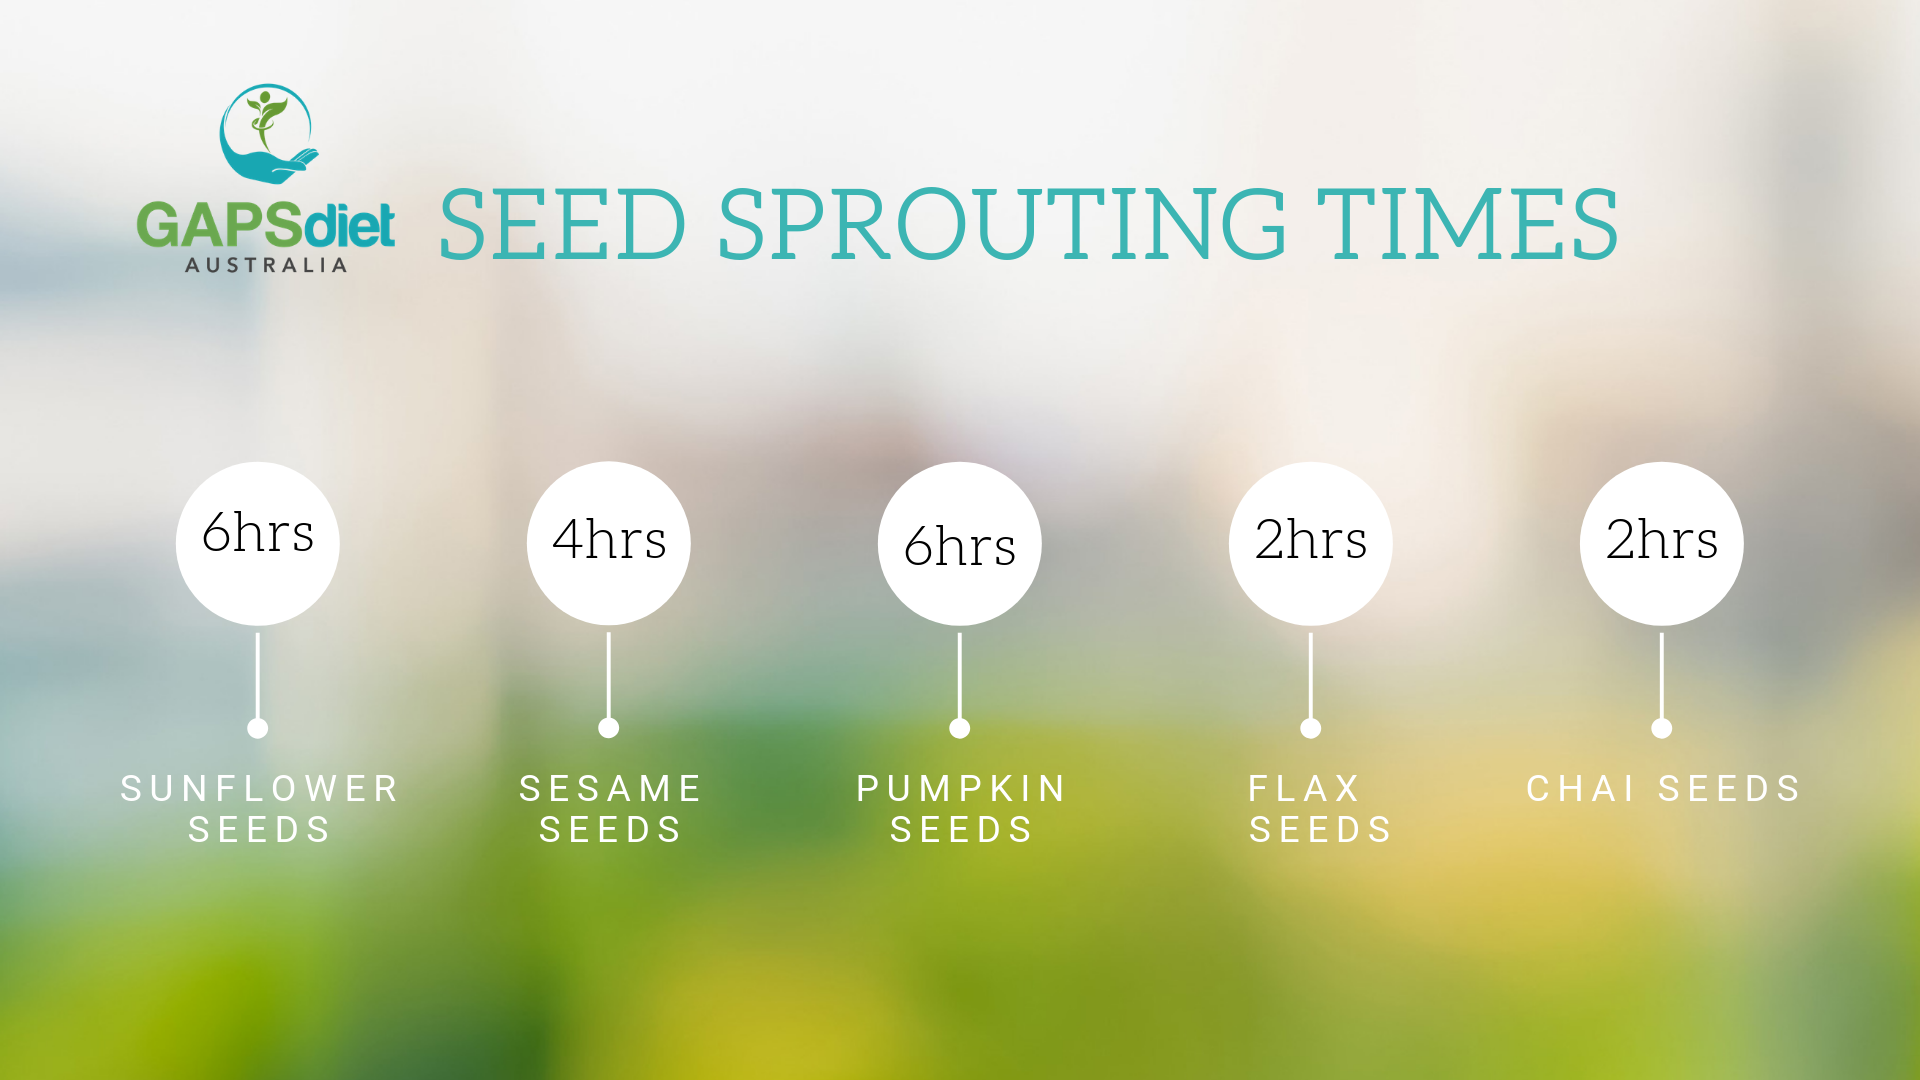
  4. Soak the nuts or seeds for the specified time according to the chart below (see soaking time chart)

  5. Strain and rinse the nuts when the specified time has lapsed.

  6. Spread the nuts or seeds over a dehydrator rack, or baking tray.

  7. Place in the oven on a low heat (90 degrees) or dehydrator until completely dry and the moisture is removed. The dehydrator is a longer drying process but helps to keep activated nuts active. The oven can stop the germination process, however it will get the job done in drying the nuts and seeds after they enzyme inhibitors have been removed.

  8. Eat the activated nuts as they are or make flour from them by grinding the nuts in a strong blender like a vitamix or thermo until you have a flour like consistency.

  9. Store nuts, seeds or nut flours in an air tight container.


Recipe Notes

Clinical Notes

Try fermenting nut/seed flour or nut/seed milk if nuts and seeds continue to be a bit of a problem.

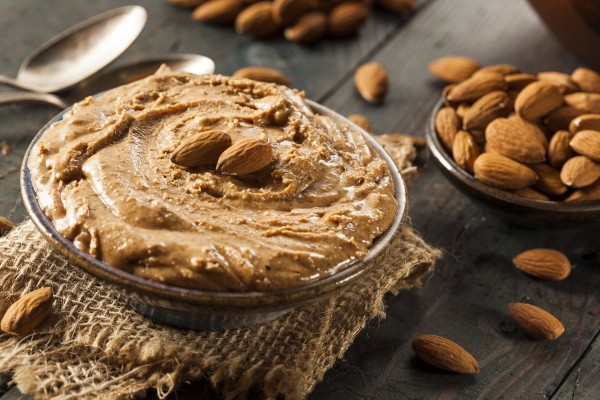
Nut Butter

The GAPS Diet advocates you make your own nut butters especially if you are just starting out with GAPS.  This way you know exactly what is in it and whether any reactions are specific to the nuts or other hidden ingredients or chemicals.  Store bought nut butter is acceptable so long as it does not […]


Print Recipe


Nut Butter

This recipe is appropriate for the Introduction Diet from Stage 3 onward

Votes: 1
Rating: 5
You:
Rate this recipe!

Prep Time 20 Minutes

Servings
Jar


Ingredients

Prep Time 20 Minutes

Servings
Jar


Ingredients

Votes: 1
Rating: 5
You:
Rate this recipe!


Instructions
  1. Soak and dry nuts as per our recipe provided in the recipe section under condiments

  2. Blanch nuts if required (see almond blanching recipe instructions) This is not usually necessary if the nuts have been soaked but this step can be helpful for extreme sensitivities.

  3. Using a good strong blender, vitamix or thermo mixer, blend nuts and salt for as long as it takes to break down the size of the nuts into a nut butter consistency whilst gradually adding the coconut oil sparingly to begin with and proceed to add additional oil to produce the smooth consistency desired. This can take up to 20 minutes.

  4. If the nuts have been roasted, you may not need any oil or very little. Children love honey added to this spread but this is dependent upon whether you are ready to introduce honey at this stage and whether you are trying to avoid yeast feeding sugars.

  5. Remember: preparing your nuts through drying and soaking first will allow for a better nut butter and easier digestion.


Recipe Notes

Clinical Notes

Nuts and Seeds are fibrous and should not be introduced for GAPS patients until digestive symptoms have shown some signs of improvement. The introduction diet provides a slow introduction to nuts by starting with nut butter followed by baking with nut flour and finally nuts for snacks themselves with encouragement to prepare them and chew them well. The sensitivity test is advised to be carried out first for those who suspect a true nut allergy, however there are many people who express their intolerance for nuts during the introduction diet who may need to determine themselves whether to wait until further healing takes place before introducing them.

Nut and Seed Soaking Chart

Print Recipe Nut and Seed Soaking Chart Votes: 0 Rating: 0 You: Rate this recipe! Course Baking at home, Miscellaneous Cuisine Full GAPS Diet, GAPS Baby: Introducing Solids, GAPS Introduction Stages, Stage 6 – onward Servings MetricUS Imperial Ingredients 2-3 Cups Organic Nuts or Seeds1 Tbs Celtic or Himalayan Sea Salt1 Litre Filtered water Course […]


Print Recipe


Nut and Seed Soaking Chart

Votes: 0
Rating: 0
You:
Rate this recipe!

Servings

Votes: 0
Rating: 0
You:
Rate this recipe!


Instructions
  1. Almonds
    12 Hours
    1 tablespoon salt

  2. Brazil Nuts
    2 Hours
    1 tablespoon salt

  3. Cashews
    2 Hours
    1 tablespoon salt

  4. Chia Seeds
    2 Hours
    No salt

  5. Flax Seeds
    2 Hours
    No salt

  6. Hazel Nuts
    8 Hours
    1 tablespoon salt

  7. Macadamia Nuts
    2 Hours
    1 tablespoon salt

  8. Pecans
    8 Hours
    2 teaspoons salt

  9. Pine Nuts
    2 Hours
    1 tablespoon salt

  10. Pumpkin Seeds
    6 Hours
    2 tablespoons salt

  11. Sesame Seeds un-hulled
    6 Hours
    1 tablespoon salt

  12. Sunflower Seeds
    4 Hours
    2 tablespoons salt

  13. Walnuts
    8 Hours
    2 teaspoons salt

  14. Wild Peanuts
    8 Hours
    1 tablespoon salt

  15. See other recipe 'Activating Nuts/Seeds for Flour' for instructions to soak and sprout seeds to make flour.


Recipe Notes

Clinical Notes

Nuts and Seeds are fibrous and should not be introduced for GAPS patients until digestive symptoms have shown some signs of improvement. The introduction diet provides a slow introduction to nuts by starting with nut butter followed by baking with nut flour and finally nuts for snacks themselves with encouragement to prepare them and chew them well. The sensitivity test is advised to be carried out first for those who suspect a true nut allergy, however there are many people who express their intolerance for nuts during the introduction diet who may need to determine themselves whether to wait until further healing takes place before introducing them.

Selecting organic nuts and seeds and preparing them by soaking and sometimes blanching them (skins removed) often makes all the difference for a GAPS patient to better tolerate them.  Many GAPS patients have a toxic overload and cannot tolerate even the smallest amount of chemicals or pesticides in their system and this is why organic serves to be a better option.

In addition to crop chemicals, nuts and seeds contain their own toxic substances known as enzyme inhibitors and phytates (phytic acid).  These toxins can play havoc in the digestive system, blocking nutrients such as calcium, magnesium, copper iron and especially zinc.  Enzyme inhibitors in particular, are contained on the skins or surrounds of nuts and seeds and they are especially apparent in nuts with brown skins like almonds.  Their purpose serves as a protective layer to naturally prevent animals and insects from consuming them so that they have the opportunity to germinate and sprout into a plant. Soaking nuts and seeds in warm salty water overnight will activate enzymes that neutralise enzyme inhibitors and also breakdown a large portion of phytic acid that allow the nutrients to be better absorbed in the digestive system. This soaking preparation process is often referred to as activating nuts and seeds.

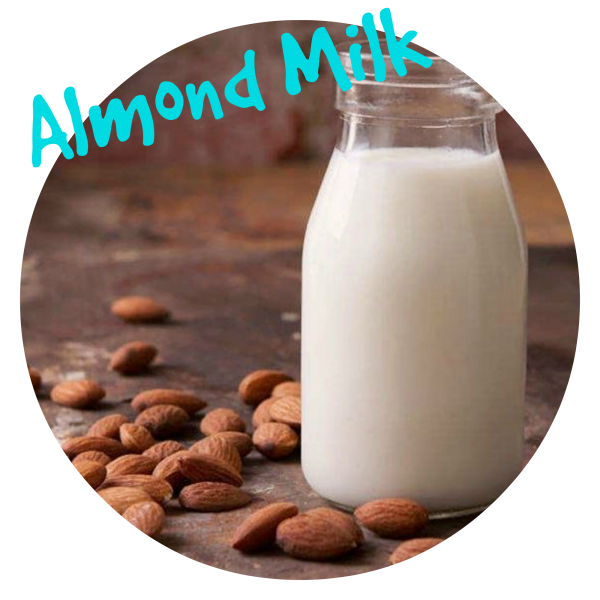
Nut Seed Milk

Preparation in making nut milk is important, especially for people who already have digestive problems and food sensitivities. Almonds (as well as most other nuts) contain toxic substances known as enzyme inhibitors and phytates (phytic acid). These toxins can play havoc in the digestive system, blocking nutrients such as calcium, magnesium, copper iron and especially […]


Print Recipe


Nut Seed Milk

This recipe is appropriate for the Introduction diet when nuts have been successfully introduced and tolerated from stage 4 onward.

Votes: 0
Rating: 0
You:
Rate this recipe!

Prep Time 5 Minutes
Passive Time 14 Hours

Servings
People


Ingredients

Prep Time 5 Minutes
Passive Time 14 Hours

Servings
People


Ingredients

Votes: 0
Rating: 0
You:
Rate this recipe!


Instructions
Part 1 - Soaking
  1. Add 3 cups of filtered water to a jug or bowl and mix in 1 tablespoon of salt

  2. Add 1 cup of almonds and cover with a tea towel or cheese cloth

  3. Soak the nuts in the salt water brine for 12 hours

  4. Rinse the nuts under filtered water to remove salt residue and discard the salt water brine

  5. Place the nuts in a clean jug or bowl and add 1 - 2 teaspoons of flaxseeds and 3 – 4 cups of water and place in the fridge for 2 – 3 hours. Adding the flaxseeds will allow the milk to thicken a little more. Exclude this step if you have no concern for thickness

  6. If you wish to add a little sweetener to the milk, this will be the stage that you will need to add the pitted dates to the mixture to soak for a few hours. This is optional

Part 1 - Blending and Straining
  1. Add the soaked nut mixture from the fridge (including the water) to a good strong blender, vitamix or thermo mixer and blend for as long as it takes to break down the size of the nuts into a pulp consistency

  2. Place a nut milk bag or cheesecloth over a bowl and pour the milk mixture through the cheesecloth or nut milk bag like a strainer

  3. When all the pulp and liquid has been strained through the nut milk bag or cheesecloth, squeeze any excess milk from the pulp mixture with your hands, allowing the milk to drain through the cloth. If you find that the milk is too rich, simply add more filtered water

  4. Store in the fridge for 2 – 3 days.


Recipe Notes

Clinical Notes

Why soak nuts and seeds?

  • To neutralize enzyme inhibitors
  • To remove or reduce phytates
  • To encourage the production of beneficial enzymes

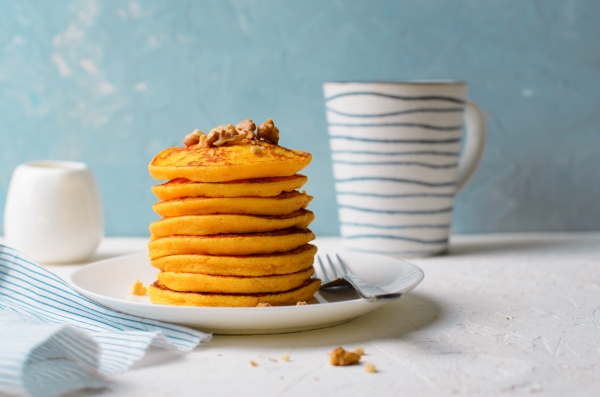
Nut Butter Pancakes

This recipe is introduced on stage 3 and in week 8 and 9 on the GAPS Baby Diet – Introducing Solids for Baby.  It is simple to make and most children love them.  They can be served with a little honey or a spread of ghee and avocado.  This is easy to pack into school […]


Print Recipe


Nut Butter Pancakes

This recipe is appropriate for the GAPS Introduction Diet from Stage 3 onward

Votes: 0
Rating: 0
You:
Rate this recipe!

Prep Time 10 Minutes

Servings
People


Ingredients
  • 1 Cup Nut Butter Homemade almond, peanut, cashew etc
  • 3 Whole Eggs Organic and pasture raised
  • 3 Tbsp Pumpkin Or squash or zucchini
  • 2-3 Tbsp Ghee Or coconut oil if dairy not introduced

Prep Time 10 Minutes

Servings
People


Ingredients
  • 1 Cup Nut Butter Homemade almond, peanut, cashew etc
  • 3 Whole Eggs Organic and pasture raised
  • 3 Tbsp Pumpkin Or squash or zucchini
  • 2-3 Tbsp Ghee Or coconut oil if dairy not introduced

Votes: 0
Rating: 0
You:
Rate this recipe!


Instructions
  1. Process nut butter, eggs and winter squash in the food processor

  2. Melt ghee or other fat in the pan and spoon pancake sized portions in the pan.

  3. Gently fry and make sure not to burn


Recipe Notes

Clinical Notes

If you find that the introduction of nuts (nut butter) is too soon, you may try the Nut Free Flourless Chicken Pancakes more suitable. Some people may need to try introducing nuts much later in the diet than others, however this recipe is a good place to start when you feel that the time is right and you can make baked items from seeds as an alternative.

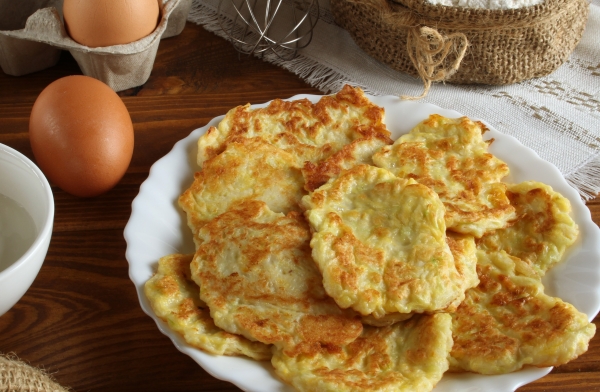
Nut Free Flour-less Chicken Pancakes

This recipe is introduced on stage 3 as a replacement for the Nut Butter Pancakes for people who can not tollerate nuts. It can also be adapted in week 8 and 9 on the GAPS Baby Diet – Introducing Solids for Baby. It is simple to make and most children and adults find them enjoyable. […]


Print Recipe


Nut Free Flour-less Chicken Pancakes

This recipe is appropriate for the Introduction Diet from Stage 3 on wards

Votes: 0
Rating: 0
You:
Rate this recipe!

Prep Time 15 Minutes

Servings
People


Ingredients

Prep Time 15 Minutes

Servings
People


Ingredients

Votes: 0
Rating: 0
You:
Rate this recipe!


Instructions
  1. Using a food processor, blend all ingredients together until completely smooth. The mixture will look like thick pancake batter

  2. Heat the pan and melt some ghee or duck fat to grease the pan

  3. Pour spoonfuls of the batter into the pan. The batter may need to be spread out a bit with the spoon so that it is not too thick

  4. Watch to see tiny bubbles form on the top before flipping them over but be sure not to cook to high or they will burn

  5. Serve warm or cold with a slice of avocado or just as they are


Recipe Notes

Alternatives

When you have progressed through the stages, you may add onion, grated carrot and zucchini for extra flavour. Other ingredients to consider when making this recipe are equal amounts of organic nut butter, eggs and squash (as directed in the introduction diet).

When on the full GAPS diet you may wish to add spring onion shallots, carrot and zucchini to the recipe to make fritters.  Later when cucumbers are tollerated, you can enjoy these with a nice homemade tzatziki dip.

GAPS Chamomile Tea

Good organic Chamomile tea can be found at your local health food store, however here are the instructions on how to make your own. Chamomile flowers are a little white flower with a yellow centre like a small daisy. There are two types of chamomile – the Roman or English Chamomile, which is a perennial, […]


Print Recipe


GAPS Chamomile Tea

This recipe is approapriate for the introduction diet from stage One onward

Votes: 0
Rating: 0
You:
Rate this recipe!

Prep Time 5 Minutes

Servings
Person


Ingredients

Prep Time 5 Minutes

Servings
Person


Ingredients

Votes: 0
Rating: 0
You:
Rate this recipe!


Instructions
  1. Snip the flowers off when they’re flowering in summer, and use them fresh in a teapot with filtered boiling water.

  2. You may also dry them and store them in an airtight container to use at a later time

  3. Let the tea steep for 3 – 5 minutes before pouring through a tea strainer (consumed between meals).


Recipe Notes


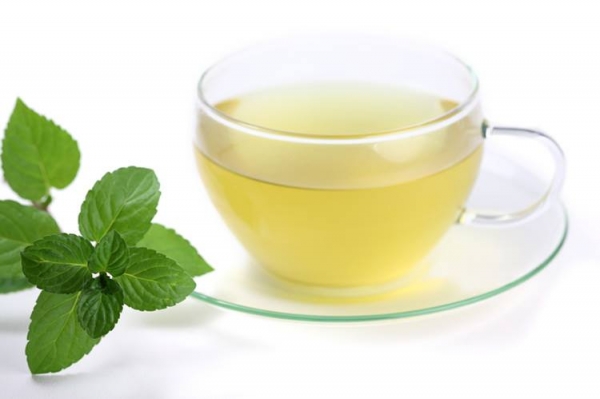
GAPS Mint Tea

Good organic mint tea can be found at your local health food store, however here are the instructions on how to make your own. There are a variety of mint plants available at nurseries; spearmint, chocolate mint, apple mint, pineapple mint, lemon mint, etc. Mint has some interesting healing properties associated with settling a nervous […]


Print Recipe


GAPS Mint Tea

This recipe is appropriate for the introduction diet from Stage 1 onward

Votes: 0
Rating: 0
You:
Rate this recipe!

Prep Time 5 Minutes

Servings
Person


Ingredients

Prep Time 5 Minutes

Servings
Person


Ingredients

Votes: 0
Rating: 0
You:
Rate this recipe!


Instructions
  1. Cut some fresh mint leaves by removing them from their stems

  2. Place the leaves into a pot and pour filtered boiling water over the top and allow to steep for 3 – 5 minutes.

  3. Pour the tea through a tea strainer and enjoy

  4. Use one teaspoon of mint tea leaves per cup

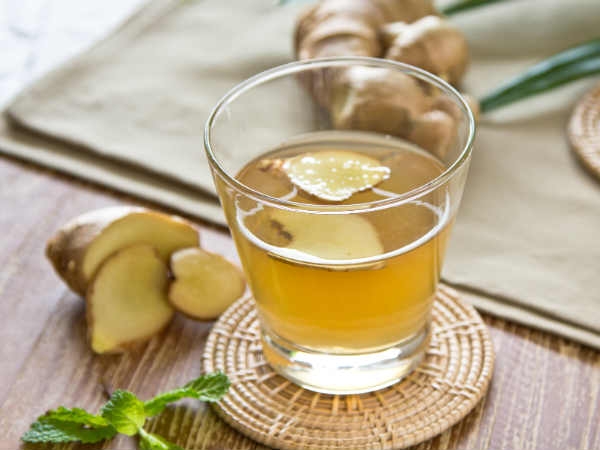
GAPS Ginger Tea

Ginger is well known for its relief of pain and inflammation and assists in soothing the digestive tract, reduces flatulence and eases symptoms of nausea. Print Recipe GAPS Ginger Tea This recipe is appropriate for the introduction diet from Stage 1 onward Votes: 0 Rating: 0 You: Rate this recipe! Course Beverages Cuisine Full GAPS […]


Print Recipe


GAPS Ginger Tea

This recipe is appropriate for the introduction diet from Stage 1 onward

Votes: 0
Rating: 0
You:
Rate this recipe!

Prep Time 5 Minutes

Servings
Person


Ingredients

Prep Time 5 Minutes

Servings
Person


Ingredients

Votes: 0
Rating: 0
You:
Rate this recipe!


Instructions
  1. Grate some fresh ginger root and place a teaspoon of grated ginger in the teapot and pour boiling water over it

  2. Let the tea steep for 3 – 5 minutes before pouring through a tea strainer. (to be consumed between meals)

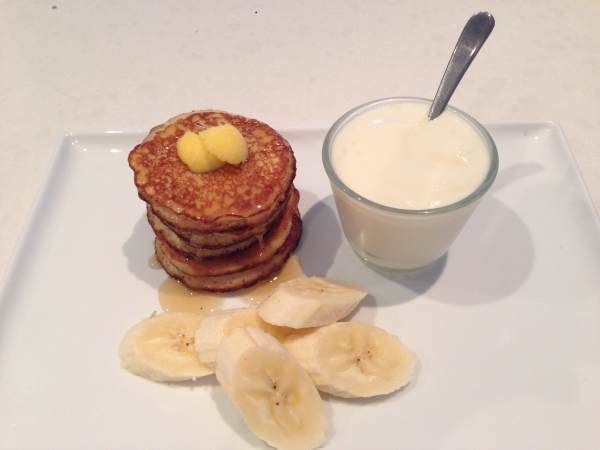
Banana Almond and Blueberry Pancakes

I could not tell you how many times we have made these pancakes.  They are simple to make and a great lunch box filler for school or work. Print Recipe Banana Almond and Blueberry Pancakes This recipe is appropriate for the GAPS Introduction Stages from Stage 6 onward Votes: 0 Rating: 0 You: Rate this […]


Print Recipe


Banana Almond and Blueberry Pancakes

This recipe is appropriate for the GAPS Introduction Stages from Stage 6 onward

Votes: 0
Rating: 0
You:
Rate this recipe!

Prep Time 5 Minutes
Cook Time 10 Minutes

Servings
People


Ingredients

Prep Time 5 Minutes
Cook Time 10 Minutes

Servings
People


Ingredients

Votes: 0
Rating: 0
You:
Rate this recipe!


Instructions
  1. Mash bananas and place them into a bowl

  2. Add eggs, almond flour and vanilla essence to the bowl and blend briefly with an electric beater until smooth

  3. Add dried blueberries and hand mix

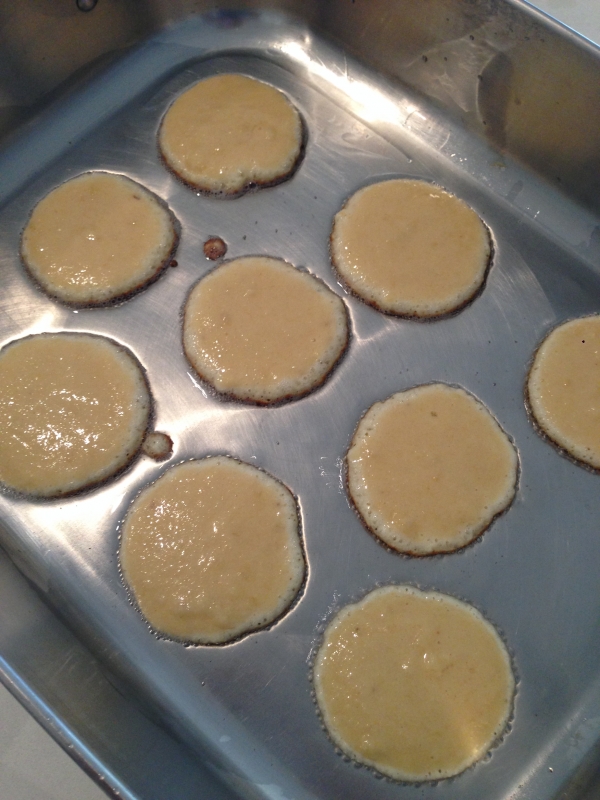
  4. Heat frying pan on a low heat to ensure you do not burn the nut flour and spoon small pancakes into the fry pan

  5. You will notice some fine bubbles on the top indicating that they may be ready to flip. Use an egg lifter to flip and lightly cook the other side. If the pan is too hot they will burn

  6. You may need some practice in making these before you fry the perfect pancake but they are well worth the effort

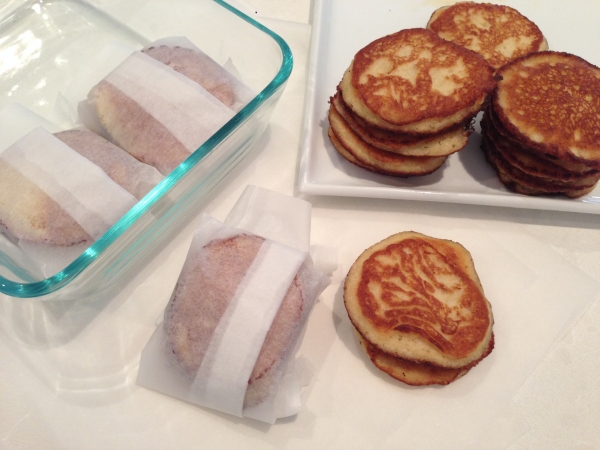
  7. Wrap each pancake in sets of two with baking paper and store them in the fridge or freezer. These are great school snacks or morning tea for visitors.

  8. Serve with fresh sour cream, yoghurt or kefir and fresh banana or blueberries


Recipe Notes

Clinical Notes

If you are trying to avoid all sugars including mono sugars found in honey and fruit to help combat candida (yeast overgrowth)  it is best to avoid this recipe as it contains honey and fruit.  Please refer to our GAPS101 Online learning course for the GAPS Candida Protocol.

Banana Peanut Butter Mini Muffins

These cute little mini muffins are a great treat for the little ones. They are easy to make, are GAPS compliant and kids love them. They are also great snacks and lunch box fillers. What more can you ask for. Print Recipe Banana Cake or Mini Muffins These delicious treats are suitable from Stage 6 […]


Print Recipe


Banana Cake or Mini Muffins

These delicious treats are suitable from Stage 6 on wards.

Votes: 0
Rating: 0
You:
Rate this recipe!

Prep Time 10 Minutes
Cook Time 15 Minutes (cake) or 15 Minutes for Mini Muffins

Servings
24 Mini Muffins


Ingredients
Mini Muffin Ingredients

Icing

Prep Time 10 Minutes
Cook Time 15 Minutes (cake) or 15 Minutes for Mini Muffins

Servings
24 Mini Muffins


Ingredients
Mini Muffin Ingredients

Icing

Votes: 0
Rating: 0
You:
Rate this recipe!


Instructions
Cake/Muffin Intructions
  1. Preheat oven to 150 degrees Celsius

  2. Separate whites from eggs and beat until fluffy, then beat the egg yolks separately

  3. Add honey, vanilla extract and softened coconut oil to a mixing bowl and beat well whilst gradually adding both egg mixtures and almond flour.

  4. Mix in mashed bananas and desiccated coconut and pour into mini muffin papers or a loaf tin lined with baking paper.

    Mini muffins will take approximately 15 minutes to cook. Keep an eye on them as almond flour is easy to burn (Don’t cook them in too high temperatures). Regular sized muffins will take a little longer with approximately 25 minutes.

    Alternatively you may wish to cook a banana loaf which will require 45 – 5o minutes cooking time. Be sure to line your loaf tin with baking paper so that you can easily remove your cake as soon as it is done as this will keep the outside colour golden. You may also consider adding walnuts to the mixture.

Icing Instructions
  1. Whip both honey and peanut butter together. This will set nicely in the fridge like regular hard icing. You can also use a piping bag to make rosettes. Make sure you have given the muffins enough time to cook before applying the icing.

  2. Garnish with dried bananas or walnuts on top if you wish.


Recipe Notes

Clinical Notes As with all stages of the GAPS diet, baked goods should only make up a small percentage of the diet and that the focus should be on healing nourishing foods, broths and juices.

GAPS Milkshake/Smoothie

The GAPS Milkshake should be avoided if the patient suffers from digestive distress associated with diarrhoea. This milkshake will provide valuable raw nutrients and beneficial fats. Some parents find it easier to add Cod Liver Oil to the milkshake, rather than on its own and children don’t know it has been added. Dr Natasha suggests […]

Print Recipe


GAPS Milkshake / Smoothie

This recipe can be introduced on the introduction diet from stage 5 onward unless otherwise advised by your Certified GAPS Practitioner.

Votes: 2
Rating: 5
You:
Rate this recipe!

Prep Time 10 Minutes

Servings
Person


Ingredients
Fruit

Vegetables

Fats

Eggs

Prep Time 10 Minutes

Servings
Person


Ingredients
Fruit

Vegetables

Fats

Eggs

Votes: 2
Rating: 5
You:
Rate this recipe!


Instructions
  1. Wash all fruit and vegetables

  2. Freshly press all fruit and vegetable in your juicer

  3. Pour juice into a blender if you have one

  4. Add the eggs and fats to the juice. Blend the mixture together in the blender or mix by a hand held kitchen tool


Recipe Notes

Alternative Options

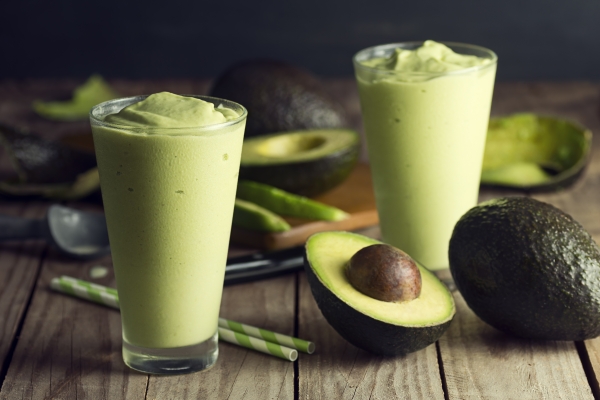
The GAPS Milkshake/Smoothie is not limited to the above fruit and vegetable combinations. You may wish to include mint, carrot, kale, berries, banana's or exclude cabbage or other items. Just remember to include one of the ingredients from the FATS and EGGS with your fruit and veg juice combination.  Avocado is also another great source of healthy fat to add to the smoothy and provides a nice added texture.

My favorite combination smoothie

Apple, Celery, Mint, Avocado, Egg and Yoghurt

Clinical Notes

If the person is not prone to diarrhoea, this recipe can be introduced the GAPS milkshake from the beginning in stage one or two.

Grilled Meats: Lamb Cutlets

The GAPS Introduction Diet introduces roast meats and grilling in stage 4.  The first three stages of the GAPS Diet requires easy to digest foods and that is why the meats are soft and slow cooked in casseroles and soups.  When the digestion system shows signs of improvement, people following the GAPS Introduction Diet can […]


Print Recipe


Grilled Meats: Lamb Cutlets

This recipe is appropriate for the Introduction Diet from stage 4 onward

Votes: 0
Rating: 0
You:
Rate this recipe!

Prep Time 10 Minutes
Cook Time 10 Minutes

Servings
People


Ingredients
Meat

Vegetables

Meat Stock and Fats

Prep Time 10 Minutes
Cook Time 10 Minutes

Servings
People


Ingredients
Meat

Vegetables

Meat Stock and Fats

Votes: 0
Rating: 0
You:
Rate this recipe!


Instructions
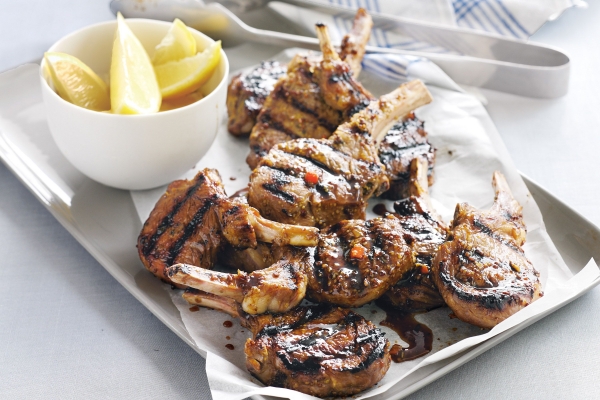
  1. Grill your lamb cutlets on a pre-heated BBQ grill, fry pan or under the grill in the oven on medium to high.

  2. If cooking on a BBQ grill, cook the lamb for 3-4 minutes each side or until cooked to your liking.

    Cooking under the oven grill or fry pan may require different time frames so you will need to estimate a time for this based on how they cook on the inside. Try not to over cook them and test by cutting a small piece with a knife. A slight pink colour inside is perfect.

  3. Boil and cook remaining chosen vegetables in a pot with stock until well cooked.

  4. Drizzle olive oil (1-2 tablespoons) over your ready served vegetables.

  5. Serve with a cup of homemade meat stock and some lemon wedges on the side.


Recipe Notes

Clinical Notes

When digestion has improved over time, you can add chili or other garnished herbs to the cutlets for added flavour.

Roast Pork Belly

This meal is a delicious and nutritious favourite in our home.  It can be added in stage four when roasts and grilling is added to the GAPS Introduction Diet. It is very important for a GAPS person to have plenty of natural fats in every meal from meats, butter, ghee, coconut and cold pressed olive […]


Print Recipe


Rost Pork Belly

This recipe is appropriate for the GAPS Introduction Diet from stage 4 onward.

Votes: 0
Rating: 0
You:
Rate this recipe!

Prep Time 10 Minutes
Cook Time 60 Minutes
Passive Time 50 Minutes

Servings
People


Ingredients
Meat and Stock

Fats

Vegetables

Prep Time 10 Minutes
Cook Time 60 Minutes
Passive Time 50 Minutes

Servings
People


Ingredients
Meat and Stock

Fats

Vegetables

Votes: 0
Rating: 0
You:
Rate this recipe!


Instructions
  1. Pre heat oven to 180 – 200 degrees Celsius

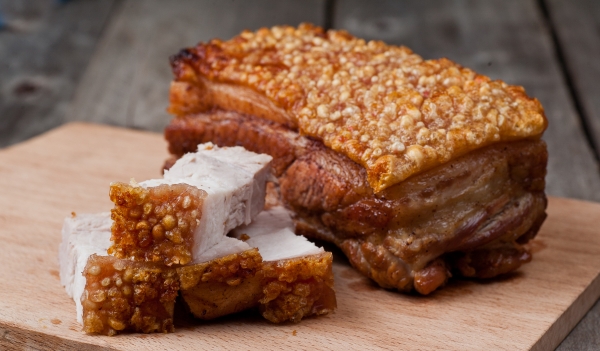
  2. Place the pork belly in a baking dish with the rind fat (crackle top) side up.

  3. With your hands, rub lard all over the pork. This is where your hands get messy. Shake a generous amount of salt on the top pork rind and continue to rub and massage more lard and salt until the rind is well covered. Lightly give it one more sprinkle of salt on the top. The salt is what allows the rind to crackle.

  4. Place the pork in the oven at 200 degrees Celsius for 30 minutes to allow the rind to crackle and then turn it down to 180 degrees Celsius and cook for 2 - 2 and a half hours pending in size.

  5. Cut the onions in half and roast them with the punpkin along side the pork.

  6. Cook some other seasonal vegetables in some homemade meat stock for approximately 20 minutes before the pork is finished.

  7. Remove the baking tray with the pork and vegetables from the oven and set them aside on paper towel to soak up excess dripping.

  8. Drain any excess dripping from the baking tray into your dripping tray to store for later use in the fridge.

  9. To make a very tasty gravy leave one tablespoon of dripping, one onion half and one to two pieces of pumpkin remaining in the bottom of the pan that the pork was roasting in and mix with the flat of a fork to make a delicious gravy on the stove at a low heat (you can add pepper to taste).

  10. Strain the cooked vegetables and set aside the meat stock to serve as a hot beverage with your meal.

  11. Serve this delicious pork belly with roasted pumpkin and other seasonal vegetables. Stewed apple can also be eaten with this meal.

Apple Puree

Apple Pure is introduced in the Introduction Diet on stage 5.  Apple Pure for GAPS is an easy way to disguise fats.  GAPS is a high fat diet so we want to add fats to everything and apple puree is a good way to deliver it. We usually add duck fat, ghee or coconut oil.  […]

Print Recipe


Apple Puree

This recipe is appropriate for the GAPS Introduction Diet from stage 5 onward

Votes: 0
Rating: 0
You:
Rate this recipe!

Prep Time 5-10 Minutes
Cook Time 15-20 Minutes

Servings
People


Ingredients
Fruit

Other

Prep Time 5-10 Minutes
Cook Time 15-20 Minutes

Servings
People


Ingredients
Fruit

Other

Votes: 0
Rating: 0
You:
Rate this recipe!


Instructions
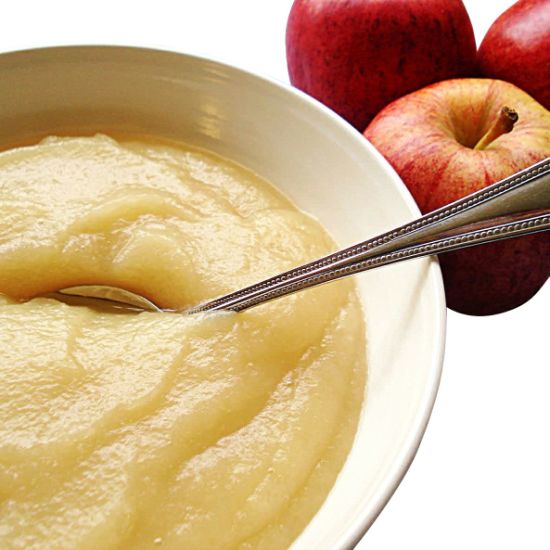
  1. Peel and core the ripe apples and slice thinly into your stainless steel cook pot. An apple slinky is great at doing this job.

  2. Add the water and cook the apples on low whilst stirring occasionally. You may place the lid on top to create steam in the cooking process.
  3. When the apples have become soft, take the pan off the stove and mash with a vegetable masher.
  4. Add a couple of tablespoons of ghee or duck fat or coconut fat (depending on what you have introduced) and blend with the apple.

  5. Store the stewed apples in the fridge.


Recipe Notes

Clinical Notes

Start to introduce with a few spoonful’s  a day and gradually increase the amount if there are no reactions.

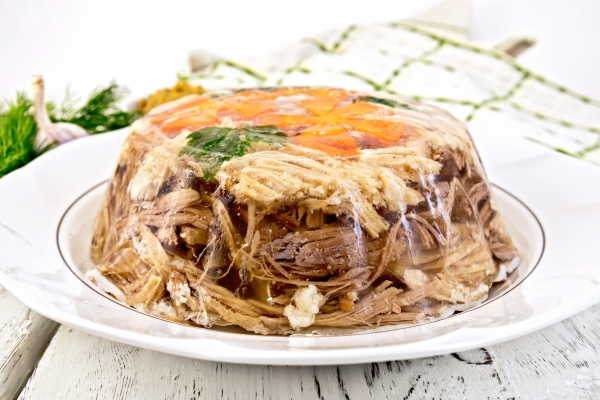
Meat Jelly Slice

This dish is a traditionally known remedy for digestive problems and is famous for its healing powers and nourishing components such as gelatine, glucosamine, glycoproteins, phospholipids etc… A highly recommended recipe of Dr Natasha’s for healing tummies. Print Recipe Meat Jelly Slice This recipe is appropriate for stage two onward Votes: 0 Rating: 0 You: […]


Print Recipe


Meat Jelly Slice

This recipe is appropriate for stage two onward

Votes: 0
Rating: 0
You:
Rate this recipe!

Prep Time 45 minutes
Cook Time 5 hours
Passive Time 1 hour

Servings
people


Ingredients

Prep Time 45 minutes
Cook Time 5 hours
Passive Time 1 hour

Servings
people


Ingredients

Votes: 0
Rating: 0
You:
Rate this recipe!


Instructions
  1. Bring 2 litres of water to boil and place pigs trotters into the pot. Boil the trotters for a further 5 minutes and then remove the trotters from the pot whilst discarding the water. (this is to clean and prepare the trotters).

  2. Bring a new pot to boil with 3 litres of water with all 4 pigs trotters added (ensuring that they are completely covered).

  3. Add pepper, salt, onion, leaks and bay leaves and cook on a low heat with the lid on for 5 hours in total.

  4. By the 3rd Hour; add the chicken legs and bring to the boil and lower the heat again. Make sure to keep the meat covered by the broth and top up water if needed (but not too much - only enough to cover.

  5. Continue to cook with the lid slightly to the side to allow for some evaporation of the stock so that you can establish the right amount of broth for the perfect batch. Too much water will not allow the broth to solidify whilst too little can make it too hard.

  6. By the 4th Hour; add remaining vegetables (onion, garlic, carrot and leaks) except for the additional 3 garlic cloves and additional 2 carrots to be set aside and used later. Cook for the final hour. After an hour, the broth should appear thick and the meat tender and soft. Turn off the heat and remove from the stove.

  7. Strain all the meat cuts, trotters and vegetables from the stock through a sieve and set them aside (ensuring to catch the stock in a pyrex jug under the colander for later use).

  8. Return the stock to the stove with the two additional freshly sliced carrots and three large whole garlic cloves added and bring to a boil and then simmer until the carrots are cooked but not too soft.

  9. Whilst the carrots are cooking let the trotters and chicken legs cool. Once they are cool, remove any bones and unwanted parts from the pigs trotters and and set aside the pulled meat. Remove and throw away the bones and the cooked vegetable, peppercorns and bay leaf remains.

  10. After the carrots and garlic have been cooked in the stock, strain them from the stock (ensuring to catch the stock in a pyrex jug under the colander) and set them aside.

  11. Strain the broth again through a cheese cloth and set aside.

  12. Slice the cooked garlic cloves into slithers and add them to a deep glass dish with the sliced cooked carrots. You can improvise by adding a few fresh sliced shallots parsley or fennel sprigs at this stage.

  13. Chop the meat collected from the pigs trotters and chicken legs and add them to the glass dish on top of the carrots and garlic.

  14. Pour the reserved stock over the top to ensure that all the meat is covered.

  15. Place meat jelly into the fridge to set overnight.


Recipe Notes

Serving

This can be cut into slices and served cold with salad or vegetables with a cup of meat stock.  It is important to always remember to eat protein with vegetables.

Points

You may alternatively use small bowls or cups to set and serve your meat jelly.

You may use other meats such as fish (salmon) or beef and lamb to create this meal.


Osso Buco

This recipe can be cooked in a slow cooker or in the oven.  I prefer to cook this in a slow cooker but it depends if you wish to brown the meat at the end a little in the oven by removing the lid and turning it up for the last half an hour.  This […]


Print Recipe


Osso Buco

This recipe is stage two appropriate & onward

Votes: 0
Rating: 0
You:
Rate this recipe!

Prep Time 15 minutes
Cook Time 6-8 hours

Servings
people


Ingredients
  • 6-8 cuts Beef Osso buco cuts These are cuts of meat with the marrow bone in the centre
  • 2 whole Onions Diced
  • 6 cloves garlic Crushed
  • 1-2 whole Carrots Diced
  • 1-2 whole Zucchini Diced
  • 2-3 whole Tomatoes Diced
  • 2 tbs olive oil
  • 1/4 tsp Thyme Optional
  • 1/4 tsp Oregano Optional
  • 1 inch piece Ginger root Finely grated (weigh the peeled ginger on a food scale before grating or mincing to determine the correct measurement for the recipe)
  • 1 inch peice Tumeric root Finely grated (weigh the peeled tumeric on a food scale before grating or mincing to determine the correct measurement for the recipe)
  • 2 tbs Tomato paste Organic and sugar free (no additives)
  • 3 Bayleaves
  • 1 cup Meat Stock
  • 3 sprigs Fresh Parsley For garnish
  • 1 Lemon Cut into quarters for serving

Votes: 0
Rating: 0
You:
Rate this recipe!


Instructions
  1. Chop onions and crush garlic and combine them with tomatoes, tumeric, ginger, thyme, oregano, olive oil and tomato paste in food processor. Blend mixture until all ingredients are well diced and results in a thick paste.

  2. Place the lemon aside for serving later and add osso buco cuts, in the crock pot or slow cooker and add all other prepared chopped vegetables and ingredients including the bay leaves and cup of meat stock.

  3. Cook slow on low for several hours until the meat begins to fall off the bones. This can be achieved in the oven for 4 hours (covered with lid) on a low heat 160 Degrees Celsius or during the day in a slow cooker for 6 – 8 hours on low.

  4. If you are cooking this recipe in the oven and wish to brown the meat a little and create a more caramelised flavour, you may remove the lid and turn the oven up to 200 Degrees Celsius at the end of the cooking time for the last half an hour.

  5. Serve on some homemade cauliflower mash and or with a slice of lemon on the side.


Recipe Notes

Serve

Serve this healing nutrient dense meal with a warm cup of stock to drink on the side.

Coconut Milk

Here we have two coconut milk recipes for the GAPS Diet for people who cannot tolerate nut milks. Canned coconut milk often contains, preservatives and other additives that the GAPS Program does not allow for. BPA is also usually lined within the tin cans containing coconut milk as well. For these reasons, we encourage you […]


Print Recipe


Coconut Milk

This recipe is appropriate for the Introduction diet when nuts have been successfully introduced and tolerated from stage 4 onward.

Votes: 1
Rating: 5
You:
Rate this recipe!

Prep Time 20-40 mins

Servings
Cups


Ingredients
Raw Coconut Milk
  • 4-6 Young green coconuts Enough to produce 1-2 cups of fresh coconut meat and 1/4 - 1/2 cup of coconut water

Equipment for Raw Coconut Milk

Coconut Milk from Shredded Coconut

Prep Time 20-40 mins

Servings
Cups


Ingredients
Raw Coconut Milk
  • 4-6 Young green coconuts Enough to produce 1-2 cups of fresh coconut meat and 1/4 - 1/2 cup of coconut water

Equipment for Raw Coconut Milk

Coconut Milk from Shredded Coconut

Votes: 1
Rating: 5
You:
Rate this recipe!


Instructions
Raw Coconut Milk
  1. With a sterilised kitchen flat head screw driver, use a hammer to pierce three holes into the top of the young green coconut ensuring that it penetrates the nut inside.

  2. Line a strainer with a cheese cloth over the jug or bowl and pour the coconut water from the three holes into the jug and set aside

  3. When all the coconut water is drained, open the top of the coconut by slashing the top off with a strong knife or cleaver. This may take a few slashes on each side at the top of the coconut. There are many videos online that you can view to learn how to do this.

  4. When the top of the coconut is open, spoon out the coconut meat from the sides of the shell. Try to avoid collecting the brown husk and only set aside the white soft meaty flesh. The meat from a young coconut should be soft and moist. If you have lots of coconuts you can do this all at once and freeze the coconut meat for later use.

  5. Repeat the above 3 steps with all coconuts until you have two cups of coconut meat flesh.

  6. Place the coconut meat into a good strong blender, vitamix or thermo mixer and mix the ingredients for as long as it takes to reach a smooth thick consistency whilst gradually adding the coconut water for the desired thickness result. It is important to ensure that the coconut milk mixture is not grainy or lumpy if you wish to have the best yoghurt like resemblance to make yoghurt later.

  7. Contain in a glass bottle with a screw top lid and store in the fridge. Keeps for up to one week in the fridge or can be frozen.

Coconut Milk from Shredded Coconut
  1. Add 1 cup of shredded coconut to one cup of water in a saucepan and bring to the boil. Boiling the coconut will rehydrate the coconut and release the natural coconut fat making it thicker.

  2. Allow the mixture to cool for 15 – 20 minutes and then add the mixture to a good strong blender, vitamix or thermo mixer and mix the ingredients well for a few minutes or so.

  3. Line the top of a jug with a strainer and cheesecloth and pour the mixture through the cheesecloth.

  4. Lifting the edges of the cheesecloth and gathering the strained coconut flakes, twist the cloth and squeeze with your hands allowing all the coconut milk to drip through the strainer and into the jug.

  5. When all the milk has been squeezed and collected in the jug, contain in a glass bottle and store in the fridge. Keeps for up to one week in the fridge.

Almond Pumkin Bread

This recipe is acceptable for the GAPS Introduction Diet from stage Four onward. It is easy to make and well liked byGAPS children.  This recipe can be made using different nut or seed flours and you may wish to add different cooked vegetables to it. Suggestions Nice with some avocado or nut butter. You can […]


Print Recipe


Almond Pumkin Bread

This recipe is appropriate for the Introduction Diet from stage 4 onward

Votes: 0
Rating: 0
You:
Rate this recipe!

Prep Time 5-15 minutes
Cook Time 1 hour

Servings
loaf


Ingredients
Bread Mixture

Special equipment

Prep Time 5-15 minutes
Cook Time 1 hour

Servings
loaf


Ingredients
Bread Mixture

Special equipment

Votes: 0
Rating: 0
You:
Rate this recipe!


Instructions
  1. Preheat conventional oven at 150 degrees (almond flour burns easily so this recipe needs to be cooked slowly).

  2. Cook the pumpkin by boiling it or use previously roasted punpkin from a left over meal. I like to make extra pumkin with my meals for this purpose in mind.

  3. Mix all ingredients in a glass bowl with hand held mixer on low. (do not over mix – just enough to ensure all ingredients is mixed and combined well)

  4. Line your bread tin with oven paper and pour ingredients in. Place in oven and cook for one hour (ensureing not to burn the top).

  5. When removing the bread from the oven, be sure to take it out of the tin immediately to allow it to cool by lifting the loaf out with the paper sides. This will avoid a darker crust because burnt nut flour is bitter. Let it sit and cook on the cooling rack with the paper still surrounding it. When it has cooled you may wrap the loaf in the baking paper and and place in a pyrex dish with a sealed lid to store in the fridge.


Recipe Notes

Suggestions

Nice with some avocado or nut butter.  You can make thin slices and crisp them in a dehydrator which is great for homemade dips and  soup dunkers.  The bread is also great for dippity eggs.

Traditional Wild Sauerkraut & Sauerkraut Juice

Wild fermentation is specific to the live organisms naturally present on the raw vegetables. This is the traditional way to ferment vegetables and sauerkraut because there are abundant lactic acid bacteria on all plants and if submerged under its own juices with a good coverage of salt (regardless of what type vessel they are contained […]


Print Recipe


Traditional Wild Sauerkraut & Sauerkraut Juice

Votes: 0
Rating: 0
You:
Rate this recipe!

Prep Time 45 mins
Passive Time 4 weeks

Servings
litre


Ingredients
Cabbage mixture
  • 1 kg Cabbage The green cabbages produce more brine – select a good quality fresh organic cabbage that is not dry or too old
  • 2 - 3 tbl Celtic or Himalayan Sea Salt Salt is a traditional ingredient in sauerkraut because it increases shelf life, texture, and flavor. The amount of salt used can vary according to personal taste but too little can spoit the batch. The salt helps to preserve.

Special equipment
  • 1 Fermenting Jar/Vessle There are many kinds of fermenting vessles on the market. You can make your own at home or spend extra money on something fancy. See our notes for recommendations
  • 1 Heavy weight this is used to keep the cabbage submerged under its own juices
  • 1 Cabbage/vegetable pounder This aids to help push and compress the cabbage or fermented vegetables so that they are submerged udner their own brine
  • 1 Unbleached cheesecloth

Votes: 0
Rating: 0
You:
Rate this recipe!


Instructions
Sauerkraut Mixture
  1. Thinly slice or shred the cabbage and place it into a large bowl. A good quality mandolin is great for shredding. A big cooking pot is good to contain the cabbage for this will allow you to easily get your hands into the mix later.

  2. Add a generous amount of salt to the mixture and mix the salt into the cabbage with your hands. Let it sit for 10 – 20 minutes to allow the salt to draw out some of the cabbage juice naturally. Salt actually allows the cabbage to sweat so that juices can be extracted to create the brine. 2 tablesppons of salt per 1kg cabbage.

  3. After you have allowed the cabbage to sit for 20 minutes, mix, massage and knead the ingredients with your hands. Bruising the cabbage this way allows the cabbage to extract more natural brine solution. Keep kneading until you have squeezed a substantial amount of juice from the mixture. This may take approximately 10-20 minutes. It is always handy to have someone with strong hands to do the kneading & massaging.

  4. Place the cabbage mixture into the selected kraut vessel and pack and push the mixture down so that the cabbage is compacted in the bottom and the juice is sitting on the top of the cabbage with a minimum of 4 - 5cm’s or 2 inches of the juice above. It is important to push the cabbage down firmly so that no air is trapped and the cabbage is completely submerged in and under its own brine juice. A cabbage/vegetable pounder or potato masher can be a good tool for this.

  5. Most fermented vegetable kits will have a weight but if you do not have a kit with a weight, simply make your own weight by using a plate that fits snug in the fermenting vessle and place it on the top of the cabbage and then place a smaller jar (filled with water) on top of the plate to weigh the cabbage down and keep it submerged. Push the jar down and you will see more juice rise to the top. It is very important to ensure that all the sauerkraut is submerged under its own juice. Don’t worry if you don’t have a weight to push it down, just try to make sure that all the cabbage remains under the brine and if any bits float up, remove them throughout the process to prevent them from going mouldy.

  6. When all the cabage is submerged under its own juices with the weight keeping it down, cover the top with a double folded cheesecloth to keep away the dust and store in a dark place for four weeks (ie pantry). If you use a canning jar with a rubber ring top, and close the lid, be sure to burp it a few times in the first few days to release the pressure or it will burst - you won’t need the cheesecloth if you use this type of jar. Keep checking to remove any mould or scum build up floating on the top and make sure the kraut remains under its own juices. The sauerkraut may be consumed and ready to eat after 2 weeks but it matures better and contains more good bacteria wioth more time. The sauerkraut may be stored in the fridge after 2 - 4 weeks of fermentation. If there is any scum or mould development on the top – remove this. The kraut remaining under the juice will be fine.

  7. After the cabbage has completed the fermentation process it becomes preserved and will last up to 12 months in the fridge. Fermentation is the traditional way we preserved food before companies decided to create synthetic harmful preservative options.

Kraut Juice
  1. The juice remaining in the kraut jar is a by-product of the sauerkraut but it is just as probiotic and benneficial to consume as the kraut itself. Do not discard the juice, either leave it in the jar and consume it gradually along with the kraut or strain it into a bottle to use as a fermented probiotic drink. This juice is what we like to use in the introduction stages of the GAPS Diet. It is introduced slowely and methodically. Refer to the GAPS introduction stagesfor this method.


Recipe Notes

Alternative options

This is a wild feremtnation method which often takes a little more time to ferment naturally, however you can assist this process further by inoculating the kraut batch with good bacteria from the very beginning by adding a vegetable starter culture to the mixture and massage that through with your hands along with the salt.

You may add other vegetables like grated carrots and other favourites such as caraway seeds or dill. 

Trouble shooting

If for any reason the cabbage is not submerged under enough of its own juices, you may need to add a small amount of filtered water with more salt (15 gms of salt to 1 ltr).

Sauerkraut & how to introduce it


Ghee (clarified butter)

  It’s hard to improve on butter, but… Ghee, a traditional Indian preparation, eliminates the milk solids and gives you just the pure, unadulterated butterfat. It’s gheelicious. And it doesn’t burn, so it is a perfect choice for high temperature frying. Before introducing butter on the GAPS diet, the introduction stages advises to introduce ghee […]


Print Recipe


Ghee (clarified butter)

This recipe is appropriate for stage two of the GAPS Introduction Diet and onwards

Votes: 0
Rating: 0
You:
Rate this recipe!

Prep Time 15 mins
Cook Time 1 hour

Servings
tub


Ingredients

Prep Time 15 mins
Cook Time 1 hour

Servings
tub


Ingredients

Votes: 0
Rating: 0
You:
Rate this recipe!


Instructions
Option one
  1. Preheat your oven to approximately 60 – 120 Degrees Celsius.

  2. Add a large block of unsalted organic butter to a glass or stainless steel oven dish and leave it in the oven for 45 – 60 minutes.

  3. The liquid in the dish will separate with milk solids on the bottom (liquid creamy white colour), ghee in the middle (yellow) with some floaty bits of whey on top (crusty yellow and golden brown floaty bits). The whey can be carefully scooped out from the top with a tea strainer and the yellow liquid which is the ghee can be carefully poured into a jar with a cheese cloth on top to catch any whey or unwanted milk solids. Try not to disrupt the milk solids and ensure that they remain in the bottom of the pan as you pour out the ghee.

  4. Discard the milk solids and refrigerate the ghee in glass jars.

Option two
  1. Melt the unsalted butter in a saucepan over low heat. Don't stir.

  2. Reduce heat and let the melted butter simmer for an hour or until a firm "foam" forms on the surface.

  3. Remove the foam with a flat head stainless steel seive straining spoon (see image). On the bottom, you'll now see white milk protein, which you want to leave behind in the pan or filter out of your ghee.

  4. Carefully pour the clarified butter through a cheese cloth. The white milk protein should remain in the cloth, while the clear butterfat seeps through.

  5. Repeat the filtering a couple of times for optimal results.

  6. Let the ghee cool in a glass jar and store at room temperature.


Recipe Notes

Other Options: You can use your slow cooker to make ghee. Put the butter in it and turn on low heat for 6-8 hours. Then follow the steps above.

Fermented Almond Flour

If the introduction of nuts or nut flour persists to be a problem for people starting the GAPS Diet, you may wish to ferment the nut flour itself. Both nuts and seeds contain phytates, phenols and oxalates etc and these can make it difficult for some people (not all) to digest whilst their gut is […]


Print Recipe


Fermented Almond Flour

Fermenting Almond Flour

Votes: 1
Rating: 5
You:
Rate this recipe!

Prep Time 5 mins
Passive Time 24 hours

Servings
cups


Ingredients
Fermenting mixture
  • 2-3 cups Blanched almond flour Organic - quantity here is dependant upon how much you plan to use for the recipe intended
  • 1 cup Whey This is the dripped liquid from your yoghurt - see whey recipe
  • 2 cups Filtered water

Special equipment

Fermenting Almond Flour

Votes: 1
Rating: 5
You:
Rate this recipe!


Instructions
  1. Add the almond flour into a bowl or dish

  2. Mix filtered water with a cup of whey and pour over the almond flour

  3. Leave the bowl or dish on the kitchen bench top at room temperature for 24 hours.

  4. When 24 hours have passed, drain the flour through a cheescloth and use the drained flour directly in baking.

Carrot Cake Muffins

Print Recipe Carrot Cake Muffins Votes: 2 Rating: 4.5 You: Rate this recipe! Course Baking at home, Deserts Cuisine Full GAPS Diet Prep Time 20 mins Cook Time 30 minutes Servings muffins MetricUS Imperial Ingredients Cake Mixture 3/4 cup Raw honey Raw organic2- 3 Carrots Finely grated10 Pitted dates (soaked in boiking water to soften)1/2 […]


Print Recipe


Carrot Cake Muffins

Votes: 2
Rating: 4.5
You:
Rate this recipe!

Prep Time 20 mins
Cook Time 30 minutes

Servings
muffins


Ingredients
Cake Mixture

Frosting
  • 100 grams Butter Organic unprocessed or ghee
  • 2 cups Yoghurt Dripping yoghurt to produce thickened sour cream/fraiche
  • 5-6 tbs Raw honey Raw organic
  • 1-2 tbs lemmon juice Freshly squeezed

Special equipment

Votes: 2
Rating: 4.5
You:
Rate this recipe!


Instructions
Cake mixture
  1. Preheat oven to 175 degrees Celsius. (never cook recipes containing almond flour too high as it burns easily).

  2. Finely grate the carrots and place them in a small bowl. Pour the honey over the carrots and place them in the fridge for 20 minutes.

  3. Cover the dates with boiling water in a separate bowl and let them sit for 20 minutes also. When they are nice and soft, you can easily remove the pit inside.

  4. In a mixing bowl or thermomix - add eggs, carrot mixture, dates, vanilla extract, yoghurt, melted coconut oil and blend well until the mixture is runny.

  5. Add the remaining dry ingredients to the mixture and mix further until all combined into a thick paste.

  6. At the final stages, add the bicarbonate of soda to the top of the mixture and pour the 2 tablespoons of lemon juice on top. This will fiz at first. Turn the mixer on again to ensure that all final ingredinents are all blended well.

  7. Pour the mixture into bleach free baking cup cake holders linned within a 12 tin muffin tray and bake in a preheated oven at 175 degrees Celsius for 30 minutes. You can also make a carrot cake with this mixture but you will need to adjust the cooking time.

    You do not want the mixture to be too runny. If it is, simply add a little more almond flour to accommodate.

Frosting
  1. Drip your yoghurt to thicken or make some creme fraiche for best results as this will make it thick and creamier.

  2. Combine butter (that has softened at room temperature) with yoghurt and mix well.

  3. Gradually add the honey followed by the lemon juice. You don't have to use all the lemon juice if you don't want to, pending on preferred taste.


Recipe Notes

This recipe can make a locely carot cake or regular sized muffins or minni muffins.

Cooking Time for cake or muffins

The cake baking time is approximately 50 minutes

The muffin standard cup size makes approximately 12 with a bit left over to make mini muffins.  The standard muffin size cook time is approximately 30 minutes and the smaller mini size usually takes 20 minutes cooking time.

Fermented Fish

This is a very easy and nutritious probiotic meal to prepare. Avoid Farmed Fish Farmed fish are generally not native to the area and if they escape (which they do) they create disease among native fish, pollute the native species gene pool and compete for food and spawning sites. Some 50,000 salmon are farmed in […]


Print Recipe


Fermented Fish

This recipe is appropriate for the GAPS Introduction Diet Stage Two - onward

Votes: 4
Rating: 4.25
You:
Rate this recipe!

Prep Time 25 Mins
Passive Time 3 Days

Servings
Litre jar


Ingredients

Prep Time 25 Mins
Passive Time 3 Days

Servings
Litre jar


Ingredients

Votes: 4
Rating: 4.25
You:
Rate this recipe!


Instructions
  1. Skin the fish and remove the bones, cut into mouth size pieces.

  2. Put the pieces of the fish into the jar mixing with slightly crushed peppercorns, a few slices of white onion (optional), coriander seeds, bay leaves and dill seeds or dill herb.

  3. In a separate jug add ½ litre of water and dissolve 1 tablespoon of sea salt and 3-4 tablespoons of your homemade whey. Pour this brine into the jar with the fish until the fish is completely covered; if the fish is not covered just add more water.

  4. Close the jar tightly and leave to ferment for 3-5 days at a room temperature, then store in the fridge.

  5. This fish does not keep long, so consume in the next few days. Serve with avocado, lemons and onions.


Recipe Notes

Alternative Options

Another way to ferment fish: buy some fresh sardines (also works for herring and mackerel), de-scale the fish, cut the heads off and clean the belly out. Put into a suitable size glass jar or a stainless steel pan. Add 1-2 cups of whey, 1-2 tablespoons of salt (per 1 litre), a teaspoon of black pepper corns (freshly crushed), 10 bay leaves and ½ a teaspoon of coriander seeds (freshly crushed). Top up with water so the fish is completely covered with water, you may want to float a small plate on top of the fish to keep it submerged in the brine. Cover the pan or put the lid on the jar and let it ferment for 3-5 days at a room temperature. When the fish is ready take the meat off the bones, cut into bite-size pieces and serve with avocado, fresh dill and some chopped red onion.

GAPS Staple Casserole

This recipe is referred to by Dr Natasha Campbell-McBride as the ‘Italian Meat Casserole’ and we believe it is a staple dish that is easy to cook with it’s versatility in what can be used. It is a slow cooked method in the oven that produces a lovely tender meat that falls off the bone […]


Print Recipe


GAPS Staple Casserole

Votes: 1
Rating: 5
You:
Rate this recipe!

Prep Time 35 Minutes
Cook Time 4-6 hrs

Servings
People


Ingredients
Meat and Stock
  • 1 Lamb Shoulder See notes for other meat options
  • 1 Litre Filtered water Approcimate: this is dependant upon how bif the pot is and the size of the lamb

Herbs & Spices

Vegetables
  • 6-8 Cloves Raw Garlic Crushed - See notes caution
  • 1 Whole Onion Large - See notes caution
  • 2 Whole Celery sticks Finely diced - Only use celery on Full GAPS Diet
  • 2 Whole Carrots Finely diced - See notes caution
  • 1/2 Whole Pumpkin Cubed - See notes caution
  • 1/2 Head of Cauliflower or Brocoli - Cut and remove all stalks - See notes caution

Special Equipment

Votes: 1
Rating: 5
You:
Rate this recipe!


Instructions
  1. Heat the oven to 140 - 160 degrees Celsius. Place your meat joint or other selection of meat into an oval cast iron pot and fill 2/3 with filtered water. Be sure not to cover the meat joint completely with water, because the exposed part at the top of the meat produces a lovely tasting stock for drinking. This recipe should allow you to save a few jars of stock when you are done.

  2. If tolerated (see recipe notes) dice some onion and celery and crush some garlic and saute in a separate pan with a little lamb fat or duck fat and add to the pot. It is often nice to salt the top of the lamb and add some of the sauteed ingredients on top as well as surrounding the lamb in the stock.

  3. Add salt, dried herbs, bay leaves and a sprig of rosemary. Cover with the pot with the lid and cook on very low heat for 4-6 hours (125 – 140 degrees Celsius).

  4. After 4 or 5 hours add a variety of chopped vegetables. We have made some suggestions for you above that work nicely but feel free to experiment with seasonal organic vegetables. At this time it is essential to leave the lid off in the final stages of cooking and increase the temperature to 180 degrees celcius and cook for a further 40-50 minutes.

  5. When cooked, serve the meat and vegetables and use the stock (strained through a sieve) for a warm drink with your meal. Keep left over stock in the fridge or freezer for later meals or stock drinks.


Recipe Notes

Alternative Recipe Options

You can use any of the following meats (joint meats are easier to digest than muscle meats) Try to use a broad range of different meats each time you cook this meal.

  • Shoulder of lamb
  • Joint of pork
  • Joint of beef
  • Pheasant
  • Quail
  • Venison
  • Whole chicken
  • Turkey legs
  • Lamb shanks

You may experiment by adding a variety of vegetables keeping a broad range in your diet, however make sure you are ready for them - Refer to clinical notes.

The fat content of these meals need to be quite high: the more fresh animal fats you consume the faster the recovery.  Be sure to add fermented vegetables with every serving.  If you are still in the introduction stage, avoid spices at this stage and only use herbs, salt, and bay leaves.  This meal is easy to cook and provides you with a variety of options to choose from.  If you make a large batch, this meal is easily frozen and defrosted and heated in a glass Pyrex dish with a glass lid in the oven.  Cooking several of these meals and freezing them will allow you to have a break in the kitchen.

This method can be achieved with a slow cooker

Clinical Notes:

Introducing new food: If and when you introduce a new food, your patient’s symptoms of diarrhoea return, or pain or any other digestive symptom is experienced, then wait a week and try again after some more healing has taken place because this indicates that they are not ready for this food.

Avoid vegetables and consume only the meat and stock from this recipe if the patient is experiencing profuse diarrhoea.  Vegetables should be added gradually until well tolerated and digestion improves.

*This recipe is appropriate for the GAPS Introduction Diet Stage Two - onward

Coconut Milk Yoghurt

This recipe is a good alternative for people following the GAPS Diet who are unable to tolerate dairy or who have an anaphylaxis reaction which is a true allergy. Dr Natasha Campbell-McBride does not encourage individuals to avoid GAPS fermented dairy unless there is a true food allergy, and this can be determined by doing […]


Print Recipe


Coconut Milk Yoghurt

Making your own coconut yoghurt is simple and cost effective. You can choose how probiotic you want your yoghurt to be by extending the fermentation length time and by what culture source you use. We recommend you select a starter culture with a good selection of beneficial probiotic strains. You can even use kefir grains to make kefir instead of yoghurt with this recipe. GAPS Diet Australia have a good selection in their shop, however if you have a good strong multi strain probiotic of your own, you may also use that for your starter.

Votes: 1
Rating: 5
You:
Rate this recipe!

Prep Time 30 minutes
Cook Time 7-9 hours

Servings
Litre


Ingredients
Mixture Ingredients
  • 1 Litre Full fat coconut milk (see our coconut milk recipe) Avoid BPA cans & petra-paks containing added water
  • Yoghurt starter culture OPTIONS • Dairy free cultured yoghurt starter powder (measure as per product instructions) OR • Two Dairy free probiotic capsules per litre of milk OR • 1/3 cup of coconut yoghurt as a starter per litre of milk • Kefir
  • 1-2 Tbs Raw honey Generally not required for incubation depending on milk source. See notes below
  • 2 Tbs organic gelatin powder Optional: depending on viscosity preference

Optional ingredients for sweetening
  • 1-2 Tsp Raw honey Optional: To be added after fermentation & refrigeration to taste

Equipment

Votes: 1
Rating: 5
You:
Rate this recipe!


Instructions
  1. Sterilize all equipment in hot water (80˚C) for 1 minute. If you are sterilizing glass jars, do not drop them in boiling water over 80 ˚C or you may risk cracking or breaking them. You may risk contamination with bad bacteria if all the equipment is not first sterilized.

  2. In a saucepan, bring coconut milk to 80 degrees C, then remove from heat. Do not boil the milk over 90 degrees Celsius; this will spoil the flavour. Your coconut milk must reach 80-90 degrees Celsius or you risk contamination with bad bacteria. Raw coconut milk can be made without heating, however this needs to be done with fresh naturally retrieved coconut milk that is less likely to be contaminated.

  3. In some cases you may need to add honey. Honey is not usually added to coconut milk because it does contain it’s own sweetness to feed the culture during the fermentation process, however some milk sources may require it so you may need to experiment with this in whether to add the honey or not. Sweetness provides food for the bacterial culture and your yogurt will often not ferment well without it if it is not sweet enough on it’s own.

  4. Cover and cool the milk until it reaches a temperature between 38-45 degrees Celsius. Do not add the starter culture until it has cooled down or it will kill the good bacterial culture you are about to introduce.

  5. Pour aproximately1/2 cup of cooled coconut milk from your mixture into a sterilized glass, and mix in your starter culture or probiotic. Stir well until all is dissolved.

  6. Return the stirred ½ cup mixture to the existing cooled milk and mix well with a whisk or spoon.

  7. Pour cultured milk into your sterile yogurt maker jars, or any sterile glass or enamel containers that work for you and place the jar in the yoghurt maker.

  8. Set the timer for the desired incubation period and ferment the yoghurt for 7 – 9 hours at a temperature range between 38˚C and 45˚C. The Wholesome ‘me’ yoghurt maker will ferment up to 36 hours if you wish to ferment longer and produce a strong probiotic and very tart yoghurt flavour.

  9. When the fermentation is complete, transfer the yoghurt to the fridge to set for 6 hours before consuming. Refrigeration for this time allows the yoghurt to set.

  10. If your yogurt separates after chilling (which is common), either stir it briskly with a spoon, or whip it with a stick blender.

  11. If you wish to have thicker yoghurt strain the yoghurt and drip all the liquid whey out of your yogurt using a cheesecloth. Drip the yoghurt whey for 6 – 12 hours through a cheesecloth. The whey is probiotic and can be used to add to soups (when cooled before eating) for added probiotic nourishment.

  12. Add honey or fruit to taste.


Recipe Notes

Troubleshooting

Your yoghurt should smell and taste sour like yogurt. If you notice a bad odor, mold, or hints of grey or pink on the surface, we suggest that it has been contaminated with bad bacteria overgrowth and advise to throw it out and try again. This can be caused by a number of things:

  • The equipment was not thoroughly sterilized
  • The milk source was contaminated (was it canned or other?)
  • The milk source in a tetra-pak contained too much water and very little fat
  • The starter culture died from temps too high or too low
  • The starter culture is not right for the type of milk used the starter culture did not have enough natural sugar content to feed of in the milk source
  • The starter culture is out of date or not active
  • The correct amount of starter wasn’t used
  • Other foreign “bad” bacteria colonized the batch.

Unlike nut milks, most coconut milk sources do not require added honey during the incubation period to feed the fermentation process as the coconut milk usually has it’s own sweetness.  However, we can’t control what milk source you choose to use so adding honey during the preparation before the incubation period will be something you may need to experiment with on your own.

Coconut yogurt produces a thinner and runnier yoghurt viscosity compared to cow’s full cream milk yogurt, but there are two ways to thicken it: Add a dissolved thickener like natural gelatin to your milk before fermentation, OR after fermentation, strain the yoghurt and drip all the liquid whey out of your yogurt using a cheesecloth.

Once fully cooled, your yogurt may separate again, with some of the coconut oil hardening on top and a clear or cloudy liquid on the bottom. This happens especially with homemade coconut milk which hasn’t been homogenized and emulsified with factory machinery. This is usually not a problem, as long as everything else smells and tastes right. Just mix well with a spoon or stick blender, and enjoy.

Some new tetra-paks of coconut milk are not appropriate for making yogurt because they are mostly water and very little fat. Choose a high-fat natural coconut milk or cream made for cooking.

Use the same ingredients to make kefir by switching the dairy starter or probiotics with kefir grains and follow the kefir recipe instructions.  This is best made in one large container though (not individual jars).


Chronic Colitis & Failure to Thrive

The following GAPS testimonial was very concerning for first time parents of their 9 month old baby girl.  This family came to me when mainstream medical interventions were unsuccessful in treating her condition. With failure to thrive and severe colitis consisting of daily episodes of bloody diarrhoea, the GAPS protocol made all the difference.  We […]

Kefir Suppliers for Australia and New Zealand

Milk Kefir Grains Express post shipping within Australia for $10.00 Robert Paralowie, SA ryk5108@gmail.com   Milk Kefir Grains Pick up  $15.00 Or Express post shipping within Australia for $25.00 Mike Bucky Wynyard, TAS bukysoper@hotmail.com   Milk and Water Kefir Grains Margaret Blackney VIC marg.blackney@optusnet.com.au   Milk and Water Kefir Grains Anita Gerardi VIC gamgo@optusnet.com.au   […]