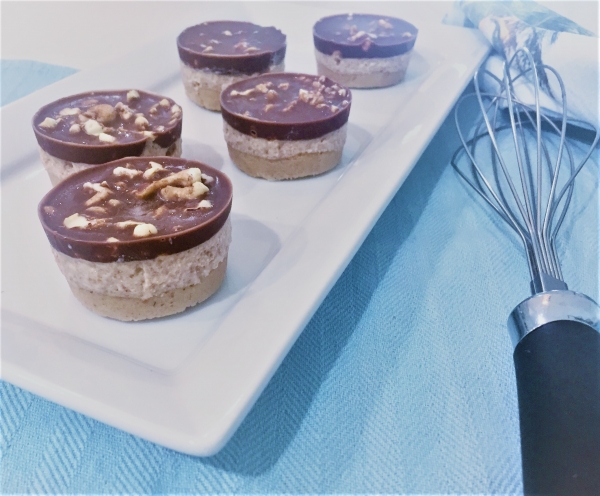
Choc Cross Buns

Some people following GAPS in the early stages should avoid sweets all together as honey and cocoa powder can prove to be problematic for people with IBS or chronic diarrhoea. This recipe can be made when all signs of digestion have improved and the patient has been on the GAPS diet for approximately 12 months […]

Print Recipe
Choc cross buns
Votes: 0
Rating: 0
You:
Rate this recipe!
Servings
Ingredients
Equipment
Choc Bun Ingredients
Choc Bun Topping Ingredients
White Chocolate Cross Topping Ingredients
Servings
Ingredients
Equipment
Choc Bun Ingredients
Choc Bun Topping Ingredients
White Chocolate Cross Topping Ingredients
Votes: 0
Rating: 0
You:
Rate this recipe!
Instructions
Cake Mixture Instructions:
  1. Preheat oven at 150◦C
  2. Place pitted dates in a saucepan on the stove with a tablespoon of ghee and heat on a low temperature until they soften. (if you have a thermomix, you can do this for 5-7 minutes).
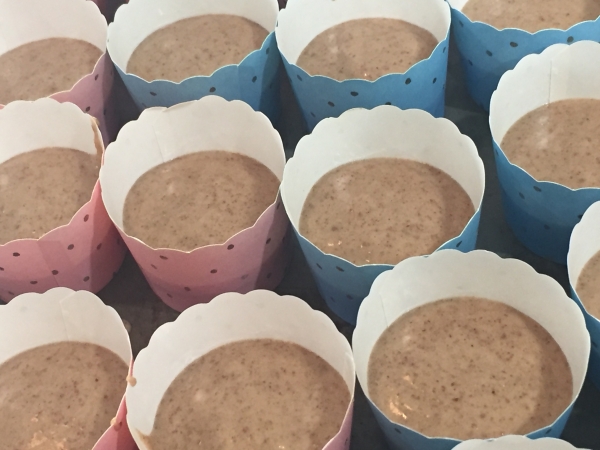
  3. Place softened date mixture in the blender (or thermomix) and blend dates into a paste. Add remaining ingredients and blend at a high speed until the mixture resembles a chocolate cake mixture. The mixture should hold a firm smooth consistency.
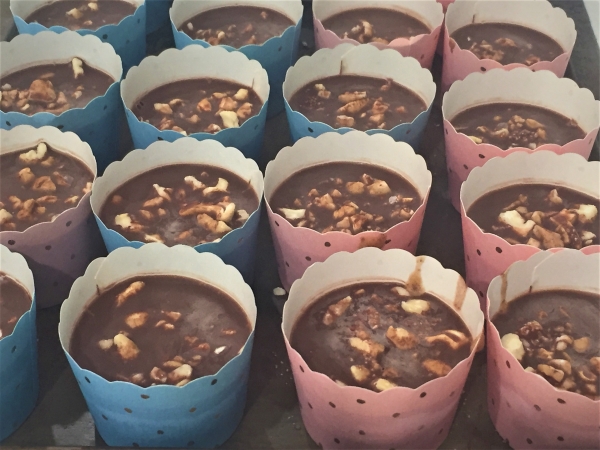
  4. Grease and prepare cupcake tins or use bleach free patty cake papers to pour the mixture into. Cook for 40 – 50 minutes at 150◦C
  5. Test the cake buns with a fork before you take it out of the oven and when ready, remove cakes from the oven and let the cakes cool on a cooling rack. When cooled, take them out of their wrappers or leave them in for character.
Topping Recipe Instructions
  1. Simmer some water on a low heat in a saucepan and place a glass bowl over the simmering water. Add the cacao butter to the glass bowl and melt the cacao butter completely. (CAUTION: Keep the heat at a low temperature so that the steam does not cause any water residue within the glass bowl and make sure all your utensils and materials do not have any water on them because any water contaminating the mixture will cause lumps and clumps and spoil the smooth chocolate result).
  2. Once melted, turn off the heat and add the cocao powder gradually whilst stirring continuously with a bone dry whisk until mixed well with no lumps. Add vanilla seeds, honey and vanilla essence and continue to whisk until smooth.
  3. When the mixture is lovely and smooth it is ready for the choc bun dipping. HINT: It is a good idea to have put the buns in the fridge for a while because the chocolate will harden on the top of the bun faster like ice magic. Simply dip the buns in the chocolate and place on a tray with baking paper and place in the fridge for 15 minutes. Any leftover chocolate can be poured into chocolate molds to make chocolate treats.
White Chocolate Cross Topping Instructions
  1. Simmer some water on a low heat in a saucepan and place a glass bowl over the simmering water. Add the cacao butter to the glass bowl and melt the cacao butter completely. (CAUTION: Keep the heat at a low temperature so that the steam does not cause any water residue within the glass bowl and make sure all your utensils and materials do not have any water on them because any water contaminating the mixture will cause lumps and clumps and spoil the smooth chocolate result).
  2. Once melted, turn off the heat and add the coconut flour and honey gradually whilst stirring continuously with a bone dry whisk until mixed well with no lumps. Add vanilla extract and continue to whisk vigorously whilst you gradually and slowly add the coconut oil.
  3. Use a syringe to dispense the cross on the buns and refrigerate for the cross to harden. Make sure to work quickly or keep mixing in between batches to ensure the oil does not start to separate in the mixture.
  4. Any left over white chocolate can be poured into chocolate molds to make chocolate treats.
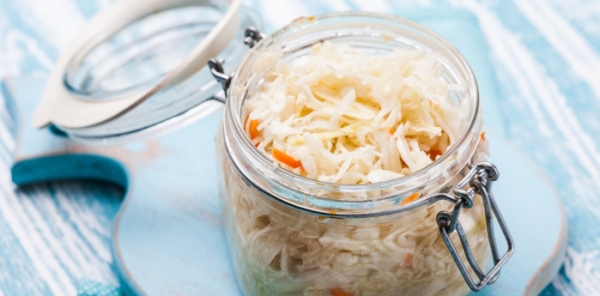
Sauerkraut

Sauerkraut is a condiment suggested to be eaten as a side dish whenever meat is consumed and especially at the end of the day when the body’s enzyme storage is depleted having already been expended on previous meals earlier in the day.  The evening meal is often the most difficult for people who suffer from […]

Print Recipe
Sauerkraut
This recipe is appropriate for the introduction diet from stage One onward
Votes: 0
Rating: 0
You:
Rate this recipe!
Servings
Litre
Ingredients
Sauerkraut
Sauerkraut Equipment
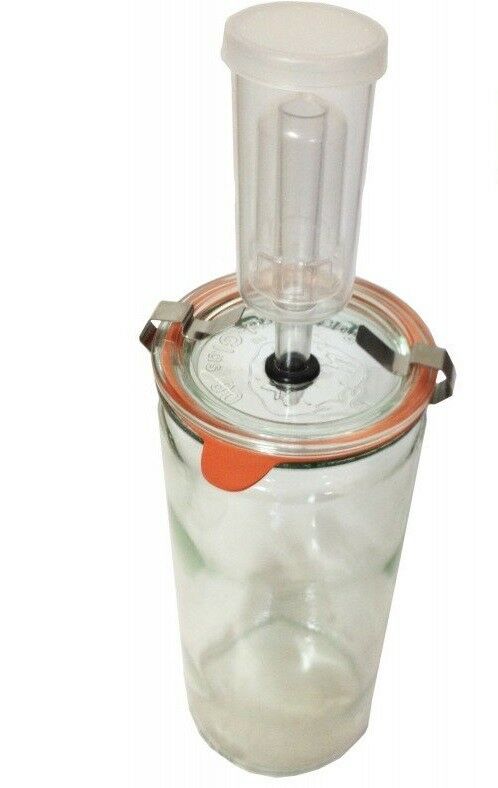
  • 1 Fermentation Vessel A glass jar or crock with a weight to hold the vegetables submerged under the brine and an airlock system with a release valve to allow air to escape whilst creating an anaerobic environment. Refer to Weck images below
  • 1 Mandolin For slicing cabage (or use a knife)
Votes: 0
Rating: 0
You:
Rate this recipe!
Instructions
  1. Thinly slice or shred the cabbage with a knife or mandolin. I like to use a mandolin.
  2. Place the shredded cabbage in a large glass bowl and add the dill (optional).
  3. For Wild Fermentation, add a generous amount of salt to the cabbage and mix it through with your hands to allow an overall coverage. Let it sit for 15 – 20 minutes to allow the salt to draw out some of the cabbage juice naturally. 5-8grams - (max 15grams) per 1kg cabbage. HINTS: Salt allows the cabbage to sweat so that juices can be extracted to create the brine. For Cultured fermentation, add the commercial culture starter as per packet instructions.
  4. Mix, massage and knead the ingredients with your hands. Bruising the cabbage this way allows the cabbage to extract a natural brine solution. Keep kneading until you have squeezed a substantial amount of juice from the mixture. Sometimes this may take 10-20 minutes. HINTS: It is beneficial to have someone with strong hands to do the kneading & massaging.
  5. Place mixture into the selected fermenting vessel and pack and push the mixture down so that the cabbage is compacted in the bottom and the juice is sitting on the top of the cabbage with a minimum of 4 - 5cm’s or 2 inches. It is important to push the cabbage down firmly so that no air is trapped and the cabbage is completely submerged in and under its own brine juice. HINTS: If for any reason the cabbage is not submerged under enough of its own juices, you may need to add a small amount of filtered water with more salt (15 gms of salt to 1 ltr).
  6. Place the weight on the top of the cabbage to keep all the cabbage submerged. Push the weight down and you will see more juice rise to the top. It is very important to ensure that all the sauerkraut is submerged under its own juice. If any bits of cabbage float up to the surface, remove them throughout the fermentation process to prevent them from going moldy.
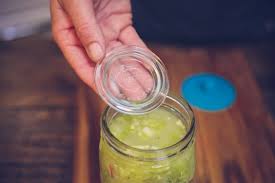
  7. If you use a canning jar with a rubber ring top, and close the lid, be sure to burp it a few times in the first few days to release the pressure. If using the weck airlock system which has it's own release valve allowing gasses to escape without letting air into the jar, place the rubber ring around the top and clamp down the lid with the attached release valve to the top. Store in a dark place for one to two weeks (ie pantry).
  8. The sauerkraut may be consumed and ready to eat after 5-7 days but it matures better with age so it is good to wait the full two weeks unless the outside temperature is hot which will speed up the fermentation process.
  9. The sauerkraut may be stored in the fridge after 1-2 weeks of fermentation. If there is any scum or mold development on the top – remove this. The kraut remaining under the juice will be fine.
Recipe Notes

Optional: It is also nice to add a little grated carrot to your sauerkraut.

Fish Stock

Compared to the other stocks, fish stock is easier to make because there is no roasting or long cooking times required. The DHA and EPA make this stock more beneficial than other meat stock. These Omega-3 fatty acids are the most important nutrients for brain function. Fish stock will produce it’s own gelatin and other […]

Print Recipe
Fish Stock
*This fish stock recipe is appropriate for the GAPS Introduction Diet Stage One - onward Things you may need: Wide Mouthed Mason Stock Storage Jars, 6-8L Stainless Steel Cooking Pot, Stainless Steel colander, straining spoon and Cheesecloth.
Votes: 0
Rating: 0
You:
Rate this recipe!
Prep Time 30 Minutes
Cook Time 2-4 Hours
Passive Time 30 Minutes
Servings
3 litre pot
Ingredients
Basic Ingredients
Fish Meat and Bone
Prep Time 30 Minutes
Cook Time 2-4 Hours
Passive Time 30 Minutes
Servings
3 litre pot
Ingredients
Basic Ingredients
Fish Meat and Bone
Votes: 0
Rating: 0
You:
Rate this recipe!
Instructions
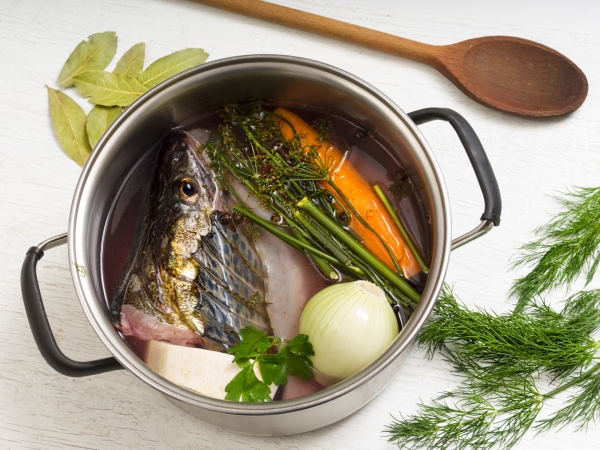
  1. Place the fish bones, heads and fins into a large pot and fill it up with 3 litres of filtered water.
  2. Add the onion and garlic to the pot, along with the bay leaf, black pepper corns and salt.
  3. Add the fennel, parsley and juice from the lemon.
  4. Add the apple cider vinegar and bring to a boil. Skim off any scum that rises to the top. Reduce the heat, cover and simmer for at least 2 - 4 hours.
  5. After cooking for the recommended time above, remove the bones and any meat by straining the stock ingredients through a sieve and discard all the vegetables and bones caught in the sieve.
  6. Strain the remaining stock with a cheesecloth to remove all remaining small bones, pepper corns and any vegetables that were added. Discard any tiny bones, fins, heads and vegetables added.
  7. Store the stock in wide mouthed freezer safe mason jars in the fridge or freezer. The meat stock will keep well in the fridge for at least 7 days or it can be frozen for several months.
Recipe Notes

For Best Storage

Storing your stock properly will be key!  In the fridge it lasts up to 7 days so it is best to purchase freezer safe storage containers to keep you stock on hand.  I recommend purchasing a dozen or more Wide Mouthed Freezer Safe Mason Jars. These will allow you to have stock on hand within minutes because the wide opening allows the stock to slide straight out after running the bottom of the jar under hot tap water for a few minutes to loosen it up.   This can be added directly to the cook pot for use.  If you freeze in other glass jars, the stock will not slide out and you will have to wait for it to defrost.  Other glass jars are not freezer safe and you can easily destroy an entire batch with glass cracking in the freezer or from the change in temperature when running them under hot water to loosen them.  These jars are supplied at our Online GAPS Shop

Fish Stock Selections & Preparation

Fish frames with fish heads intact, including skin and fins (no fish meat required).

The fish flesh contained in the heads of the fish will produce the necessary gelatin and essential minerals for this recipe.  If you use the whole fish including the fish flesh to make the stock, the fish will fall apart and begin to disintegrate into the stock, clouding the stock and making it messy.  The meat is better saved for an enjoyable meal separately.  And of course this is very resourceful, sustainable and satisfying to get use out of every part of the animal you’re eating.

If you are aiming to make a tasty fish stock, select bones from white fish such as bass, cod and flat fish. Bones from oily fish such as salmon, mackerel or tuna are very fatty (which is ideal for GAPS) but they can impart a greasy and unpleasant taste for people who are getting used to fish stock.  Having said this, fatty fish are preferred sources for the GAPS diet.

The fish bones must be cleaned of any blood and gills as these will impart a nasty, bitter taste and cloud up your stock. Fish heads add a lot of flavour and contain a lot of gelatine which will give body to your stock, but make sure they are thoroughly cleaned (and always remove the gills). A good way of cleaning the bones is to run them under a cold tap and leave them to soak in the water to allow impurities to float the surface (which you can then skim and discard).

Hints & Facts:

  • Add 1/4 a cup of apple cider vinegar to help draw out minerals from the bones and into the stock such as calcium potassium and magnesium. Some people may not be ready to add this during intro.
  • If you choose fatty fish like mackerel or salmon, make sure they are not farmed or preserved in any way.
  • Gelatin is the substance extracted by boiling bones, fins and heads.

Contrary to popular belief meat, fish and organ meats like liver and kidney have the highest contents of vitamins, amino acids nourishing fats, many minerals and other nutrients which we need in order to be adequately nourished.

Clinical Notes:

Low fibre is the aim initially (especially for people who have profuse watery diarhoea), however if you are more prone to constipation, you can add onion, celery and cabbage to the stock for more flavour.

https://shop.gapsaustralia.com.au/freezer-safe-mason-stock-storage-jar-475ml/

Pork Meat Stock

It is important to understand the difference between meat and bone broth. Meat stock and bone broth are two different things. Simply put, meat stock is made over a few hours with raw bones and meat, where as bone broth is made with old cooked bones and cooked over 12 – 24 hours or more. […]

Print Recipe
Pork Meat Stock
Remember, a rich meat stock is what we are seeking to make on the introduction stages, not bone broth until you graduate to the Full GAPS Diet Program. *This meat stock recipe is appropriate for the GAPS Introduction Diet Stage One - onward Things you may need: Wide Mouthed Mason Stock Storage Jars, 6-8L Stainless Steel Cooking Pot, Stainless Steel colander, straining spoon and Cheesecloth.
Votes: 2
Rating: 4
You:
Rate this recipe!
Prep Time 30 Minutes
Cook Time 3-6 Hours
Passive Time 30 Minutes
Servings
4 litre pot
Ingredients
Basic Ingredients
Pork Meat Joints: Your meat joint must contain bones with marrow, soft tissue and bones with meat still attached to it - Select at least 3-4 items from this group below
Prep Time 30 Minutes
Cook Time 3-6 Hours
Passive Time 30 Minutes
Servings
4 litre pot
Ingredients
Basic Ingredients
Pork Meat Joints: Your meat joint must contain bones with marrow, soft tissue and bones with meat still attached to it - Select at least 3-4 items from this group below
Votes: 2
Rating: 4
You:
Rate this recipe!
Instructions
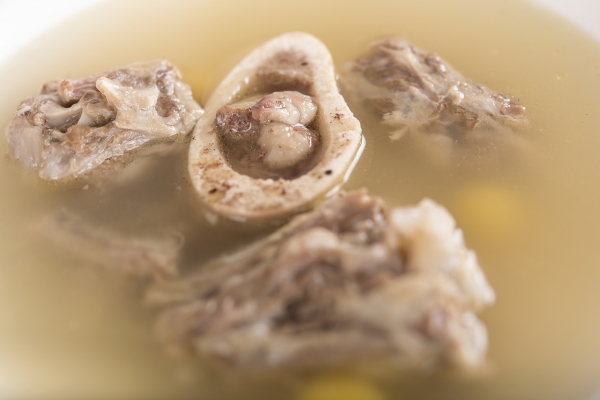
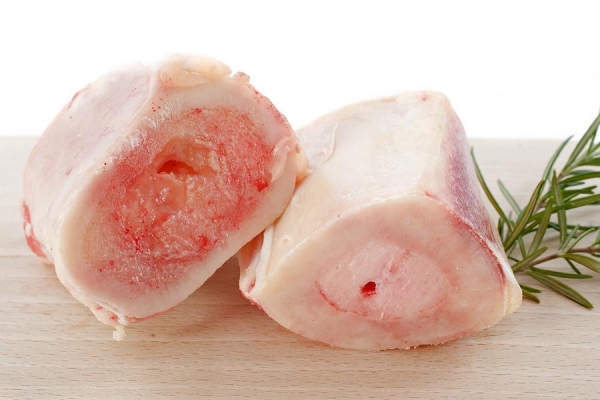
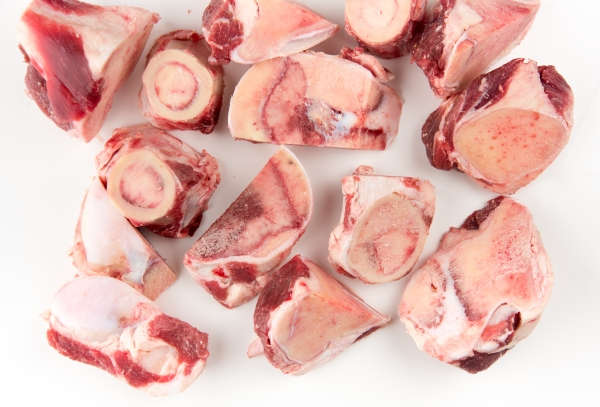
  1. Your selected meat joint must contain bones with marrow, soft tissue and bones with meat still attached to it. Ask your butcher to cut some large tubular marrow bones so that the marrow can be easily accessed like that shown in the image.
  2. Lightly brown the meat cuts in lard or ghee in a frypan or . This creates added flavour to the stock. Do not cook it, just lightly sear it with a sprinkle of salt to create flavour.
  3. Place the bones and meat joints into a large pot and fill it up with 4 litres of filtered water.
  4. Cut the onions into halves or quarters and add them to the pot along with roughly chopped carrots and crushed garlic cloves. If you are following the introduction diet stages, we recommend you avoid the fibrous vegetables such as celery at this time.
  5. Add salt to taste at the beginning of cooking and about a teaspoon of black peppercorns.
  6. Add apple cider vinegar and fresh oregano.
  7. Bring to a boil and skim and skim off any scum that rises to the top. Then reduce the heat and leave on the stove at a low simmer for about 3–6 hours. If you are cooking in the oven, cook at 150°C for 3 hours. If using crock pot, cook on high for 2 hours, then on low for 6 -8 hours. This is the measured cooking time frame to make your nutrient meat stock. Bone stock without the meat cuts are usually longer. The longer you cook the bone stock the more nutrients and the softer the bones become for fishing out marrow.
  8. After cooking for the recommended time above, remove the meat, marrow and bones by straining the stock ingredients through a sieve. You can do this by collecting the stock under the strainer into a larger pot. Strip off all the meat and soft tissues from the bones as best as you can and extract the bone marrow out of the large tubular bones while they are still warm: to do that bang the bone on a thick wooden chopping board. The gelatinous soft tissues around the bones and the bone marrow provide some of the best healing remedies for the gut lining and these should be put aside with the meat that has been stripped from the bones to add later to soups or as a meal. It is also ok for the patient to eat the marrow and soft tissue direct from the bones.
  9. Strain the remaining stock with a cheesecloth to remove all remaining small bones, pepper corns and any vegetables that were added. Discard any tiny bones and vegetables added. Store the stock in wide mouthed freezer safe mason jars in the fridge or freezer. The meat stock will keep well in the fridge for at least 7 days or it can be frozen. The bones can be frozen and later used again to make bone broth.
Recipe Notes

If you wish to make bone broth/stock later, you can keep the bones by storing them in the freezer and cook the ingredients for longer to extract more nutrients from the bones.  Refer to our Bone Broth Recipe to make this but remember not to introduce bone broth until you are on Full GAPS Diet or simply continue with the nutritious meat and gelatin stocks.

For Best Storage

Storing your stock properly will be key! In the fridge it lasts up to 7 days so it is best to purchase freezer safe storage containers to keep you stock on hand. I recommend purchasing a dozen or more Wide Mouthed Freezer Safe Mason Jars. These will allow you to have stock on hand within minutes because the wide opening allows the stock to slide straight out after running the bottom of the jar under hot tap water for a few minutes to loosen it up. This can be added directly to the cook pot for use. If you freeze in other glass jars, the stock will not slide out and you will have to wait for it to defrost. Other glass jars are not freezer safe and you can easily destroy an entire batch with glass cracking in the freezer or from the change in temperature when running them under hot water to loosen them. These jars are supplied at our Online GAPS Shop

Butcher supplies for meat stock

The ratio of ingredients is individual and dependant on the size of the batch you wish to make but keep in mind that some stock should be reserved for drinking and some for making your batch for soup.  The remainder of your ingredients will depend on what type of meat stock you are making.  Here is a list of bone selections you can ask for at your organic butcher shop.

Beef, Lamb, Pork or Game Selections

  • Large tubular marrow bones
  • Gelatinous meats
  • Meaty rib bones
  • Osso Buco cuts
  • Knuckle bones
  • Shanks
  • Neck bones
  • Tail bones
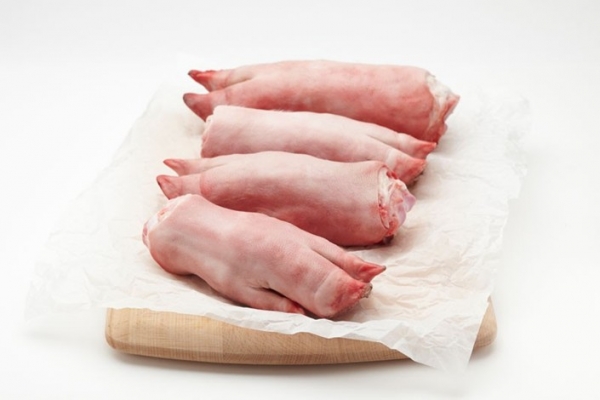
  • Trotters
  • Joints
  • Ears

Poultry Selections

  • Whole chicken & extra chicken frames
  • Feet from one chicken
  • Gizards & giblets
  • Spatchcock
  • Pheasants
  • Pigeon
  • Goose
  • Duck

Fish Selections

  • Fish frames with heads (no fish meat)
  • Skins
  • Fins

Hints & Facts:

  • Add 1/4 a cup of apple cider vinegar to help draw out minerals from the bones and into the stock such as calcium potassium and magnesium. Some people may not be ready to add this during intro.
  • Choose fatty fish like mackerel or salmon. But make sure they are not farmed or preserved in any way.
  • Gelatine as the substance extracted by boiling bones, hoofs, trotters and soft animal tissues from gelatinous meats.
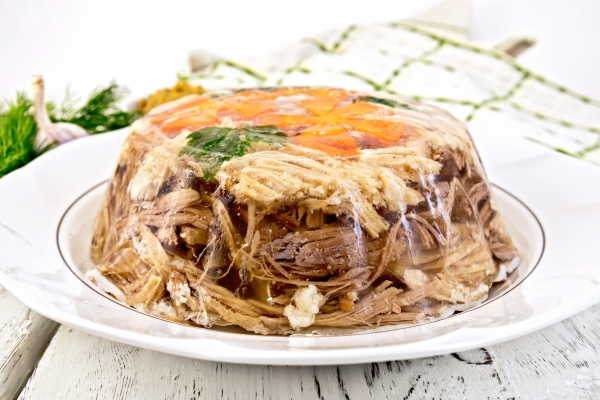
  • The celery sticks should be avoided for patients in the introductions diet stages.  These can be added later on full gaps for added stock flavour.  They can be freshly cut as shown in the instructions or sauteed in a pan with onion and garlic prior to adding to the pot  for added flavour.

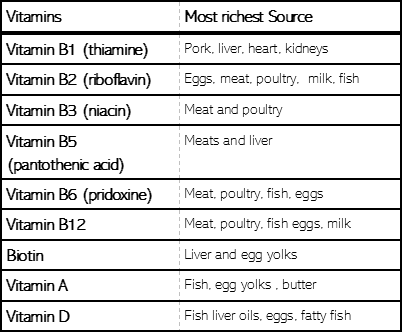
Contrary to popular belief meat, fish and organ meats like liver and kidney have the highest contents of vitamins, amino acids nourishing fats, many minerals and other nutrients which we need in order to be adequately nourished.

Charting the highest source of essential nutrients

Clinical Notes:

Low fibre is the aim initially (especially for people who have profuse watery diarhoea), however if you are more prone to constipation, you can add onion, celery and cabbage to the stock for more flavour.


Chicken Meat Stock

It is important to understand the difference between meat and bone broth. Meat stock and bone broth are two different things. Simply put, meat stock is made over a few hours with raw bones and meat, where as bone broth is made with old cooked bones and cooked over 12 – 24 hours or more. […]

Print Recipe
Chicken Meat Stock
Remember, a rich meat stock is what we are seeking to make on the introduction stages, not bone broth until you graduate to the Full GAPS Diet Program. *This meat stock recipe is appropriate for the GAPS Introduction Diet Stage One - onward. Things you may need: Wide Mouthed Mason Stock Storage Jars, 6-8L Stainless Steel Cooking Pot, Stainless Steel colander, straining spoon and Cheesecloth.
Votes: 1
Rating: 5
You:
Rate this recipe!
Prep Time 40 Minutes
Cook Time 1.5 -3 Hours
Passive Time 30 Minutes
Servings
4 litre pot
Ingredients
Basic ingredients
Chicken or other Poultry Stock
Prep Time 40 Minutes
Cook Time 1.5 -3 Hours
Passive Time 30 Minutes
Servings
4 litre pot
Ingredients
Basic ingredients
Chicken or other Poultry Stock
Votes: 1
Rating: 5
You:
Rate this recipe!
Instructions
  1. Place chicken frames, feet, gizzards and whole chicken into a large pot and fill it up with 4 Litres of filtered water, add natural unprocessed salt to your taste at the beginning of cooking and about a teaspoon of black peppercorns, roughly crushed (optional – pepper sometimes too hot for children). Apple cider vinegar can be added at this point if you are using it.
  2. Add fresh oregano and peppercorns.
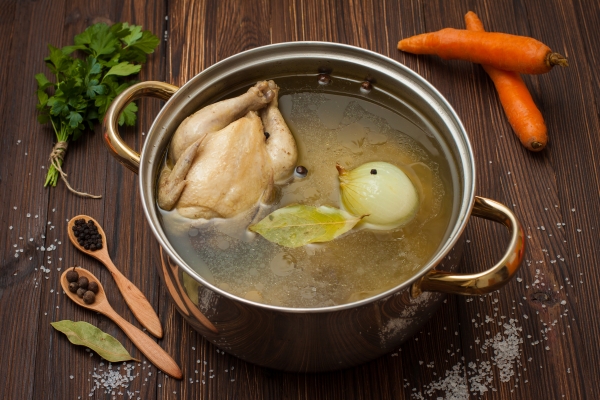
  3. Bring to boil on the stove and skim and discard any floating scum on the top. Cover and simmer on a low heat for 1 ½ -3 hours. If you are using a crock pot, cook for 1 hour on high, then 6 hours on low.
  4. After cooking for the recommended time, remove the meat and bones by straining the stock ingredients through a sieve. You can do this by collecting the stock under the strainer into a larger pot or large pyrex jug. Strip off all the meat and soft tissues from the bones as best as you can and put aside. The gelatinous soft tissues around the bones and the bone marrow provide some of the best healing remedies for the gut lining and these should be put aside with the meat that has been stripped from the bones to add later to the soup. It is also good for the patient to eat the marrow and soft tissue direct from the bones as a meal.
  5. Strain the remaining stock with a cheesecloth to remove all remaining small bones, pepper corns and any vegetables that were added. Discard any tiny bones and vegetables added. Store the stock in wide mouthed freezer safe mason jars in the fridge or freezer. The meat stock will keep well in the fridge for at least 7 days or it can be frozen.
Recipe Notes

If you wish to make bone broth/stock later, you can keep the bones by storing them in the freezer and cook the ingredients for longer to extract more nutrients from the bones.  Refer to our Bone Broth Recipe to make this but remember not to introduce bone broth until you are on Full GAPS Diet or simply continue with the nutritious meat and gelatin stocks.

For Best Storage

Storing your stock properly will be key! In the fridge it lasts up to 7 days so it is best to purchase freezer safe storage containers to keep you stock on hand. I recommend purchasing a dozen or more Wide Mouthed Freezer Safe Mason Jars. These will allow you to have stock on hand within minutes because the wide opening allows the stock to slide straight out after running the bottom of the jar under hot tap water for a few minutes to loosen it up. This can be added directly to the cook pot for use. If you freeze in other glass jars, the stock will not slide out and you will have to wait for it to defrost. Other glass jars are not freezer safe and you can easily destroy an entire batch with glass cracking in the freezer or from the change in temperature when running them under hot water to loosen them. These jars are supplied at our Online GAPS Shop

Butcher supplies for meat stock

The ratio of ingredients is individual and dependant on the size of the batch you wish to make but keep in mind that some stock should be reserved for drinking and some for making your batch for soup.  The remainder of your ingredients will depend on what type of meat stock you are making.  Here is a list of bone selections you can ask for at your organic butcher shop.

Beef, Lamb, Pork or Game Selections

  • Large tubular marrow bones
  • Gelatinous meats
  • Meaty rib bones
  • Osso Buco cuts
  • Knuckle bones
  • Shanks
  • Neck bones
  • Tail bones
  • Trotters
  • Joints
  • Ears

Poultry Selections

  • Whole chicken & extra chicken frames
  • Feet from one chicken
  • Gizards & giblets
  • Spatchcock
  • Pheasants
  • Pigeon
  • Goose
  • Duck

Fish Selections

  • Fish frames with heads (no fish meat)
  • Skins
  • Fins

Hints & Facts for fish stock:

  • Add 1/4 a cup of apple cider vinegar to help draw out minerals from the bones and into the stock such as calcium potassium and magnesium. Some people may not be ready to add this during the introduction diet stages.
  • Choose fatty fish like mackerel or salmon. But make sure they are not farmed or preserved in any way.
  • Gelatine as the substance extracted by boiling bones, hoofs, trotters and soft animal tissues from gelatinous meats.
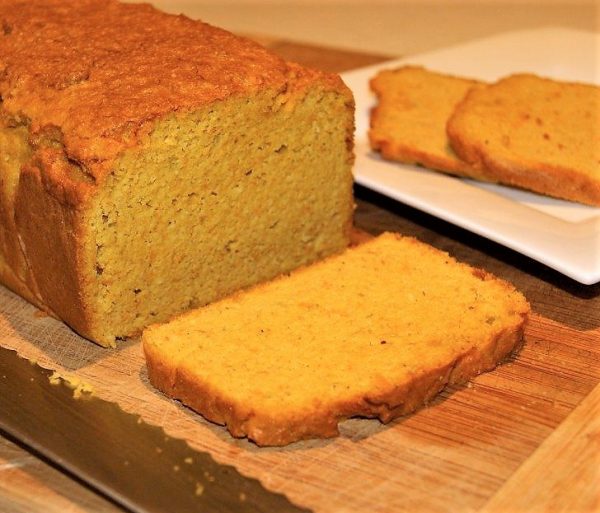
  • The celery sticks should be avoided for patients in the introductions diet stages.  These can be added later on full gaps for added stock flavour.  They can be freshly cut as shown in the instructions or sauteed in a pan with onion and garlic prior to adding to the pot  for added flavour.

Contrary to popular belief meat, fish and organ meats like liver and kidney have the highest contents of vitamins, amino acids nourishing fats, many minerals and other nutrients which we need in order to be adequately nourished.

Charting the highest source of essential nutrients

Clinical Notes:

Low fibre is the aim initially (especially for people who have profuse watery diarhoea), however if you are more prone to constipation, you can add onion, celery and cabbage to the stock for more flavour.


Lamb Meat Stock

It is important to understand the difference between meat and bone broth. Meat stock and bone broth are two different things. Simply put, meat stock is made over a few hours with raw bones and meat, where as bone broth is made with old cooked bones and cooked over 12 – 24 hours or more. […]

Print Recipe
Lamb Meat Stock
Remember, a rich meat stock is what we are seeking to make on the introduction stages, not bone broth until you graduate to the Full GAPS Diet Program. *This meat stock recipe is appropriate for the GAPS Introduction Diet Stage One - onward. Things you may need: Wide Mouthed Mason Stock Storage Jars, 6-8L Stainless Steel Cooking Pot, Stainless Steel colander, straining spoon and Cheesecloth.
Votes: 0
Rating: 0
You:
Rate this recipe!
Prep Time 30 Minutes
Cook Time 3-6 Hours
Passive Time 30 Minutes
Servings
4 litre pot
Ingredients
Basic Ingredients
Lamb Meat Joints: Your meat joint must contain bones with marrow, soft tissue and bones with meat still attached to it - Select at least 3-4 items from this group below
Prep Time 30 Minutes
Cook Time 3-6 Hours
Passive Time 30 Minutes
Servings
4 litre pot
Ingredients
Basic Ingredients
Lamb Meat Joints: Your meat joint must contain bones with marrow, soft tissue and bones with meat still attached to it - Select at least 3-4 items from this group below
Votes: 0
Rating: 0
You:
Rate this recipe!
Instructions
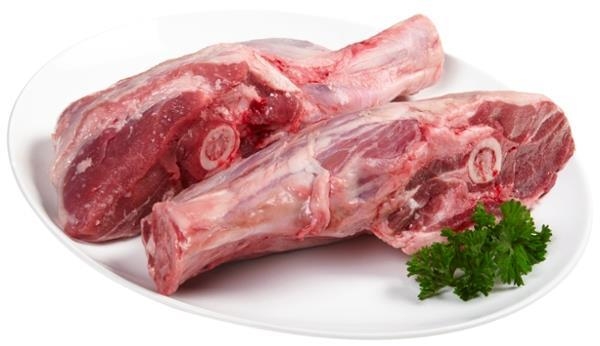
  1. Your selected meat joint must contain bones with marrow, soft tissue and bones with meat still attached to it. Ask your butcher to cut some large tubular marrow bones so that the marrow can be easily accessed like that shown in the image.
  2. Lightly brown the meat cuts in tallow or ghee in a frypan or . This creates added flavour to the stock. Do not cook it, just lightly sear it with a sprinkle of salt to create flavour.
  3. Place the bones and meat joints into a large pot and fill it up with 4 litres of filtered water.
  4. Cut the onions into halves or quarters and add them to the pot along with roughly chopped carrots and crushed garlic cloves. If you are following the introduction diet stages, we recommend you avoid the fibrous vegetables such as celery at this time.
  5. Add salt to taste at the beginning of cooking and about a teaspoon of black peppercorns.
  6. Add apple cider vinegar and fresh oregano.
  7. Bring to a boil and skim off any scum that rises to the top. Then reduce the heat and leave on the stove at a low simmer for about 3–6 hours. If you are cooking in the oven, cook at 150°C for 3 hours. If using crock pot, cook on high for 2 hours, then on low for 6 hours. This is the measured cooking time frame to make your nutrient meat stock. Bone stock without the meat cuts are usually longer. The longer you cook the bone stock the more nutrients and the softer the bones become for fishing out marrow.
  8. After cooking for the recommended time above, remove the meat, marrow and bones by straining the stock ingredients through a sieve. You can do this by collecting the stock under the strainer into a larger pot. Strip off all the meat and soft tissues from the bones as best as you can and extract the bone marrow out of the large tubular bones while they are still warm: to do that bang the bone on a thick wooden chopping board. The gelatinous soft tissues around the bones and the bone marrow provide some of the best healing remedies for the gut lining and these should be put aside with the meat that has been stripped from the bones to add later to soups or as a meal. It is also ok for the patient to eat the marrow and soft tissue direct from the bones.
  9. Strain the remaining stock with a cheesecloth to remove all remaining small bones, pepper corns and any vegetables that were added. Discard any tiny bones and vegetables added. Store the stock in wide mouthed freezer safe mason jars in the fridge or freezer. The meat stock will keep well in the fridge for at least 7 days or it can be frozen. The bones can be frozen and later used again to make bone broth.
Recipe Notes

If you wish to make bone broth/stock later, you can keep the bones by storing them in the freezer and cook the ingredients for longer to extract more nutrients from the bones.  Refer to our Bone Broth Recipe to make this but remember not to introduce bone broth until you are on Full GAPS Diet or simply continue with the nutritious meat and gelatin stocks.

For Best Storage

Storing your stock properly will be key! In the fridge it lasts up to 7 days so it is best to purchase freezer safe storage containers to keep you stock on hand. I recommend purchasing a dozen or more Wide Mouthed Freezer Safe Mason Jars. These will allow you to have stock on hand within minutes because the wide opening allows the stock to slide straight out after running the bottom of the jar under hot tap water for a few minutes to loosen it up. This can be added directly to the cook pot for use. If you freeze in other glass jars, the stock will not slide out and you will have to wait for it to defrost. Other glass jars are not freezer safe and you can easily destroy an entire batch with glass cracking in the freezer or from the change in temperature when running them under hot water to loosen them. These jars are supplied at our Online GAPS Shop

Butcher supplies for meat stock

The ratio of ingredients is individual and dependant on the size of the batch you wish to make but keep in mind that some stock should be reserved for drinking and some for making your batch for soup.  The remainder of your ingredients will depend on what type of meat stock you are making.  Here is a list of bone selections you can ask for at your organic butcher shop.

Beef, Lamb, Pork or Game Selections

  • Large tubular marrow bones
  • Gelatinous meats
  • Meaty rib bones
  • Osso Buco cuts
  • Knuckle bones
  • Shanks
  • Neck bones
  • Tail bones
  • Trotters
  • Joints
  • Ears

Poultry Selections

  • Whole chicken & extra chicken frames
  • Feet from one chicken
  • Gizards & giblets
  • Spatchcock
  • Pheasants
  • Pigeon
  • Goose
  • Duck

Fish Selections

  • Fish frames with heads (no fish meat)
  • Skins
  • Fins

Hints & Facts:

  • Add 1/4 a cup of apple cider vinegar to help draw out minerals from the bones and into the stock such as calcium potassium and magnesium. Some people may not be ready to add this during intro.
  • Choose fatty fish like mackerel or salmon. But make sure they are not farmed or preserved in any way.
  • Gelatine as the substance extracted by boiling bones, hoofs, trotters and soft animal tissues from gelatinous meats.
  • The celery sticks should be avoided for patients in the introductions diet stages.  These can be added later on full gaps for added stock flavour.  They can be freshly cut as shown in the instructions or sauteed in a pan with onion and garlic prior to adding to the pot  for added flavour.
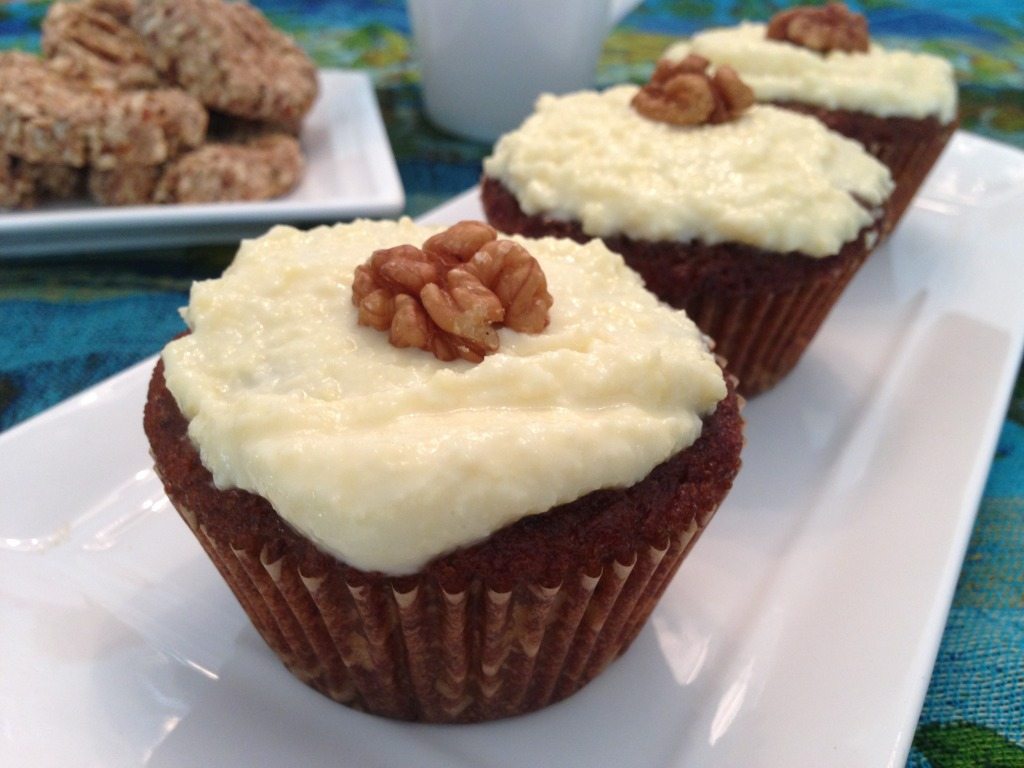
Contrary to popular belief meat, fish and organ meats like liver and kidney have the highest contents of vitamins, amino acids nourishing fats, many minerals and other nutrients which we need in order to be adequately nourished.

Charting the highest source of essential nutrients

Clinical Notes:

Low fibre is the aim initially (especially for people who have profuse watery diarhoea), however if you are more prone to constipation, you can add onion, celery and cabbage to the stock for more flavour.


Beef Meat Stock

It is important to understand the difference between meat and bone broth. Meat stock and bone broth are two different things. Simply put, meat stock is made over a few hours with raw bones and meat, where as bone broth is made with old cooked bones and cooked over 12 – 24 hours or more. […]

Print Recipe
Beef Meat Stock
Remember, a rich meat stock is what we are seeking to make on the introduction stages, not bone broth until you graduate to the Full GAPS Diet Program. *This meat stock recipe is appropriate for the GAPS Introduction Diet Stage One - onward. Things you may need: Wide Mouthed Mason Stock Storage Jars, 6-8L Stainless Steel Cooking Pot, Stainless Steel colander, straining spoon and Cheesecloth.
Votes: 0
Rating: 0
You:
Rate this recipe!
Prep Time 30 Minutes
Cook Time 3-6 Hours
Passive Time 30 Minutes
Servings
4 litre pot
Ingredients
Basic Ingredients
Beef Meat Joints: Your meat joint must contain bones with marrow, soft tissue and bones with meat still attached to it - Select at least 4-5 items from this group below
Prep Time 30 Minutes
Cook Time 3-6 Hours
Passive Time 30 Minutes
Servings
4 litre pot
Ingredients
Basic Ingredients
Beef Meat Joints: Your meat joint must contain bones with marrow, soft tissue and bones with meat still attached to it - Select at least 4-5 items from this group below
Votes: 0
Rating: 0
You:
Rate this recipe!
Instructions
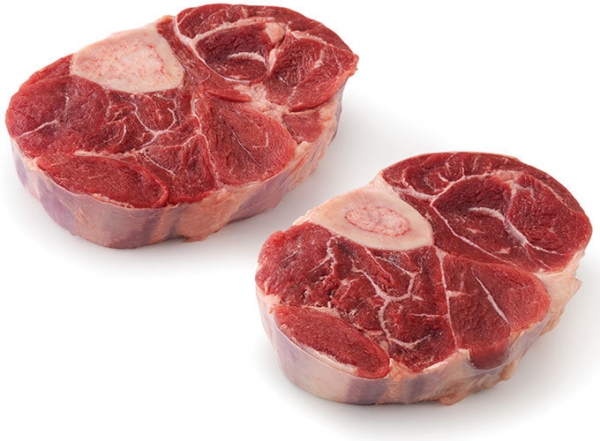
  1. Your selected meat joint must contain bones with marrow, soft tissue and bones with meat still attached to it. Osso Bucco cuts as shown in the image are perfect for this, along with the other meaty bones and joints listed in the recipe. Lightly brown the meat cuts in tallow or ghee in a frypan or . This creates added flavour to the stock. Do not cook it, just lightly sear it with a sprinkle of salt to create flavour.
  2. Place the bones and meat joints into a large pot and fill it up with 4 litres of filtered water.
  3. Cut the onions into halves or quarters and add them to the pot along with roughly chopped carrots and crushed garlic cloves. If you are following the introduction diet stages, we recommend you avoid the fibrous vegetables such as celery at this time.
  4. Add salt to taste at the beginning of cooking and about a teaspoon of black peppercorns.
  5. Add apple cider vinegar and fresh oregano.
  6. Bring to a boil and skim off any scum that rises to the top. Then reduce the heat and leave on the stove at a low simmer for about 3–6 hours. If you are cooking in the oven, cook at 150°C for 3 hours. If using crock pot, cook on high for 2 hours, then on low for 8–10 hours. This is the measured cooking time frame to make your nutrient meat stock. Bone stock without the meat cuts are usually longer. The longer you cook the bone stock the more nutrients and the softer the bones become for fishing out marrow.
  7. After cooking for the recommended time above, remove the meat, marrow and bones by straining the stock ingredients through a sieve. You can do this by collecting the stock under the strainer into a larger pot. Strip off all the meat and soft tissues from the bones as best as you can and extract the bone marrow out of the large tubular bones while they are still warm: to do that bang the bone on a thick wooden chopping board. The gelatinous soft tissues around the bones and the bone marrow provide some of the best healing remedies for the gut lining and these should be put aside with the meat that has been stripped from the bones to add later to soups or as a meal. It is also ok for the patient to eat the marrow and soft tissue direct from the bones.
  8. Strain the remaining stock with a cheesecloth to remove all remaining small bones, pepper corns and any vegetables that were added. Discard any tiny bones and vegetables added. Store the stock in wide mouthed freezer safe mason jars in the fridge or freezer. The meat stock will keep well in the fridge for at least 7 days or it can be frozen. The bones can be frozen and later used again to make bone broth.
Recipe Notes

If you wish to make bone broth/stock later, you can keep the bones by storing them in the freezer and cook the ingredients for longer to extract more nutrients from the bones.  Refer to our Bone Broth Recipe to make this but remember not to introduce bone broth until you are on Full GAPS Diet or simply continue with the nutritious meat and gelatin stocks.

For Best Storage

Storing your stock properly will be key! In the fridge it lasts up to 7 days so it is best to purchase freezer safe storage containers to keep you stock on hand. I recommend purchasing a dozen or more Wide Mouthed Freezer Safe Mason Jars. These will allow you to have stock on hand within minutes because the wide opening allows the stock to slide straight out after running the bottom of the jar under hot tap water for a few minutes to loosen it up. This can be added directly to the cook pot for use. If you freeze in other glass jars, the stock will not slide out and you will have to wait for it to defrost. Other glass jars are not freezer safe and you can easily destroy an entire batch with glass cracking in the freezer or from the change in temperature when running them under hot water to loosen them. These jars are supplied at our Online GAPS Shop

Butcher supplies for meat stock

The ratio of ingredients is individual and dependant on the size of the batch you wish to make but keep in mind that some stock should be reserved for drinking and some for making your batch for soup.  The remainder of your ingredients will depend on what type of meat stock you are making.  Here is a list of bone selections you can ask for at your organic butcher shop.

Beef, Lamb, Pork or Game Selections

  • Large tubular marrow bones
  • Gelatinous meats
  • Meaty rib bones
  • Osso Buco cuts
  • Knuckle bones
  • Shanks
  • Neck bones
  • Tail bones
  • Trotters
  • Joints
  • Ears

Poultry Selections

  • Whole chicken & extra chicken frames
  • Feet from one chicken
  • Gizards & giblets
  • Spatchcock
  • Pheasants
  • Pigeon
  • Goose
  • Duck

Fish Selections

  • Fish frames with heads (no fish meat)
  • Skins
  • Fins

Hints & Facts:

  • Add 1/4 a cup of apple cider vinegar to help draw out minerals from the bones and into the stock such as calcium potassium and magnesium. Some people may not be ready to add this during intro.
  • Choose fatty fish like mackerel or salmon. But make sure they are not farmed or preserved in any way.
  • Gelatine as the substance extracted by boiling bones, hoofs, trotters and soft animal tissues from gelatinous meats.
  • The celery sticks should be avoided for patients in the introductions diet stages.  These can be added later on full gaps for added stock flavour.  They can be freshly cut as shown in the instructions or sauteed in a pan with onion and garlic prior to adding to the pot  for added flavour.

Contrary to popular belief meat, fish and organ meats like liver and kidney have the highest contents of vitamins, amino acids nourishing fats, many minerals and other nutrients which we need in order to be adequately nourished.

Charting the highest source of essential nutrients

Clinical Notes:

Low fibre is the aim initially (especially for people who have profuse watery diarhoea), however if you are more prone to constipation, you can add onion, celery and cabbage to the stock for more flavour.


Cookies & Caramel Cream

Caramel Cream Barrels of pure joy.  Love at first Bite!!!  This little treat creates a burst of flavour to enjoy with the sound of a crack with the first bite followed by pure enjoyment.  Ok, I am in love with this little creation and hope you are too.  Enjoy.     Print Recipe Cookies & […]

Print Recipe
Cookies & Caramel Cream
This recipe is appropriate for people who are following the Full GAPS Diet.
Votes: 0
Rating: 0
You:
Rate this recipe!
Prep Time 1 Hour
Passive Time 4 - 6 Hours
Servings
Cups
Ingredients
Caramel Cream Filling
Nut Sprinkles
Prep Time 1 Hour
Passive Time 4 - 6 Hours
Servings
Cups
Ingredients
Caramel Cream Filling
Nut Sprinkles
Votes: 0
Rating: 0
You:
Rate this recipe!
Instructions
Biscuit Bottom
  1. Pre-heat oven to 150 degrees Celsius for 10 minutes (no hotter)
  2. Mix all ingredients in a bowl with a spoon, followed by massaging all the contents and squeezing the ingredients in your hands where you can feel the mixture starting to stick together and form shape. Depending on the consistency of the mixture, add more nut butter or coconut oil if it is too dry or more nut flour if it is too moist. You want to create a cookie dough so keep mixing and squeezing the contents with your hands so that the mixture can form a big ball ready for making smaller balls.
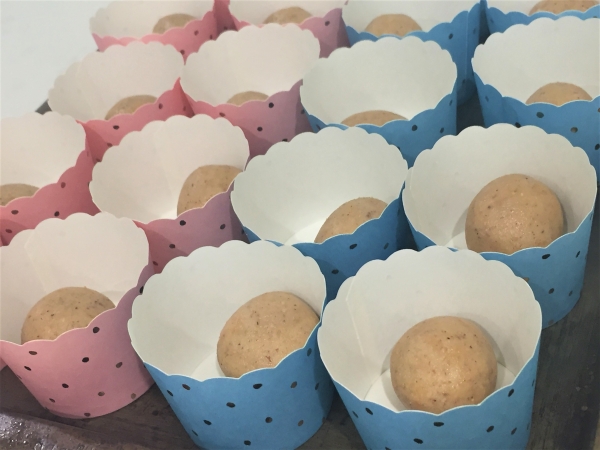
  3. When you have rolled the cookie mixture into a ball on the bench top, pinch a section of the dough and roll the section into a ball approximately 4cm in width. Continue this until you have 24 balls ready.
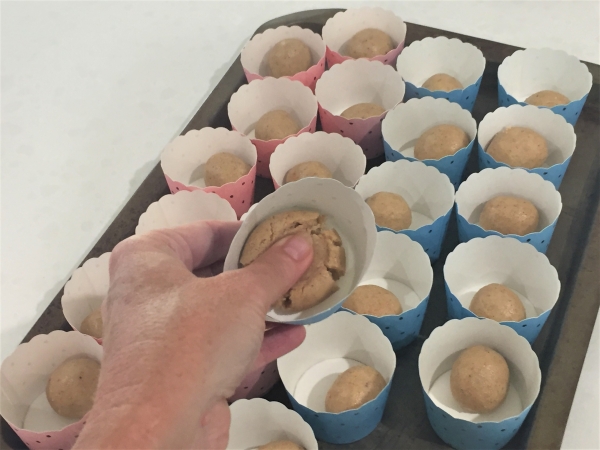
  4. Place each ball into mini round cardboard baking cups. These will be used as the mold for the entire cheesecake and they should be 5cm wide measured from the bottom.
  5. Press the first layer with your thumb by pushing the ball down flat to make a base in the bottom of the cup ensureing it reaches all the sides with good coverage.
  6. Place the baking cups onto a baking tray and place the tray in the preheated oven at no more than 150 degrees Celsius for 10 minutes, keeping a close eye on them to ensure they do not burn. Almond flour burns easily so do not cook any higher than 150 degrees Celsius.
  7. Remove the tray from the oven after 10 minutes and let the cookies cool for 5 minutes and then place them in the fridge for 15 minutes to cool whilst you prepare the next layer.
Caramel Cream Filling
  1. After soaking the Midjool dates for 20 minutes, add them to the thermomix or food processor with the remaining caramel Cream filling ingredients except for the gelatin powder and water.
  2. Mix on a medium to high speed to combine all the ingredients to make a smooth sauce like consistency whilst occasionally stopping to wipe down the sides with the spatula to ensure all the ingredients are blended together evenly.
  3. Place the gelatin powder in a small bowl or cup and add the warm water stiring well to make a consistency similar to apple sauce. Add this to the mixture in the thermomix and blend well.
  4. Remove the baking cups from the fridge and add a spoonful of the mixture until all the ingredients is evenly dispersed in each cup.
  5. With the back of a teaspoon, level out the cream centre so that it is reasonably flat and place the cups in the freezer for 15-20 minutes.
Nut Sprinkles
  1. Place the nuts in the thermomix or blender to chop into the size you prefer to add as a nut sprinkle layer. I like to make ours a little bit chunky. You can also chop them if you wrap them inside a tea towel and bang them with a wooden rolling pin.
  2. Sprinkle the nut mix evenly over the top of the coconut cream filling until distributed evenly in all 24 cups.
Chocolate Top
  1. Simmer some water on a low heat in a saucepan and place a glass bowl over the simmering water. I like to use a pyrex jug (size measures 4 cups) for this as it works nicely to pour the ingredients later.
  2. Add the cacao butter to the glass bowl and melt the cacao butter completely. (CAUTION: Keep the heat at a low temperature so that the steam does not cause any water residue within the glass bowl and make sure all your utensils and materials do not have any water on them because any water contaminating the mixture will cause lumps and clumps and spoil the smooth chocolate result).
  3. Once melted, turn off the heat and add the cocao powder gradually whilst stirring continuously with a bone dry whisk until mixed well with no lumps. Add honey and vanilla essence and continue to whisk. Let the chocoloate topping cool for 5 minutes.
  4. Pour chocolate mixture over the top and remember to allow some of the nuts to be exposed at the tops. This gives it character and encourages you not to over fill the top layer. Aim not to make the top layer too thick or it will make it difficult to bite into.
  5. Refrigerate for 4 - 6 hour to fully set.
  6. When all ingredients have set, you can tear the cardboard paper cups and slowly remove the cheesecake medallions from the cup casing to expose them for serving. I recommend you keep them in the baking cups until you are ready to serve or eat.

Coconut Vanilla Fudge

This recipe will show you how to make your own sensational additive free chocolate. CONTAINS NO nuts, dairy, sugar, eggs or other additives.With a soft fudge coconut cream and vanilla flavoured centre, slightly coated in homemade dairy free chocolate, these old family favourites will be consumed quickly in our home. You can make them rough […]

Print Recipe
Coconut Vanilla Fudge
This recipe is appropriate for people who are following the full GAPS Diet and who do not have serious digestive issues.
Votes: 1
Rating: 5
You:
Rate this recipe!
Prep Time 35 Minutes
Passive Time 45 Minutes
Servings
Slices
Ingredients
Coconut Cream Filling
Prep Time 35 Minutes
Passive Time 45 Minutes
Servings
Slices
Ingredients
Coconut Cream Filling
Votes: 1
Rating: 5
You:
Rate this recipe!
Instructions
Cococnut Cream Filling
  1. Mix all coconut meat ingredients in a saucepan on medium heat until all ingredients is well combined and melted and then mix in a food processor to grind the dessicated coconut a little finer.
  2. Line a 8×6 inch dish with bleach free baking paper and pour the ingredients into the dish and push down flat.
  3. Place the coconut meat mixture dish into the freezer and leave for 4 hours or overnight.
  4. When the mixture has set hard, pull the sides of the baking paper up to pull out the coconut mixture out of the dish and place it on a chopping board. With a long sharp knife, carefully cut the coconut fudge middle meat into even squares.
  5. Place the squares into a container with a lid back into the freezer for preparation for the chocolate coating step.
Choc Coating
  1. Simmer some water on a low heat in a saucepan and place a glass bowl over the simmering water. Add the cacao butter to the glass bowl and melt the cacao butter completely. (CAUTION: Keep the heat at a low temperature so that the steam does not cause any water residue within the glass bowl and make sure all your utensils and materials do not have any water on them because any water contaminating the mixture will cause lumps and clumps and spoil the smooth chocolate result).
  2. Once melted, turn off the heat and add the cocao powder gradually whilst stirring continuously with a bone dry whisk until mixed well with no lumps. Add honey and vanilla essence and continue to whisk.
  3. When the mixture is lovely and smooth it is ready for the coconut meat fudge dipping.
Coating with chocolate
  1. Take the chopped coconut meat squares from the freezer and place one square on top of a fork.
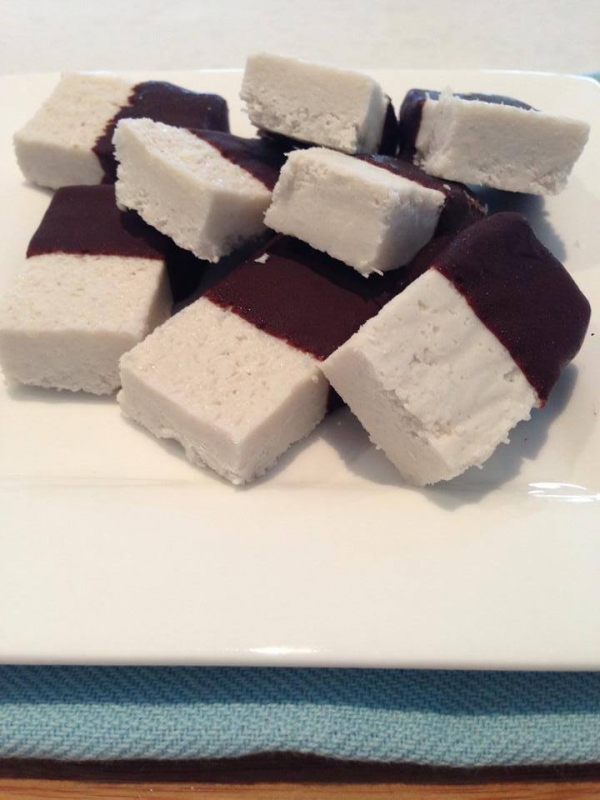
  2. Dip the square into the chocolate so that it covers only half of the slice. (you can cover the entire slice if you want to and this can be done by dropping it into the choc mixture and then lifting it with the fork from the bottom and let the excess chocolate drip off.
  3. The cold coconut squares will start to harden the outer layer of chocolate as you lay the squares down onto some bleach free baking paper on a tray to set.
  4. Place the choc covered squares into the fridge for 10 minutes to set. These are reasonably stable at room temperature.
Recipe Notes

OPTIONAL: You may wish to add a teaspoon of organic mint flavour to the mixture if desired.

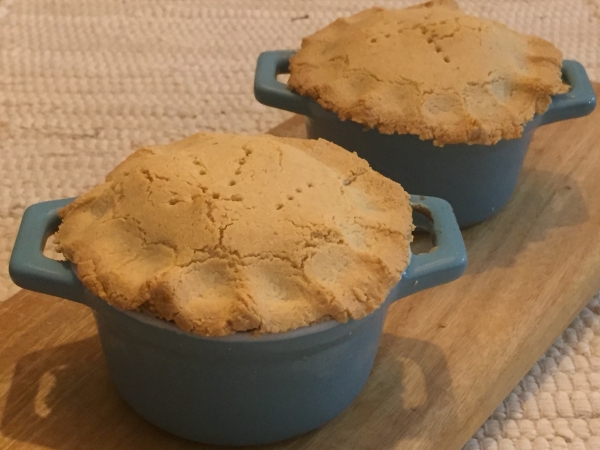
Chicken Vegetable Pie

You will need 4 mini pie pots (size 4cm width opening from the top) This is a delicious meal on it’s own, served with a salad and fermented vegetables on the side.  It is a great winter warmer for all the family. Print Recipe Chicken Vegetable Pie Votes: 0 Rating: 0 You: Rate this recipe! […]

Print Recipe
Chicken Vegetable Pie
Votes: 0
Rating: 0
You:
Rate this recipe!
Course Main Dishes
Cuisine Full GAPS Diet
Prep Time 20 Mins
Cook Time 40 Mins
Passive Time 45 Mins
Servings
Pies
Ingredients
Pie Filling
Course Main Dishes
Cuisine Full GAPS Diet
Prep Time 20 Mins
Cook Time 40 Mins
Passive Time 45 Mins
Servings
Pies
Ingredients
Pie Filling
Votes: 0
Rating: 0
You:
Rate this recipe!
Instructions
Pie Pasty Prep
  1. Preheat the oven to 150 Degrees Celsius
  2. Place all pie pastry ingredients into a bowl and kneed with your hands, massaging and squeezing the ingredients until it forms a tight ball. You can also get this effect very quickly if you place all ingredients in a thermomix for 20 seconds on speed 4.
  3. Roll the dough flat so that it is approximately 1cm thick. Cut out sections of the dough to fill 4 mini pie pots (size 4cm width opening from the top) and press them into the bottom and side walls with your fingers. Make sure to leave enough dough to make the lids.
  4. With the remaining pastry and cut offs, roll out the dough again and cut out 4 lids.
  5. Place the bottoms of the pie crust pressed into the pie pots into the oven and cook for 15 - 20 minutes. Place the lids into the fridge for later.
Preparing the Filling
  1. Bring to boil the chicken breast in two cups of chicken stock.
  2. When chicken is cooked, remove the chicken and dice it up into small bite sized pieces for the pie.
  3. In a separate fry pan, saute the onion and garlic.
  4. Chop pumpkin and carrots to small bite sized pieces. Cut the heads from the broccolini and add them to the chicken stock in the pot along with the carrot and pumpkin pieces..
  5. Also add the onion and garlic along with the chicken to the chicken stock.
  6. Add all remaining chicken filling ingredients and bring to the boil and then reduce the heat to a simmer on a low heat for 45 minutes.
Putting it all together
  1. When all ingredients are cooked and ready, remove from the stoce and prepare the pie bottoms for filling.
  2. Evenly scoop the chicken pie filling into each pie pot crust filling.
  3. take the pie crust filling lids from the fridge and place them over the top of each pot. Pinch the sides of the pastry to connect the base of the pie with the pie tops. alternatively you can use a fork to do this.
  4. Spear the tops of the pie with a fork and place the pots on a tray in the oven. Cook for 20 minutes ( or until lightly golden brown) at 150 Degrees Celcius.
  5. Remove and let cool for ten minutes before serving.

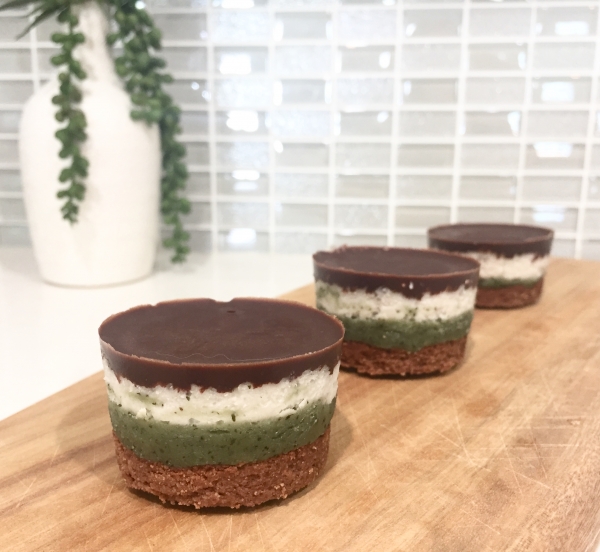
Choc Top Minty Moments – Cheesecake Medallions

This recipe is an absolute delight if you love chocolate and mint with a splash of coconut cream flavour on a delicious crumbly biscuit bottom.  If you don’t like mint, simply leave that out of the recipe.  Although this recipe is not difficult, it does take some time to prepare but the time taken is […]

Print Recipe
Choc Top Minty Moments Cheesecake Medallions
This recipe is appropriate for people who are following the Full GAPS Diet.
Votes: 1
Rating: 5
You:
Rate this recipe!
Prep Time 1 Hour
Passive Time 40 Minutes
Servings
Cups
Prep Time 1 Hour
Passive Time 40 Minutes
Servings
Cups
Votes: 1
Rating: 5
You:
Rate this recipe!
Instructions
Biscuit Bottom
  1. Pre-heat oven to 150 degrees Celsius for 10 minutes (no hotter)
  2. Mix all ingredients in a bowl with a spoon, followed by massaging all the contents and squeezing the ingredients in your hands where you can feel the mixture starting to stick together. Depending on the consistency of the mixture, add more nut butter or coconut oil if it is too dry or more nut flour if it is too moist. You want to create a cookie dough so keep mixing and squeezing the contents with your hands so that the mixture can form a big ball ready for making smaller balls.
  3. When you have rolled the cookie mixture into a ball on the bench top, pinch a section of the dough and roll the section into a ball approximately 4cm in width. Continue this until you have 20 balls ready.
  4. Place each ball into mini round cardboard baking cups. These will be used as the mold for the entire cheesecake and they should be 5cm wide measured from the bottom.
  5. Press the first layer with your thumb by pushing the ball down flat to make a base in the bottom of the cup ensureing it reaches all the sides with good coverage.
  6. Place the baking cups onto a baking tray and place the tray in the preheated oven at no more than 150 degrees Celsius for 10 minutes, keeping a close eye on them to ensure they do not burn. Almond flour burns easily so do not cook any higher than 150 degrees Celsius.
  7. Remove the tray from the oven after 10 minutes and let the cookies cool for 5 minutes and then place them in the fridge for 15 minutes to cool whilst you prepare the next layer.
Mint Cheescake Layer
  1. Soak cashews in water for 20 minutes and then rince them and drain off the water.
  2. Add Cashews to the thermomix or strong mixer and mix on a high speed to break down the nuts into a flour like consistency.
  3. Add coconut oil and coconut milk to the mixture and continue to blend whilst occasionally stopping to wipe down the sides with the spatula to ensure all the ingredients are blended together evenly.
  4. Add honey, vanilla essence, mint flavour and mint leaves. The mint leaves are optional because they do require a lot of blending and pulsing to break them down into a paste along with the nut and coconut mixture. They do contribute slightly to the flavour and add some colour.
  5. If you wish to add more colour, add the spirulina powder.
  6. Continue to mix and blend whilst occasionally stopping to wipe down the sides with the spatula to ensure all the ingredients are blended together evenly. Keep blending until you establish a nice creamy like texture.
  7. Remove the baking cups from the fridge and add a spoonful of the mixture until all the ingredients is evenly dispersed in each cup.
  8. With the back of a teaspoon, level out the mint layer so that it is reasonably flat and place the cups in the freezer for 15 minutes.
Coconut Cream Layer
  1. Mix all coconut meat ingredients in a saucepan on medium heat until all ingredients is well combined and melted
  2. Remove from stove and mix ingredients in a food processor to grind the desiccated coconut a little finer.
  3. Add a spoonful of the mixture
  4. With the back of a teaspoon, level out the mint layer so that it is reasonably flat and place the cups in the freezer for 15 minutes.
Chocolate Top
  1. Simmer some water on a low heat in a saucepan and place a glass bowl over the simmering water. I like to use a pyrex jug (size measures 4 cups) for this as it works nicely to pour the ingredients later.
  2. Add the cacao butter to the glass bowl and melt the cacao butter completely. (CAUTION: Keep the heat at a low temperature so that the steam does not cause any water residue within the glass bowl and make sure all your utensils and materials do not have any water on them because any water contaminating the mixture will cause lumps and clumps and spoil the smooth chocolate result).
  3. Once melted, turn off the heat and add the cocao powder gradually whilst stirring continuously with a bone dry whisk until mixed well with no lumps. Add honey and vanilla essence and continue to whisk.
  4. Remove the baking cups from the freezer and pour chocolate mixture over the top until all the ingredients is evenly dispersed in each cup to provide good coverage as the top layer. Try not to make the top layer too thick to make it easier to bite into the cheesecake.
  5. Refrigerate for 1hour to set.
  6. When all ingredients have set, you can tear the cardboard paper cups and slowly remove the cheesecake medallions from the cup casing to expose them for serving. I recommend you keep them in the baking cups until you are ready to serve or eat.

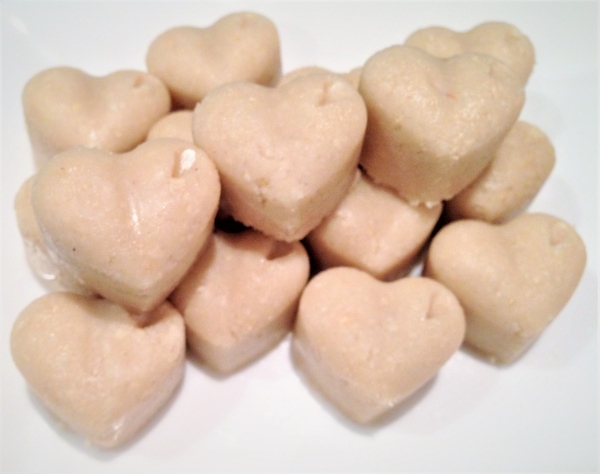
Raw Vanilla Hearts

This recipe is a great white chocolate alternative and is quick and easy to make requiring no baking what-so ever. Print Recipe Raw Vanilla Hearts This is a recipe for the Introduction Diet from Stage 6 onward. Votes: 0 Rating: 0 You: Rate this recipe! Course Baking at home, Deserts, Egg free recipes Cuisine Full […]

Print Recipe
Raw Vanilla Hearts
This is a recipe for the Introduction Diet from Stage 6 onward.
Votes: 0
Rating: 0
You:
Rate this recipe!
Prep Time 10
Passive Time 30
Servings
Prep Time 10
Passive Time 30
Servings
Votes: 0
Rating: 0
You:
Rate this recipe!
Instructions
  1. Place all ingredients into a food processor or thermomix and mix or pulse until all lumps are completely removed and the mixture becomes smooth for moulding
  2. Using heart silicon moulds or any other shape, press the mixture with your finger tips into the moulds until leveled.
  3. Place in the fridge to set. This can take up to half an hour or longer. Simply pop them out and store in the fridge when complete.

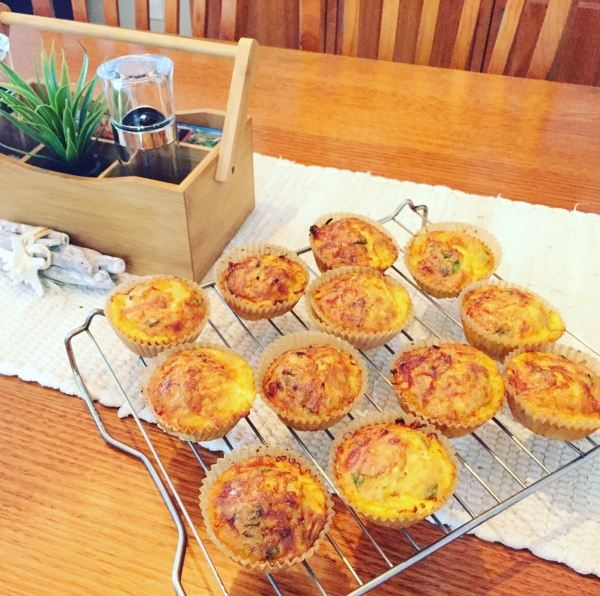
Bacon and Egg Pies

This recipe is great for both school or work lunch ideas.  They are supper easy to make and can be frozen for a later time. They do not last very long in our home and rarely get to the freezer unless I hide them. Selecting the right bacon is important: GAPS does not recommend smoked […]

Print Recipe
Bacon and Egg Pies
This recipe is appropriate for people following the Full GAPS Diet (not intro)
Votes: 1
Rating: 5
You:
Rate this recipe!
Prep Time 10 Minutes
Cook Time 30 Minutes
Servings
Pies
Ingredients
Prep Time 10 Minutes
Cook Time 30 Minutes
Servings
Pies
Ingredients
Votes: 1
Rating: 5
You:
Rate this recipe!
Instructions
  1. Preheat the oven to 175 Degrees Celcius
  2. Dice both the onion and bacon.
  3. Saute the onion and bacon in a fry pan with ghee and set aside.
  4. In a glass bowl, add the eggs and whisk the eggs until well mixed.
  5. Dice shallots and grate the cheddar cheese.
  6. Add the shallots, almond flour, salt and cheddar cheese.
  7. When the bacon and onion has cooled a little, add them to the mixture and mix all ingredients well.
  8. Line a muffin tray with regular 12 sized bleach free muffin cups and spoon the ingredients into all the cups evenly.
  9. Cook in the oven at 175 Degrees Celsius for 30 minutes or until browned on the top.
  10. After 30 minutes, remove from the oven and place on a cooling tray. When cooled, store in an airtight container in the fridge or freeze for later. These defrost easily overnight in the fridge.

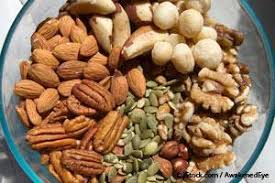
Activating Nuts/Seeds for Flour

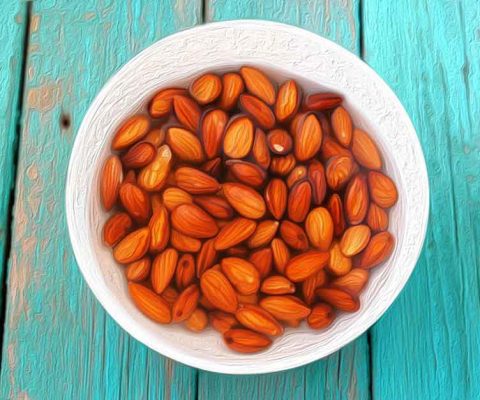
What are Activated Nuts? Activated nuts have been soaked in water and salt for a period of time, which starts off the germination or sprouting process, then dehydrated at a low temperature. Soaking increases the nutrient value of the nuts along with breaking down the problematic compounds that help enhance their digestibility. Nuts and Seeds […]

Print Recipe
Activating Nuts/Seeds for Flour
This recipe is appropriate from Stage 6 on the Introductions Diet
Votes: 0
Rating: 0
You:
Rate this recipe!
Prep Time 2-12 hrs
Servings
Ingredients
Prep Time 2-12 hrs
Servings
Ingredients
Votes: 0
Rating: 0
You:
Rate this recipe!
Instructions
  1. In a large bowl place your nuts or seed of choice.
  2. Dissolve salt in enough water to cover the amount of nuts/seeds you are activating.
  3. Cover with the salt water solution.
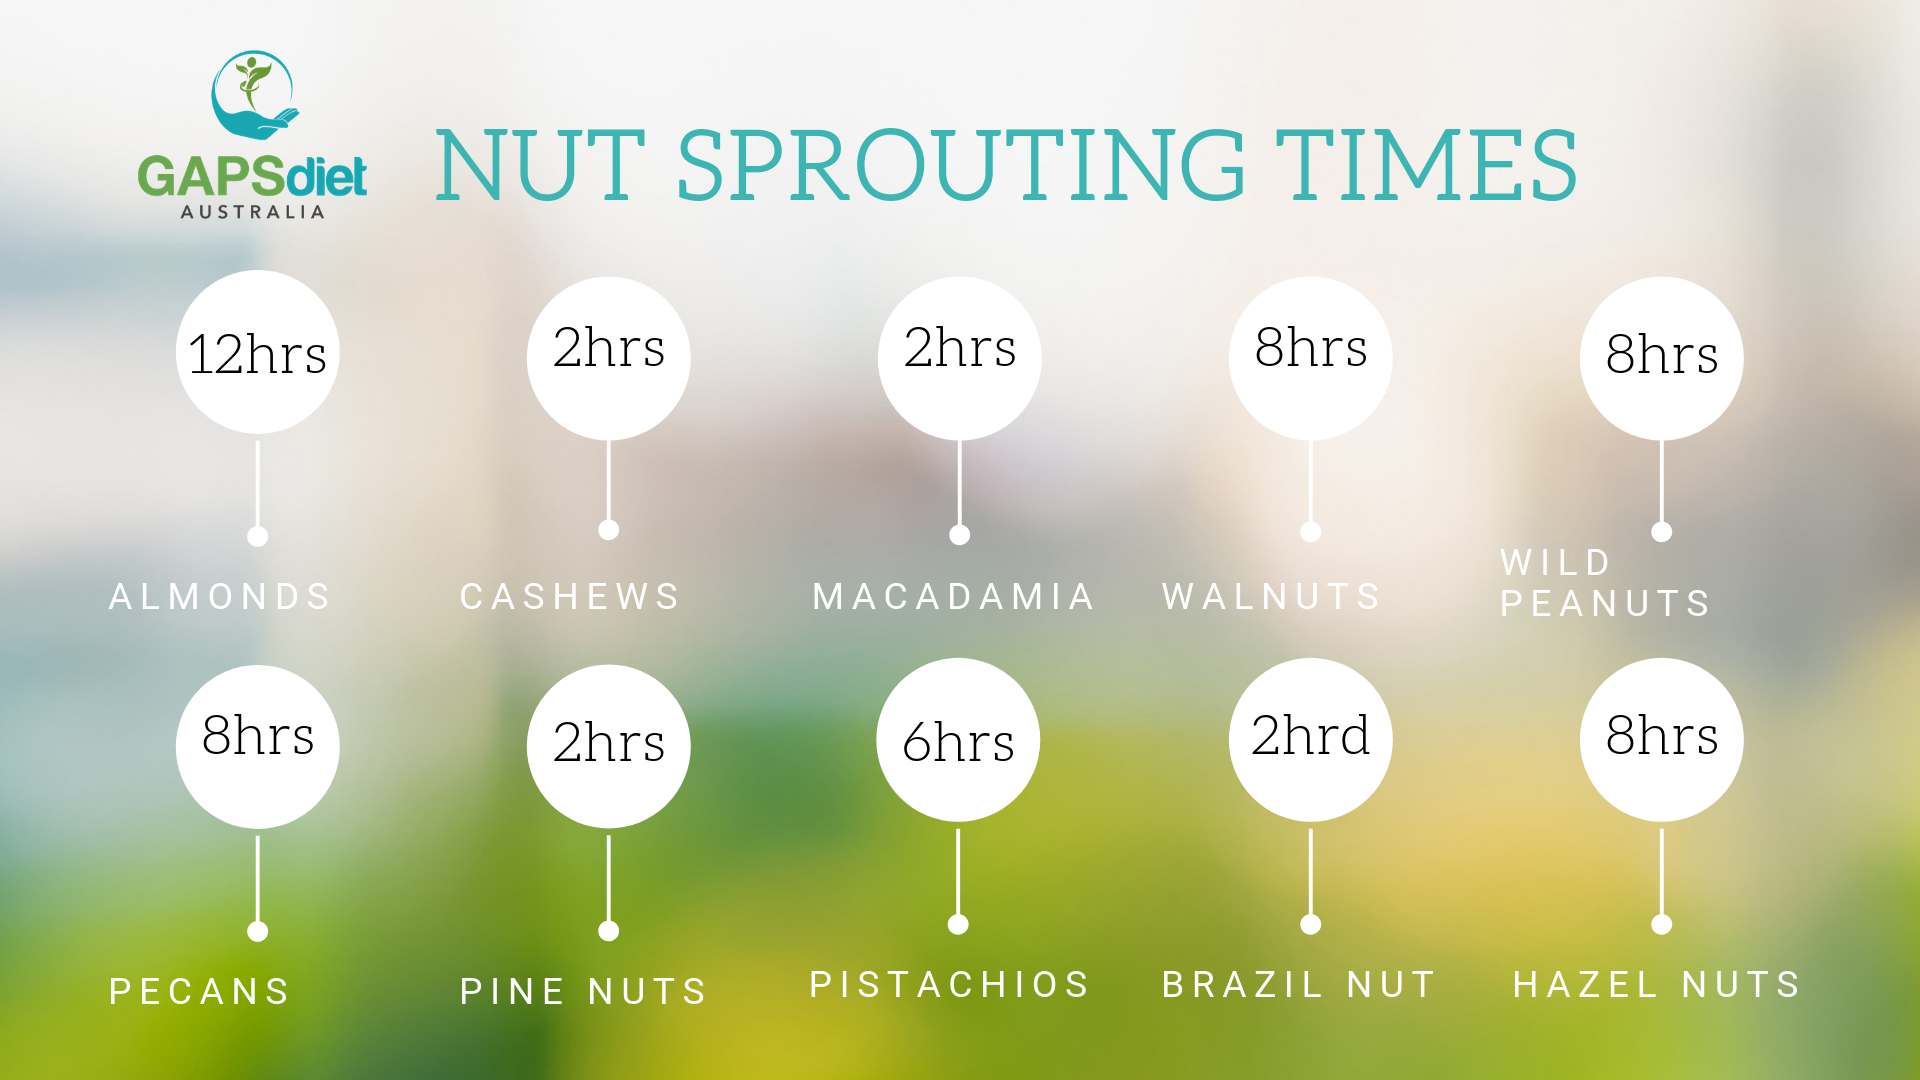
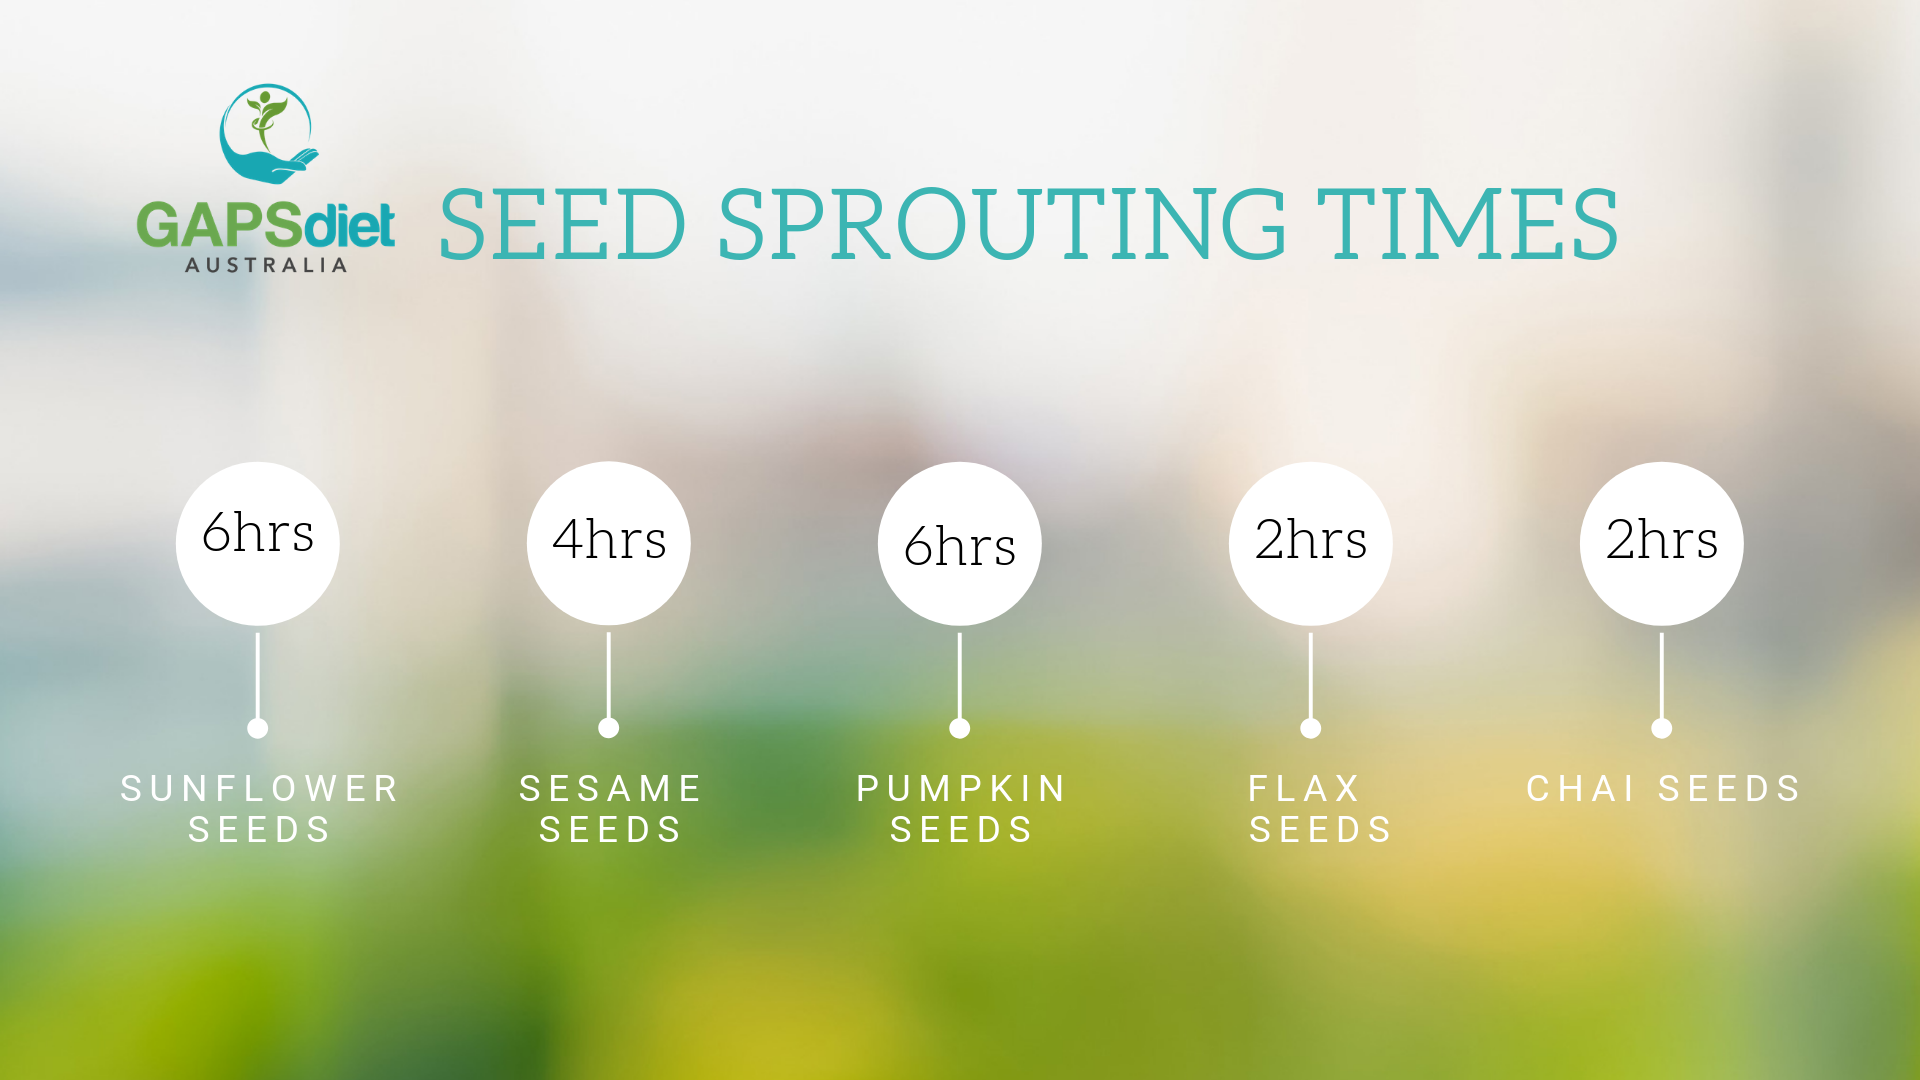
  4. Soak the nuts or seeds for the specified time according to the chart below (see soaking time chart)
  5. Strain and rinse the nuts when the specified time has lapsed.
  6. Spread the nuts or seeds over a dehydrator rack, or baking tray.
  7. Place in the oven on a low heat (90 degrees) or dehydrator until completely dry and the moisture is removed. The dehydrator is a longer drying process but helps to keep activated nuts active. The oven can stop the germination process, however it will get the job done in drying the nuts and seeds after they enzyme inhibitors have been removed.
  8. Eat the activated nuts as they are or make flour from them by grinding the nuts in a strong blender like a vitamix or thermo until you have a flour like consistency.
  9. Store nuts, seeds or nut flours in an air tight container.
Recipe Notes

Clinical Notes

Try fermenting nut/seed flour or nut/seed milk if nuts and seeds continue to be a bit of a problem.

Nut Butter

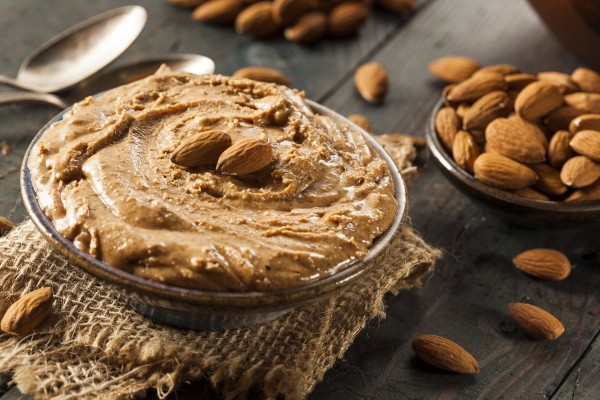
The GAPS Diet advocates you make your own nut butters especially if you are just starting out with GAPS.  This way you know exactly what is in it and whether any reactions are specific to the nuts or other hidden ingredients or chemicals.  Store bought nut butter is acceptable so long as it does not […]

Print Recipe
Nut Butter
This recipe is appropriate for the Introduction Diet from Stage 3 onward
Votes: 1
Rating: 5
You:
Rate this recipe!
Prep Time 20 Minutes
Servings
Jar
Ingredients
Prep Time 20 Minutes
Servings
Jar
Ingredients
Votes: 1
Rating: 5
You:
Rate this recipe!
Instructions
  1. Soak and dry nuts as per our recipe provided in the recipe section under condiments
  2. Blanch nuts if required (see almond blanching recipe instructions) This is not usually necessary if the nuts have been soaked but this step can be helpful for extreme sensitivities.
  3. Using a good strong blender, vitamix or thermo mixer, blend nuts and salt for as long as it takes to break down the size of the nuts into a nut butter consistency whilst gradually adding the coconut oil sparingly to begin with and proceed to add additional oil to produce the smooth consistency desired. This can take up to 20 minutes.
  4. If the nuts have been roasted, you may not need any oil or very little. Children love honey added to this spread but this is dependent upon whether you are ready to introduce honey at this stage and whether you are trying to avoid yeast feeding sugars.
  5. Remember: preparing your nuts through drying and soaking first will allow for a better nut butter and easier digestion.
Recipe Notes

Clinical Notes

Nuts and Seeds are fibrous and should not be introduced for GAPS patients until digestive symptoms have shown some signs of improvement. The introduction diet provides a slow introduction to nuts by starting with nut butter followed by baking with nut flour and finally nuts for snacks themselves with encouragement to prepare them and chew them well. The sensitivity test is advised to be carried out first for those who suspect a true nut allergy, however there are many people who express their intolerance for nuts during the introduction diet who may need to determine themselves whether to wait until further healing takes place before introducing them.

Nut and Seed Soaking Chart

Print Recipe Nut and Seed Soaking Chart Votes: 0 Rating: 0 You: Rate this recipe! Course Baking at home, Miscellaneous Cuisine Full GAPS Diet, GAPS Baby: Introducing Solids, GAPS Introduction Stages, Stage 6 – onward Servings MetricUS Imperial Ingredients 2-3 Cups Organic Nuts or Seeds1 Tbs Celtic or Himalayan Sea Salt1 Litre Filtered water Course […]

Print Recipe
Nut and Seed Soaking Chart
Votes: 0
Rating: 0
You:
Rate this recipe!
Servings
Votes: 0
Rating: 0
You:
Rate this recipe!
Instructions
  1. Almonds 12 Hours 1 tablespoon salt
  2. Brazil Nuts 2 Hours 1 tablespoon salt
  3. Cashews 2 Hours 1 tablespoon salt
  4. Chia Seeds 2 Hours No salt
  5. Flax Seeds 2 Hours No salt
  6. Hazel Nuts 8 Hours 1 tablespoon salt
  7. Macadamia Nuts 2 Hours 1 tablespoon salt
  8. Pecans 8 Hours 2 teaspoons salt
  9. Pine Nuts 2 Hours 1 tablespoon salt
  10. Pumpkin Seeds 6 Hours 2 tablespoons salt
  11. Sesame Seeds un-hulled 6 Hours 1 tablespoon salt
  12. Sunflower Seeds 4 Hours 2 tablespoons salt
  13. Walnuts 8 Hours 2 teaspoons salt
  14. Wild Peanuts 8 Hours 1 tablespoon salt
  15. See other recipe 'Activating Nuts/Seeds for Flour' for instructions to soak and sprout seeds to make flour.
Recipe Notes

Clinical Notes

Nuts and Seeds are fibrous and should not be introduced for GAPS patients until digestive symptoms have shown some signs of improvement. The introduction diet provides a slow introduction to nuts by starting with nut butter followed by baking with nut flour and finally nuts for snacks themselves with encouragement to prepare them and chew them well. The sensitivity test is advised to be carried out first for those who suspect a true nut allergy, however there are many people who express their intolerance for nuts during the introduction diet who may need to determine themselves whether to wait until further healing takes place before introducing them.

Selecting organic nuts and seeds and preparing them by soaking and sometimes blanching them (skins removed) often makes all the difference for a GAPS patient to better tolerate them.  Many GAPS patients have a toxic overload and cannot tolerate even the smallest amount of chemicals or pesticides in their system and this is why organic serves to be a better option.

In addition to crop chemicals, nuts and seeds contain their own toxic substances known as enzyme inhibitors and phytates (phytic acid).  These toxins can play havoc in the digestive system, blocking nutrients such as calcium, magnesium, copper iron and especially zinc.  Enzyme inhibitors in particular, are contained on the skins or surrounds of nuts and seeds and they are especially apparent in nuts with brown skins like almonds.  Their purpose serves as a protective layer to naturally prevent animals and insects from consuming them so that they have the opportunity to germinate and sprout into a plant. Soaking nuts and seeds in warm salty water overnight will activate enzymes that neutralise enzyme inhibitors and also breakdown a large portion of phytic acid that allow the nutrients to be better absorbed in the digestive system. This soaking preparation process is often referred to as activating nuts and seeds.

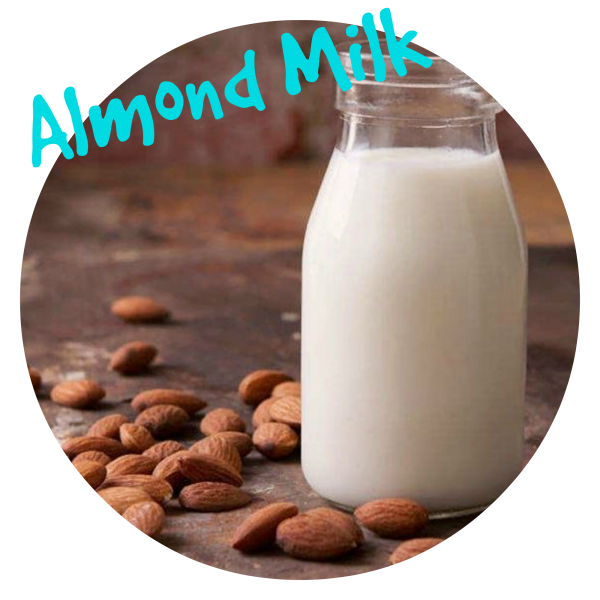
Nut Seed Milk

Preparation in making nut milk is important, especially for people who already have digestive problems and food sensitivities. Almonds (as well as most other nuts) contain toxic substances known as enzyme inhibitors and phytates (phytic acid). These toxins can play havoc in the digestive system, blocking nutrients such as calcium, magnesium, copper iron and especially […]

Print Recipe
Nut Seed Milk
This recipe is appropriate for the Introduction diet when nuts have been successfully introduced and tolerated from stage 4 onward.
Votes: 0
Rating: 0
You:
Rate this recipe!
Prep Time 5 Minutes
Passive Time 14 Hours
Servings
People
Ingredients
Prep Time 5 Minutes
Passive Time 14 Hours
Servings
People
Ingredients
Votes: 0
Rating: 0
You:
Rate this recipe!
Instructions
Part 1 - Soaking
  1. Add 3 cups of filtered water to a jug or bowl and mix in 1 tablespoon of salt
  2. Add 1 cup of almonds and cover with a tea towel or cheese cloth
  3. Soak the nuts in the salt water brine for 12 hours
  4. Rinse the nuts under filtered water to remove salt residue and discard the salt water brine
  5. Place the nuts in a clean jug or bowl and add 1 - 2 teaspoons of flaxseeds and 3 – 4 cups of water and place in the fridge for 2 – 3 hours. Adding the flaxseeds will allow the milk to thicken a little more. Exclude this step if you have no concern for thickness
  6. If you wish to add a little sweetener to the milk, this will be the stage that you will need to add the pitted dates to the mixture to soak for a few hours. This is optional
Part 1 - Blending and Straining
  1. Add the soaked nut mixture from the fridge (including the water) to a good strong blender, vitamix or thermo mixer and blend for as long as it takes to break down the size of the nuts into a pulp consistency
  2. Place a nut milk bag or cheesecloth over a bowl and pour the milk mixture through the cheesecloth or nut milk bag like a strainer
  3. When all the pulp and liquid has been strained through the nut milk bag or cheesecloth, squeeze any excess milk from the pulp mixture with your hands, allowing the milk to drain through the cloth. If you find that the milk is too rich, simply add more filtered water
  4. Store in the fridge for 2 – 3 days.
Recipe Notes

Clinical Notes

Why soak nuts and seeds?

  • To neutralize enzyme inhibitors
  • To remove or reduce phytates
  • To encourage the production of beneficial enzymes

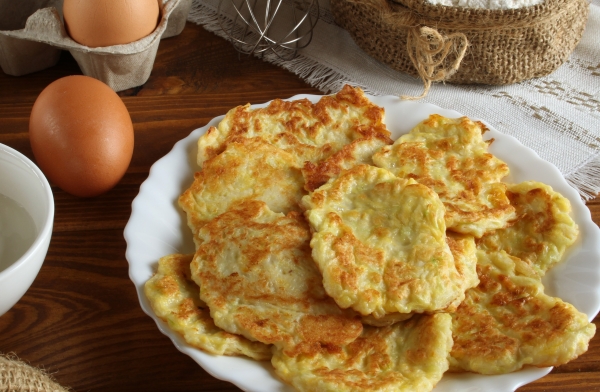
Nut Free Flour-less Chicken Pancakes

This recipe is introduced on stage 3 as a replacement for the Nut Butter Pancakes for people who can not tollerate nuts. It can also be adapted in week 8 and 9 on the GAPS Baby Diet – Introducing Solids for Baby. It is simple to make and most children and adults find them enjoyable. […]

Print Recipe
Nut Free Flour-less Chicken Pancakes
This recipe is appropriate for the Introduction Diet from Stage 3 on wards
Votes: 0
Rating: 0
You:
Rate this recipe!
Prep Time 15 Minutes
Servings
People
Ingredients
Prep Time 15 Minutes
Servings
People
Ingredients
Votes: 0
Rating: 0
You:
Rate this recipe!
Instructions
  1. Using a food processor, blend all ingredients together until completely smooth. The mixture will look like thick pancake batter
  2. Heat the pan and melt some ghee or duck fat to grease the pan
  3. Pour spoonfuls of the batter into the pan. The batter may need to be spread out a bit with the spoon so that it is not too thick
  4. Watch to see tiny bubbles form on the top before flipping them over but be sure not to cook to high or they will burn
  5. Serve warm or cold with a slice of avocado or just as they are
Recipe Notes

Alternatives

When you have progressed through the stages, you may add onion, grated carrot and zucchini for extra flavour. Other ingredients to consider when making this recipe are equal amounts of organic nut butter, eggs and squash (as directed in the introduction diet).

When on the full GAPS diet you may wish to add spring onion shallots, carrot and zucchini to the recipe to make fritters.  Later when cucumbers are tollerated, you can enjoy these with a nice homemade tzatziki dip.

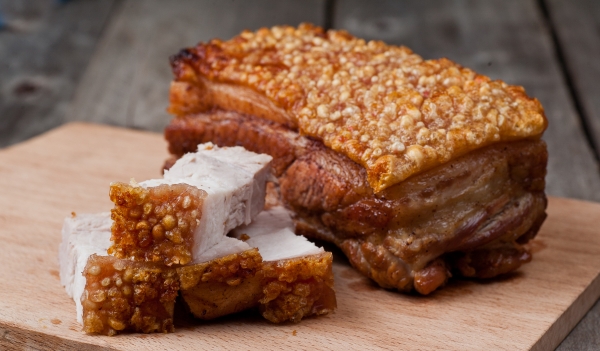
Roast Pork Belly

This meal is a delicious and nutritious favourite in our home.  It can be added in stage four when roasts and grilling is added to the GAPS Introduction Diet. It is very important for a GAPS person to have plenty of natural fats in every meal from meats, butter, ghee, coconut and cold pressed olive […]

Print Recipe
Rost Pork Belly
This recipe is appropriate for the GAPS Introduction Diet from stage 4 onward.
Votes: 0
Rating: 0
You:
Rate this recipe!
Prep Time 10 Minutes
Cook Time 60 Minutes
Passive Time 50 Minutes
Servings
People
Ingredients
Meat and Stock
Fats
Vegetables
Prep Time 10 Minutes
Cook Time 60 Minutes
Passive Time 50 Minutes
Servings
People
Ingredients
Meat and Stock
Fats
Vegetables
Votes: 0
Rating: 0
You:
Rate this recipe!
Instructions
  1. Pre heat oven to 180 – 200 degrees Celsius
  2. Place the pork belly in a baking dish with the rind fat (crackle top) side up.
  3. With your hands, rub lard all over the pork. This is where your hands get messy. Shake a generous amount of salt on the top pork rind and continue to rub and massage more lard and salt until the rind is well covered. Lightly give it one more sprinkle of salt on the top. The salt is what allows the rind to crackle.
  4. Place the pork in the oven at 200 degrees Celsius for 30 minutes to allow the rind to crackle and then turn it down to 180 degrees Celsius and cook for 2 - 2 and a half hours pending in size.
  5. Cut the onions in half and roast them with the punpkin along side the pork.
  6. Cook some other seasonal vegetables in some homemade meat stock for approximately 20 minutes before the pork is finished.
  7. Remove the baking tray with the pork and vegetables from the oven and set them aside on paper towel to soak up excess dripping.
  8. Drain any excess dripping from the baking tray into your dripping tray to store for later use in the fridge.
  9. To make a very tasty gravy leave one tablespoon of dripping, one onion half and one to two pieces of pumpkin remaining in the bottom of the pan that the pork was roasting in and mix with the flat of a fork to make a delicious gravy on the stove at a low heat (you can add pepper to taste).
  10. Strain the cooked vegetables and set aside the meat stock to serve as a hot beverage with your meal.
  11. Serve this delicious pork belly with roasted pumpkin and other seasonal vegetables. Stewed apple can also be eaten with this meal.

Meat Jelly Slice

This dish is a traditionally known remedy for digestive problems and is famous for its healing powers and nourishing components such as gelatine, glucosamine, glycoproteins, phospholipids etc… A highly recommended recipe of Dr Natasha’s for healing tummies. Print Recipe Meat Jelly Slice This recipe is appropriate for stage two onward Votes: 0 Rating: 0 You: […]

Print Recipe
Meat Jelly Slice
This recipe is appropriate for stage two onward
Votes: 0
Rating: 0
You:
Rate this recipe!
Prep Time 45 minutes
Cook Time 5 hours
Passive Time 1 hour
Servings
people
Ingredients
Prep Time 45 minutes
Cook Time 5 hours
Passive Time 1 hour
Servings
people
Ingredients
Votes: 0
Rating: 0
You:
Rate this recipe!
Instructions
  1. Bring 2 litres of water to boil and place pigs trotters into the pot. Boil the trotters for a further 5 minutes and then remove the trotters from the pot whilst discarding the water. (this is to clean and prepare the trotters).
  2. Bring a new pot to boil with 3 litres of water with all 4 pigs trotters added (ensuring that they are completely covered).
  3. Add pepper, salt, onion, leaks and bay leaves and cook on a low heat with the lid on for 5 hours in total.
  4. By the 3rd Hour; add the chicken legs and bring to the boil and lower the heat again. Make sure to keep the meat covered by the broth and top up water if needed (but not too much - only enough to cover.
  5. Continue to cook with the lid slightly to the side to allow for some evaporation of the stock so that you can establish the right amount of broth for the perfect batch. Too much water will not allow the broth to solidify whilst too little can make it too hard.
  6. By the 4th Hour; add remaining vegetables (onion, garlic, carrot and leaks) except for the additional 3 garlic cloves and additional 2 carrots to be set aside and used later. Cook for the final hour. After an hour, the broth should appear thick and the meat tender and soft. Turn off the heat and remove from the stove.
  7. Strain all the meat cuts, trotters and vegetables from the stock through a sieve and set them aside (ensuring to catch the stock in a pyrex jug under the colander for later use).
  8. Return the stock to the stove with the two additional freshly sliced carrots and three large whole garlic cloves added and bring to a boil and then simmer until the carrots are cooked but not too soft.
  9. Whilst the carrots are cooking let the trotters and chicken legs cool. Once they are cool, remove any bones and unwanted parts from the pigs trotters and and set aside the pulled meat. Remove and throw away the bones and the cooked vegetable, peppercorns and bay leaf remains.
  10. After the carrots and garlic have been cooked in the stock, strain them from the stock (ensuring to catch the stock in a pyrex jug under the colander) and set them aside.
  11. Strain the broth again through a cheese cloth and set aside.
  12. Slice the cooked garlic cloves into slithers and add them to a deep glass dish with the sliced cooked carrots. You can improvise by adding a few fresh sliced shallots parsley or fennel sprigs at this stage.
  13. Chop the meat collected from the pigs trotters and chicken legs and add them to the glass dish on top of the carrots and garlic.
  14. Pour the reserved stock over the top to ensure that all the meat is covered.
  15. Place meat jelly into the fridge to set overnight.
Recipe Notes

Serving

This can be cut into slices and served cold with salad or vegetables with a cup of meat stock.  It is important to always remember to eat protein with vegetables.

Points

You may alternatively use small bowls or cups to set and serve your meat jelly.

You may use other meats such as fish (salmon) or beef and lamb to create this meal.


Almond Pumkin Bread

This recipe is acceptable for the GAPS Introduction Diet from stage Four onward. It is easy to make and well liked byGAPS children.  This recipe can be made using different nut or seed flours and you may wish to add different cooked vegetables to it. Suggestions Nice with some avocado or nut butter. You can […]

Print Recipe
Almond Pumkin Bread
This recipe is appropriate for the Introduction Diet from stage 4 onward
Votes: 0
Rating: 0
You:
Rate this recipe!
Prep Time 5-15 minutes
Cook Time 1 hour
Servings
loaf
Ingredients
Bread Mixture
Special equipment
Prep Time 5-15 minutes
Cook Time 1 hour
Servings
loaf
Ingredients
Bread Mixture
Special equipment
Votes: 0
Rating: 0
You:
Rate this recipe!
Instructions
  1. Preheat conventional oven at 150 degrees (almond flour burns easily so this recipe needs to be cooked slowly).
  2. Cook the pumpkin by boiling it or use previously roasted punpkin from a left over meal. I like to make extra pumkin with my meals for this purpose in mind.
  3. Mix all ingredients in a glass bowl with hand held mixer on low. (do not over mix – just enough to ensure all ingredients is mixed and combined well)
  4. Line your bread tin with oven paper and pour ingredients in. Place in oven and cook for one hour (ensureing not to burn the top).
  5. When removing the bread from the oven, be sure to take it out of the tin immediately to allow it to cool by lifting the loaf out with the paper sides. This will avoid a darker crust because burnt nut flour is bitter. Let it sit and cook on the cooling rack with the paper still surrounding it. When it has cooled you may wrap the loaf in the baking paper and and place in a pyrex dish with a sealed lid to store in the fridge.
Recipe Notes

Suggestions

Nice with some avocado or nut butter.  You can make thin slices and crisp them in a dehydrator which is great for homemade dips and  soup dunkers.  The bread is also great for dippity eggs.

Traditional Wild Sauerkraut & Sauerkraut Juice

Wild fermentation is specific to the live organisms naturally present on the raw vegetables. This is the traditional way to ferment vegetables and sauerkraut because there are abundant lactic acid bacteria on all plants and if submerged under its own juices with a good coverage of salt (regardless of what type vessel they are contained […]

Print Recipe
Traditional Wild Sauerkraut & Sauerkraut Juice
Votes: 0
Rating: 0
You:
Rate this recipe!
Prep Time 45 mins
Passive Time 4 weeks
Servings
litre
Ingredients
Cabbage mixture
  • 1 kg Cabbage The green cabbages produce more brine – select a good quality fresh organic cabbage that is not dry or too old
  • 2 - 3 tbl Celtic or Himalayan Sea Salt Salt is a traditional ingredient in sauerkraut because it increases shelf life, texture, and flavor. The amount of salt used can vary according to personal taste but too little can spoit the batch. The salt helps to preserve.
Special equipment
  • 1 Fermenting Jar/Vessle There are many kinds of fermenting vessles on the market. You can make your own at home or spend extra money on something fancy. See our notes for recommendations
  • 1 Heavy weight this is used to keep the cabbage submerged under its own juices
  • 1 Cabbage/vegetable pounder This aids to help push and compress the cabbage or fermented vegetables so that they are submerged udner their own brine
  • 1 Unbleached cheesecloth
Votes: 0
Rating: 0
You:
Rate this recipe!
Instructions
Sauerkraut Mixture
  1. Thinly slice or shred the cabbage and place it into a large bowl. A good quality mandolin is great for shredding. A big cooking pot is good to contain the cabbage for this will allow you to easily get your hands into the mix later.
  2. Add a generous amount of salt to the mixture and mix the salt into the cabbage with your hands. Let it sit for 10 – 20 minutes to allow the salt to draw out some of the cabbage juice naturally. Salt actually allows the cabbage to sweat so that juices can be extracted to create the brine. 2 tablesppons of salt per 1kg cabbage.
  3. After you have allowed the cabbage to sit for 20 minutes, mix, massage and knead the ingredients with your hands. Bruising the cabbage this way allows the cabbage to extract more natural brine solution. Keep kneading until you have squeezed a substantial amount of juice from the mixture. This may take approximately 10-20 minutes. It is always handy to have someone with strong hands to do the kneading & massaging.
  4. Place the cabbage mixture into the selected kraut vessel and pack and push the mixture down so that the cabbage is compacted in the bottom and the juice is sitting on the top of the cabbage with a minimum of 4 - 5cm’s or 2 inches of the juice above. It is important to push the cabbage down firmly so that no air is trapped and the cabbage is completely submerged in and under its own brine juice. A cabbage/vegetable pounder or potato masher can be a good tool for this.
  5. Most fermented vegetable kits will have a weight but if you do not have a kit with a weight, simply make your own weight by using a plate that fits snug in the fermenting vessle and place it on the top of the cabbage and then place a smaller jar (filled with water) on top of the plate to weigh the cabbage down and keep it submerged. Push the jar down and you will see more juice rise to the top. It is very important to ensure that all the sauerkraut is submerged under its own juice. Don’t worry if you don’t have a weight to push it down, just try to make sure that all the cabbage remains under the brine and if any bits float up, remove them throughout the process to prevent them from going mouldy.
  6. When all the cabage is submerged under its own juices with the weight keeping it down, cover the top with a double folded cheesecloth to keep away the dust and store in a dark place for four weeks (ie pantry). If you use a canning jar with a rubber ring top, and close the lid, be sure to burp it a few times in the first few days to release the pressure or it will burst - you won’t need the cheesecloth if you use this type of jar. Keep checking to remove any mould or scum build up floating on the top and make sure the kraut remains under its own juices. The sauerkraut may be consumed and ready to eat after 2 weeks but it matures better and contains more good bacteria wioth more time. The sauerkraut may be stored in the fridge after 2 - 4 weeks of fermentation. If there is any scum or mould development on the top – remove this. The kraut remaining under the juice will be fine.
  7. After the cabbage has completed the fermentation process it becomes preserved and will last up to 12 months in the fridge. Fermentation is the traditional way we preserved food before companies decided to create synthetic harmful preservative options.
Kraut Juice
  1. The juice remaining in the kraut jar is a by-product of the sauerkraut but it is just as probiotic and benneficial to consume as the kraut itself. Do not discard the juice, either leave it in the jar and consume it gradually along with the kraut or strain it into a bottle to use as a fermented probiotic drink. This juice is what we like to use in the introduction stages of the GAPS Diet. It is introduced slowely and methodically. Refer to the GAPS introduction stagesfor this method.
Recipe Notes

Alternative options

This is a wild feremtnation method which often takes a little more time to ferment naturally, however you can assist this process further by inoculating the kraut batch with good bacteria from the very beginning by adding a vegetable starter culture to the mixture and massage that through with your hands along with the salt.

You may add other vegetables like grated carrots and other favourites such as caraway seeds or dill. 

Trouble shooting

If for any reason the cabbage is not submerged under enough of its own juices, you may need to add a small amount of filtered water with more salt (15 gms of salt to 1 ltr).

Sauerkraut & how to introduce it


Carrot Cake Muffins

Print Recipe Carrot Cake Muffins Votes: 2 Rating: 4.5 You: Rate this recipe! Course Baking at home, Deserts Cuisine Full GAPS Diet Prep Time 20 mins Cook Time 30 minutes Servings muffins MetricUS Imperial Ingredients Cake Mixture 3/4 cup Raw honey Raw organic2- 3 Carrots Finely grated10 Pitted dates (soaked in boiking water to soften)1/2 […]

Print Recipe
Carrot Cake Muffins
Votes: 2
Rating: 4.5
You:
Rate this recipe!
Prep Time 20 mins
Cook Time 30 minutes
Servings
muffins
Ingredients
Cake Mixture
Frosting
  • 100 grams Butter Organic unprocessed or ghee
  • 2 cups Yoghurt Dripping yoghurt to produce thickened sour cream/fraiche
  • 5-6 tbs Raw honey Raw organic
  • 1-2 tbs lemmon juice Freshly squeezed
Special equipment
Votes: 2
Rating: 4.5
You:
Rate this recipe!
Instructions
Cake mixture
  1. Preheat oven to 175 degrees Celsius. (never cook recipes containing almond flour too high as it burns easily).
  2. Finely grate the carrots and place them in a small bowl. Pour the honey over the carrots and place them in the fridge for 20 minutes.
  3. Cover the dates with boiling water in a separate bowl and let them sit for 20 minutes also. When they are nice and soft, you can easily remove the pit inside.
  4. In a mixing bowl or thermomix - add eggs, carrot mixture, dates, vanilla extract, yoghurt, melted coconut oil and blend well until the mixture is runny.
  5. Add the remaining dry ingredients to the mixture and mix further until all combined into a thick paste.
  6. At the final stages, add the bicarbonate of soda to the top of the mixture and pour the 2 tablespoons of lemon juice on top. This will fiz at first. Turn the mixer on again to ensure that all final ingredinents are all blended well.
  7. Pour the mixture into bleach free baking cup cake holders linned within a 12 tin muffin tray and bake in a preheated oven at 175 degrees Celsius for 30 minutes. You can also make a carrot cake with this mixture but you will need to adjust the cooking time. You do not want the mixture to be too runny. If it is, simply add a little more almond flour to accommodate.
Frosting
  1. Drip your yoghurt to thicken or make some creme fraiche for best results as this will make it thick and creamier.
  2. Combine butter (that has softened at room temperature) with yoghurt and mix well.
  3. Gradually add the honey followed by the lemon juice. You don't have to use all the lemon juice if you don't want to, pending on preferred taste.
Recipe Notes

This recipe can make a locely carot cake or regular sized muffins or minni muffins.

Cooking Time for cake or muffins

The cake baking time is approximately 50 minutes

The muffin standard cup size makes approximately 12 with a bit left over to make mini muffins.  The standard muffin size cook time is approximately 30 minutes and the smaller mini size usually takes 20 minutes cooking time.

GAPS Staple Casserole

This recipe is referred to by Dr Natasha Campbell-McBride as the ‘Italian Meat Casserole’ and we believe it is a staple dish that is easy to cook with it’s versatility in what can be used. It is a slow cooked method in the oven that produces a lovely tender meat that falls off the bone […]

Print Recipe
GAPS Staple Casserole
Votes: 1
Rating: 5
You:
Rate this recipe!
Prep Time 35 Minutes
Cook Time 4-6 hrs
Servings
People
Ingredients
Meat and Stock
  • 1 Lamb Shoulder See notes for other meat options
  • 1 Litre Filtered water Approcimate: this is dependant upon how bif the pot is and the size of the lamb
Herbs & Spices
Vegetables
  • 6-8 Cloves Raw Garlic Crushed - See notes caution
  • 1 Whole Onion Large - See notes caution
  • 2 Whole Celery sticks Finely diced - Only use celery on Full GAPS Diet
  • 2 Whole Carrots Finely diced - See notes caution
  • 1/2 Whole Pumpkin Cubed - See notes caution
  • 1/2 Head of Cauliflower or Brocoli - Cut and remove all stalks - See notes caution
Special Equipment
Votes: 1
Rating: 5
You:
Rate this recipe!
Instructions
  1. Heat the oven to 140 - 160 degrees Celsius. Place your meat joint or other selection of meat into an oval cast iron pot and fill 2/3 with filtered water. Be sure not to cover the meat joint completely with water, because the exposed part at the top of the meat produces a lovely tasting stock for drinking. This recipe should allow you to save a few jars of stock when you are done.
  2. If tolerated (see recipe notes) dice some onion and celery and crush some garlic and saute in a separate pan with a little lamb fat or duck fat and add to the pot. It is often nice to salt the top of the lamb and add some of the sauteed ingredients on top as well as surrounding the lamb in the stock.
  3. Add salt, dried herbs, bay leaves and a sprig of rosemary. Cover with the pot with the lid and cook on very low heat for 4-6 hours (125 – 140 degrees Celsius).
  4. After 4 or 5 hours add a variety of chopped vegetables. We have made some suggestions for you above that work nicely but feel free to experiment with seasonal organic vegetables. At this time it is essential to leave the lid off in the final stages of cooking and increase the temperature to 180 degrees celcius and cook for a further 40-50 minutes.
  5. When cooked, serve the meat and vegetables and use the stock (strained through a sieve) for a warm drink with your meal. Keep left over stock in the fridge or freezer for later meals or stock drinks.
Recipe Notes

Alternative Recipe Options

You can use any of the following meats (joint meats are easier to digest than muscle meats) Try to use a broad range of different meats each time you cook this meal.

  • Shoulder of lamb
  • Joint of pork
  • Joint of beef
  • Pheasant
  • Quail
  • Venison
  • Whole chicken
  • Turkey legs
  • Lamb shanks

You may experiment by adding a variety of vegetables keeping a broad range in your diet, however make sure you are ready for them - Refer to clinical notes.

The fat content of these meals need to be quite high: the more fresh animal fats you consume the faster the recovery.  Be sure to add fermented vegetables with every serving.  If you are still in the introduction stage, avoid spices at this stage and only use herbs, salt, and bay leaves.  This meal is easy to cook and provides you with a variety of options to choose from.  If you make a large batch, this meal is easily frozen and defrosted and heated in a glass Pyrex dish with a glass lid in the oven.  Cooking several of these meals and freezing them will allow you to have a break in the kitchen.

This method can be achieved with a slow cooker

Clinical Notes:

Introducing new food: If and when you introduce a new food, your patient’s symptoms of diarrhoea return, or pain or any other digestive symptom is experienced, then wait a week and try again after some more healing has taken place because this indicates that they are not ready for this food.

Avoid vegetables and consume only the meat and stock from this recipe if the patient is experiencing profuse diarrhoea.  Vegetables should be added gradually until well tolerated and digestion improves.

*This recipe is appropriate for the GAPS Introduction Diet Stage Two - onward