Choc Cross Buns

Some people following GAPS in the early stages should avoid sweets all together as honey and cocoa powder can prove to be problematic for people with IBS or chronic diarrhoea. This recipe can be made when all signs of digestion have improved and the patient has been on the GAPS diet for approximately 12 months […]

Print Recipe
Choc cross buns
Votes: 0
Rating: 0
You:
Rate this recipe!
Servings
Ingredients
Equipment
Choc Bun Ingredients
Choc Bun Topping Ingredients
White Chocolate Cross Topping Ingredients
Servings
Ingredients
Equipment
Choc Bun Ingredients
Choc Bun Topping Ingredients
White Chocolate Cross Topping Ingredients
Votes: 0
Rating: 0
You:
Rate this recipe!
Instructions
Cake Mixture Instructions:
  1. Preheat oven at 150◦C
  2. Place pitted dates in a saucepan on the stove with a tablespoon of ghee and heat on a low temperature until they soften. (if you have a thermomix, you can do this for 5-7 minutes).
  3. Place softened date mixture in the blender (or thermomix) and blend dates into a paste. Add remaining ingredients and blend at a high speed until the mixture resembles a chocolate cake mixture. The mixture should hold a firm smooth consistency.
  4. Grease and prepare cupcake tins or use bleach free patty cake papers to pour the mixture into. Cook for 40 – 50 minutes at 150◦C
  5. Test the cake buns with a fork before you take it out of the oven and when ready, remove cakes from the oven and let the cakes cool on a cooling rack. When cooled, take them out of their wrappers or leave them in for character.
Topping Recipe Instructions
  1. Simmer some water on a low heat in a saucepan and place a glass bowl over the simmering water. Add the cacao butter to the glass bowl and melt the cacao butter completely. (CAUTION: Keep the heat at a low temperature so that the steam does not cause any water residue within the glass bowl and make sure all your utensils and materials do not have any water on them because any water contaminating the mixture will cause lumps and clumps and spoil the smooth chocolate result).
  2. Once melted, turn off the heat and add the cocao powder gradually whilst stirring continuously with a bone dry whisk until mixed well with no lumps. Add vanilla seeds, honey and vanilla essence and continue to whisk until smooth.
  3. When the mixture is lovely and smooth it is ready for the choc bun dipping. HINT: It is a good idea to have put the buns in the fridge for a while because the chocolate will harden on the top of the bun faster like ice magic. Simply dip the buns in the chocolate and place on a tray with baking paper and place in the fridge for 15 minutes. Any leftover chocolate can be poured into chocolate molds to make chocolate treats.
White Chocolate Cross Topping Instructions
  1. Simmer some water on a low heat in a saucepan and place a glass bowl over the simmering water. Add the cacao butter to the glass bowl and melt the cacao butter completely. (CAUTION: Keep the heat at a low temperature so that the steam does not cause any water residue within the glass bowl and make sure all your utensils and materials do not have any water on them because any water contaminating the mixture will cause lumps and clumps and spoil the smooth chocolate result).
  2. Once melted, turn off the heat and add the coconut flour and honey gradually whilst stirring continuously with a bone dry whisk until mixed well with no lumps. Add vanilla extract and continue to whisk vigorously whilst you gradually and slowly add the coconut oil.
  3. Use a syringe to dispense the cross on the buns and refrigerate for the cross to harden. Make sure to work quickly or keep mixing in between batches to ensure the oil does not start to separate in the mixture.
  4. Any left over white chocolate can be poured into chocolate molds to make chocolate treats.
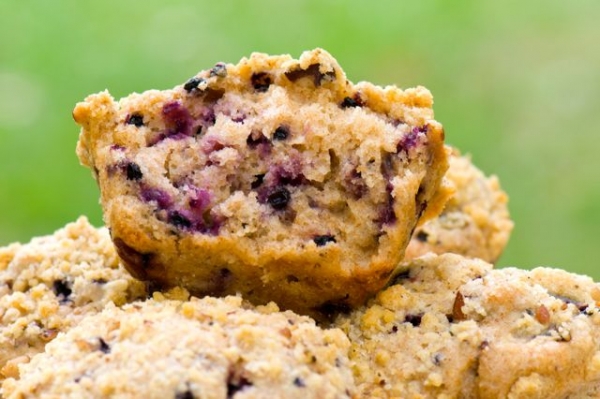
Apple & Black Elderberry Muffin Crumble Tops

This is a great Breakfast muffin or snack for morning tea. This recipe contains Black Elderberries so it is filled with beneficial immune properties well known to support GAPS conditions. Black Elderberry bushes have been found in many parts of the world and grow very well as a native bush right here in Australia. The […]

Print Recipe
Apple & Black Elderberry Muffin Crumble Tops
These delicious treats are suitable from Stage 6 on wards.
Votes: 0
Rating: 0
You:
Rate this recipe!
Prep Time 20 Minutes
Cook Time 25-30 Minutes
Servings
Muffins
Ingredients
Mini Muffin Ingredients
Topping
Prep Time 20 Minutes
Cook Time 25-30 Minutes
Servings
Muffins
Ingredients
Mini Muffin Ingredients
Topping
Votes: 0
Rating: 0
You:
Rate this recipe!
Instructions
  1. Peal and cut 4-5 apples into squares and stew them with a tablespoon of water. When cooked remove half a cup of the stewed apples to make the apple crumble topping. (put the remaining stewed apples aside).
  2. Add the half a cup of stewed apple squares to the remaining crumble mixture and mix together and set aside.
  3. Preheat oven to 150 degrees Celsius
  4. With the remaining stewed apple (which will be approximately 1 - 1.5 cups of stewed apples) mash and mix until the apple mixtures is a smooth pure texture.
  5. In a new bowl, add the almond flour, eggs, apple pure, honey, coconut oil and vanilla extract and mix with a hand held electric beater or thermomix. When well combined, add the bicarbonate of soda and lemon juice and mix again for a further 20 seconds or so. This will aid as a raising agent.
  6. Add the elderberries to the cake mixture and stir them in with a wooden spoon.
  7. Pour the mixture into muffin papers placed into a muffin tin.
  8. When the mixture is settled in the muffin papers, add the prepared topping ingredients on top and place into the preheated oven.
  9. Muffins will take approximately 25-30 minutes to cook. Keep an eye on them as almond flour is easy to burn (Don’t cook them in too high temperatures).
  10. Remove from the oven when cooked and allow to cool on a cooling tray. Serve with yoghurt, kefir or sourcream
Recipe Notes

Clinical Notes As with all stages of the GAPS diet, baked goods should only make up a small percentage of the diet and that the focus should be on healing nourishing foods, broths and juices.

Banana Bread

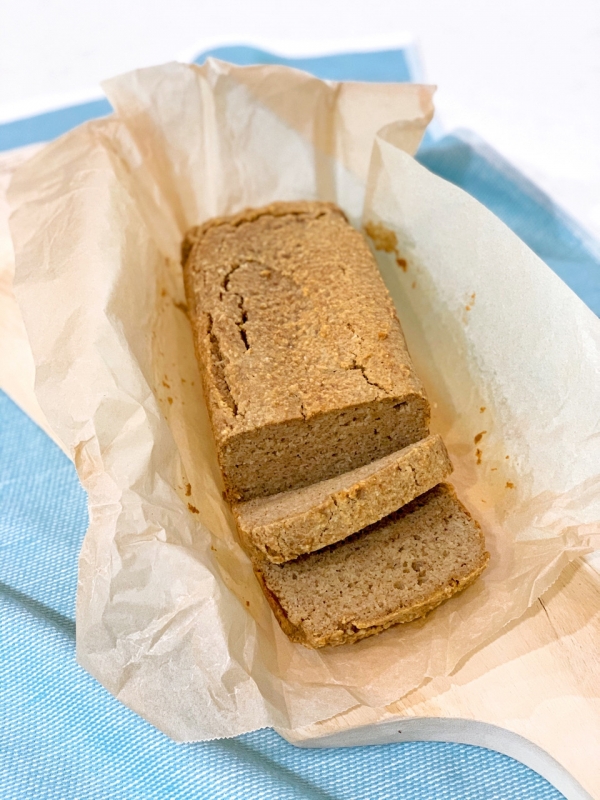
Print Recipe Banana Bread Votes: 2 Rating: 4.5 You: Rate this recipe! Course Baking at home Cook Time 50-55 Minutes Servings MetricUS Imperial Ingredients 2 1/2 Cups Organic blanched almond flour1 TSP Pure Bicarbonate of Soda1 TBSP Yoghurt Optional5mL Lemon juice Freshly Squeezed2 Ripe Bananas Mashed2-3 TBSP Organic Raw Honey Optional – Bananas are sweet […]

Print Recipe
Banana Bread
Votes: 2
Rating: 4.5
You:
Rate this recipe!
Cook Time 50-55 Minutes
Servings
Ingredients
Cook Time 50-55 Minutes
Servings
Ingredients
Votes: 2
Rating: 4.5
You:
Rate this recipe!
Instructions
  1. Line bread tin with baking paper (bleach free baking paper) & preheat oven to 150⁰C.
  2. In a small bowl or jug, beat eggs, vanilla essence, honey and butter/ghee.
  3. In a large mixing bowl add almond flour, mashed bananas and egg mixture and blend until all ingredients are mixed well and bananas have blended into the mixture.
  4. Place the yoghurt on top of the mixture and then sprinkle the pure bicarbonate of soda on the yoghurt. Finally add the lemon juice on top of the bicarbonate of soda and blend with the mixer quickly. The bicarb needs a sour ingredient to activate or the bread won’t rise and the lemon juice and yoghurt will help with this.
  5. When combined, quickly pour it into the bread tin and place in the oven.
  6. Bake the bread on 150⁰C for 50 – 55 minutes and then remove from the oven. Remove the loaf from the tin by pulling it out with the sides of the baking paper and allow it to cool on a cooling tray.

Apple Crumble

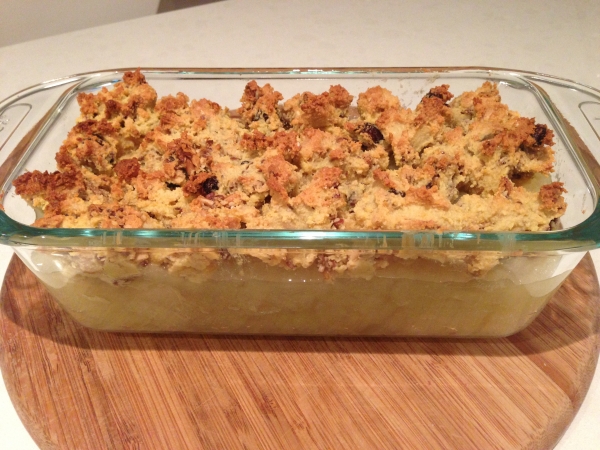
Print Recipe Apple Crumble Votes: 0 Rating: 0 You: Rate this recipe! Course Baking at home, Deserts Cook Time 15-20 minutes Servings MetricUS Imperial Ingredients 6-8 Apples1 TBSP Water1 Cup Almond Flour1 egg1 TSP Homemade Vanilla Extract1 TBSP Organic Raw Honey1 1/2 Cups crunchy nut seed combo bites or other cookies you have madeRaw cultured […]

Print Recipe
Apple Crumble
Votes: 0
Rating: 0
You:
Rate this recipe!
Cook Time 15-20 minutes
Servings
Cook Time 15-20 minutes
Servings
Votes: 0
Rating: 0
You:
Rate this recipe!
Instructions
  1. Preheat oven 150⁰C
  2. Peel, core and slice apples (using an apple slinky for this is very helpful as it will peel, cut and core the apple in seconds).
  3. Add apples to the pot on the stove with a tablespoon of water and stew with the lid on at a low to medium temperature.  Stew the apples until they are soft.
  4. Strain the apples and add them to a glass oven dish.
  5. Whisk an egg with the vanilla essence and honey and set aside.
  6. In a bowl crumble the crunchy nut seed combo bites with your hands and add 1 cup of almond flour.
  7. Add the wet ingredients with the dry and mix together with a spoon.
  8. Scoop the mixture onto the top of the stewed apples.
  9. Place in the oven for 15 – 20 minutes on a low temperature at 150⁰C so you are sure not to burn the almond flour. 
  10. Serve this dish warm with raw cultured cream or yoghurt.

Christmas Cookie Dough

Print Recipe Basic GAPS Cookie Dough Suitable from Stage 6 onwards You can make little faces on these cookies with a variety of different expressions and call them emotion cookies or you can make small gingerbread men for Christmas. Votes: 2 Rating: 5 You: Rate this recipe! Course Baking at home, Dairy free recipes, Deserts, […]

Print Recipe
Basic GAPS Cookie Dough
Suitable from Stage 6 onwards You can make little faces on these cookies with a variety of different expressions and call them emotion cookies or you can make small gingerbread men for Christmas.
Votes: 2
Rating: 5
You:
Rate this recipe!
Prep Time 10 Minutes
Cook Time 10 Minutes
Servings
Cookies
Ingredients
Prep Time 10 Minutes
Cook Time 10 Minutes
Servings
Cookies
Ingredients
Votes: 2
Rating: 5
You:
Rate this recipe!
Instructions
  1. Pre-heat oven to 150 degrees Celsius for 10 minutes (no hotter)
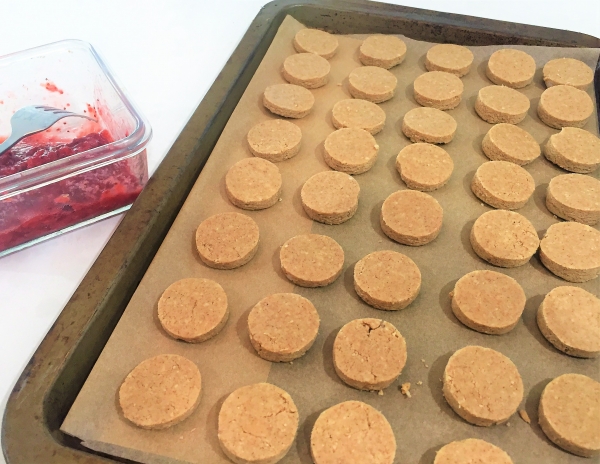
  2. Mix all ingredients in a bowl with a spoon, followed by massaging the contents in the bowl into a ball. Depending on the consistency of the mixture, add more nut butter or coconut oil if it is too dry or more nut flour if it is too moist. You want to create a cookie dough so keep mixing and squeezing the contents with your hands so that the mixture can be pressed and ready for rolling.
  3. When you have rolled the cookie mixture into a ball on the bench top, push down with the palms of your hands to flatten it a little and then use a rolling pin to roll out the dough into a flat surface approximately ¾ cm thick.
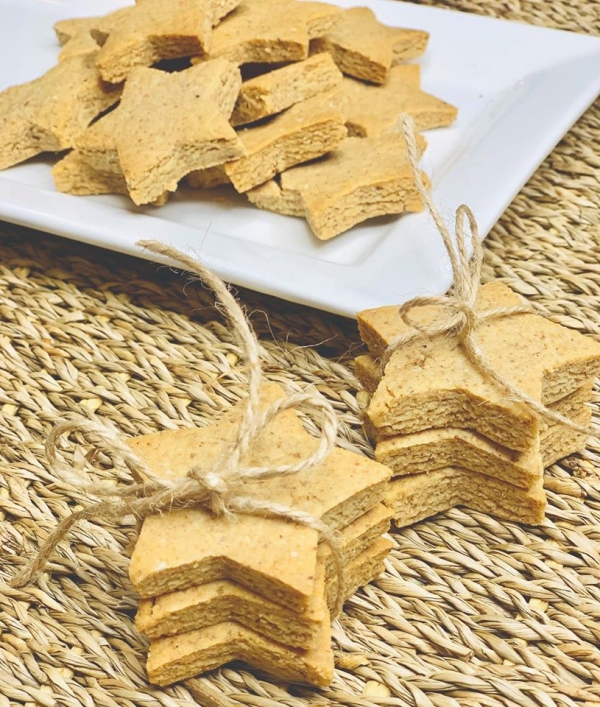
  4. Use a cookie cutter of your choice to make Christmas shaped biscuits. We have chosen stars, but you can make ginger bread shapes or any other Christmas shape you prefer.
  5. Place the tray in the preheated oven at no more than 150 degrees Celsius for 10 minutes, keeping a close eye on them to ensure they do not burn. Almond flour burns easily so do not cook any higher than 150 degrees Celsius.
  6. Remove the tray from the oven after 10 minutes and let the cookies cool on the tray before trying to pick them up as they will be soft and may crumble. If left to cool, they will become firmer.

Completely Raw Kingston’s

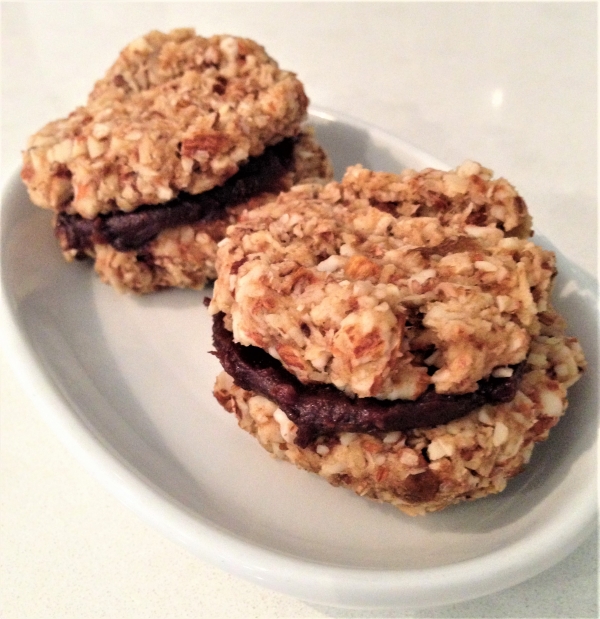
  Just like a Kingston only better!! This recipe is always a big pleaser to our visitors.  Not only is it wonderful for our GAPS tummies, our guests love it too!  Yes it looks and tastes just like a kingston Cookie with the exception of no added sugar and other ingredients we wish to avoid. […]

Print Recipe
Completely Raw Kingston's
*Tools needed: Dehydrator, thermomix (or steel blade blender/food processor)
Votes: 1
Rating: 5
You:
Rate this recipe!
Prep Time 30 Minutes
Passive Time 24 Hours
Servings
Ingredients
Prep Time 30 Minutes
Passive Time 24 Hours
Servings
Ingredients
Votes: 1
Rating: 5
You:
Rate this recipe!
Instructions
Preparation
  1. Boil water and pit dates
Choc Frosting
  1. Pit the dates and warm them in the oven at 150 degrees C for 5-10 minutes to soften them and make them easier to work with. Sometimes it is easier to double the ingredients so that the blades have more to work with and you can save the left overs for another recipe like a cake frosting and store it in the fridge. This frosting will keep for up to 6 weeks.
  2. Place all Choc Frosting ingredients in a high-speed blender or thermomix.
  3. Blend all ingredients in your high-speed blender. The ingredients can be a little finicky to blend, so start at a slow speed and increase speed slowly.
  4. With this step you need to be patient and keep blending on low to medium for a very long time to get a velvety consistency. You will see that this frosting creation is more of an art than a matter of combining ingredients. This is one of those recipes that really makes use of the power of a high-speed blender. If you feel that the blades are just spinning but aren't actually moving all of the frosting around, turn the blender off and make an air pocket down the side of the blender with a spatula to expose the blades. Remove the spatula, replace the lid, and start blending slowly again. You may need to do this several times and add tiny amounts of the water gradually and slowly to get the right consistency. You can achieve a very smooth result if the dates have been warmed gently in the oven for 5-10 minutes and continue to baby the blending process constantly running the spatula down the sides making sure all the ingredients are mixing and blending well. Be sure not to add too much water. You do not want to make the mixture runny, the ideal consistency is a thick paste like a nut butter.
  5. You'll know it's ready when you see no bits of dates in the mixture and all you can taste is velvety chocolate consistency.
  6. This raw chocolate icing is ready to use as soon as you pour it out of the blender When the Cookies have cooled smear the chocolate frosting on the flat side of the cookie with a knife and press another cookie on top squeezing the chock frosting in the middle.  Store in an air tight container. Enjoy!

Easter Bunny Bites 

This recipe is easy to make with little preparation time required.   Print Recipe Easter Bunny Bites  This recipe is appropriate for people who are following the Introduction Diet from Stage 3 onwards. Cook Time10 minsTotal Time10 mins Course: Baking at home, Egg free recipesCuisine: Full GAPS Diet Recipes, GAPS Introduction Stages Ingredients2 Cups Organic […]

Crunchy Nut Seed Fruit Combo Bites or Bars

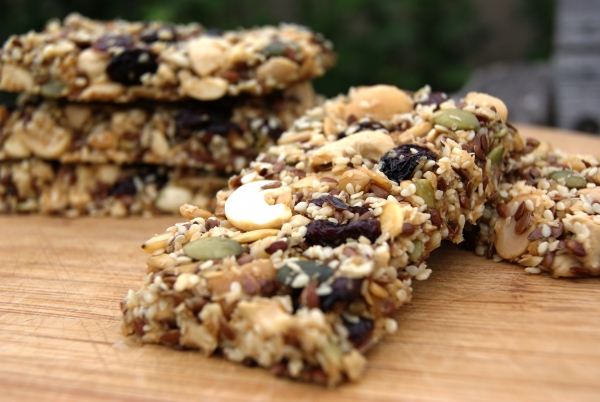
This recipe is a favourite and can resemble a crunchy nut and seed fruit bar or equivalent bite sized snack. When I make the bars, I tend to spread the ingredients into a thickness similar to a museli bar but when I like to make smaller bite sized pieces, I spread the ingredients further to […]

Print Recipe
Crunchy Nut Seed Fruit Combo Bites or Bars
Votes: 1
Rating: 5
You:
Rate this recipe!
Servings
Ingredients
Servings
Ingredients
Votes: 1
Rating: 5
You:
Rate this recipe!
Instructions
  1. You may wish to lightly grind some of the nuts to break them up a little but they can be left as they are
  2. Soak all seeds and nuts overnight and rinse them under filtered water in a sieve
  3. Combine and mix all ingredients with your hands or a big spoon in a bowl
  4. The flax seed may need a little more draining in a sieve before you add them to the remaining of the ingredients. These will work as a binding agent to keep all your ingredients together.
  5. When all is combined simply spread the ingredients on a dehydrator sheet (1 cm thick) and Dry at 135 degrees F or 57 ◦C for 20-24 hrs
  6. You may dehydrate for longer if you want a crispier result or intend to make thicker nut/seed bars
  7. When completed, simply break into bite size snacks or cut specific portions with a knife. You may also wish to break it up further to make a muesli mix for breakfast with your yoghurt.
  8. You can explore any nut fruit and seed combo that you desire. Enjoy!

GAPS Ginger Cookies

These cookies are not your usual ginger snaps because they are light and airy to bite into.  They are great on their own for a snack but make for the perfect combo with a cup of GAPS Ginger Tea.  If you had your heart set on a crispy cookie that looks just like the one […]

Print Recipe
GAPS Ginger Cookies
This recipe is appropriate for people who have reached stage 6 of the Introduction Diet and the Full GAPS Diet
Votes: 1
Rating: 5
You:
Rate this recipe!
Prep Time 15 Minutes
Cook Time 15 Minutes
Passive Time 7 Hours
Servings
Cookies
Ingredients
Prep Time 15 Minutes
Cook Time 15 Minutes
Passive Time 7 Hours
Servings
Cookies
Ingredients
Votes: 1
Rating: 5
You:
Rate this recipe!
Instructions
Preparation
  1. Preheat oven to 150˚C and prepare one large or two medium stainless steel trays by lining them with (bleach free) baking paper.
Mixing and Baking the Cookies
  1. Add all the ingredients into a bowl (except for the desiccated coconut and bicarbonate of soda).
  2. Mix the mixture with electric beaters or other mixer/thermomix. I used electric hand held beaters for this recipe.
  3. When well combined, add the desiccated coconut and add the bicarbonate of soda last.
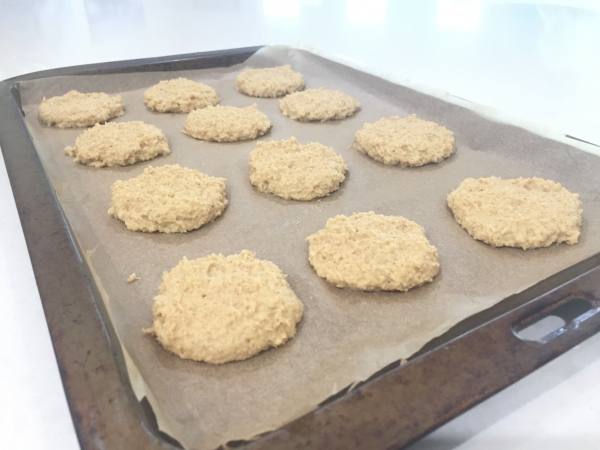
  4. Spoon a tablespoon of mixture neatly onto the prepared lined baking trays and pat gently with the flat of one finger so that the mixture resembles a rounded semi-flat shape.
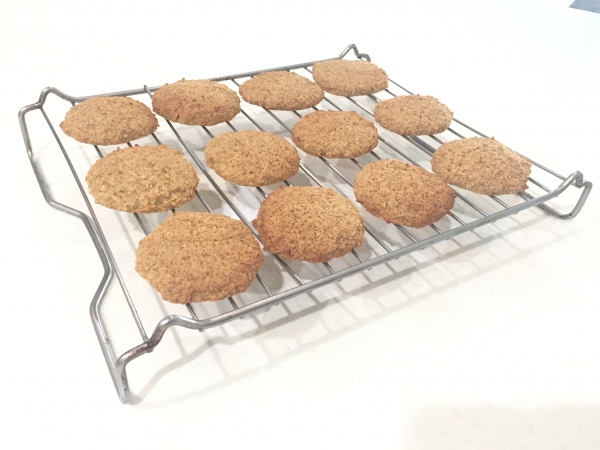
  5. Place the baking tray into the preheated oven and bake for 15 minutes. Do not be tempted to cook longer than this as the cookies will burn. If your oven tends to cook quickly, you may want to remove them sooner. The edges and tops should be browned but not burnt.
  6. Once removed from the oven, carefully slide the liner off the tray and onto a cooling tray with the cookies still in place. Let them cool this way for ten minutes to allow the cookies to cool. DO NOT try to pick them up as they will be soft and fall apart.
  7. When they are cool to touch and are becoming more solid, remove the paper lining under the cookies so that the bottoms don’t sweat. Allow the cookies to cool for a further 20 – 30 minutes on the cooling tray.
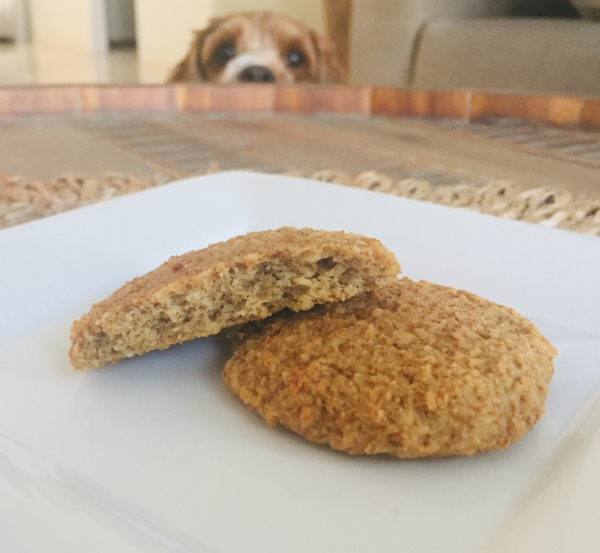
  8. The cookies will be light, airy and soft to eat. If you like them like this, you may store them in an air tight container. They will be soft to eat similar to a cake like consistency. They can be kept fresh for a week
Recipe Notes

The Excalibur food dehydrator is the best on the market.  I have had mine for ten years and it is still going strong. We have a few Excalibur Dehydrator options available at GAPS Diet Australia based on affordability and specification.  If you do purchase one, I highly recommend the one with a timer.  This helps greatly when dehydrating food on an ongoing basis.

View and listen to the cookie crunch video here

Raw Vanilla Hearts

This recipe is a great white chocolate alternative and is quick and easy to make requiring no baking what-so ever. Print Recipe Raw Vanilla Hearts This is a recipe for the Introduction Diet from Stage 6 onward. Votes: 0 Rating: 0 You: Rate this recipe! Course Baking at home, Deserts, Egg free recipes Cuisine Full […]

Print Recipe
Raw Vanilla Hearts
This is a recipe for the Introduction Diet from Stage 6 onward.
Votes: 0
Rating: 0
You:
Rate this recipe!
Prep Time 10
Passive Time 30
Servings
Prep Time 10
Passive Time 30
Servings
Votes: 0
Rating: 0
You:
Rate this recipe!
Instructions
  1. Place all ingredients into a food processor or thermomix and mix or pulse until all lumps are completely removed and the mixture becomes smooth for moulding
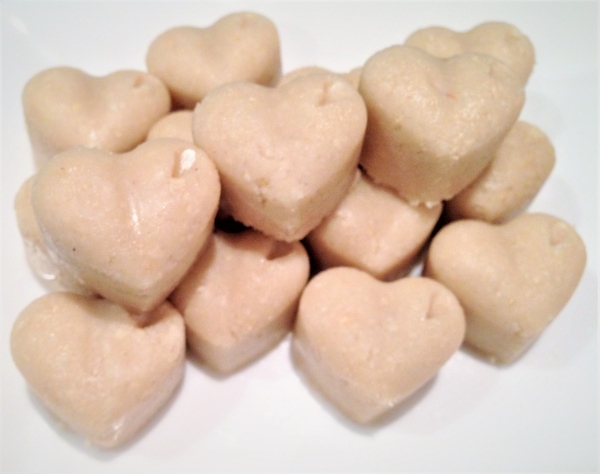
  2. Using heart silicon moulds or any other shape, press the mixture with your finger tips into the moulds until leveled.
  3. Place in the fridge to set. This can take up to half an hour or longer. Simply pop them out and store in the fridge when complete.

Bacon and Egg Pies

This recipe is great for both school or work lunch ideas.  They are supper easy to make and can be frozen for a later time. They do not last very long in our home and rarely get to the freezer unless I hide them. Selecting the right bacon is important: GAPS does not recommend smoked […]

Print Recipe
Bacon and Egg Pies
This recipe is appropriate for people following the Full GAPS Diet (not intro)
Votes: 1
Rating: 5
You:
Rate this recipe!
Prep Time 10 Minutes
Cook Time 30 Minutes
Servings
Pies
Ingredients
Prep Time 10 Minutes
Cook Time 30 Minutes
Servings
Pies
Ingredients
Votes: 1
Rating: 5
You:
Rate this recipe!
Instructions
  1. Preheat the oven to 175 Degrees Celcius
  2. Dice both the onion and bacon.
  3. Saute the onion and bacon in a fry pan with ghee and set aside.
  4. In a glass bowl, add the eggs and whisk the eggs until well mixed.
  5. Dice shallots and grate the cheddar cheese.
  6. Add the shallots, almond flour, salt and cheddar cheese.
  7. When the bacon and onion has cooled a little, add them to the mixture and mix all ingredients well.
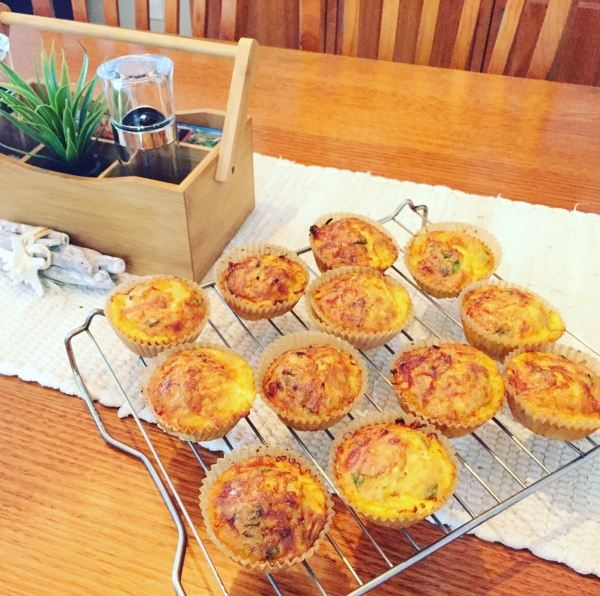
  8. Line a muffin tray with regular 12 sized bleach free muffin cups and spoon the ingredients into all the cups evenly.
  9. Cook in the oven at 175 Degrees Celsius for 30 minutes or until browned on the top.
  10. After 30 minutes, remove from the oven and place on a cooling tray. When cooled, store in an airtight container in the fridge or freeze for later. These defrost easily overnight in the fridge.

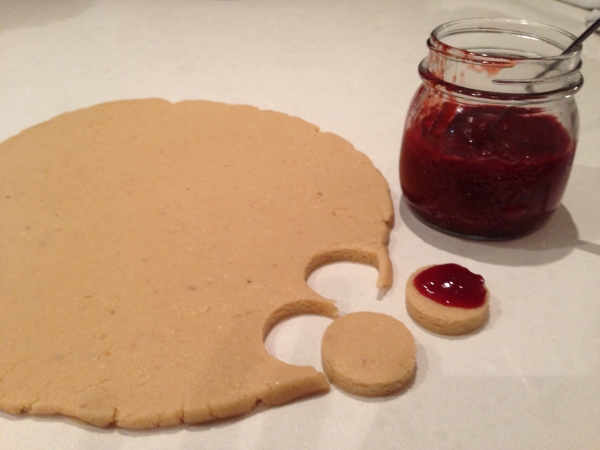
Basic GAPS Cookie Dough

I have been making these cookies for over ten years when my son was 3 and first diagnosed with Autism.  We made little faces on them with all kinds of different emotions.  This was to help with understanding the different emotions and prompt communication when eating them.  My son is now 14 and still enjoys […]

Print Recipe
Basic GAPS Cookie Dough
Suitable from Stage 6 onwards You can make little faces on these cookies with a variety of different expressions and call them emotion cookies or you can make small gingerbread men for Christmas.
Votes: 0
Rating: 0
You:
Rate this recipe!
Prep Time 10 Minutes
Cook Time 10 Minutes
Servings
Cookies
Ingredients
Jam
Prep Time 10 Minutes
Cook Time 10 Minutes
Servings
Cookies
Ingredients
Jam
Votes: 0
Rating: 0
You:
Rate this recipe!
Instructions
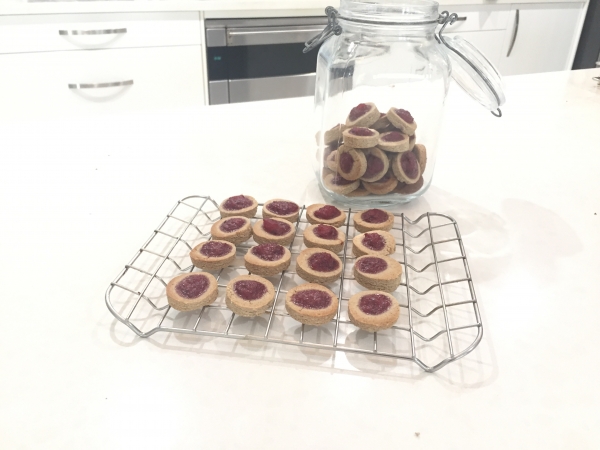
Strawberry Jam
  1. Add all ingredients to a saucepan on a low simmering heat and use a wooden spoon to stir the ingredients whilst applying pressure to the strawberries to squash them into a jam sauce.
  2. Continue to do this for approximately 15 - 20 minutes on a low heat so that the mixture will thicken.
  3. Pour the jam mixture into a jar and refrigerate. This will set when cooled.

GAPS Approved Raising Agents for Baking

The GAPS diet does not allow baking powder or raising agents of any kind apart from pure bicarbonate of soda, otherwise known in USA as baking soda. (Use sparingly for people who have very low stomach acid). Egg whites (albumen) are especially good as a mechanical raising agent and for both soufflé and mousse the […]

Print Recipe
GAPS Approved Raising Agents for Baking
Appropriate for Full GAPS and Stage 6 of the Intro Diet
Votes: 0
Rating: 0
You:
Rate this recipe!
Servings
Votes: 0
Rating: 0
You:
Rate this recipe!
Instructions
  1. Bicarbonate of soda is a pure leavening agent. It needs to be mixed with moisture and an acidic ingredient for the necessary chemical reaction to take place to make food rise. Because it needs an acid to create the rising quality, it is often used in recipes where there is already an acidic ingredient present, such as lemon juice, cocoa, yoghurt or honey. Baking Powder should be avoided as it contains additional non GAPS allowable ingredients.
  2. People who have very low stomach acid may need to avoid Bicarbonate of soda for a while and egg whites may be used for an alternative raising agent. Simply whisk the egg whites into soft fluffy peaks before adding to the mix.

Almond Flour Replacement/Alternatives

Almond flour is commonly used in many of the GAPS baking recipes, however these recipes can be substituted with other flours made from seeds. Almond Flour Replacement/Alternatives • Sunflower seeds ground into flour (remember to soak them first for 12 hours) • Pumpkin seeds ground into flour (remember to soak them first for 12 hours) […]

Print Recipe
Almond Flour Replacement/Alternative
Appropriate for the introduction diet from stage 6 onward
Votes: 0
Rating: 0
You:
Rate this recipe!
Servings
Ingredients
Servings
Ingredients
Votes: 0
Rating: 0
You:
Rate this recipe!
Instructions
  1. Sunflower seeds need to be soaked in order to activate them. Once activated they can be dehydrated to remove the moisture and then ground into a flour in the thermomix or food processor.
  2. Pepitas (also known as pumlin seeds) need to be soaked in order to activate them. Once activated they can be dehydrated to remove the moisture and then ground into a flour in the thermomix or food processor.

Coconut Fudge Slice

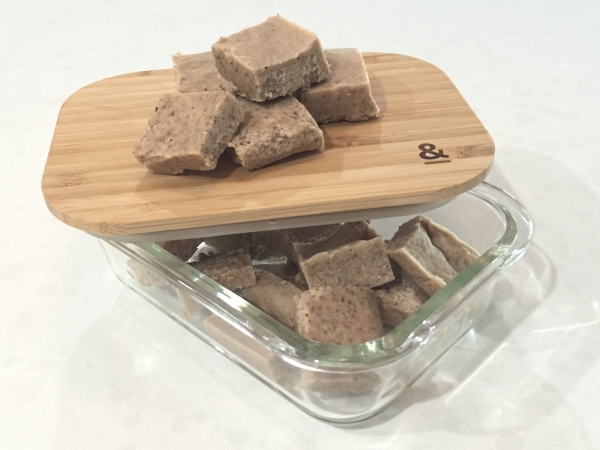
This recipe is useful as a reward system for children who are fussy eaters on the intro diet, it is smooth and has the texture of chocolate as it melts in their mouth. About 50% of fatty acids found in coconut oil is Lauric Acid which is one of the ingredients found in human breast […]

Print Recipe
Coconut Fudge Slice
This recipe is appropriate for stage one on the intro diet for fussy eaters only.
Votes: 0
Rating: 0
You:
Rate this recipe!
Prep Time 5 minutes
Passive Time 1 hour
Servings
peices
Ingredients
Basic Fudge Recipe
Other Variations
Prep Time 5 minutes
Passive Time 1 hour
Servings
peices
Ingredients
Basic Fudge Recipe
Other Variations
Votes: 0
Rating: 0
You:
Rate this recipe!
Instructions
  1. Place all ingredients into the food processor and blend until all well combined and creamy
  2. line a glass pyrex dish with bleach free baking paper and pour the ingredients into the dish
  3. Place dish into the freezer for 45 minutes to an hour so that it hardens quickly and doesn't separate
  4. Remove from freezer and store in the fridge
  5. Cut small square portions as desired

Berry Birthday Cake (Better than Chocolate Cake)

I was very delighted with the creation of this cake recipe and happy to share it with you.  I have been making it for over 8 years now for my family and perfecting it each time or adding different things to it for variety.  This cake is a treat and should be consumed sparingly which […]

Print Recipe
Berry Birthday Cake
Appropriate for the Full GAPS Diet and when all digestive distress has settled
Votes: 2
Rating: 5
You:
Rate this recipe!
Prep Time 30 Minutes
Cook Time 40 Minutes
Servings
People
Ingredients
Cake Ingredients
Filling
Chocolate Icing
Prep Time 30 Minutes
Cook Time 40 Minutes
Servings
People
Ingredients
Cake Ingredients
Filling
Chocolate Icing
Votes: 2
Rating: 5
You:
Rate this recipe!
Instructions
Equipment
  1. 2 x stainless steel round spring-form cake pans
  2. Food processor or thermomix
  3. Saucepan
Cake Mixture Instructions
  1. Place pitted dates in a saucepan on the stove with a tablespoon of ghee and heat on a low temperature until they soften. If you have a thermomix, you can do this for 5-7 minutes
  2. Place softened date mixture in the blender (or thermomix) and blend dates into a paste. Add remaining ingredients and blend at a high speed until the mixture resembles a chocolate cake mixture. The mixture should hold a firm smooth consistency
  3. Baste the spring-form cake pans with ghee or coconut oil and pour the mixture into the pans. Cook for 40 – 50 minutes at 150◦C
  4. Test the cake with a fork before you take it out of the oven and when ready, remove cakes from the oven and take them out of the spring-form pans as soon as you can. Let the cakes cool on a cooling rack
  5. You can place any filling in the middle or on the top of the cake with a little creativity. The berry filling works well as a middle filling for the cakes and the top of the cake works well with sour cream and fresh berries. Alternatively, you can try the cake icing below and use it for the top layer with fresh berries on top as shown in the picture.
Filling Instructions
  1. Combine berries, apples, lemon juice and honey in a saucepan and bring ingredients to boiling point, then turn the temperature down and continue cooking the mixture slowly on a low heat. Stir frequently as it thickens
  2. Place the ingredients in the fridge to set for 4 hours
Chocolate Icing Instructions
  1. Place all ingredients in a high-speed blender. If possible, let them sit in there for a few minutes to soften the dates a little bit.
  2. Blend all ingredients in your high-speed blender. The ingredients can be a little tricky to blend, so start at a slow speed and increase speed slowly
  3. Keep blending for a very long time to get a velvety consistency. This is one of those recipes that really makes use of the power of a high-speed blender. If you feel that the blades are just spinning but aren't actually moving all of the icing around, turn the blender off and make an air pocket down the side of the blender with a spatula to expose the blades. Remove the spatula, replace the lid, and start blending slowly again.
  4. You'll know it's ready if there are no bits of dates and all you can taste is velvety chocolate goodness. This raw chocolate icing is ready to use as soon as you pour it out of the blender
  5. Simply use a spatula to spread the mixture on the sides and top of the cake.
Recipe Notes

Serve with some sour cream, kefir, yoghurt or creme fraiche

How to Blanch Almonds

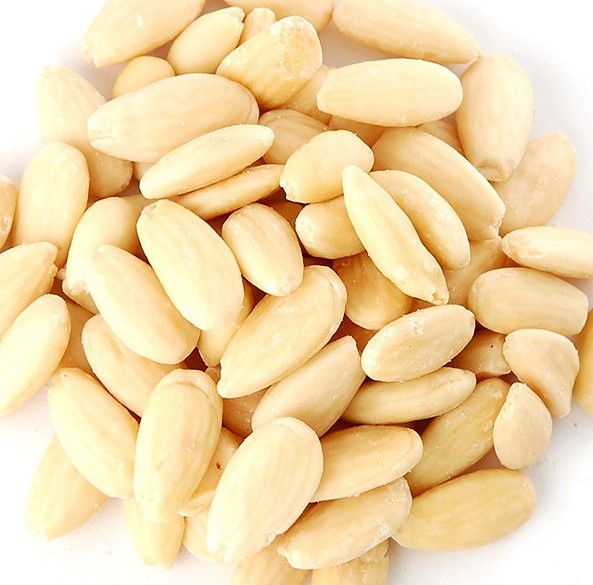
These instructions will teach you how easy it is to blanch your own almonds.  This means removing the husk.  Whilst it is true that it requires more work, blanching almonds can be easier on the digestive system for severe food sensitivities than simple soaking, however blanching almonds may not be required for everyone. It is […]

Print Recipe
How to Blanch Almonds
Votes: 0
Rating: 0
You:
Rate this recipe!
Prep Time 25 Minutes
Passive Time 1 Hour
Servings
Kg
Ingredients
Prep Time 25 Minutes
Passive Time 1 Hour
Servings
Kg
Ingredients
Votes: 0
Rating: 0
You:
Rate this recipe!
Instructions
  1. Bring a small pot of filtered water to the boil
  2. Place your raw almonds into the boiling water and let sit for half an hour. They will swell and appear larger.
  3. Drain the almonds in a colander or strainer and rinse them with cold water to cool them
  4. Blot the almonds dry with a tea towel
  5. Use your fingers to gently squeeze the almonds and loosen the skin from them. They usually just slip right out.
  6. Dry nuts as per activated nut instructions
  7. Store in an airtight container in the fridge
Recipe Notes

Whilst it is true that it requires more work, blanching almonds can be easier on the digestive system for severe food sensitivities than simple soaking, however blanching almonds may not be required for everyone.  It is a preferred method for making almond milk for those who are more prone to food sensitivities as this will completely remove the phytates.  Removing the husks on almonds also make for a nicer homemade almond milk.  It is very unlikely that commercial nut milk producers will have taken the time to activate their nuts or remove the husks, not to mention any additives and preservatives within the product ingredients.

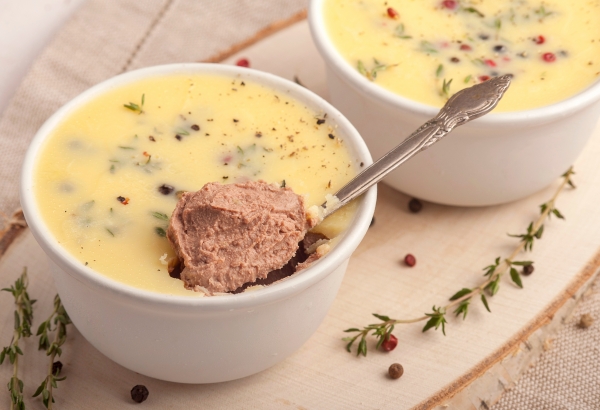
Organic Chicken liver pate

Organ meats are recognised as a ‘top GAPS nutrient dense food‘ and to ensure you are nourishing your body adequately this recipe will allow you to get your daily portions to optimise healing.  Many people having tasted liver on it’s own before (like myself) may feel that it is not on their fabourite go to […]

Print Recipe
Organic Chicken liver pate
Votes: 5
Rating: 4.2
You:
Rate this recipe!
Servings
Ingredients
Soaking Solution
  • 2 Cups Kefir if you have a food allergy to dairy kefir, lemon juice or apple cider vinegar work great too.
Chicken Liver Pate
Servings
Ingredients
Soaking Solution
  • 2 Cups Kefir if you have a food allergy to dairy kefir, lemon juice or apple cider vinegar work great too.
Chicken Liver Pate
Votes: 5
Rating: 4.2
You:
Rate this recipe!
Instructions
Preparation and Soaking
  1. After you have frozen the liver for two weeks prepare your liver by soaking it. Simply add the liver to a glass bowl and pour the kefir over the top making sure it is all covered and place it in the fridge for 4 hours or overnight. This will help to remove any impurities, tenderise the liver and improve the flavor of the liver.
  2. When soaking is complete, wash the liver to remove the kefir with filtered water.
Liver Pate
  1. Heat oil/fat in pan and add onion, celery and garlic and sauté for 1 minute
  2. Add liver and sauté till opaque
  3. Add herbs if selected and let cool
  4. Transfer to the blender and remaining oil/fat and blend till smooth
  5. Transfer to glass container and refrigerate
  6. Add melted ghee or lard over the top to create a skin to preserve the colour. Sprinkle a little herbs over the top for garnish if you wish.
  7. Alternatively transfer mixture to ice cube trays and freeze
Recipe Notes

Clinical Notes

Another way to supplement with liver if you do not like the flavour of pate is to freeze it raw and cut them into small capsule sizes and swallow them whole like a capsule.  This way you will not taste the liver as it is swallowed whole.  If you do this option, be sure to freeze the liver for two weeks first.

Activating Nuts/Seeds for Flour

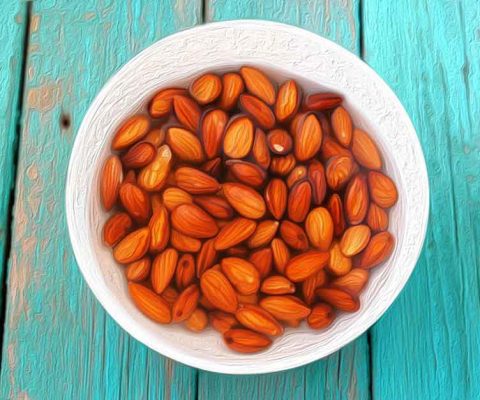
What are Activated Nuts? Activated nuts have been soaked in water and salt for a period of time, which starts off the germination or sprouting process, then dehydrated at a low temperature. Soaking increases the nutrient value of the nuts along with breaking down the problematic compounds that help enhance their digestibility. Nuts and Seeds […]

Print Recipe
Activating Nuts/Seeds for Flour
This recipe is appropriate from Stage 6 on the Introductions Diet
Votes: 0
Rating: 0
You:
Rate this recipe!
Prep Time 2-12 hrs
Servings
Ingredients
Prep Time 2-12 hrs
Servings
Ingredients
Votes: 0
Rating: 0
You:
Rate this recipe!
Instructions
  1. In a large bowl place your nuts or seed of choice.
  2. Dissolve salt in enough water to cover the amount of nuts/seeds you are activating.
  3. Cover with the salt water solution.
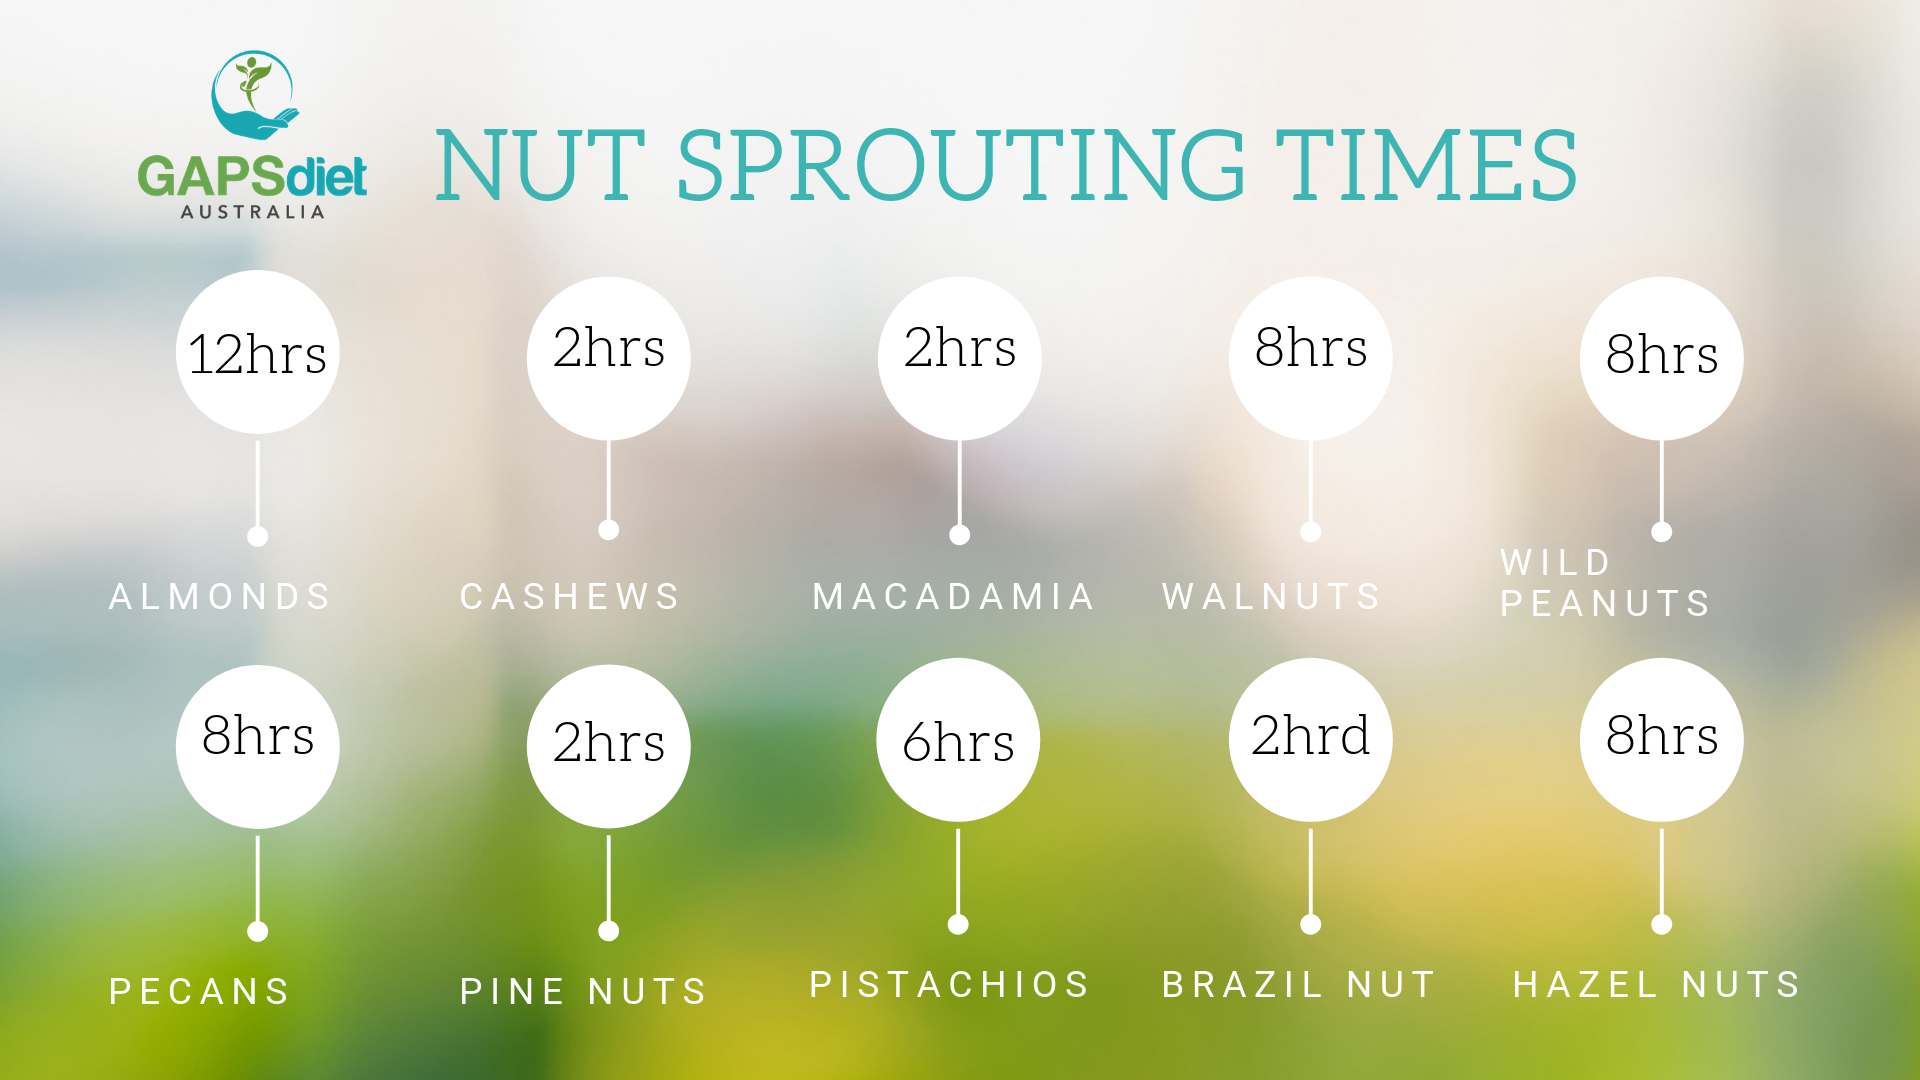
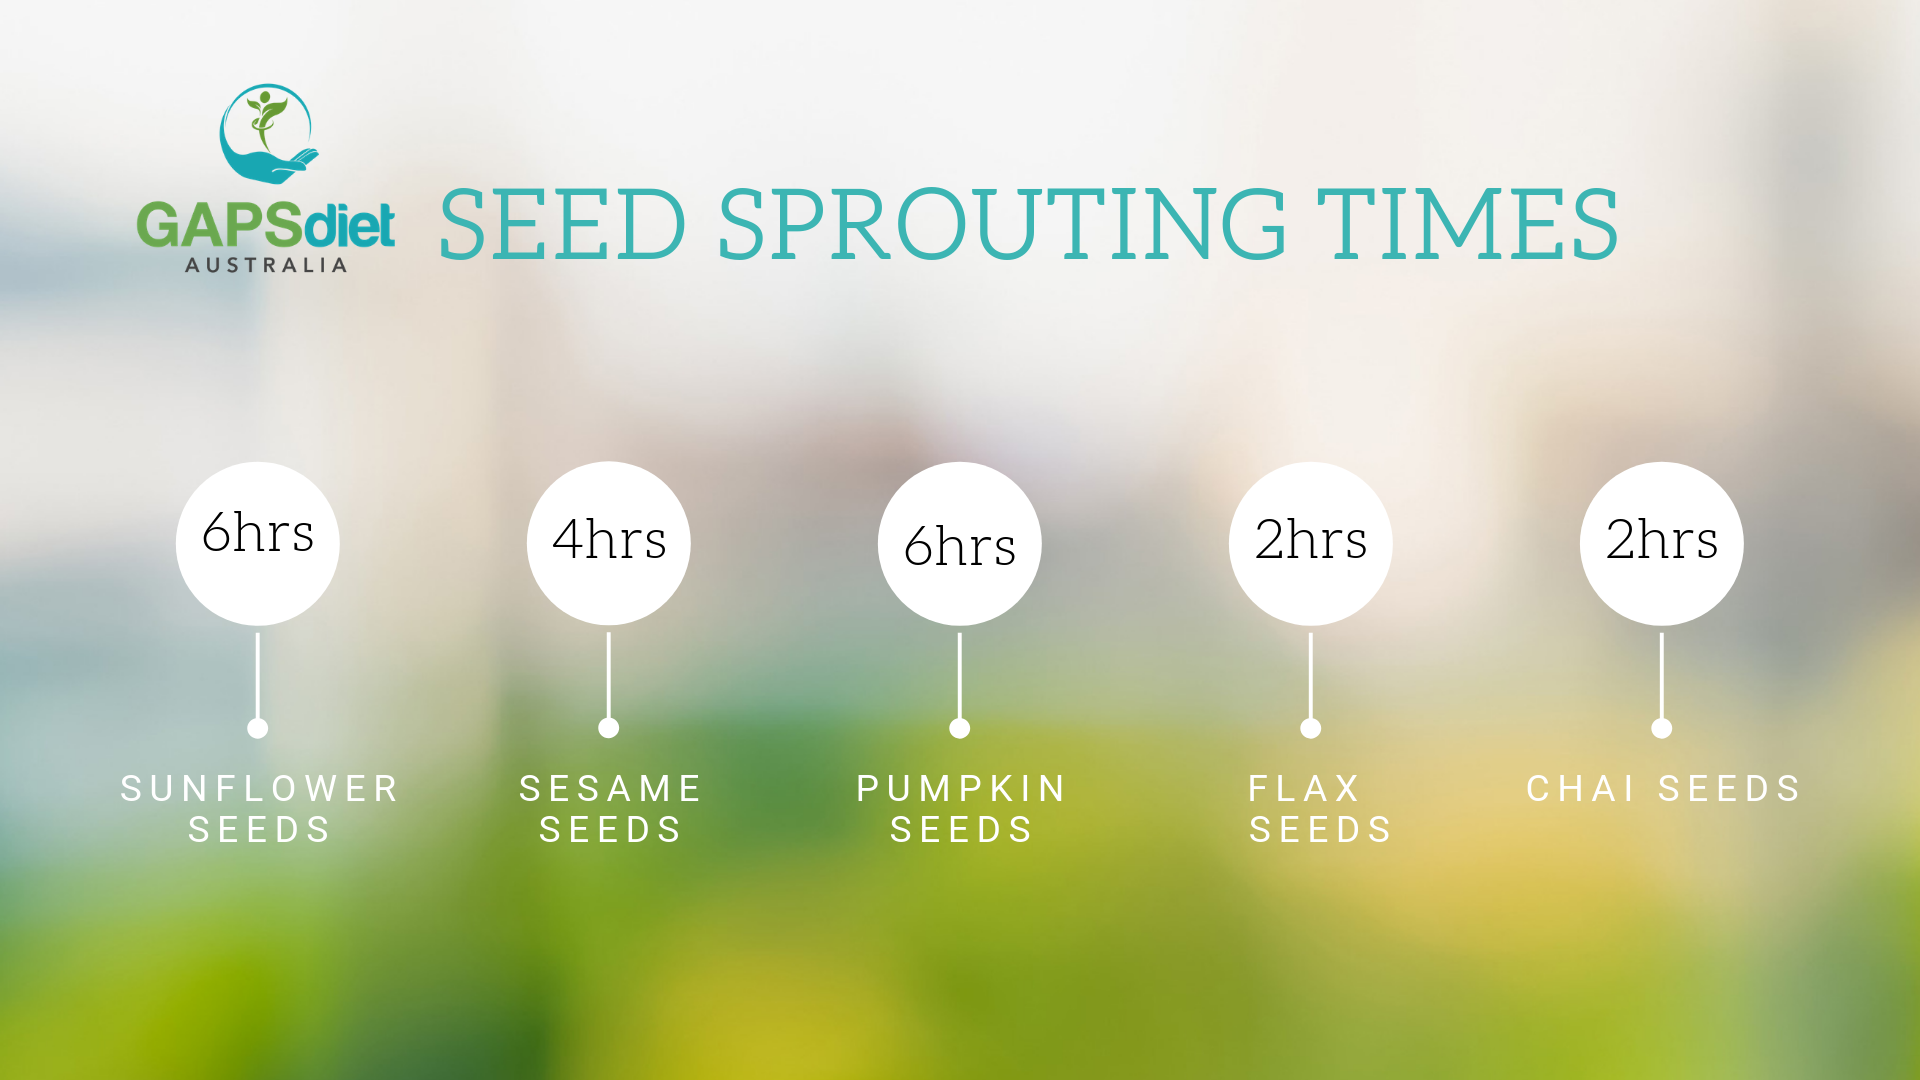
  4. Soak the nuts or seeds for the specified time according to the chart below (see soaking time chart)
  5. Strain and rinse the nuts when the specified time has lapsed.
  6. Spread the nuts or seeds over a dehydrator rack, or baking tray.
  7. Place in the oven on a low heat (90 degrees) or dehydrator until completely dry and the moisture is removed. The dehydrator is a longer drying process but helps to keep activated nuts active. The oven can stop the germination process, however it will get the job done in drying the nuts and seeds after they enzyme inhibitors have been removed.
  8. Eat the activated nuts as they are or make flour from them by grinding the nuts in a strong blender like a vitamix or thermo until you have a flour like consistency.
  9. Store nuts, seeds or nut flours in an air tight container.
Recipe Notes

Clinical Notes

Try fermenting nut/seed flour or nut/seed milk if nuts and seeds continue to be a bit of a problem.

Nut and Seed Soaking Chart

Print Recipe Nut and Seed Soaking Chart Votes: 0 Rating: 0 You: Rate this recipe! Course Baking at home, Miscellaneous Cuisine Full GAPS Diet, GAPS Baby: Introducing Solids, GAPS Introduction Stages, Stage 6 – onward Servings MetricUS Imperial Ingredients 2-3 Cups Organic Nuts or Seeds1 Tbs Celtic or Himalayan Sea Salt1 Litre Filtered water Course […]

Print Recipe
Nut and Seed Soaking Chart
Votes: 0
Rating: 0
You:
Rate this recipe!
Servings
Votes: 0
Rating: 0
You:
Rate this recipe!
Instructions
  1. Almonds 12 Hours 1 tablespoon salt
  2. Brazil Nuts 2 Hours 1 tablespoon salt
  3. Cashews 2 Hours 1 tablespoon salt
  4. Chia Seeds 2 Hours No salt
  5. Flax Seeds 2 Hours No salt
  6. Hazel Nuts 8 Hours 1 tablespoon salt
  7. Macadamia Nuts 2 Hours 1 tablespoon salt
  8. Pecans 8 Hours 2 teaspoons salt
  9. Pine Nuts 2 Hours 1 tablespoon salt
  10. Pumpkin Seeds 6 Hours 2 tablespoons salt
  11. Sesame Seeds un-hulled 6 Hours 1 tablespoon salt
  12. Sunflower Seeds 4 Hours 2 tablespoons salt
  13. Walnuts 8 Hours 2 teaspoons salt
  14. Wild Peanuts 8 Hours 1 tablespoon salt
  15. See other recipe 'Activating Nuts/Seeds for Flour' for instructions to soak and sprout seeds to make flour.
Recipe Notes

Clinical Notes

Nuts and Seeds are fibrous and should not be introduced for GAPS patients until digestive symptoms have shown some signs of improvement. The introduction diet provides a slow introduction to nuts by starting with nut butter followed by baking with nut flour and finally nuts for snacks themselves with encouragement to prepare them and chew them well. The sensitivity test is advised to be carried out first for those who suspect a true nut allergy, however there are many people who express their intolerance for nuts during the introduction diet who may need to determine themselves whether to wait until further healing takes place before introducing them.

Selecting organic nuts and seeds and preparing them by soaking and sometimes blanching them (skins removed) often makes all the difference for a GAPS patient to better tolerate them.  Many GAPS patients have a toxic overload and cannot tolerate even the smallest amount of chemicals or pesticides in their system and this is why organic serves to be a better option.

In addition to crop chemicals, nuts and seeds contain their own toxic substances known as enzyme inhibitors and phytates (phytic acid).  These toxins can play havoc in the digestive system, blocking nutrients such as calcium, magnesium, copper iron and especially zinc.  Enzyme inhibitors in particular, are contained on the skins or surrounds of nuts and seeds and they are especially apparent in nuts with brown skins like almonds.  Their purpose serves as a protective layer to naturally prevent animals and insects from consuming them so that they have the opportunity to germinate and sprout into a plant. Soaking nuts and seeds in warm salty water overnight will activate enzymes that neutralise enzyme inhibitors and also breakdown a large portion of phytic acid that allow the nutrients to be better absorbed in the digestive system. This soaking preparation process is often referred to as activating nuts and seeds.

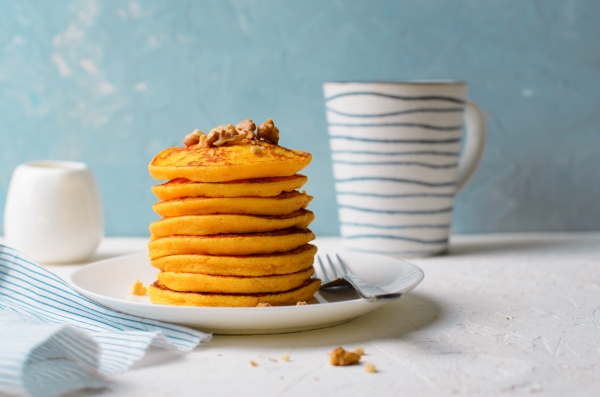
Nut Butter Pancakes

This recipe is introduced on stage 3 and in week 8 and 9 on the GAPS Baby Diet – Introducing Solids for Baby.  It is simple to make and most children love them.  They can be served with a little honey or a spread of ghee and avocado.  This is easy to pack into school […]

Print Recipe
Nut Butter Pancakes
This recipe is appropriate for the GAPS Introduction Diet from Stage 3 onward
Votes: 0
Rating: 0
You:
Rate this recipe!
Prep Time 10 Minutes
Servings
People
Ingredients
  • 1 Cup Nut Butter Homemade almond, peanut, cashew etc
  • 3 Whole Eggs Organic and pasture raised
  • 3 Tbsp Pumpkin Or squash or zucchini
  • 2-3 Tbsp Ghee Or coconut oil if dairy not introduced
Prep Time 10 Minutes
Servings
People
Ingredients
  • 1 Cup Nut Butter Homemade almond, peanut, cashew etc
  • 3 Whole Eggs Organic and pasture raised
  • 3 Tbsp Pumpkin Or squash or zucchini
  • 2-3 Tbsp Ghee Or coconut oil if dairy not introduced
Votes: 0
Rating: 0
You:
Rate this recipe!
Instructions
  1. Process nut butter, eggs and winter squash in the food processor
  2. Melt ghee or other fat in the pan and spoon pancake sized portions in the pan.
  3. Gently fry and make sure not to burn
Recipe Notes

Clinical Notes

If you find that the introduction of nuts (nut butter) is too soon, you may try the Nut Free Flourless Chicken Pancakes more suitable. Some people may need to try introducing nuts much later in the diet than others, however this recipe is a good place to start when you feel that the time is right and you can make baked items from seeds as an alternative.

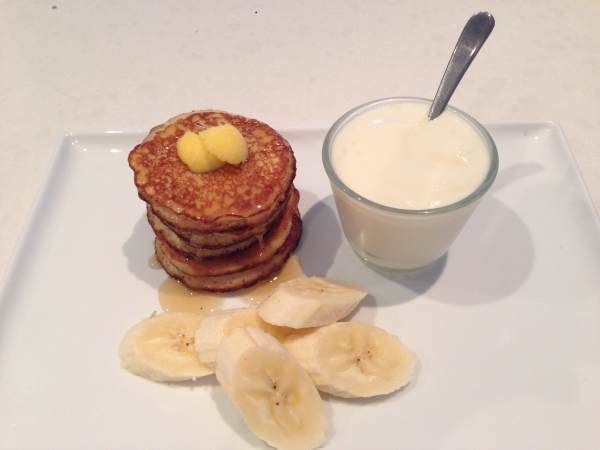
Banana Almond and Blueberry Pancakes

I could not tell you how many times we have made these pancakes.  They are simple to make and a great lunch box filler for school or work. Print Recipe Banana Almond and Blueberry Pancakes This recipe is appropriate for the GAPS Introduction Stages from Stage 6 onward Votes: 0 Rating: 0 You: Rate this […]

Print Recipe
Banana Almond and Blueberry Pancakes
This recipe is appropriate for the GAPS Introduction Stages from Stage 6 onward
Votes: 0
Rating: 0
You:
Rate this recipe!
Prep Time 5 Minutes
Cook Time 10 Minutes
Servings
People
Ingredients
Prep Time 5 Minutes
Cook Time 10 Minutes
Servings
People
Ingredients
Votes: 0
Rating: 0
You:
Rate this recipe!
Instructions
  1. Mash bananas and place them into a bowl
  2. Add eggs, almond flour and vanilla essence to the bowl and blend briefly with an electric beater until smooth
  3. Add dried blueberries and hand mix
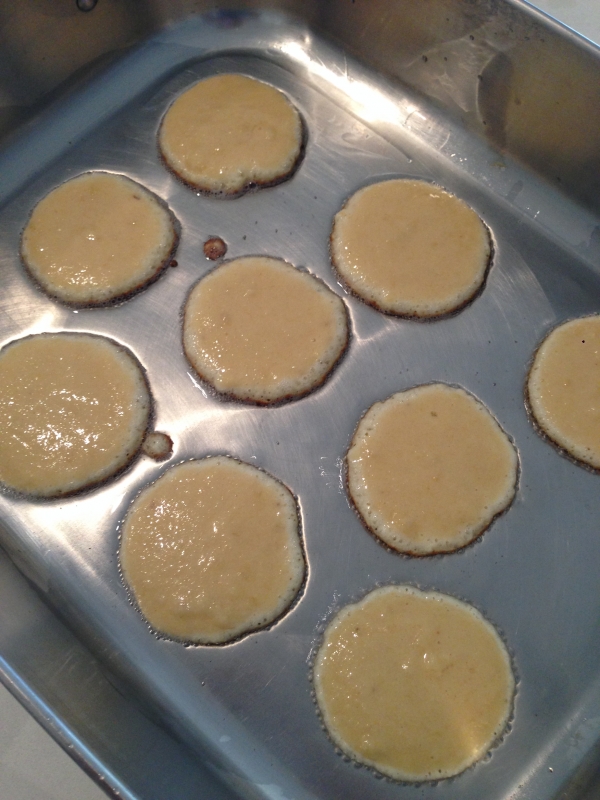
  4. Heat frying pan on a low heat to ensure you do not burn the nut flour and spoon small pancakes into the fry pan
  5. You will notice some fine bubbles on the top indicating that they may be ready to flip. Use an egg lifter to flip and lightly cook the other side. If the pan is too hot they will burn
  6. You may need some practice in making these before you fry the perfect pancake but they are well worth the effort
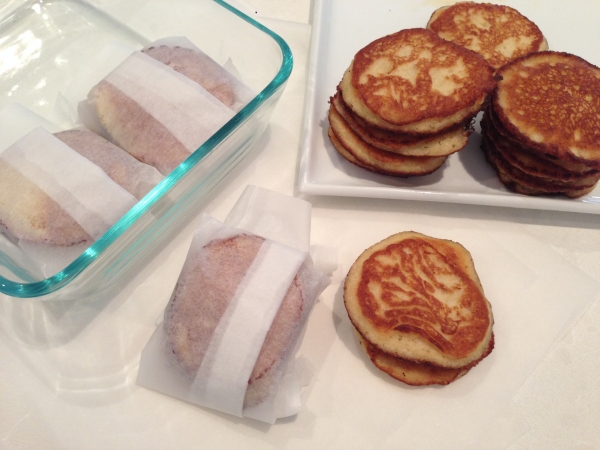
  7. Wrap each pancake in sets of two with baking paper and store them in the fridge or freezer. These are great school snacks or morning tea for visitors.
  8. Serve with fresh sour cream, yoghurt or kefir and fresh banana or blueberries
Recipe Notes

Clinical Notes

If you are trying to avoid all sugars including mono sugars found in honey and fruit to help combat candida (yeast overgrowth)  it is best to avoid this recipe as it contains honey and fruit.  Please refer to our GAPS101 Online learning course for the GAPS Candida Protocol.

Banana Peanut Butter Mini Muffins

These cute little mini muffins are a great treat for the little ones. They are easy to make, are GAPS compliant and kids love them. They are also great snacks and lunch box fillers. What more can you ask for. Print Recipe Banana Cake or Mini Muffins These delicious treats are suitable from Stage 6 […]

Print Recipe
Banana Cake or Mini Muffins
These delicious treats are suitable from Stage 6 on wards.
Votes: 0
Rating: 0
You:
Rate this recipe!
Prep Time 10 Minutes
Cook Time 15 Minutes (cake) or 15 Minutes for Mini Muffins
Servings
24 Mini Muffins
Ingredients
Mini Muffin Ingredients
Icing
Prep Time 10 Minutes
Cook Time 15 Minutes (cake) or 15 Minutes for Mini Muffins
Servings
24 Mini Muffins
Ingredients
Mini Muffin Ingredients
Icing
Votes: 0
Rating: 0
You:
Rate this recipe!
Instructions
Cake/Muffin Intructions
  1. Preheat oven to 150 degrees Celsius
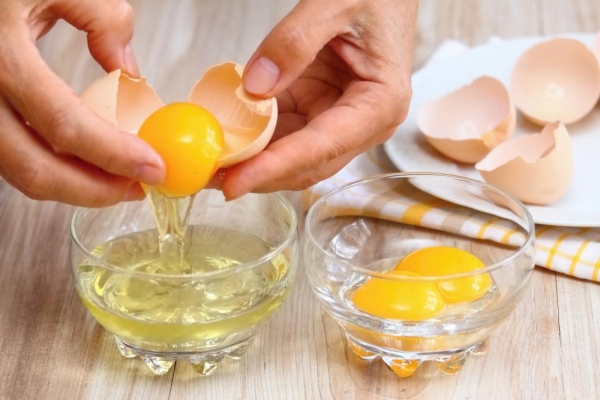
  2. Separate whites from eggs and beat until fluffy, then beat the egg yolks separately
  3. Add honey, vanilla extract and softened coconut oil to a mixing bowl and beat well whilst gradually adding both egg mixtures and almond flour.
  4. Mix in mashed bananas and desiccated coconut and pour into mini muffin papers or a loaf tin lined with baking paper. Mini muffins will take approximately 15 minutes to cook. Keep an eye on them as almond flour is easy to burn (Don’t cook them in too high temperatures). Regular sized muffins will take a little longer with approximately 25 minutes. Alternatively you may wish to cook a banana loaf which will require 45 – 5o minutes cooking time. Be sure to line your loaf tin with baking paper so that you can easily remove your cake as soon as it is done as this will keep the outside colour golden. You may also consider adding walnuts to the mixture.
Icing Instructions
  1. Whip both honey and peanut butter together. This will set nicely in the fridge like regular hard icing. You can also use a piping bag to make rosettes. Make sure you have given the muffins enough time to cook before applying the icing.
  2. Garnish with dried bananas or walnuts on top if you wish.
Recipe Notes

Clinical Notes As with all stages of the GAPS diet, baked goods should only make up a small percentage of the diet and that the focus should be on healing nourishing foods, broths and juices.

Apple Puree

Apple Pure is introduced in the Introduction Diet on stage 5.  Apple Pure for GAPS is an easy way to disguise fats.  GAPS is a high fat diet so we want to add fats to everything and apple puree is a good way to deliver it. We usually add duck fat, ghee or coconut oil.  […]

Print Recipe
Apple Puree
This recipe is appropriate for the GAPS Introduction Diet from stage 5 onward
Votes: 0
Rating: 0
You:
Rate this recipe!
Prep Time 5-10 Minutes
Cook Time 15-20 Minutes
Servings
People
Ingredients
Fruit
Other
Prep Time 5-10 Minutes
Cook Time 15-20 Minutes
Servings
People
Ingredients
Fruit
Other
Votes: 0
Rating: 0
You:
Rate this recipe!
Instructions
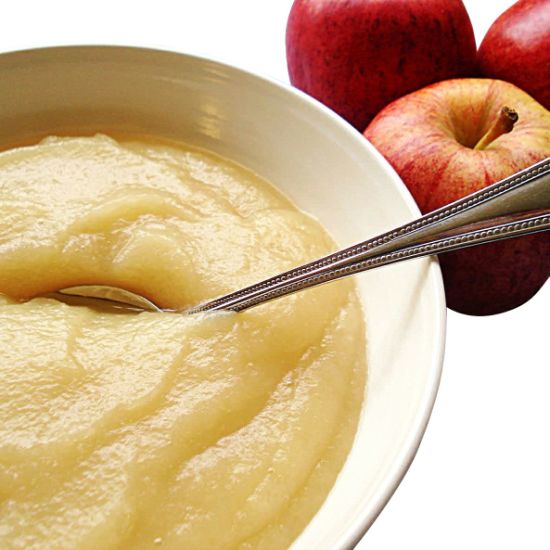
  1. Peel and core the ripe apples and slice thinly into your stainless steel cook pot. An apple slinky is great at doing this job.
  2. Add the water and cook the apples on low whilst stirring occasionally. You may place the lid on top to create steam in the cooking process.
  3. When the apples have become soft, take the pan off the stove and mash with a vegetable masher.
  4. Add a couple of tablespoons of ghee or duck fat or coconut fat (depending on what you have introduced) and blend with the apple.
  5. Store the stewed apples in the fridge.
Recipe Notes

Clinical Notes

Start to introduce with a few spoonful’s  a day and gradually increase the amount if there are no reactions.

Almond Pumkin Bread

This recipe is acceptable for the GAPS Introduction Diet from stage Four onward. It is easy to make and well liked byGAPS children.  This recipe can be made using different nut or seed flours and you may wish to add different cooked vegetables to it. Suggestions Nice with some avocado or nut butter. You can […]

Print Recipe
Almond Pumkin Bread
This recipe is appropriate for the Introduction Diet from stage 4 onward
Votes: 0
Rating: 0
You:
Rate this recipe!
Prep Time 5-15 minutes
Cook Time 1 hour
Servings
loaf
Ingredients
Bread Mixture
Special equipment
Prep Time 5-15 minutes
Cook Time 1 hour
Servings
loaf
Ingredients
Bread Mixture
Special equipment
Votes: 0
Rating: 0
You:
Rate this recipe!
Instructions
  1. Preheat conventional oven at 150 degrees (almond flour burns easily so this recipe needs to be cooked slowly).
  2. Cook the pumpkin by boiling it or use previously roasted punpkin from a left over meal. I like to make extra pumkin with my meals for this purpose in mind.
  3. Mix all ingredients in a glass bowl with hand held mixer on low. (do not over mix – just enough to ensure all ingredients is mixed and combined well)
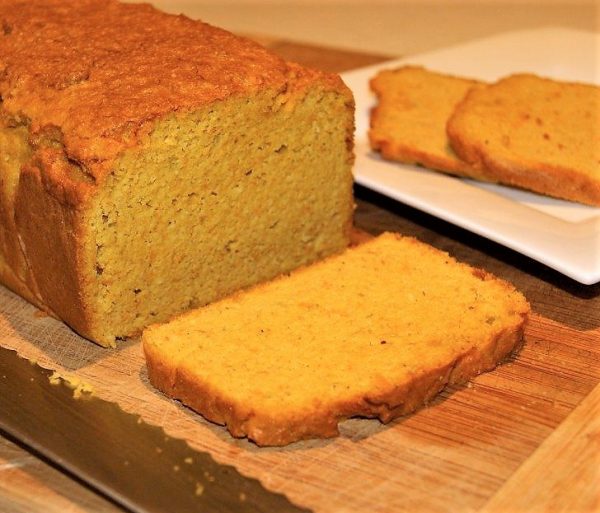
  4. Line your bread tin with oven paper and pour ingredients in. Place in oven and cook for one hour (ensureing not to burn the top).
  5. When removing the bread from the oven, be sure to take it out of the tin immediately to allow it to cool by lifting the loaf out with the paper sides. This will avoid a darker crust because burnt nut flour is bitter. Let it sit and cook on the cooling rack with the paper still surrounding it. When it has cooled you may wrap the loaf in the baking paper and and place in a pyrex dish with a sealed lid to store in the fridge.
Recipe Notes

Suggestions

Nice with some avocado or nut butter.  You can make thin slices and crisp them in a dehydrator which is great for homemade dips and  soup dunkers.  The bread is also great for dippity eggs.

Fermented Almond Flour

If the introduction of nuts or nut flour persists to be a problem for people starting the GAPS Diet, you may wish to ferment the nut flour itself. Both nuts and seeds contain phytates, phenols and oxalates etc and these can make it difficult for some people (not all) to digest whilst their gut is […]

Print Recipe
Fermented Almond Flour
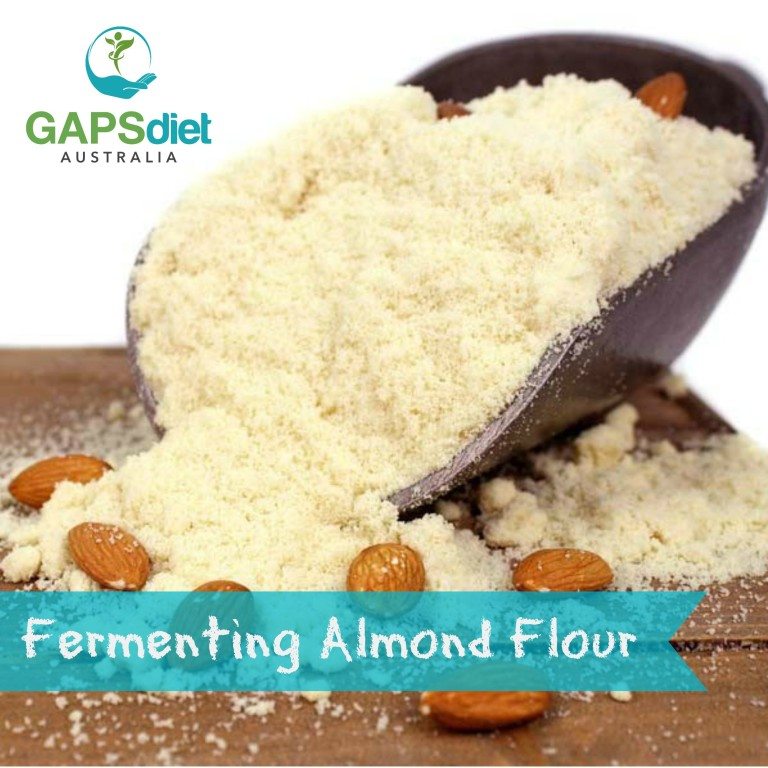
Fermenting Almond Flour
Votes: 1
Rating: 5
You:
Rate this recipe!
Prep Time 5 mins
Passive Time 24 hours
Servings
cups
Ingredients
Fermenting mixture
  • 2-3 cups Blanched almond flour Organic - quantity here is dependant upon how much you plan to use for the recipe intended
  • 1 cup Whey This is the dripped liquid from your yoghurt - see whey recipe
  • 2 cups Filtered water
Special equipment
Fermenting Almond Flour
Votes: 1
Rating: 5
You:
Rate this recipe!
Instructions
  1. Add the almond flour into a bowl or dish
  2. Mix filtered water with a cup of whey and pour over the almond flour
  3. Leave the bowl or dish on the kitchen bench top at room temperature for 24 hours.
  4. When 24 hours have passed, drain the flour through a cheescloth and use the drained flour directly in baking.

Carrot Cake Muffins

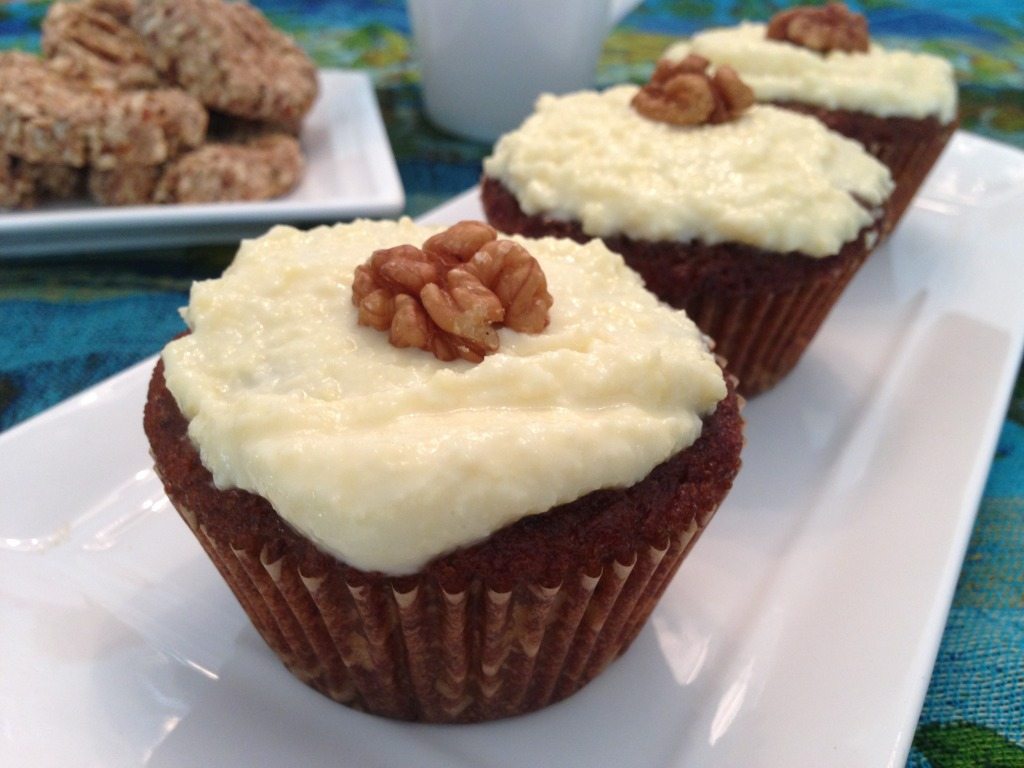
Print Recipe Carrot Cake Muffins Votes: 2 Rating: 4.5 You: Rate this recipe! Course Baking at home, Deserts Cuisine Full GAPS Diet Prep Time 20 mins Cook Time 30 minutes Servings muffins MetricUS Imperial Ingredients Cake Mixture 3/4 cup Raw honey Raw organic2- 3 Carrots Finely grated10 Pitted dates (soaked in boiking water to soften)1/2 […]

Print Recipe
Carrot Cake Muffins
Votes: 2
Rating: 4.5
You:
Rate this recipe!
Prep Time 20 mins
Cook Time 30 minutes
Servings
muffins
Ingredients
Cake Mixture
Frosting
  • 100 grams Butter Organic unprocessed or ghee
  • 2 cups Yoghurt Dripping yoghurt to produce thickened sour cream/fraiche
  • 5-6 tbs Raw honey Raw organic
  • 1-2 tbs lemmon juice Freshly squeezed
Special equipment
Votes: 2
Rating: 4.5
You:
Rate this recipe!
Instructions
Cake mixture
  1. Preheat oven to 175 degrees Celsius. (never cook recipes containing almond flour too high as it burns easily).
  2. Finely grate the carrots and place them in a small bowl. Pour the honey over the carrots and place them in the fridge for 20 minutes.
  3. Cover the dates with boiling water in a separate bowl and let them sit for 20 minutes also. When they are nice and soft, you can easily remove the pit inside.
  4. In a mixing bowl or thermomix - add eggs, carrot mixture, dates, vanilla extract, yoghurt, melted coconut oil and blend well until the mixture is runny.
  5. Add the remaining dry ingredients to the mixture and mix further until all combined into a thick paste.
  6. At the final stages, add the bicarbonate of soda to the top of the mixture and pour the 2 tablespoons of lemon juice on top. This will fiz at first. Turn the mixer on again to ensure that all final ingredinents are all blended well.
  7. Pour the mixture into bleach free baking cup cake holders linned within a 12 tin muffin tray and bake in a preheated oven at 175 degrees Celsius for 30 minutes. You can also make a carrot cake with this mixture but you will need to adjust the cooking time. You do not want the mixture to be too runny. If it is, simply add a little more almond flour to accommodate.
Frosting
  1. Drip your yoghurt to thicken or make some creme fraiche for best results as this will make it thick and creamier.
  2. Combine butter (that has softened at room temperature) with yoghurt and mix well.
  3. Gradually add the honey followed by the lemon juice. You don't have to use all the lemon juice if you don't want to, pending on preferred taste.
Recipe Notes

This recipe can make a locely carot cake or regular sized muffins or minni muffins.

Cooking Time for cake or muffins

The cake baking time is approximately 50 minutes

The muffin standard cup size makes approximately 12 with a bit left over to make mini muffins.  The standard muffin size cook time is approximately 30 minutes and the smaller mini size usually takes 20 minutes cooking time.