Coconut Milk

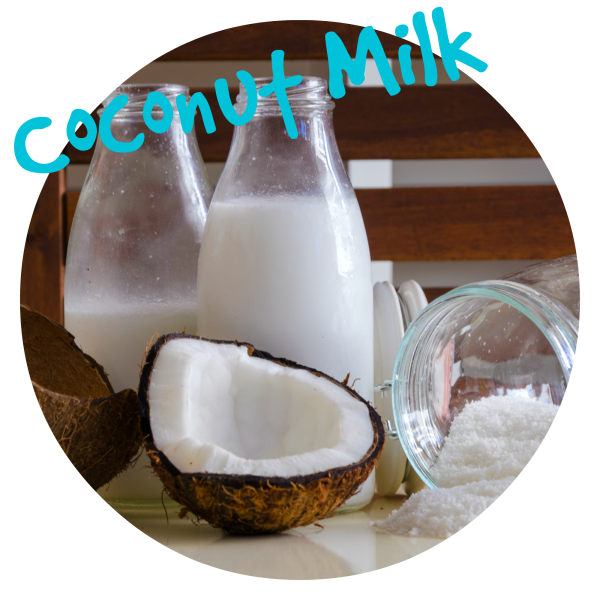
Here we have two coconut milk recipes for the GAPS Diet for people who cannot tolerate nut milks. Canned coconut milk often contains, preservatives and other additives that the GAPS Program does not allow for. BPA is also usually lined within the tin cans containing coconut milk as well. For these reasons, we encourage you […]
Print Recipe
Coconut Milk
This recipe is appropriate for the Introduction diet when nuts have been successfully introduced and tolerated from stage 4 onward.
Votes: 1
Rating: 5
You:
Rate this recipe!
Prep Time 20-40 mins
Servings
Cups
Ingredients
Raw Coconut Milk
  • 4-6 Young green coconuts Enough to produce 1-2 cups of fresh coconut meat and 1/4 - 1/2 cup of coconut water
Equipment for Raw Coconut Milk
Coconut Milk from Shredded Coconut
Prep Time 20-40 mins
Servings
Cups
Ingredients
Raw Coconut Milk
  • 4-6 Young green coconuts Enough to produce 1-2 cups of fresh coconut meat and 1/4 - 1/2 cup of coconut water
Equipment for Raw Coconut Milk
Coconut Milk from Shredded Coconut
Votes: 1
Rating: 5
You:
Rate this recipe!
Instructions
Raw Coconut Milk
  1. With a sterilised kitchen flat head screw driver, use a hammer to pierce three holes into the top of the young green coconut ensuring that it penetrates the nut inside.
  2. Line a strainer with a cheese cloth over the jug or bowl and pour the coconut water from the three holes into the jug and set aside
  3. When all the coconut water is drained, open the top of the coconut by slashing the top off with a strong knife or cleaver. This may take a few slashes on each side at the top of the coconut. There are many videos online that you can view to learn how to do this.
  4. When the top of the coconut is open, spoon out the coconut meat from the sides of the shell. Try to avoid collecting the brown husk and only set aside the white soft meaty flesh. The meat from a young coconut should be soft and moist. If you have lots of coconuts you can do this all at once and freeze the coconut meat for later use.
  5. Repeat the above 3 steps with all coconuts until you have two cups of coconut meat flesh.
  6. Place the coconut meat into a good strong blender, vitamix or thermo mixer and mix the ingredients for as long as it takes to reach a smooth thick consistency whilst gradually adding the coconut water for the desired thickness result. It is important to ensure that the coconut milk mixture is not grainy or lumpy if you wish to have the best yoghurt like resemblance to make yoghurt later.
  7. Contain in a glass bottle with a screw top lid and store in the fridge. Keeps for up to one week in the fridge or can be frozen.
Coconut Milk from Shredded Coconut
  1. Add 1 cup of shredded coconut to one cup of water in a saucepan and bring to the boil. Boiling the coconut will rehydrate the coconut and release the natural coconut fat making it thicker.
  2. Allow the mixture to cool for 15 – 20 minutes and then add the mixture to a good strong blender, vitamix or thermo mixer and mix the ingredients well for a few minutes or so.
  3. Line the top of a jug with a strainer and cheesecloth and pour the mixture through the cheesecloth.
  4. Lifting the edges of the cheesecloth and gathering the strained coconut flakes, twist the cloth and squeeze with your hands allowing all the coconut milk to drip through the strainer and into the jug.
  5. When all the milk has been squeezed and collected in the jug, contain in a glass bottle and store in the fridge. Keeps for up to one week in the fridge.

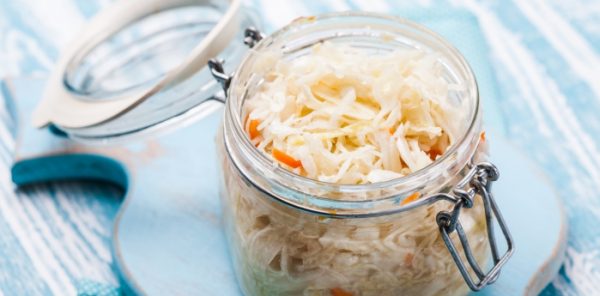
Traditional Wild Sauerkraut & Sauerkraut Juice

Wild fermentation is specific to the live organisms naturally present on the raw vegetables. This is the traditional way to ferment vegetables and sauerkraut because there are abundant lactic acid bacteria on all plants and if submerged under its own juices with a good coverage of salt (regardless of what type vessel they are contained […]

Print Recipe
Traditional Wild Sauerkraut & Sauerkraut Juice
Votes: 0
Rating: 0
You:
Rate this recipe!
Prep Time 45 mins
Passive Time 4 weeks
Servings
litre
Ingredients
Cabbage mixture
  • 1 kg Cabbage The green cabbages produce more brine – select a good quality fresh organic cabbage that is not dry or too old
  • 2 - 3 tbl Celtic or Himalayan Sea Salt Salt is a traditional ingredient in sauerkraut because it increases shelf life, texture, and flavor. The amount of salt used can vary according to personal taste but too little can spoit the batch. The salt helps to preserve.
Special equipment
  • 1 Fermenting Jar/Vessle There are many kinds of fermenting vessles on the market. You can make your own at home or spend extra money on something fancy. See our notes for recommendations
  • 1 Heavy weight this is used to keep the cabbage submerged under its own juices
  • 1 Cabbage/vegetable pounder This aids to help push and compress the cabbage or fermented vegetables so that they are submerged udner their own brine
  • 1 Unbleached cheesecloth
Votes: 0
Rating: 0
You:
Rate this recipe!
Instructions
Sauerkraut Mixture
  1. Thinly slice or shred the cabbage and place it into a large bowl. A good quality mandolin is great for shredding. A big cooking pot is good to contain the cabbage for this will allow you to easily get your hands into the mix later.
  2. Add a generous amount of salt to the mixture and mix the salt into the cabbage with your hands. Let it sit for 10 – 20 minutes to allow the salt to draw out some of the cabbage juice naturally. Salt actually allows the cabbage to sweat so that juices can be extracted to create the brine. 2 tablesppons of salt per 1kg cabbage.
  3. After you have allowed the cabbage to sit for 20 minutes, mix, massage and knead the ingredients with your hands. Bruising the cabbage this way allows the cabbage to extract more natural brine solution. Keep kneading until you have squeezed a substantial amount of juice from the mixture. This may take approximately 10-20 minutes. It is always handy to have someone with strong hands to do the kneading & massaging.
  4. Place the cabbage mixture into the selected kraut vessel and pack and push the mixture down so that the cabbage is compacted in the bottom and the juice is sitting on the top of the cabbage with a minimum of 4 - 5cm’s or 2 inches of the juice above. It is important to push the cabbage down firmly so that no air is trapped and the cabbage is completely submerged in and under its own brine juice. A cabbage/vegetable pounder or potato masher can be a good tool for this.
  5. Most fermented vegetable kits will have a weight but if you do not have a kit with a weight, simply make your own weight by using a plate that fits snug in the fermenting vessle and place it on the top of the cabbage and then place a smaller jar (filled with water) on top of the plate to weigh the cabbage down and keep it submerged. Push the jar down and you will see more juice rise to the top. It is very important to ensure that all the sauerkraut is submerged under its own juice. Don’t worry if you don’t have a weight to push it down, just try to make sure that all the cabbage remains under the brine and if any bits float up, remove them throughout the process to prevent them from going mouldy.
  6. When all the cabage is submerged under its own juices with the weight keeping it down, cover the top with a double folded cheesecloth to keep away the dust and store in a dark place for four weeks (ie pantry). If you use a canning jar with a rubber ring top, and close the lid, be sure to burp it a few times in the first few days to release the pressure or it will burst - you won’t need the cheesecloth if you use this type of jar. Keep checking to remove any mould or scum build up floating on the top and make sure the kraut remains under its own juices. The sauerkraut may be consumed and ready to eat after 2 weeks but it matures better and contains more good bacteria wioth more time. The sauerkraut may be stored in the fridge after 2 - 4 weeks of fermentation. If there is any scum or mould development on the top – remove this. The kraut remaining under the juice will be fine.
  7. After the cabbage has completed the fermentation process it becomes preserved and will last up to 12 months in the fridge. Fermentation is the traditional way we preserved food before companies decided to create synthetic harmful preservative options.
Kraut Juice
  1. The juice remaining in the kraut jar is a by-product of the sauerkraut but it is just as probiotic and benneficial to consume as the kraut itself. Do not discard the juice, either leave it in the jar and consume it gradually along with the kraut or strain it into a bottle to use as a fermented probiotic drink. This juice is what we like to use in the introduction stages of the GAPS Diet. It is introduced slowely and methodically. Refer to the GAPS introduction stagesfor this method.
Recipe Notes

Alternative options

This is a wild feremtnation method which often takes a little more time to ferment naturally, however you can assist this process further by inoculating the kraut batch with good bacteria from the very beginning by adding a vegetable starter culture to the mixture and massage that through with your hands along with the salt.

You may add other vegetables like grated carrots and other favourites such as caraway seeds or dill. 

Trouble shooting

If for any reason the cabbage is not submerged under enough of its own juices, you may need to add a small amount of filtered water with more salt (15 gms of salt to 1 ltr).

Sauerkraut & how to introduce it


Ghee (clarified butter)

  It’s hard to improve on butter, but… Ghee, a traditional Indian preparation, eliminates the milk solids and gives you just the pure, unadulterated butterfat. It’s gheelicious. And it doesn’t burn, so it is a perfect choice for high temperature frying. Before introducing butter on the GAPS diet, the introduction stages advises to introduce ghee […]

Print Recipe
Ghee (clarified butter)
This recipe is appropriate for stage two of the GAPS Introduction Diet and onwards
Votes: 0
Rating: 0
You:
Rate this recipe!
Prep Time 15 mins
Cook Time 1 hour
Servings
tub
Ingredients
Prep Time 15 mins
Cook Time 1 hour
Servings
tub
Ingredients
Votes: 0
Rating: 0
You:
Rate this recipe!
Instructions
Option one
  1. Preheat your oven to approximately 60 – 120 Degrees Celsius.
  2. Add a large block of unsalted organic butter to a glass or stainless steel oven dish and leave it in the oven for 45 – 60 minutes.
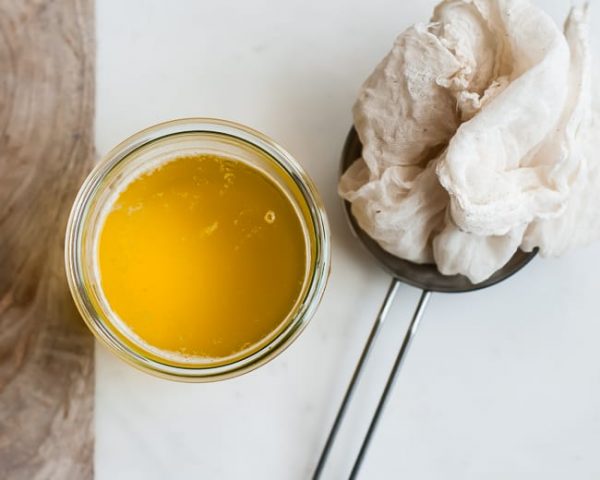
  3. The liquid in the dish will separate with milk solids on the bottom (liquid creamy white colour), ghee in the middle (yellow) with some floaty bits of whey on top (crusty yellow and golden brown floaty bits). The whey can be carefully scooped out from the top with a tea strainer and the yellow liquid which is the ghee can be carefully poured into a jar with a cheese cloth on top to catch any whey or unwanted milk solids. Try not to disrupt the milk solids and ensure that they remain in the bottom of the pan as you pour out the ghee.
  4. Discard the milk solids and refrigerate the ghee in glass jars.
Option two
  1. Melt the unsalted butter in a saucepan over low heat. Don't stir.
  2. Reduce heat and let the melted butter simmer for an hour or until a firm "foam" forms on the surface.
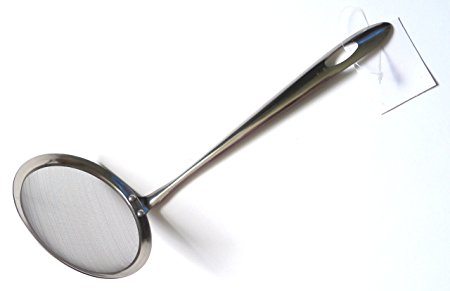
  3. Remove the foam with a flat head stainless steel seive straining spoon (see image). On the bottom, you'll now see white milk protein, which you want to leave behind in the pan or filter out of your ghee.
  4. Carefully pour the clarified butter through a cheese cloth. The white milk protein should remain in the cloth, while the clear butterfat seeps through.
  5. Repeat the filtering a couple of times for optimal results.
  6. Let the ghee cool in a glass jar and store at room temperature.
Recipe Notes

Other Options: You can use your slow cooker to make ghee. Put the butter in it and turn on low heat for 6-8 hours. Then follow the steps above.

Fermented Almond Flour

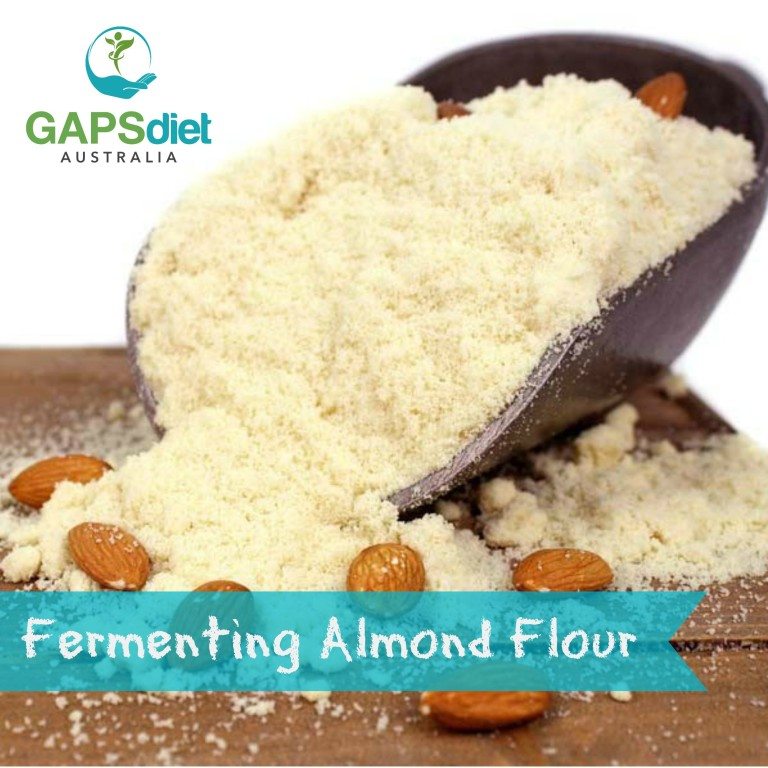
If the introduction of nuts or nut flour persists to be a problem for people starting the GAPS Diet, you may wish to ferment the nut flour itself. Both nuts and seeds contain phytates, phenols and oxalates etc and these can make it difficult for some people (not all) to digest whilst their gut is […]

Print Recipe
Fermented Almond Flour
Fermenting Almond Flour
Votes: 1
Rating: 5
You:
Rate this recipe!
Prep Time 5 mins
Passive Time 24 hours
Servings
cups
Ingredients
Fermenting mixture
  • 2-3 cups Blanched almond flour Organic - quantity here is dependant upon how much you plan to use for the recipe intended
  • 1 cup Whey This is the dripped liquid from your yoghurt - see whey recipe
  • 2 cups Filtered water
Special equipment
Fermenting Almond Flour
Votes: 1
Rating: 5
You:
Rate this recipe!
Instructions
  1. Add the almond flour into a bowl or dish
  2. Mix filtered water with a cup of whey and pour over the almond flour
  3. Leave the bowl or dish on the kitchen bench top at room temperature for 24 hours.
  4. When 24 hours have passed, drain the flour through a cheescloth and use the drained flour directly in baking.

Carrot Cake Muffins

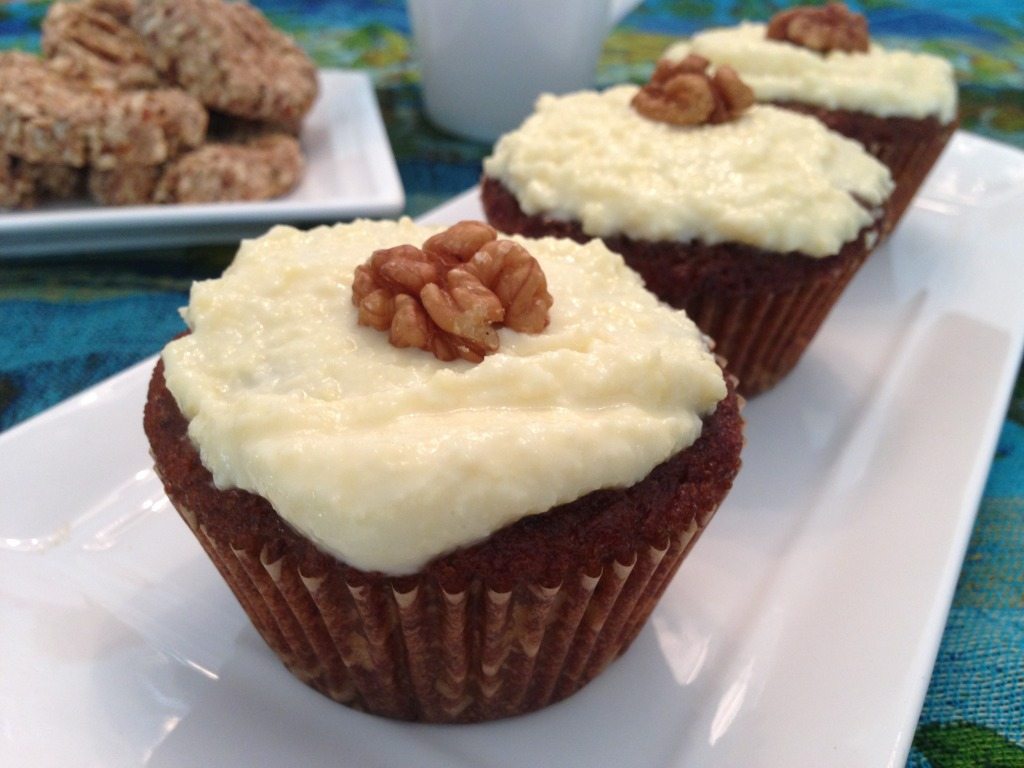
Print Recipe Carrot Cake Muffins Votes: 2 Rating: 4.5 You: Rate this recipe! Course Baking at home, Deserts Cuisine Full GAPS Diet Prep Time 20 mins Cook Time 30 minutes Servings muffins MetricUS Imperial Ingredients Cake Mixture 3/4 cup Raw honey Raw organic2- 3 Carrots Finely grated10 Pitted dates (soaked in boiking water to soften)1/2 […]

Print Recipe
Carrot Cake Muffins
Votes: 2
Rating: 4.5
You:
Rate this recipe!
Prep Time 20 mins
Cook Time 30 minutes
Servings
muffins
Ingredients
Cake Mixture
Frosting
  • 100 grams Butter Organic unprocessed or ghee
  • 2 cups Yoghurt Dripping yoghurt to produce thickened sour cream/fraiche
  • 5-6 tbs Raw honey Raw organic
  • 1-2 tbs lemmon juice Freshly squeezed
Special equipment
Votes: 2
Rating: 4.5
You:
Rate this recipe!
Instructions
Cake mixture
  1. Preheat oven to 175 degrees Celsius. (never cook recipes containing almond flour too high as it burns easily).
  2. Finely grate the carrots and place them in a small bowl. Pour the honey over the carrots and place them in the fridge for 20 minutes.
  3. Cover the dates with boiling water in a separate bowl and let them sit for 20 minutes also. When they are nice and soft, you can easily remove the pit inside.
  4. In a mixing bowl or thermomix - add eggs, carrot mixture, dates, vanilla extract, yoghurt, melted coconut oil and blend well until the mixture is runny.
  5. Add the remaining dry ingredients to the mixture and mix further until all combined into a thick paste.
  6. At the final stages, add the bicarbonate of soda to the top of the mixture and pour the 2 tablespoons of lemon juice on top. This will fiz at first. Turn the mixer on again to ensure that all final ingredinents are all blended well.
  7. Pour the mixture into bleach free baking cup cake holders linned within a 12 tin muffin tray and bake in a preheated oven at 175 degrees Celsius for 30 minutes. You can also make a carrot cake with this mixture but you will need to adjust the cooking time. You do not want the mixture to be too runny. If it is, simply add a little more almond flour to accommodate.
Frosting
  1. Drip your yoghurt to thicken or make some creme fraiche for best results as this will make it thick and creamier.
  2. Combine butter (that has softened at room temperature) with yoghurt and mix well.
  3. Gradually add the honey followed by the lemon juice. You don't have to use all the lemon juice if you don't want to, pending on preferred taste.
Recipe Notes

This recipe can make a locely carot cake or regular sized muffins or minni muffins.

Cooking Time for cake or muffins

The cake baking time is approximately 50 minutes

The muffin standard cup size makes approximately 12 with a bit left over to make mini muffins.  The standard muffin size cook time is approximately 30 minutes and the smaller mini size usually takes 20 minutes cooking time.