Recipes collated under this category are specific for Stage Four of the GAPS Introduction Diet onward.

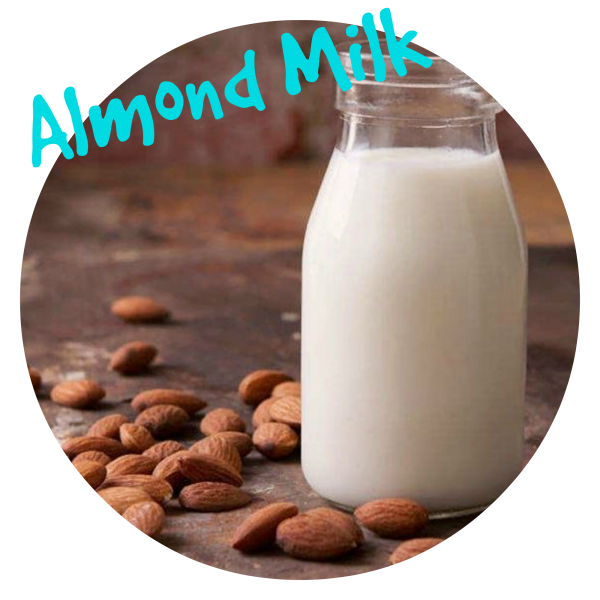
Nut Seed Milk

Preparation in making nut milk is important, especially for people who already have digestive problems and food sensitivities. Almonds (as well as most other nuts) contain toxic substances known as enzyme inhibitors and phytates (phytic acid). These toxins can play havoc in the digestive system, blocking nutrients such as calcium, magnesium, copper iron and especially […]

Print Recipe
Nut Seed Milk
This recipe is appropriate for the Introduction diet when nuts have been successfully introduced and tolerated from stage 4 onward.
Votes: 0
Rating: 0
You:
Rate this recipe!
Prep Time 5 Minutes
Passive Time 14 Hours
Servings
People
Ingredients
Prep Time 5 Minutes
Passive Time 14 Hours
Servings
People
Ingredients
Votes: 0
Rating: 0
You:
Rate this recipe!
Instructions
Part 1 - Soaking
  1. Add 3 cups of filtered water to a jug or bowl and mix in 1 tablespoon of salt
  2. Add 1 cup of almonds and cover with a tea towel or cheese cloth
  3. Soak the nuts in the salt water brine for 12 hours
  4. Rinse the nuts under filtered water to remove salt residue and discard the salt water brine
  5. Place the nuts in a clean jug or bowl and add 1 - 2 teaspoons of flaxseeds and 3 – 4 cups of water and place in the fridge for 2 – 3 hours. Adding the flaxseeds will allow the milk to thicken a little more. Exclude this step if you have no concern for thickness
  6. If you wish to add a little sweetener to the milk, this will be the stage that you will need to add the pitted dates to the mixture to soak for a few hours. This is optional
Part 1 - Blending and Straining
  1. Add the soaked nut mixture from the fridge (including the water) to a good strong blender, vitamix or thermo mixer and blend for as long as it takes to break down the size of the nuts into a pulp consistency
  2. Place a nut milk bag or cheesecloth over a bowl and pour the milk mixture through the cheesecloth or nut milk bag like a strainer
  3. When all the pulp and liquid has been strained through the nut milk bag or cheesecloth, squeeze any excess milk from the pulp mixture with your hands, allowing the milk to drain through the cloth. If you find that the milk is too rich, simply add more filtered water
  4. Store in the fridge for 2 – 3 days.
Recipe Notes

Clinical Notes

Why soak nuts and seeds?

  • To neutralize enzyme inhibitors
  • To remove or reduce phytates
  • To encourage the production of beneficial enzymes
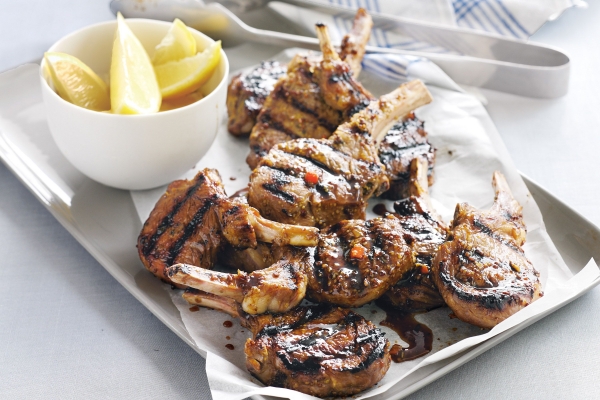
Grilled Meats: Lamb Cutlets

The GAPS Introduction Diet introduces roast meats and grilling in stage 4.  The first three stages of the GAPS Diet requires easy to digest foods and that is why the meats are soft and slow cooked in casseroles and soups.  When the digestion system shows signs of improvement, people following the GAPS Introduction Diet can […]

Print Recipe
Grilled Meats: Lamb Cutlets
This recipe is appropriate for the Introduction Diet from stage 4 onward
Votes: 0
Rating: 0
You:
Rate this recipe!
Prep Time 10 Minutes
Cook Time 10 Minutes
Servings
People
Ingredients
Meat
Vegetables
Meat Stock and Fats
Prep Time 10 Minutes
Cook Time 10 Minutes
Servings
People
Ingredients
Meat
Vegetables
Meat Stock and Fats
Votes: 0
Rating: 0
You:
Rate this recipe!
Instructions
  1. Grill your lamb cutlets on a pre-heated BBQ grill, fry pan or under the grill in the oven on medium to high.
  2. If cooking on a BBQ grill, cook the lamb for 3-4 minutes each side or until cooked to your liking. Cooking under the oven grill or fry pan may require different time frames so you will need to estimate a time for this based on how they cook on the inside. Try not to over cook them and test by cutting a small piece with a knife. A slight pink colour inside is perfect.
  3. Boil and cook remaining chosen vegetables in a pot with stock until well cooked.
  4. Drizzle olive oil (1-2 tablespoons) over your ready served vegetables.
  5. Serve with a cup of homemade meat stock and some lemon wedges on the side.
Recipe Notes

Clinical Notes

When digestion has improved over time, you can add chili or other garnished herbs to the cutlets for added flavour.

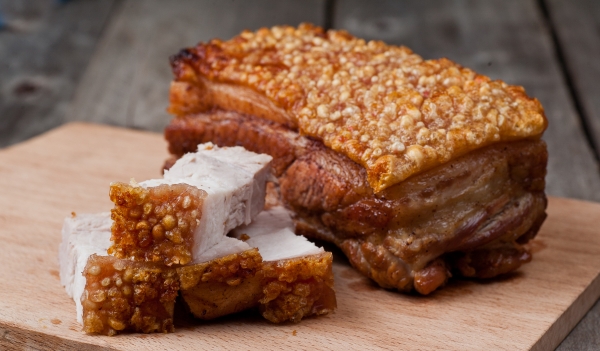
Roast Pork Belly

This meal is a delicious and nutritious favourite in our home.  It can be added in stage four when roasts and grilling is added to the GAPS Introduction Diet. It is very important for a GAPS person to have plenty of natural fats in every meal from meats, butter, ghee, coconut and cold pressed olive […]

Print Recipe
Rost Pork Belly
This recipe is appropriate for the GAPS Introduction Diet from stage 4 onward.
Votes: 0
Rating: 0
You:
Rate this recipe!
Prep Time 10 Minutes
Cook Time 60 Minutes
Passive Time 50 Minutes
Servings
People
Ingredients
Meat and Stock
Fats
Vegetables
Prep Time 10 Minutes
Cook Time 60 Minutes
Passive Time 50 Minutes
Servings
People
Ingredients
Meat and Stock
Fats
Vegetables
Votes: 0
Rating: 0
You:
Rate this recipe!
Instructions
  1. Pre heat oven to 180 – 200 degrees Celsius
  2. Place the pork belly in a baking dish with the rind fat (crackle top) side up.
  3. With your hands, rub lard all over the pork. This is where your hands get messy. Shake a generous amount of salt on the top pork rind and continue to rub and massage more lard and salt until the rind is well covered. Lightly give it one more sprinkle of salt on the top. The salt is what allows the rind to crackle.
  4. Place the pork in the oven at 200 degrees Celsius for 30 minutes to allow the rind to crackle and then turn it down to 180 degrees Celsius and cook for 2 - 2 and a half hours pending in size.
  5. Cut the onions in half and roast them with the punpkin along side the pork.
  6. Cook some other seasonal vegetables in some homemade meat stock for approximately 20 minutes before the pork is finished.
  7. Remove the baking tray with the pork and vegetables from the oven and set them aside on paper towel to soak up excess dripping.
  8. Drain any excess dripping from the baking tray into your dripping tray to store for later use in the fridge.
  9. To make a very tasty gravy leave one tablespoon of dripping, one onion half and one to two pieces of pumpkin remaining in the bottom of the pan that the pork was roasting in and mix with the flat of a fork to make a delicious gravy on the stove at a low heat (you can add pepper to taste).
  10. Strain the cooked vegetables and set aside the meat stock to serve as a hot beverage with your meal.
  11. Serve this delicious pork belly with roasted pumpkin and other seasonal vegetables. Stewed apple can also be eaten with this meal.

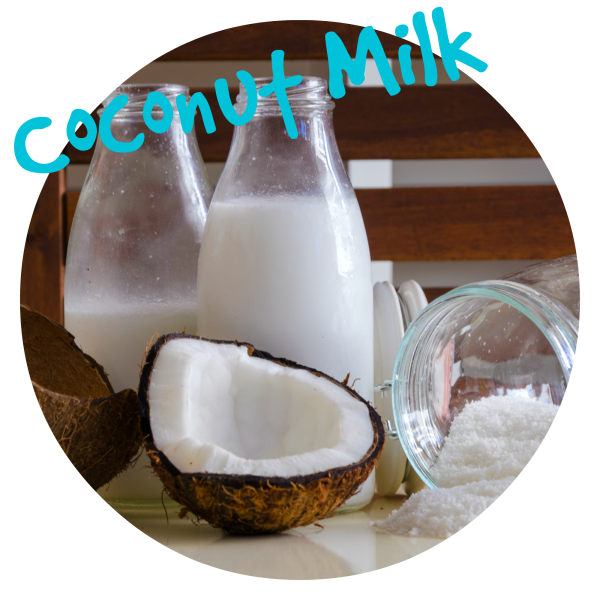
Coconut Milk

Here we have two coconut milk recipes for the GAPS Diet for people who cannot tolerate nut milks. Canned coconut milk often contains, preservatives and other additives that the GAPS Program does not allow for. BPA is also usually lined within the tin cans containing coconut milk as well. For these reasons, we encourage you […]

Print Recipe
Coconut Milk
This recipe is appropriate for the Introduction diet when nuts have been successfully introduced and tolerated from stage 4 onward.
Votes: 1
Rating: 5
You:
Rate this recipe!
Prep Time 20-40 mins
Servings
Cups
Ingredients
Raw Coconut Milk
  • 4-6 Young green coconuts Enough to produce 1-2 cups of fresh coconut meat and 1/4 - 1/2 cup of coconut water
Equipment for Raw Coconut Milk
Coconut Milk from Shredded Coconut
Prep Time 20-40 mins
Servings
Cups
Ingredients
Raw Coconut Milk
  • 4-6 Young green coconuts Enough to produce 1-2 cups of fresh coconut meat and 1/4 - 1/2 cup of coconut water
Equipment for Raw Coconut Milk
Coconut Milk from Shredded Coconut
Votes: 1
Rating: 5
You:
Rate this recipe!
Instructions
Raw Coconut Milk
  1. With a sterilised kitchen flat head screw driver, use a hammer to pierce three holes into the top of the young green coconut ensuring that it penetrates the nut inside.
  2. Line a strainer with a cheese cloth over the jug or bowl and pour the coconut water from the three holes into the jug and set aside
  3. When all the coconut water is drained, open the top of the coconut by slashing the top off with a strong knife or cleaver. This may take a few slashes on each side at the top of the coconut. There are many videos online that you can view to learn how to do this.
  4. When the top of the coconut is open, spoon out the coconut meat from the sides of the shell. Try to avoid collecting the brown husk and only set aside the white soft meaty flesh. The meat from a young coconut should be soft and moist. If you have lots of coconuts you can do this all at once and freeze the coconut meat for later use.
  5. Repeat the above 3 steps with all coconuts until you have two cups of coconut meat flesh.
  6. Place the coconut meat into a good strong blender, vitamix or thermo mixer and mix the ingredients for as long as it takes to reach a smooth thick consistency whilst gradually adding the coconut water for the desired thickness result. It is important to ensure that the coconut milk mixture is not grainy or lumpy if you wish to have the best yoghurt like resemblance to make yoghurt later.
  7. Contain in a glass bottle with a screw top lid and store in the fridge. Keeps for up to one week in the fridge or can be frozen.
Coconut Milk from Shredded Coconut
  1. Add 1 cup of shredded coconut to one cup of water in a saucepan and bring to the boil. Boiling the coconut will rehydrate the coconut and release the natural coconut fat making it thicker.
  2. Allow the mixture to cool for 15 – 20 minutes and then add the mixture to a good strong blender, vitamix or thermo mixer and mix the ingredients well for a few minutes or so.
  3. Line the top of a jug with a strainer and cheesecloth and pour the mixture through the cheesecloth.
  4. Lifting the edges of the cheesecloth and gathering the strained coconut flakes, twist the cloth and squeeze with your hands allowing all the coconut milk to drip through the strainer and into the jug.
  5. When all the milk has been squeezed and collected in the jug, contain in a glass bottle and store in the fridge. Keeps for up to one week in the fridge.

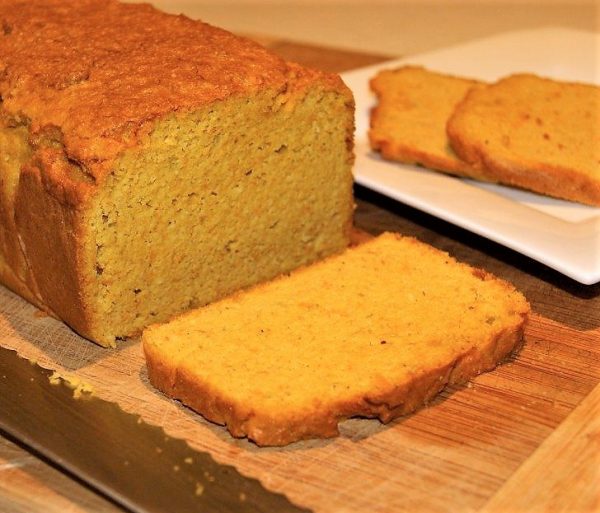
Almond Pumkin Bread

This recipe is acceptable for the GAPS Introduction Diet from stage Four onward. It is easy to make and well liked byGAPS children.  This recipe can be made using different nut or seed flours and you may wish to add different cooked vegetables to it. Suggestions Nice with some avocado or nut butter. You can […]

Print Recipe
Almond Pumkin Bread
This recipe is appropriate for the Introduction Diet from stage 4 onward
Votes: 0
Rating: 0
You:
Rate this recipe!
Prep Time 5-15 minutes
Cook Time 1 hour
Servings
loaf
Ingredients
Bread Mixture
Special equipment
Prep Time 5-15 minutes
Cook Time 1 hour
Servings
loaf
Ingredients
Bread Mixture
Special equipment
Votes: 0
Rating: 0
You:
Rate this recipe!
Instructions
  1. Preheat conventional oven at 150 degrees (almond flour burns easily so this recipe needs to be cooked slowly).
  2. Cook the pumpkin by boiling it or use previously roasted punpkin from a left over meal. I like to make extra pumkin with my meals for this purpose in mind.
  3. Mix all ingredients in a glass bowl with hand held mixer on low. (do not over mix – just enough to ensure all ingredients is mixed and combined well)
  4. Line your bread tin with oven paper and pour ingredients in. Place in oven and cook for one hour (ensureing not to burn the top).
  5. When removing the bread from the oven, be sure to take it out of the tin immediately to allow it to cool by lifting the loaf out with the paper sides. This will avoid a darker crust because burnt nut flour is bitter. Let it sit and cook on the cooling rack with the paper still surrounding it. When it has cooled you may wrap the loaf in the baking paper and and place in a pyrex dish with a sealed lid to store in the fridge.
Recipe Notes

Suggestions

Nice with some avocado or nut butter.  You can make thin slices and crisp them in a dehydrator which is great for homemade dips and  soup dunkers.  The bread is also great for dippity eggs.