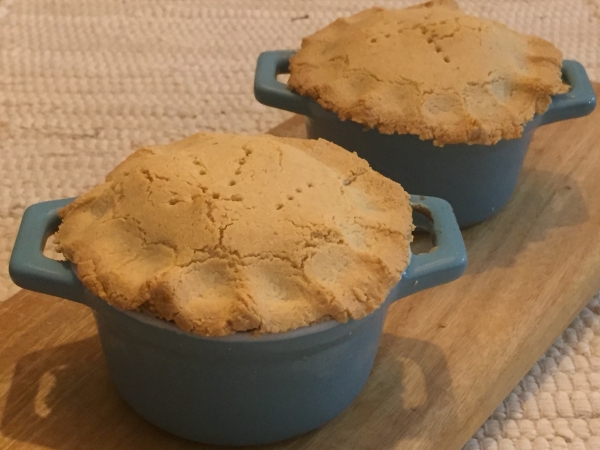
You will need 4 mini pie pots (size 4cm width opening from the top) This is a delicious meal on it’s own, served with a salad and fermented vegetables on the side. It is a great winter warmer for all the family. Print Recipe Chicken Vegetable Pie Votes: 0 Rating: 0 You: Rate this recipe! […]
Print Recipe
Chicken Vegetable Pie
Votes: 0
Rating: 0
You:
Rate this recipe!
|
|
Votes: 0
Rating: 0
You:
Rate this recipe!
|
Instructions
Pie Pasty Prep
Preheat the oven to 150 Degrees Celsius
Place all pie pastry ingredients into a bowl and kneed with your hands, massaging and squeezing the ingredients until it forms a tight ball. You can also get this effect very quickly if you place all ingredients in a thermomix for 20 seconds on speed 4.
Roll the dough flat so that it is approximately 1cm thick. Cut out sections of the dough to fill 4 mini pie pots (size 4cm width opening from the top) and press them into the bottom and side walls with your fingers. Make sure to leave enough dough to make the lids.
With the remaining pastry and cut offs, roll out the dough again and cut out 4 lids.
Place the bottoms of the pie crust pressed into the pie pots into the oven and cook for 15 - 20 minutes. Place the lids into the fridge for later.
Preparing the Filling
Bring to boil the chicken breast in two cups of chicken stock.
When chicken is cooked, remove the chicken and dice it up into small bite sized pieces for the pie.
In a separate fry pan, saute the onion and garlic.
Chop pumpkin and carrots to small bite sized pieces. Cut the heads from the broccolini and add them to the chicken stock in the pot along with the carrot and pumpkin pieces..
Also add the onion and garlic along with the chicken to the chicken stock.
Add all remaining chicken filling ingredients and bring to the boil and then reduce the heat to a simmer on a low heat for 45 minutes.
Putting it all together
When all ingredients are cooked and ready, remove from the stoce and prepare the pie bottoms for filling.
Evenly scoop the chicken pie filling into each pie pot crust filling.
take the pie crust filling lids from the fridge and place them over the top of each pot. Pinch the sides of the pastry to connect the base of the pie with the pie tops. alternatively you can use a fork to do this.
Spear the tops of the pie with a fork and place the pots on a tray in the oven. Cook for 20 minutes ( or until lightly golden brown) at 150 Degrees Celcius.
Remove and let cool for ten minutes before serving.


