Choc Cross Buns

Some people following GAPS in the early stages should avoid sweets all together as honey and cocoa powder can prove to be problematic for people with IBS or chronic diarrhoea. This recipe can be made when all signs of digestion have improved and the patient has been on the GAPS diet for approximately 12 months […]

Print Recipe
Choc cross buns
Votes: 0
Rating: 0
You:
Rate this recipe!
Servings
Ingredients
Equipment
Choc Bun Ingredients
Choc Bun Topping Ingredients
White Chocolate Cross Topping Ingredients
Servings
Ingredients
Equipment
Choc Bun Ingredients
Choc Bun Topping Ingredients
White Chocolate Cross Topping Ingredients
Votes: 0
Rating: 0
You:
Rate this recipe!
Instructions
Cake Mixture Instructions:
  1. Preheat oven at 150◦C
  2. Place pitted dates in a saucepan on the stove with a tablespoon of ghee and heat on a low temperature until they soften. (if you have a thermomix, you can do this for 5-7 minutes).
  3. Place softened date mixture in the blender (or thermomix) and blend dates into a paste. Add remaining ingredients and blend at a high speed until the mixture resembles a chocolate cake mixture. The mixture should hold a firm smooth consistency.
  4. Grease and prepare cupcake tins or use bleach free patty cake papers to pour the mixture into. Cook for 40 – 50 minutes at 150◦C
  5. Test the cake buns with a fork before you take it out of the oven and when ready, remove cakes from the oven and let the cakes cool on a cooling rack. When cooled, take them out of their wrappers or leave them in for character.
Topping Recipe Instructions
  1. Simmer some water on a low heat in a saucepan and place a glass bowl over the simmering water. Add the cacao butter to the glass bowl and melt the cacao butter completely. (CAUTION: Keep the heat at a low temperature so that the steam does not cause any water residue within the glass bowl and make sure all your utensils and materials do not have any water on them because any water contaminating the mixture will cause lumps and clumps and spoil the smooth chocolate result).
  2. Once melted, turn off the heat and add the cocao powder gradually whilst stirring continuously with a bone dry whisk until mixed well with no lumps. Add vanilla seeds, honey and vanilla essence and continue to whisk until smooth.
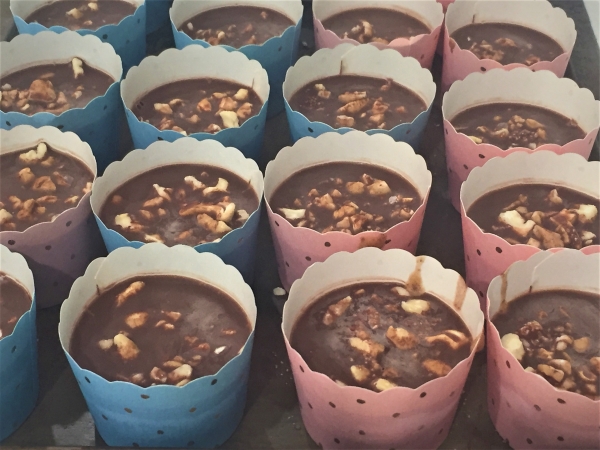
  3. When the mixture is lovely and smooth it is ready for the choc bun dipping. HINT: It is a good idea to have put the buns in the fridge for a while because the chocolate will harden on the top of the bun faster like ice magic. Simply dip the buns in the chocolate and place on a tray with baking paper and place in the fridge for 15 minutes. Any leftover chocolate can be poured into chocolate molds to make chocolate treats.
White Chocolate Cross Topping Instructions
  1. Simmer some water on a low heat in a saucepan and place a glass bowl over the simmering water. Add the cacao butter to the glass bowl and melt the cacao butter completely. (CAUTION: Keep the heat at a low temperature so that the steam does not cause any water residue within the glass bowl and make sure all your utensils and materials do not have any water on them because any water contaminating the mixture will cause lumps and clumps and spoil the smooth chocolate result).
  2. Once melted, turn off the heat and add the coconut flour and honey gradually whilst stirring continuously with a bone dry whisk until mixed well with no lumps. Add vanilla extract and continue to whisk vigorously whilst you gradually and slowly add the coconut oil.
  3. Use a syringe to dispense the cross on the buns and refrigerate for the cross to harden. Make sure to work quickly or keep mixing in between batches to ensure the oil does not start to separate in the mixture.
  4. Any left over white chocolate can be poured into chocolate molds to make chocolate treats.
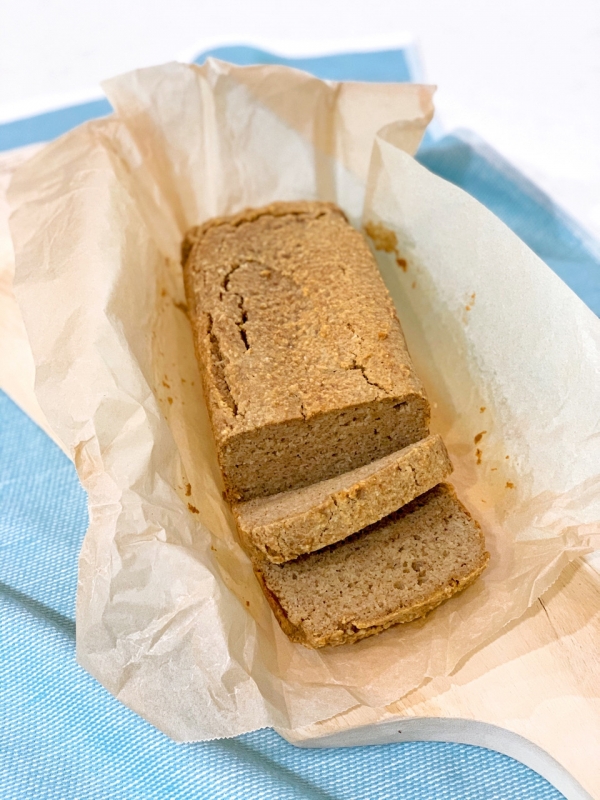
Banana Bread

Print Recipe Banana Bread Votes: 2 Rating: 4.5 You: Rate this recipe! Course Baking at home Cook Time 50-55 Minutes Servings MetricUS Imperial Ingredients 2 1/2 Cups Organic blanched almond flour1 TSP Pure Bicarbonate of Soda1 TBSP Yoghurt Optional5mL Lemon juice Freshly Squeezed2 Ripe Bananas Mashed2-3 TBSP Organic Raw Honey Optional – Bananas are sweet […]

Print Recipe
Banana Bread
Votes: 2
Rating: 4.5
You:
Rate this recipe!
Cook Time 50-55 Minutes
Servings
Ingredients
Cook Time 50-55 Minutes
Servings
Ingredients
Votes: 2
Rating: 4.5
You:
Rate this recipe!
Instructions
  1. Line bread tin with baking paper (bleach free baking paper) & preheat oven to 150⁰C.
  2. In a small bowl or jug, beat eggs, vanilla essence, honey and butter/ghee.
  3. In a large mixing bowl add almond flour, mashed bananas and egg mixture and blend until all ingredients are mixed well and bananas have blended into the mixture.
  4. Place the yoghurt on top of the mixture and then sprinkle the pure bicarbonate of soda on the yoghurt. Finally add the lemon juice on top of the bicarbonate of soda and blend with the mixer quickly. The bicarb needs a sour ingredient to activate or the bread won’t rise and the lemon juice and yoghurt will help with this.
  5. When combined, quickly pour it into the bread tin and place in the oven.
  6. Bake the bread on 150⁰C for 50 – 55 minutes and then remove from the oven. Remove the loaf from the tin by pulling it out with the sides of the baking paper and allow it to cool on a cooling tray.

Completely Raw Kingston’s

  Just like a Kingston only better!! This recipe is always a big pleaser to our visitors.  Not only is it wonderful for our GAPS tummies, our guests love it too!  Yes it looks and tastes just like a kingston Cookie with the exception of no added sugar and other ingredients we wish to avoid. […]

Print Recipe
Completely Raw Kingston's
*Tools needed: Dehydrator, thermomix (or steel blade blender/food processor)
Votes: 1
Rating: 5
You:
Rate this recipe!
Prep Time 30 Minutes
Passive Time 24 Hours
Servings
Ingredients
Prep Time 30 Minutes
Passive Time 24 Hours
Servings
Ingredients
Votes: 1
Rating: 5
You:
Rate this recipe!
Instructions
Preparation
  1. Boil water and pit dates
Choc Frosting
  1. Pit the dates and warm them in the oven at 150 degrees C for 5-10 minutes to soften them and make them easier to work with. Sometimes it is easier to double the ingredients so that the blades have more to work with and you can save the left overs for another recipe like a cake frosting and store it in the fridge. This frosting will keep for up to 6 weeks.
  2. Place all Choc Frosting ingredients in a high-speed blender or thermomix.
  3. Blend all ingredients in your high-speed blender. The ingredients can be a little finicky to blend, so start at a slow speed and increase speed slowly.
  4. With this step you need to be patient and keep blending on low to medium for a very long time to get a velvety consistency. You will see that this frosting creation is more of an art than a matter of combining ingredients. This is one of those recipes that really makes use of the power of a high-speed blender. If you feel that the blades are just spinning but aren't actually moving all of the frosting around, turn the blender off and make an air pocket down the side of the blender with a spatula to expose the blades. Remove the spatula, replace the lid, and start blending slowly again. You may need to do this several times and add tiny amounts of the water gradually and slowly to get the right consistency. You can achieve a very smooth result if the dates have been warmed gently in the oven for 5-10 minutes and continue to baby the blending process constantly running the spatula down the sides making sure all the ingredients are mixing and blending well. Be sure not to add too much water. You do not want to make the mixture runny, the ideal consistency is a thick paste like a nut butter.
  5. You'll know it's ready when you see no bits of dates in the mixture and all you can taste is velvety chocolate consistency.
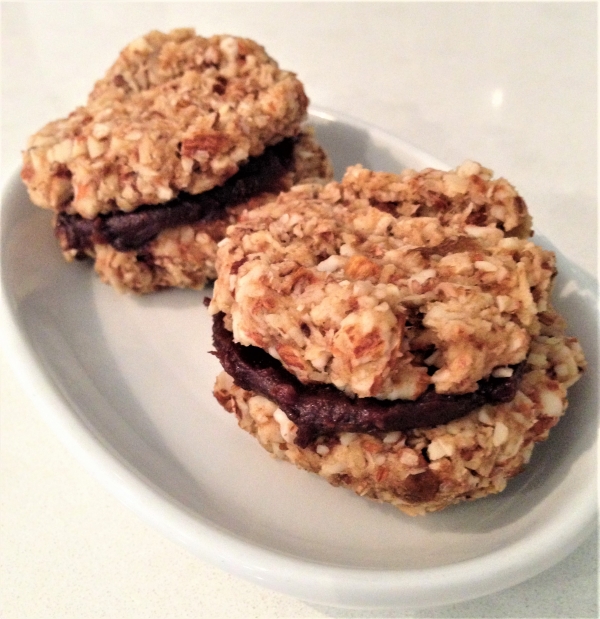
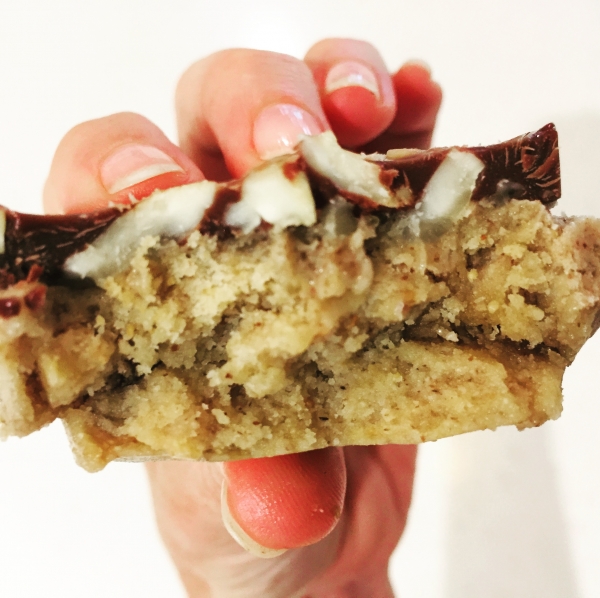
  6. This raw chocolate icing is ready to use as soon as you pour it out of the blender When the Cookies have cooled smear the chocolate frosting on the flat side of the cookie with a knife and press another cookie on top squeezing the chock frosting in the middle.  Store in an air tight container. Enjoy!

Fish Stock

Compared to the other stocks, fish stock is easier to make because there is no roasting or long cooking times required. The DHA and EPA make this stock more beneficial than other meat stock. These Omega-3 fatty acids are the most important nutrients for brain function. Fish stock will produce it’s own gelatin and other […]

Print Recipe
Fish Stock
*This fish stock recipe is appropriate for the GAPS Introduction Diet Stage One - onward Things you may need: Wide Mouthed Mason Stock Storage Jars, 6-8L Stainless Steel Cooking Pot, Stainless Steel colander, straining spoon and Cheesecloth.
Votes: 0
Rating: 0
You:
Rate this recipe!
Prep Time 30 Minutes
Cook Time 2-4 Hours
Passive Time 30 Minutes
Servings
3 litre pot
Ingredients
Basic Ingredients
Fish Meat and Bone
Prep Time 30 Minutes
Cook Time 2-4 Hours
Passive Time 30 Minutes
Servings
3 litre pot
Ingredients
Basic Ingredients
Fish Meat and Bone
Votes: 0
Rating: 0
You:
Rate this recipe!
Instructions
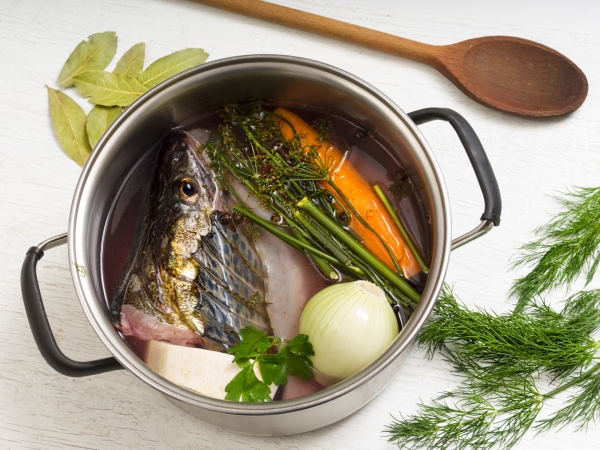
  1. Place the fish bones, heads and fins into a large pot and fill it up with 3 litres of filtered water.
  2. Add the onion and garlic to the pot, along with the bay leaf, black pepper corns and salt.
  3. Add the fennel, parsley and juice from the lemon.
  4. Add the apple cider vinegar and bring to a boil. Skim off any scum that rises to the top. Reduce the heat, cover and simmer for at least 2 - 4 hours.
  5. After cooking for the recommended time above, remove the bones and any meat by straining the stock ingredients through a sieve and discard all the vegetables and bones caught in the sieve.
  6. Strain the remaining stock with a cheesecloth to remove all remaining small bones, pepper corns and any vegetables that were added. Discard any tiny bones, fins, heads and vegetables added.
  7. Store the stock in wide mouthed freezer safe mason jars in the fridge or freezer. The meat stock will keep well in the fridge for at least 7 days or it can be frozen for several months.
Recipe Notes

For Best Storage

Storing your stock properly will be key!  In the fridge it lasts up to 7 days so it is best to purchase freezer safe storage containers to keep you stock on hand.  I recommend purchasing a dozen or more Wide Mouthed Freezer Safe Mason Jars. These will allow you to have stock on hand within minutes because the wide opening allows the stock to slide straight out after running the bottom of the jar under hot tap water for a few minutes to loosen it up.   This can be added directly to the cook pot for use.  If you freeze in other glass jars, the stock will not slide out and you will have to wait for it to defrost.  Other glass jars are not freezer safe and you can easily destroy an entire batch with glass cracking in the freezer or from the change in temperature when running them under hot water to loosen them.  These jars are supplied at our Online GAPS Shop

Fish Stock Selections & Preparation

Fish frames with fish heads intact, including skin and fins (no fish meat required).

The fish flesh contained in the heads of the fish will produce the necessary gelatin and essential minerals for this recipe.  If you use the whole fish including the fish flesh to make the stock, the fish will fall apart and begin to disintegrate into the stock, clouding the stock and making it messy.  The meat is better saved for an enjoyable meal separately.  And of course this is very resourceful, sustainable and satisfying to get use out of every part of the animal you’re eating.

If you are aiming to make a tasty fish stock, select bones from white fish such as bass, cod and flat fish. Bones from oily fish such as salmon, mackerel or tuna are very fatty (which is ideal for GAPS) but they can impart a greasy and unpleasant taste for people who are getting used to fish stock.  Having said this, fatty fish are preferred sources for the GAPS diet.

The fish bones must be cleaned of any blood and gills as these will impart a nasty, bitter taste and cloud up your stock. Fish heads add a lot of flavour and contain a lot of gelatine which will give body to your stock, but make sure they are thoroughly cleaned (and always remove the gills). A good way of cleaning the bones is to run them under a cold tap and leave them to soak in the water to allow impurities to float the surface (which you can then skim and discard).

Hints & Facts:

  • Add 1/4 a cup of apple cider vinegar to help draw out minerals from the bones and into the stock such as calcium potassium and magnesium. Some people may not be ready to add this during intro.
  • If you choose fatty fish like mackerel or salmon, make sure they are not farmed or preserved in any way.
  • Gelatin is the substance extracted by boiling bones, fins and heads.

Contrary to popular belief meat, fish and organ meats like liver and kidney have the highest contents of vitamins, amino acids nourishing fats, many minerals and other nutrients which we need in order to be adequately nourished.

Clinical Notes:

Low fibre is the aim initially (especially for people who have profuse watery diarhoea), however if you are more prone to constipation, you can add onion, celery and cabbage to the stock for more flavour.

https://shop.gapsaustralia.com.au/freezer-safe-mason-stock-storage-jar-475ml/

Pork Meat Stock

It is important to understand the difference between meat and bone broth. Meat stock and bone broth are two different things. Simply put, meat stock is made over a few hours with raw bones and meat, where as bone broth is made with old cooked bones and cooked over 12 – 24 hours or more. […]

Print Recipe
Pork Meat Stock
Remember, a rich meat stock is what we are seeking to make on the introduction stages, not bone broth until you graduate to the Full GAPS Diet Program. *This meat stock recipe is appropriate for the GAPS Introduction Diet Stage One - onward Things you may need: Wide Mouthed Mason Stock Storage Jars, 6-8L Stainless Steel Cooking Pot, Stainless Steel colander, straining spoon and Cheesecloth.
Votes: 2
Rating: 4
You:
Rate this recipe!
Prep Time 30 Minutes
Cook Time 3-6 Hours
Passive Time 30 Minutes
Servings
4 litre pot
Ingredients
Basic Ingredients
Pork Meat Joints: Your meat joint must contain bones with marrow, soft tissue and bones with meat still attached to it - Select at least 3-4 items from this group below
Prep Time 30 Minutes
Cook Time 3-6 Hours
Passive Time 30 Minutes
Servings
4 litre pot
Ingredients
Basic Ingredients
Pork Meat Joints: Your meat joint must contain bones with marrow, soft tissue and bones with meat still attached to it - Select at least 3-4 items from this group below
Votes: 2
Rating: 4
You:
Rate this recipe!
Instructions
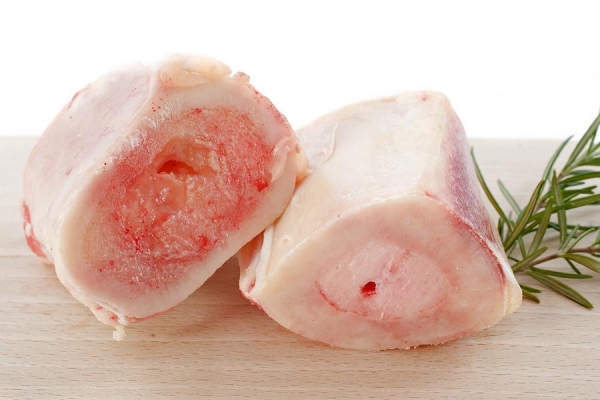
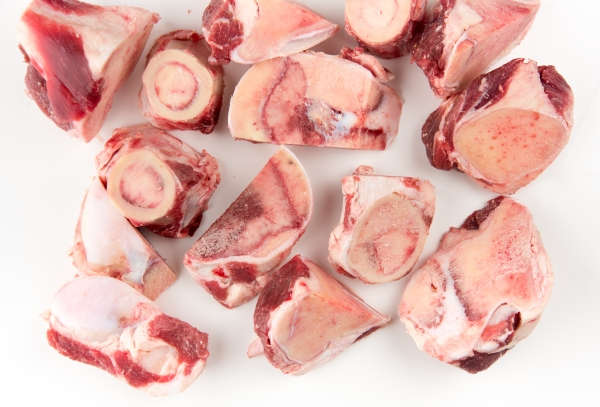
  1. Your selected meat joint must contain bones with marrow, soft tissue and bones with meat still attached to it. Ask your butcher to cut some large tubular marrow bones so that the marrow can be easily accessed like that shown in the image.
  2. Lightly brown the meat cuts in lard or ghee in a frypan or . This creates added flavour to the stock. Do not cook it, just lightly sear it with a sprinkle of salt to create flavour.
  3. Place the bones and meat joints into a large pot and fill it up with 4 litres of filtered water.
  4. Cut the onions into halves or quarters and add them to the pot along with roughly chopped carrots and crushed garlic cloves. If you are following the introduction diet stages, we recommend you avoid the fibrous vegetables such as celery at this time.
  5. Add salt to taste at the beginning of cooking and about a teaspoon of black peppercorns.
  6. Add apple cider vinegar and fresh oregano.
  7. Bring to a boil and skim and skim off any scum that rises to the top. Then reduce the heat and leave on the stove at a low simmer for about 3–6 hours. If you are cooking in the oven, cook at 150°C for 3 hours. If using crock pot, cook on high for 2 hours, then on low for 6 -8 hours. This is the measured cooking time frame to make your nutrient meat stock. Bone stock without the meat cuts are usually longer. The longer you cook the bone stock the more nutrients and the softer the bones become for fishing out marrow.
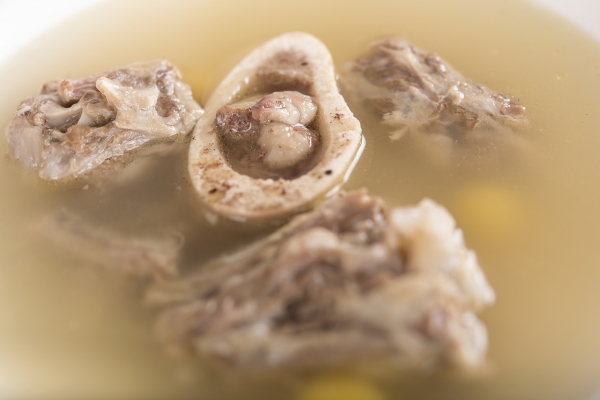
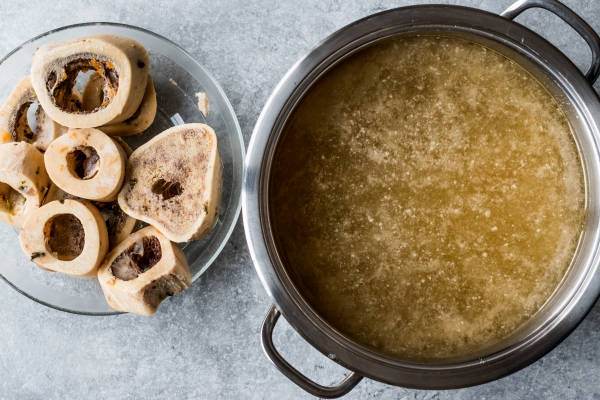
  8. After cooking for the recommended time above, remove the meat, marrow and bones by straining the stock ingredients through a sieve. You can do this by collecting the stock under the strainer into a larger pot. Strip off all the meat and soft tissues from the bones as best as you can and extract the bone marrow out of the large tubular bones while they are still warm: to do that bang the bone on a thick wooden chopping board. The gelatinous soft tissues around the bones and the bone marrow provide some of the best healing remedies for the gut lining and these should be put aside with the meat that has been stripped from the bones to add later to soups or as a meal. It is also ok for the patient to eat the marrow and soft tissue direct from the bones.
  9. Strain the remaining stock with a cheesecloth to remove all remaining small bones, pepper corns and any vegetables that were added. Discard any tiny bones and vegetables added. Store the stock in wide mouthed freezer safe mason jars in the fridge or freezer. The meat stock will keep well in the fridge for at least 7 days or it can be frozen. The bones can be frozen and later used again to make bone broth.
Recipe Notes

If you wish to make bone broth/stock later, you can keep the bones by storing them in the freezer and cook the ingredients for longer to extract more nutrients from the bones.  Refer to our Bone Broth Recipe to make this but remember not to introduce bone broth until you are on Full GAPS Diet or simply continue with the nutritious meat and gelatin stocks.

For Best Storage

Storing your stock properly will be key! In the fridge it lasts up to 7 days so it is best to purchase freezer safe storage containers to keep you stock on hand. I recommend purchasing a dozen or more Wide Mouthed Freezer Safe Mason Jars. These will allow you to have stock on hand within minutes because the wide opening allows the stock to slide straight out after running the bottom of the jar under hot tap water for a few minutes to loosen it up. This can be added directly to the cook pot for use. If you freeze in other glass jars, the stock will not slide out and you will have to wait for it to defrost. Other glass jars are not freezer safe and you can easily destroy an entire batch with glass cracking in the freezer or from the change in temperature when running them under hot water to loosen them. These jars are supplied at our Online GAPS Shop

Butcher supplies for meat stock

The ratio of ingredients is individual and dependant on the size of the batch you wish to make but keep in mind that some stock should be reserved for drinking and some for making your batch for soup.  The remainder of your ingredients will depend on what type of meat stock you are making.  Here is a list of bone selections you can ask for at your organic butcher shop.

Beef, Lamb, Pork or Game Selections

  • Large tubular marrow bones
  • Gelatinous meats
  • Meaty rib bones
  • Osso Buco cuts
  • Knuckle bones
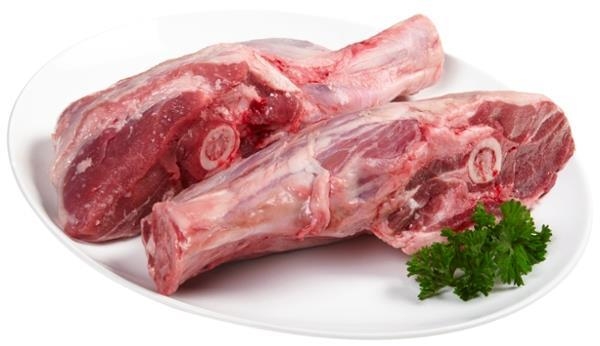
  • Shanks
  • Neck bones
  • Tail bones
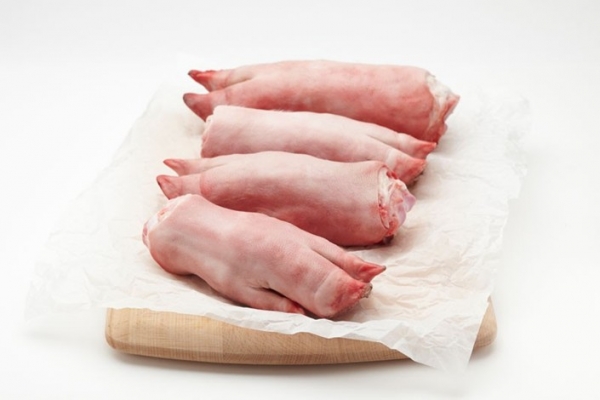
  • Trotters
  • Joints
  • Ears

Poultry Selections

  • Whole chicken & extra chicken frames
  • Feet from one chicken
  • Gizards & giblets
  • Spatchcock
  • Pheasants
  • Pigeon
  • Goose
  • Duck

Fish Selections

  • Fish frames with heads (no fish meat)
  • Skins
  • Fins

Hints & Facts:

  • Add 1/4 a cup of apple cider vinegar to help draw out minerals from the bones and into the stock such as calcium potassium and magnesium. Some people may not be ready to add this during intro.
  • Choose fatty fish like mackerel or salmon. But make sure they are not farmed or preserved in any way.
  • Gelatine as the substance extracted by boiling bones, hoofs, trotters and soft animal tissues from gelatinous meats.
  • The celery sticks should be avoided for patients in the introductions diet stages.  These can be added later on full gaps for added stock flavour.  They can be freshly cut as shown in the instructions or sauteed in a pan with onion and garlic prior to adding to the pot  for added flavour.

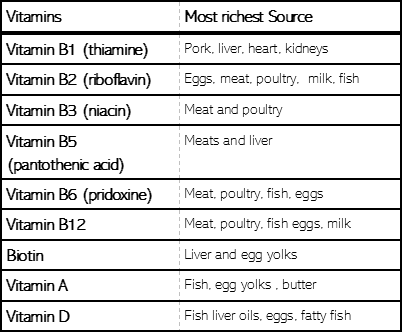
Contrary to popular belief meat, fish and organ meats like liver and kidney have the highest contents of vitamins, amino acids nourishing fats, many minerals and other nutrients which we need in order to be adequately nourished.

Charting the highest source of essential nutrients

Clinical Notes:

Low fibre is the aim initially (especially for people who have profuse watery diarhoea), however if you are more prone to constipation, you can add onion, celery and cabbage to the stock for more flavour.


Chicken Meat Stock

It is important to understand the difference between meat and bone broth. Meat stock and bone broth are two different things. Simply put, meat stock is made over a few hours with raw bones and meat, where as bone broth is made with old cooked bones and cooked over 12 – 24 hours or more. […]

Print Recipe
Chicken Meat Stock
Remember, a rich meat stock is what we are seeking to make on the introduction stages, not bone broth until you graduate to the Full GAPS Diet Program. *This meat stock recipe is appropriate for the GAPS Introduction Diet Stage One - onward. Things you may need: Wide Mouthed Mason Stock Storage Jars, 6-8L Stainless Steel Cooking Pot, Stainless Steel colander, straining spoon and Cheesecloth.
Votes: 1
Rating: 5
You:
Rate this recipe!
Prep Time 40 Minutes
Cook Time 1.5 -3 Hours
Passive Time 30 Minutes
Servings
4 litre pot
Ingredients
Basic ingredients
Chicken or other Poultry Stock
Prep Time 40 Minutes
Cook Time 1.5 -3 Hours
Passive Time 30 Minutes
Servings
4 litre pot
Ingredients
Basic ingredients
Chicken or other Poultry Stock
Votes: 1
Rating: 5
You:
Rate this recipe!
Instructions
  1. Place chicken frames, feet, gizzards and whole chicken into a large pot and fill it up with 4 Litres of filtered water, add natural unprocessed salt to your taste at the beginning of cooking and about a teaspoon of black peppercorns, roughly crushed (optional – pepper sometimes too hot for children). Apple cider vinegar can be added at this point if you are using it.
  2. Add fresh oregano and peppercorns.
  3. Bring to boil on the stove and skim and discard any floating scum on the top. Cover and simmer on a low heat for 1 ½ -3 hours. If you are using a crock pot, cook for 1 hour on high, then 6 hours on low.
  4. After cooking for the recommended time, remove the meat and bones by straining the stock ingredients through a sieve. You can do this by collecting the stock under the strainer into a larger pot or large pyrex jug. Strip off all the meat and soft tissues from the bones as best as you can and put aside. The gelatinous soft tissues around the bones and the bone marrow provide some of the best healing remedies for the gut lining and these should be put aside with the meat that has been stripped from the bones to add later to the soup. It is also good for the patient to eat the marrow and soft tissue direct from the bones as a meal.
  5. Strain the remaining stock with a cheesecloth to remove all remaining small bones, pepper corns and any vegetables that were added. Discard any tiny bones and vegetables added. Store the stock in wide mouthed freezer safe mason jars in the fridge or freezer. The meat stock will keep well in the fridge for at least 7 days or it can be frozen.
Recipe Notes

If you wish to make bone broth/stock later, you can keep the bones by storing them in the freezer and cook the ingredients for longer to extract more nutrients from the bones.  Refer to our Bone Broth Recipe to make this but remember not to introduce bone broth until you are on Full GAPS Diet or simply continue with the nutritious meat and gelatin stocks.

For Best Storage

Storing your stock properly will be key! In the fridge it lasts up to 7 days so it is best to purchase freezer safe storage containers to keep you stock on hand. I recommend purchasing a dozen or more Wide Mouthed Freezer Safe Mason Jars. These will allow you to have stock on hand within minutes because the wide opening allows the stock to slide straight out after running the bottom of the jar under hot tap water for a few minutes to loosen it up. This can be added directly to the cook pot for use. If you freeze in other glass jars, the stock will not slide out and you will have to wait for it to defrost. Other glass jars are not freezer safe and you can easily destroy an entire batch with glass cracking in the freezer or from the change in temperature when running them under hot water to loosen them. These jars are supplied at our Online GAPS Shop

Butcher supplies for meat stock

The ratio of ingredients is individual and dependant on the size of the batch you wish to make but keep in mind that some stock should be reserved for drinking and some for making your batch for soup.  The remainder of your ingredients will depend on what type of meat stock you are making.  Here is a list of bone selections you can ask for at your organic butcher shop.

Beef, Lamb, Pork or Game Selections

  • Large tubular marrow bones
  • Gelatinous meats
  • Meaty rib bones
  • Osso Buco cuts
  • Knuckle bones
  • Shanks
  • Neck bones
  • Tail bones
  • Trotters
  • Joints
  • Ears

Poultry Selections

  • Whole chicken & extra chicken frames
  • Feet from one chicken
  • Gizards & giblets
  • Spatchcock
  • Pheasants
  • Pigeon
  • Goose
  • Duck

Fish Selections

  • Fish frames with heads (no fish meat)
  • Skins
  • Fins

Hints & Facts for fish stock:

  • Add 1/4 a cup of apple cider vinegar to help draw out minerals from the bones and into the stock such as calcium potassium and magnesium. Some people may not be ready to add this during the introduction diet stages.
  • Choose fatty fish like mackerel or salmon. But make sure they are not farmed or preserved in any way.
  • Gelatine as the substance extracted by boiling bones, hoofs, trotters and soft animal tissues from gelatinous meats.
  • The celery sticks should be avoided for patients in the introductions diet stages.  These can be added later on full gaps for added stock flavour.  They can be freshly cut as shown in the instructions or sauteed in a pan with onion and garlic prior to adding to the pot  for added flavour.

Contrary to popular belief meat, fish and organ meats like liver and kidney have the highest contents of vitamins, amino acids nourishing fats, many minerals and other nutrients which we need in order to be adequately nourished.

Charting the highest source of essential nutrients

Clinical Notes:

Low fibre is the aim initially (especially for people who have profuse watery diarhoea), however if you are more prone to constipation, you can add onion, celery and cabbage to the stock for more flavour.


Lamb Meat Stock

It is important to understand the difference between meat and bone broth. Meat stock and bone broth are two different things. Simply put, meat stock is made over a few hours with raw bones and meat, where as bone broth is made with old cooked bones and cooked over 12 – 24 hours or more. […]

Print Recipe
Lamb Meat Stock
Remember, a rich meat stock is what we are seeking to make on the introduction stages, not bone broth until you graduate to the Full GAPS Diet Program. *This meat stock recipe is appropriate for the GAPS Introduction Diet Stage One - onward. Things you may need: Wide Mouthed Mason Stock Storage Jars, 6-8L Stainless Steel Cooking Pot, Stainless Steel colander, straining spoon and Cheesecloth.
Votes: 0
Rating: 0
You:
Rate this recipe!
Prep Time 30 Minutes
Cook Time 3-6 Hours
Passive Time 30 Minutes
Servings
4 litre pot
Ingredients
Basic Ingredients
Lamb Meat Joints: Your meat joint must contain bones with marrow, soft tissue and bones with meat still attached to it - Select at least 3-4 items from this group below
Prep Time 30 Minutes
Cook Time 3-6 Hours
Passive Time 30 Minutes
Servings
4 litre pot
Ingredients
Basic Ingredients
Lamb Meat Joints: Your meat joint must contain bones with marrow, soft tissue and bones with meat still attached to it - Select at least 3-4 items from this group below
Votes: 0
Rating: 0
You:
Rate this recipe!
Instructions
  1. Your selected meat joint must contain bones with marrow, soft tissue and bones with meat still attached to it. Ask your butcher to cut some large tubular marrow bones so that the marrow can be easily accessed like that shown in the image.
  2. Lightly brown the meat cuts in tallow or ghee in a frypan or . This creates added flavour to the stock. Do not cook it, just lightly sear it with a sprinkle of salt to create flavour.
  3. Place the bones and meat joints into a large pot and fill it up with 4 litres of filtered water.
  4. Cut the onions into halves or quarters and add them to the pot along with roughly chopped carrots and crushed garlic cloves. If you are following the introduction diet stages, we recommend you avoid the fibrous vegetables such as celery at this time.
  5. Add salt to taste at the beginning of cooking and about a teaspoon of black peppercorns.
  6. Add apple cider vinegar and fresh oregano.
  7. Bring to a boil and skim off any scum that rises to the top. Then reduce the heat and leave on the stove at a low simmer for about 3–6 hours. If you are cooking in the oven, cook at 150°C for 3 hours. If using crock pot, cook on high for 2 hours, then on low for 6 hours. This is the measured cooking time frame to make your nutrient meat stock. Bone stock without the meat cuts are usually longer. The longer you cook the bone stock the more nutrients and the softer the bones become for fishing out marrow.
  8. After cooking for the recommended time above, remove the meat, marrow and bones by straining the stock ingredients through a sieve. You can do this by collecting the stock under the strainer into a larger pot. Strip off all the meat and soft tissues from the bones as best as you can and extract the bone marrow out of the large tubular bones while they are still warm: to do that bang the bone on a thick wooden chopping board. The gelatinous soft tissues around the bones and the bone marrow provide some of the best healing remedies for the gut lining and these should be put aside with the meat that has been stripped from the bones to add later to soups or as a meal. It is also ok for the patient to eat the marrow and soft tissue direct from the bones.
  9. Strain the remaining stock with a cheesecloth to remove all remaining small bones, pepper corns and any vegetables that were added. Discard any tiny bones and vegetables added. Store the stock in wide mouthed freezer safe mason jars in the fridge or freezer. The meat stock will keep well in the fridge for at least 7 days or it can be frozen. The bones can be frozen and later used again to make bone broth.
Recipe Notes

If you wish to make bone broth/stock later, you can keep the bones by storing them in the freezer and cook the ingredients for longer to extract more nutrients from the bones.  Refer to our Bone Broth Recipe to make this but remember not to introduce bone broth until you are on Full GAPS Diet or simply continue with the nutritious meat and gelatin stocks.

For Best Storage

Storing your stock properly will be key! In the fridge it lasts up to 7 days so it is best to purchase freezer safe storage containers to keep you stock on hand. I recommend purchasing a dozen or more Wide Mouthed Freezer Safe Mason Jars. These will allow you to have stock on hand within minutes because the wide opening allows the stock to slide straight out after running the bottom of the jar under hot tap water for a few minutes to loosen it up. This can be added directly to the cook pot for use. If you freeze in other glass jars, the stock will not slide out and you will have to wait for it to defrost. Other glass jars are not freezer safe and you can easily destroy an entire batch with glass cracking in the freezer or from the change in temperature when running them under hot water to loosen them. These jars are supplied at our Online GAPS Shop

Butcher supplies for meat stock

The ratio of ingredients is individual and dependant on the size of the batch you wish to make but keep in mind that some stock should be reserved for drinking and some for making your batch for soup.  The remainder of your ingredients will depend on what type of meat stock you are making.  Here is a list of bone selections you can ask for at your organic butcher shop.

Beef, Lamb, Pork or Game Selections

  • Large tubular marrow bones
  • Gelatinous meats
  • Meaty rib bones
  • Osso Buco cuts
  • Knuckle bones
  • Shanks
  • Neck bones
  • Tail bones
  • Trotters
  • Joints
  • Ears

Poultry Selections

  • Whole chicken & extra chicken frames
  • Feet from one chicken
  • Gizards & giblets
  • Spatchcock
  • Pheasants
  • Pigeon
  • Goose
  • Duck

Fish Selections

  • Fish frames with heads (no fish meat)
  • Skins
  • Fins

Hints & Facts:

  • Add 1/4 a cup of apple cider vinegar to help draw out minerals from the bones and into the stock such as calcium potassium and magnesium. Some people may not be ready to add this during intro.
  • Choose fatty fish like mackerel or salmon. But make sure they are not farmed or preserved in any way.
  • Gelatine as the substance extracted by boiling bones, hoofs, trotters and soft animal tissues from gelatinous meats.
  • The celery sticks should be avoided for patients in the introductions diet stages.  These can be added later on full gaps for added stock flavour.  They can be freshly cut as shown in the instructions or sauteed in a pan with onion and garlic prior to adding to the pot  for added flavour.

Contrary to popular belief meat, fish and organ meats like liver and kidney have the highest contents of vitamins, amino acids nourishing fats, many minerals and other nutrients which we need in order to be adequately nourished.

Charting the highest source of essential nutrients

Clinical Notes:

Low fibre is the aim initially (especially for people who have profuse watery diarhoea), however if you are more prone to constipation, you can add onion, celery and cabbage to the stock for more flavour.


Beef Meat Stock

It is important to understand the difference between meat and bone broth. Meat stock and bone broth are two different things. Simply put, meat stock is made over a few hours with raw bones and meat, where as bone broth is made with old cooked bones and cooked over 12 – 24 hours or more. […]

Print Recipe
Beef Meat Stock
Remember, a rich meat stock is what we are seeking to make on the introduction stages, not bone broth until you graduate to the Full GAPS Diet Program. *This meat stock recipe is appropriate for the GAPS Introduction Diet Stage One - onward. Things you may need: Wide Mouthed Mason Stock Storage Jars, 6-8L Stainless Steel Cooking Pot, Stainless Steel colander, straining spoon and Cheesecloth.
Votes: 0
Rating: 0
You:
Rate this recipe!
Prep Time 30 Minutes
Cook Time 3-6 Hours
Passive Time 30 Minutes
Servings
4 litre pot
Ingredients
Basic Ingredients
Beef Meat Joints: Your meat joint must contain bones with marrow, soft tissue and bones with meat still attached to it - Select at least 4-5 items from this group below
Prep Time 30 Minutes
Cook Time 3-6 Hours
Passive Time 30 Minutes
Servings
4 litre pot
Ingredients
Basic Ingredients
Beef Meat Joints: Your meat joint must contain bones with marrow, soft tissue and bones with meat still attached to it - Select at least 4-5 items from this group below
Votes: 0
Rating: 0
You:
Rate this recipe!
Instructions
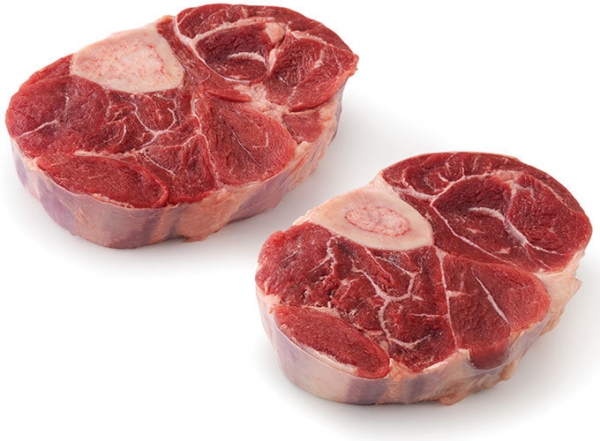
  1. Your selected meat joint must contain bones with marrow, soft tissue and bones with meat still attached to it. Osso Bucco cuts as shown in the image are perfect for this, along with the other meaty bones and joints listed in the recipe. Lightly brown the meat cuts in tallow or ghee in a frypan or . This creates added flavour to the stock. Do not cook it, just lightly sear it with a sprinkle of salt to create flavour.
  2. Place the bones and meat joints into a large pot and fill it up with 4 litres of filtered water.
  3. Cut the onions into halves or quarters and add them to the pot along with roughly chopped carrots and crushed garlic cloves. If you are following the introduction diet stages, we recommend you avoid the fibrous vegetables such as celery at this time.
  4. Add salt to taste at the beginning of cooking and about a teaspoon of black peppercorns.
  5. Add apple cider vinegar and fresh oregano.
  6. Bring to a boil and skim off any scum that rises to the top. Then reduce the heat and leave on the stove at a low simmer for about 3–6 hours. If you are cooking in the oven, cook at 150°C for 3 hours. If using crock pot, cook on high for 2 hours, then on low for 8–10 hours. This is the measured cooking time frame to make your nutrient meat stock. Bone stock without the meat cuts are usually longer. The longer you cook the bone stock the more nutrients and the softer the bones become for fishing out marrow.
  7. After cooking for the recommended time above, remove the meat, marrow and bones by straining the stock ingredients through a sieve. You can do this by collecting the stock under the strainer into a larger pot. Strip off all the meat and soft tissues from the bones as best as you can and extract the bone marrow out of the large tubular bones while they are still warm: to do that bang the bone on a thick wooden chopping board. The gelatinous soft tissues around the bones and the bone marrow provide some of the best healing remedies for the gut lining and these should be put aside with the meat that has been stripped from the bones to add later to soups or as a meal. It is also ok for the patient to eat the marrow and soft tissue direct from the bones.
  8. Strain the remaining stock with a cheesecloth to remove all remaining small bones, pepper corns and any vegetables that were added. Discard any tiny bones and vegetables added. Store the stock in wide mouthed freezer safe mason jars in the fridge or freezer. The meat stock will keep well in the fridge for at least 7 days or it can be frozen. The bones can be frozen and later used again to make bone broth.
Recipe Notes

If you wish to make bone broth/stock later, you can keep the bones by storing them in the freezer and cook the ingredients for longer to extract more nutrients from the bones.  Refer to our Bone Broth Recipe to make this but remember not to introduce bone broth until you are on Full GAPS Diet or simply continue with the nutritious meat and gelatin stocks.

For Best Storage

Storing your stock properly will be key! In the fridge it lasts up to 7 days so it is best to purchase freezer safe storage containers to keep you stock on hand. I recommend purchasing a dozen or more Wide Mouthed Freezer Safe Mason Jars. These will allow you to have stock on hand within minutes because the wide opening allows the stock to slide straight out after running the bottom of the jar under hot tap water for a few minutes to loosen it up. This can be added directly to the cook pot for use. If you freeze in other glass jars, the stock will not slide out and you will have to wait for it to defrost. Other glass jars are not freezer safe and you can easily destroy an entire batch with glass cracking in the freezer or from the change in temperature when running them under hot water to loosen them. These jars are supplied at our Online GAPS Shop

Butcher supplies for meat stock

The ratio of ingredients is individual and dependant on the size of the batch you wish to make but keep in mind that some stock should be reserved for drinking and some for making your batch for soup.  The remainder of your ingredients will depend on what type of meat stock you are making.  Here is a list of bone selections you can ask for at your organic butcher shop.

Beef, Lamb, Pork or Game Selections

  • Large tubular marrow bones
  • Gelatinous meats
  • Meaty rib bones
  • Osso Buco cuts
  • Knuckle bones
  • Shanks
  • Neck bones
  • Tail bones
  • Trotters
  • Joints
  • Ears

Poultry Selections

  • Whole chicken & extra chicken frames
  • Feet from one chicken
  • Gizards & giblets
  • Spatchcock
  • Pheasants
  • Pigeon
  • Goose
  • Duck

Fish Selections

  • Fish frames with heads (no fish meat)
  • Skins
  • Fins

Hints & Facts:

  • Add 1/4 a cup of apple cider vinegar to help draw out minerals from the bones and into the stock such as calcium potassium and magnesium. Some people may not be ready to add this during intro.
  • Choose fatty fish like mackerel or salmon. But make sure they are not farmed or preserved in any way.
  • Gelatine as the substance extracted by boiling bones, hoofs, trotters and soft animal tissues from gelatinous meats.
  • The celery sticks should be avoided for patients in the introductions diet stages.  These can be added later on full gaps for added stock flavour.  They can be freshly cut as shown in the instructions or sauteed in a pan with onion and garlic prior to adding to the pot  for added flavour.

Contrary to popular belief meat, fish and organ meats like liver and kidney have the highest contents of vitamins, amino acids nourishing fats, many minerals and other nutrients which we need in order to be adequately nourished.

Charting the highest source of essential nutrients

Clinical Notes:

Low fibre is the aim initially (especially for people who have profuse watery diarhoea), however if you are more prone to constipation, you can add onion, celery and cabbage to the stock for more flavour.


Cookies & Caramel Cream

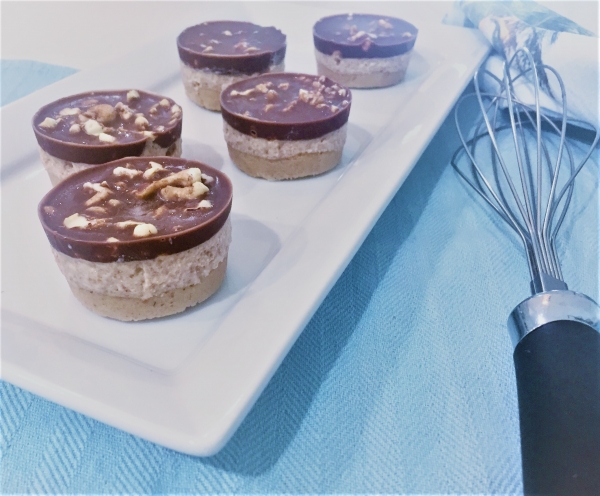
Caramel Cream Barrels of pure joy.  Love at first Bite!!!  This little treat creates a burst of flavour to enjoy with the sound of a crack with the first bite followed by pure enjoyment.  Ok, I am in love with this little creation and hope you are too.  Enjoy.     Print Recipe Cookies & […]

Print Recipe
Cookies & Caramel Cream
This recipe is appropriate for people who are following the Full GAPS Diet.
Votes: 0
Rating: 0
You:
Rate this recipe!
Prep Time 1 Hour
Passive Time 4 - 6 Hours
Servings
Cups
Ingredients
Caramel Cream Filling
Nut Sprinkles
Prep Time 1 Hour
Passive Time 4 - 6 Hours
Servings
Cups
Ingredients
Caramel Cream Filling
Nut Sprinkles
Votes: 0
Rating: 0
You:
Rate this recipe!
Instructions
Biscuit Bottom
  1. Pre-heat oven to 150 degrees Celsius for 10 minutes (no hotter)
  2. Mix all ingredients in a bowl with a spoon, followed by massaging all the contents and squeezing the ingredients in your hands where you can feel the mixture starting to stick together and form shape. Depending on the consistency of the mixture, add more nut butter or coconut oil if it is too dry or more nut flour if it is too moist. You want to create a cookie dough so keep mixing and squeezing the contents with your hands so that the mixture can form a big ball ready for making smaller balls.
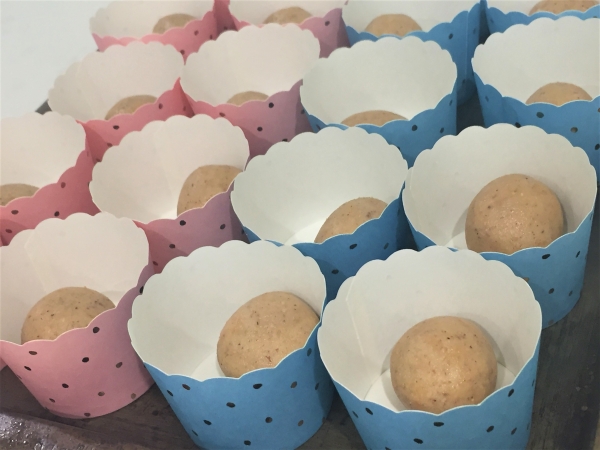
  3. When you have rolled the cookie mixture into a ball on the bench top, pinch a section of the dough and roll the section into a ball approximately 4cm in width. Continue this until you have 24 balls ready.
  4. Place each ball into mini round cardboard baking cups. These will be used as the mold for the entire cheesecake and they should be 5cm wide measured from the bottom.
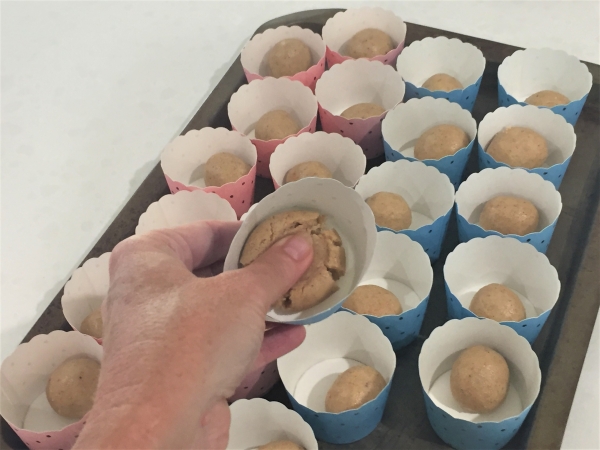
  5. Press the first layer with your thumb by pushing the ball down flat to make a base in the bottom of the cup ensureing it reaches all the sides with good coverage.
  6. Place the baking cups onto a baking tray and place the tray in the preheated oven at no more than 150 degrees Celsius for 10 minutes, keeping a close eye on them to ensure they do not burn. Almond flour burns easily so do not cook any higher than 150 degrees Celsius.
  7. Remove the tray from the oven after 10 minutes and let the cookies cool for 5 minutes and then place them in the fridge for 15 minutes to cool whilst you prepare the next layer.
Caramel Cream Filling
  1. After soaking the Midjool dates for 20 minutes, add them to the thermomix or food processor with the remaining caramel Cream filling ingredients except for the gelatin powder and water.
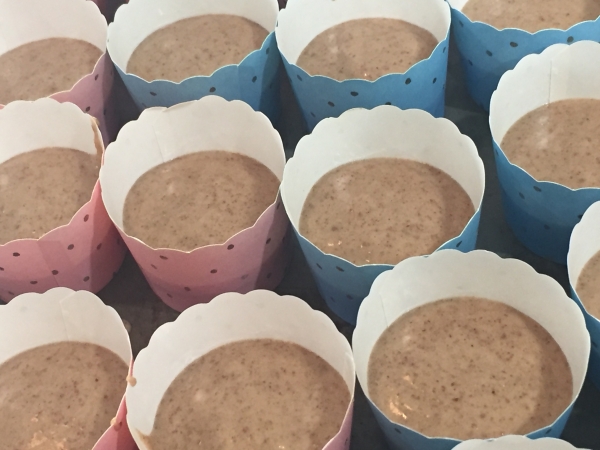
  2. Mix on a medium to high speed to combine all the ingredients to make a smooth sauce like consistency whilst occasionally stopping to wipe down the sides with the spatula to ensure all the ingredients are blended together evenly.
  3. Place the gelatin powder in a small bowl or cup and add the warm water stiring well to make a consistency similar to apple sauce. Add this to the mixture in the thermomix and blend well.
  4. Remove the baking cups from the fridge and add a spoonful of the mixture until all the ingredients is evenly dispersed in each cup.
  5. With the back of a teaspoon, level out the cream centre so that it is reasonably flat and place the cups in the freezer for 15-20 minutes.
Nut Sprinkles
  1. Place the nuts in the thermomix or blender to chop into the size you prefer to add as a nut sprinkle layer. I like to make ours a little bit chunky. You can also chop them if you wrap them inside a tea towel and bang them with a wooden rolling pin.
  2. Sprinkle the nut mix evenly over the top of the coconut cream filling until distributed evenly in all 24 cups.
Chocolate Top
  1. Simmer some water on a low heat in a saucepan and place a glass bowl over the simmering water. I like to use a pyrex jug (size measures 4 cups) for this as it works nicely to pour the ingredients later.
  2. Add the cacao butter to the glass bowl and melt the cacao butter completely. (CAUTION: Keep the heat at a low temperature so that the steam does not cause any water residue within the glass bowl and make sure all your utensils and materials do not have any water on them because any water contaminating the mixture will cause lumps and clumps and spoil the smooth chocolate result).
  3. Once melted, turn off the heat and add the cocao powder gradually whilst stirring continuously with a bone dry whisk until mixed well with no lumps. Add honey and vanilla essence and continue to whisk. Let the chocoloate topping cool for 5 minutes.
  4. Pour chocolate mixture over the top and remember to allow some of the nuts to be exposed at the tops. This gives it character and encourages you not to over fill the top layer. Aim not to make the top layer too thick or it will make it difficult to bite into.
  5. Refrigerate for 4 - 6 hour to fully set.
  6. When all ingredients have set, you can tear the cardboard paper cups and slowly remove the cheesecake medallions from the cup casing to expose them for serving. I recommend you keep them in the baking cups until you are ready to serve or eat.

Bacon and Egg Pies

This recipe is great for both school or work lunch ideas.  They are supper easy to make and can be frozen for a later time. They do not last very long in our home and rarely get to the freezer unless I hide them. Selecting the right bacon is important: GAPS does not recommend smoked […]

Print Recipe
Bacon and Egg Pies
This recipe is appropriate for people following the Full GAPS Diet (not intro)
Votes: 1
Rating: 5
You:
Rate this recipe!
Prep Time 10 Minutes
Cook Time 30 Minutes
Servings
Pies
Ingredients
Prep Time 10 Minutes
Cook Time 30 Minutes
Servings
Pies
Ingredients
Votes: 1
Rating: 5
You:
Rate this recipe!
Instructions
  1. Preheat the oven to 175 Degrees Celcius
  2. Dice both the onion and bacon.
  3. Saute the onion and bacon in a fry pan with ghee and set aside.
  4. In a glass bowl, add the eggs and whisk the eggs until well mixed.
  5. Dice shallots and grate the cheddar cheese.
  6. Add the shallots, almond flour, salt and cheddar cheese.
  7. When the bacon and onion has cooled a little, add them to the mixture and mix all ingredients well.
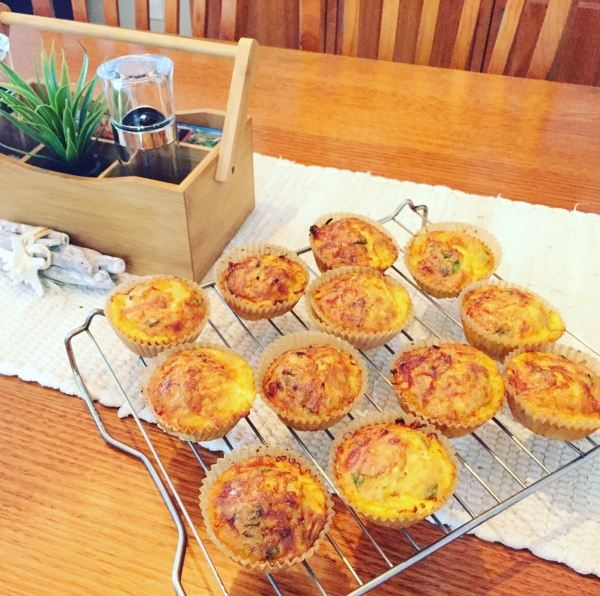
  8. Line a muffin tray with regular 12 sized bleach free muffin cups and spoon the ingredients into all the cups evenly.
  9. Cook in the oven at 175 Degrees Celsius for 30 minutes or until browned on the top.
  10. After 30 minutes, remove from the oven and place on a cooling tray. When cooled, store in an airtight container in the fridge or freeze for later. These defrost easily overnight in the fridge.

Roast Pork Belly

This meal is a delicious and nutritious favourite in our home.  It can be added in stage four when roasts and grilling is added to the GAPS Introduction Diet. It is very important for a GAPS person to have plenty of natural fats in every meal from meats, butter, ghee, coconut and cold pressed olive […]

Print Recipe
Rost Pork Belly
This recipe is appropriate for the GAPS Introduction Diet from stage 4 onward.
Votes: 0
Rating: 0
You:
Rate this recipe!
Prep Time 10 Minutes
Cook Time 60 Minutes
Passive Time 50 Minutes
Servings
People
Ingredients
Meat and Stock
Fats
Vegetables
Prep Time 10 Minutes
Cook Time 60 Minutes
Passive Time 50 Minutes
Servings
People
Ingredients
Meat and Stock
Fats
Vegetables
Votes: 0
Rating: 0
You:
Rate this recipe!
Instructions
  1. Pre heat oven to 180 – 200 degrees Celsius
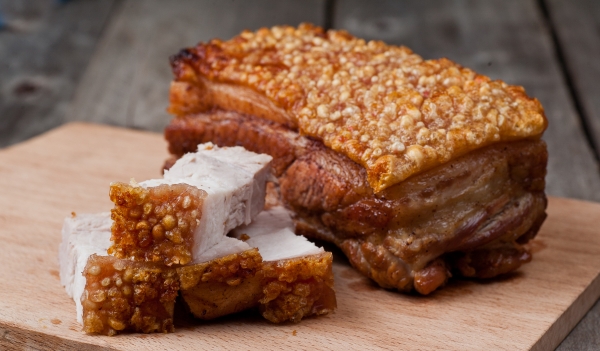
  2. Place the pork belly in a baking dish with the rind fat (crackle top) side up.
  3. With your hands, rub lard all over the pork. This is where your hands get messy. Shake a generous amount of salt on the top pork rind and continue to rub and massage more lard and salt until the rind is well covered. Lightly give it one more sprinkle of salt on the top. The salt is what allows the rind to crackle.
  4. Place the pork in the oven at 200 degrees Celsius for 30 minutes to allow the rind to crackle and then turn it down to 180 degrees Celsius and cook for 2 - 2 and a half hours pending in size.
  5. Cut the onions in half and roast them with the punpkin along side the pork.
  6. Cook some other seasonal vegetables in some homemade meat stock for approximately 20 minutes before the pork is finished.
  7. Remove the baking tray with the pork and vegetables from the oven and set them aside on paper towel to soak up excess dripping.
  8. Drain any excess dripping from the baking tray into your dripping tray to store for later use in the fridge.
  9. To make a very tasty gravy leave one tablespoon of dripping, one onion half and one to two pieces of pumpkin remaining in the bottom of the pan that the pork was roasting in and mix with the flat of a fork to make a delicious gravy on the stove at a low heat (you can add pepper to taste).
  10. Strain the cooked vegetables and set aside the meat stock to serve as a hot beverage with your meal.
  11. Serve this delicious pork belly with roasted pumpkin and other seasonal vegetables. Stewed apple can also be eaten with this meal.

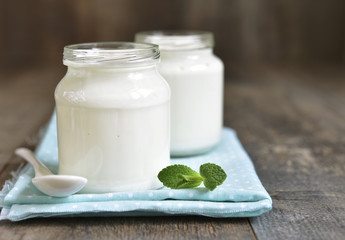
Coconut Milk Yoghurt

This recipe is a good alternative for people following the GAPS Diet who are unable to tolerate dairy or who have an anaphylaxis reaction which is a true allergy. Dr Natasha Campbell-McBride does not encourage individuals to avoid GAPS fermented dairy unless there is a true food allergy, and this can be determined by doing […]

Print Recipe
Coconut Milk Yoghurt
Making your own coconut yoghurt is simple and cost effective. You can choose how probiotic you want your yoghurt to be by extending the fermentation length time and by what culture source you use. We recommend you select a starter culture with a good selection of beneficial probiotic strains. You can even use kefir grains to make kefir instead of yoghurt with this recipe. GAPS Diet Australia have a good selection in their shop, however if you have a good strong multi strain probiotic of your own, you may also use that for your starter.
Votes: 1
Rating: 5
You:
Rate this recipe!
Prep Time 30 minutes
Cook Time 7-9 hours
Servings
Litre
Ingredients
Mixture Ingredients
  • 1 Litre Full fat coconut milk (see our coconut milk recipe) Avoid BPA cans & petra-paks containing added water
  • Yoghurt starter culture OPTIONS • Dairy free cultured yoghurt starter powder (measure as per product instructions) OR • Two Dairy free probiotic capsules per litre of milk OR • 1/3 cup of coconut yoghurt as a starter per litre of milk • Kefir
  • 1-2 Tbs Raw honey Generally not required for incubation depending on milk source. See notes below
  • 2 Tbs organic gelatin powder Optional: depending on viscosity preference
Optional ingredients for sweetening
  • 1-2 Tsp Raw honey Optional: To be added after fermentation & refrigeration to taste
Equipment
Votes: 1
Rating: 5
You:
Rate this recipe!
Instructions
  1. Sterilize all equipment in hot water (80˚C) for 1 minute. If you are sterilizing glass jars, do not drop them in boiling water over 80 ˚C or you may risk cracking or breaking them. You may risk contamination with bad bacteria if all the equipment is not first sterilized.
  2. In a saucepan, bring coconut milk to 80 degrees C, then remove from heat. Do not boil the milk over 90 degrees Celsius; this will spoil the flavour. Your coconut milk must reach 80-90 degrees Celsius or you risk contamination with bad bacteria. Raw coconut milk can be made without heating, however this needs to be done with fresh naturally retrieved coconut milk that is less likely to be contaminated.
  3. In some cases you may need to add honey. Honey is not usually added to coconut milk because it does contain it’s own sweetness to feed the culture during the fermentation process, however some milk sources may require it so you may need to experiment with this in whether to add the honey or not. Sweetness provides food for the bacterial culture and your yogurt will often not ferment well without it if it is not sweet enough on it’s own.
  4. Cover and cool the milk until it reaches a temperature between 38-45 degrees Celsius. Do not add the starter culture until it has cooled down or it will kill the good bacterial culture you are about to introduce.
  5. Pour aproximately1/2 cup of cooled coconut milk from your mixture into a sterilized glass, and mix in your starter culture or probiotic. Stir well until all is dissolved.
  6. Return the stirred ½ cup mixture to the existing cooled milk and mix well with a whisk or spoon.
  7. Pour cultured milk into your sterile yogurt maker jars, or any sterile glass or enamel containers that work for you and place the jar in the yoghurt maker.
  8. Set the timer for the desired incubation period and ferment the yoghurt for 7 – 9 hours at a temperature range between 38˚C and 45˚C. The Wholesome ‘me’ yoghurt maker will ferment up to 36 hours if you wish to ferment longer and produce a strong probiotic and very tart yoghurt flavour.
  9. When the fermentation is complete, transfer the yoghurt to the fridge to set for 6 hours before consuming. Refrigeration for this time allows the yoghurt to set.
  10. If your yogurt separates after chilling (which is common), either stir it briskly with a spoon, or whip it with a stick blender.
  11. If you wish to have thicker yoghurt strain the yoghurt and drip all the liquid whey out of your yogurt using a cheesecloth. Drip the yoghurt whey for 6 – 12 hours through a cheesecloth. The whey is probiotic and can be used to add to soups (when cooled before eating) for added probiotic nourishment.
  12. Add honey or fruit to taste.
Recipe Notes

Troubleshooting

Your yoghurt should smell and taste sour like yogurt. If you notice a bad odor, mold, or hints of grey or pink on the surface, we suggest that it has been contaminated with bad bacteria overgrowth and advise to throw it out and try again. This can be caused by a number of things:

  • The equipment was not thoroughly sterilized
  • The milk source was contaminated (was it canned or other?)
  • The milk source in a tetra-pak contained too much water and very little fat
  • The starter culture died from temps too high or too low
  • The starter culture is not right for the type of milk used the starter culture did not have enough natural sugar content to feed of in the milk source
  • The starter culture is out of date or not active
  • The correct amount of starter wasn’t used
  • Other foreign “bad” bacteria colonized the batch.

Unlike nut milks, most coconut milk sources do not require added honey during the incubation period to feed the fermentation process as the coconut milk usually has it’s own sweetness.  However, we can’t control what milk source you choose to use so adding honey during the preparation before the incubation period will be something you may need to experiment with on your own.

Coconut yogurt produces a thinner and runnier yoghurt viscosity compared to cow’s full cream milk yogurt, but there are two ways to thicken it: Add a dissolved thickener like natural gelatin to your milk before fermentation, OR after fermentation, strain the yoghurt and drip all the liquid whey out of your yogurt using a cheesecloth.

Once fully cooled, your yogurt may separate again, with some of the coconut oil hardening on top and a clear or cloudy liquid on the bottom. This happens especially with homemade coconut milk which hasn’t been homogenized and emulsified with factory machinery. This is usually not a problem, as long as everything else smells and tastes right. Just mix well with a spoon or stick blender, and enjoy.

Some new tetra-paks of coconut milk are not appropriate for making yogurt because they are mostly water and very little fat. Choose a high-fat natural coconut milk or cream made for cooking.

Use the same ingredients to make kefir by switching the dairy starter or probiotics with kefir grains and follow the kefir recipe instructions.  This is best made in one large container though (not individual jars).