Christmas Cookie Dough

Print Recipe Basic GAPS Cookie Dough Suitable from Stage 6 onwards You can make little faces on these cookies with a variety of different expressions and call them emotion cookies or you can make small gingerbread men for Christmas. Votes: 2 Rating: 5 You: Rate this recipe! Course Baking at home, Dairy free recipes, Deserts, […]

Print Recipe
Basic GAPS Cookie Dough
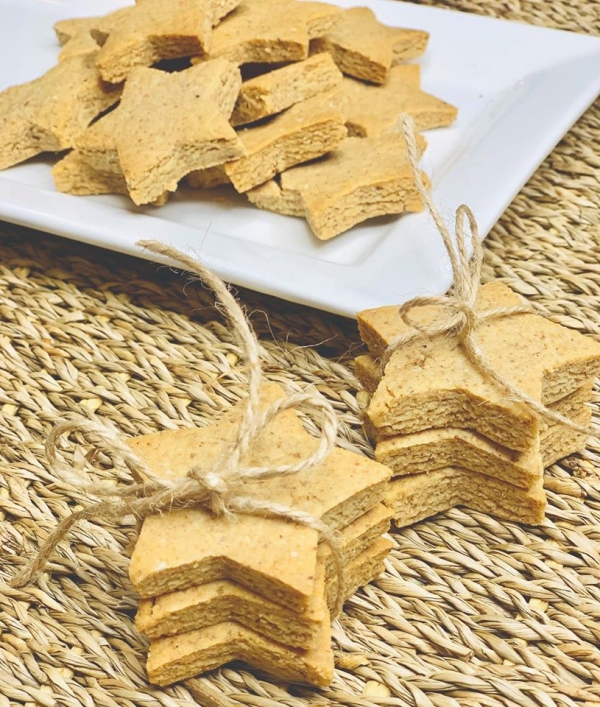
Suitable from Stage 6 onwards You can make little faces on these cookies with a variety of different expressions and call them emotion cookies or you can make small gingerbread men for Christmas.
Votes: 2
Rating: 5
You:
Rate this recipe!
Prep Time 10 Minutes
Cook Time 10 Minutes
Servings
Cookies
Ingredients
Prep Time 10 Minutes
Cook Time 10 Minutes
Servings
Cookies
Ingredients
Votes: 2
Rating: 5
You:
Rate this recipe!
Instructions
  1. Pre-heat oven to 150 degrees Celsius for 10 minutes (no hotter)
  2. Mix all ingredients in a bowl with a spoon, followed by massaging the contents in the bowl into a ball. Depending on the consistency of the mixture, add more nut butter or coconut oil if it is too dry or more nut flour if it is too moist. You want to create a cookie dough so keep mixing and squeezing the contents with your hands so that the mixture can be pressed and ready for rolling.
  3. When you have rolled the cookie mixture into a ball on the bench top, push down with the palms of your hands to flatten it a little and then use a rolling pin to roll out the dough into a flat surface approximately ¾ cm thick.
  4. Use a cookie cutter of your choice to make Christmas shaped biscuits. We have chosen stars, but you can make ginger bread shapes or any other Christmas shape you prefer.
  5. Place the tray in the preheated oven at no more than 150 degrees Celsius for 10 minutes, keeping a close eye on them to ensure they do not burn. Almond flour burns easily so do not cook any higher than 150 degrees Celsius.
  6. Remove the tray from the oven after 10 minutes and let the cookies cool on the tray before trying to pick them up as they will be soft and may crumble. If left to cool, they will become firmer.

Completely Raw Kingston’s

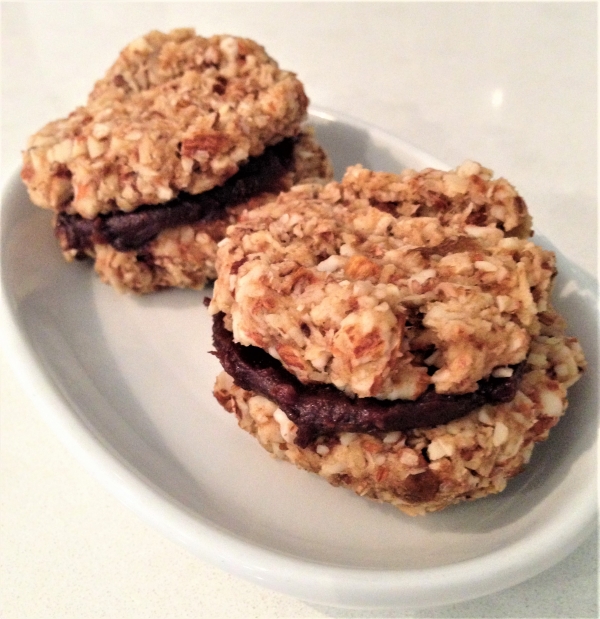
  Just like a Kingston only better!! This recipe is always a big pleaser to our visitors.  Not only is it wonderful for our GAPS tummies, our guests love it too!  Yes it looks and tastes just like a kingston Cookie with the exception of no added sugar and other ingredients we wish to avoid. […]

Print Recipe
Completely Raw Kingston's
*Tools needed: Dehydrator, thermomix (or steel blade blender/food processor)
Votes: 1
Rating: 5
You:
Rate this recipe!
Prep Time 30 Minutes
Passive Time 24 Hours
Servings
Ingredients
Prep Time 30 Minutes
Passive Time 24 Hours
Servings
Ingredients
Votes: 1
Rating: 5
You:
Rate this recipe!
Instructions
Preparation
  1. Boil water and pit dates
Choc Frosting
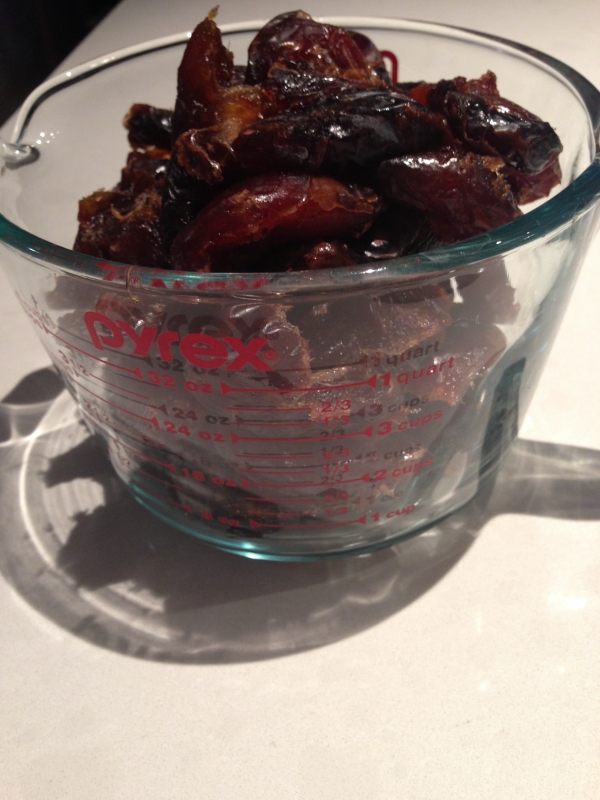
  1. Pit the dates and warm them in the oven at 150 degrees C for 5-10 minutes to soften them and make them easier to work with. Sometimes it is easier to double the ingredients so that the blades have more to work with and you can save the left overs for another recipe like a cake frosting and store it in the fridge. This frosting will keep for up to 6 weeks.
  2. Place all Choc Frosting ingredients in a high-speed blender or thermomix.
  3. Blend all ingredients in your high-speed blender. The ingredients can be a little finicky to blend, so start at a slow speed and increase speed slowly.
  4. With this step you need to be patient and keep blending on low to medium for a very long time to get a velvety consistency. You will see that this frosting creation is more of an art than a matter of combining ingredients. This is one of those recipes that really makes use of the power of a high-speed blender. If you feel that the blades are just spinning but aren't actually moving all of the frosting around, turn the blender off and make an air pocket down the side of the blender with a spatula to expose the blades. Remove the spatula, replace the lid, and start blending slowly again. You may need to do this several times and add tiny amounts of the water gradually and slowly to get the right consistency. You can achieve a very smooth result if the dates have been warmed gently in the oven for 5-10 minutes and continue to baby the blending process constantly running the spatula down the sides making sure all the ingredients are mixing and blending well. Be sure not to add too much water. You do not want to make the mixture runny, the ideal consistency is a thick paste like a nut butter.
  5. You'll know it's ready when you see no bits of dates in the mixture and all you can taste is velvety chocolate consistency.
  6. This raw chocolate icing is ready to use as soon as you pour it out of the blender When the Cookies have cooled smear the chocolate frosting on the flat side of the cookie with a knife and press another cookie on top squeezing the chock frosting in the middle.  Store in an air tight container. Enjoy!

Liquorice Wheels

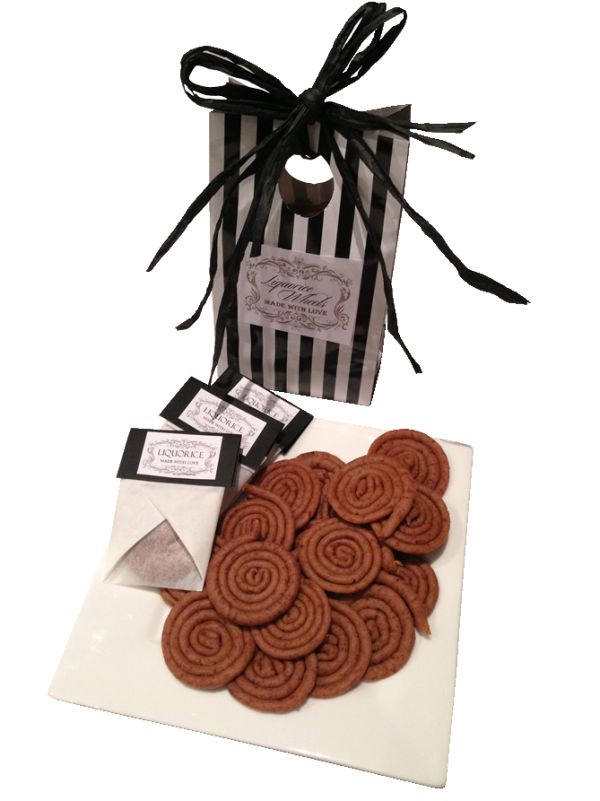
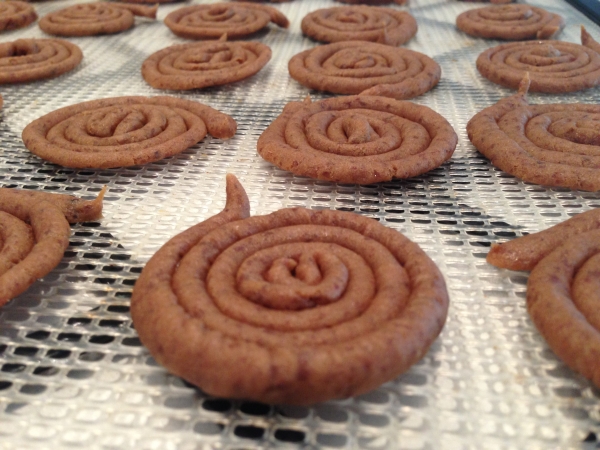
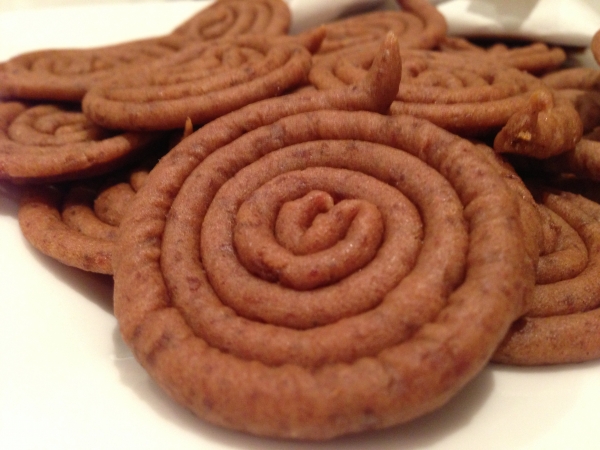
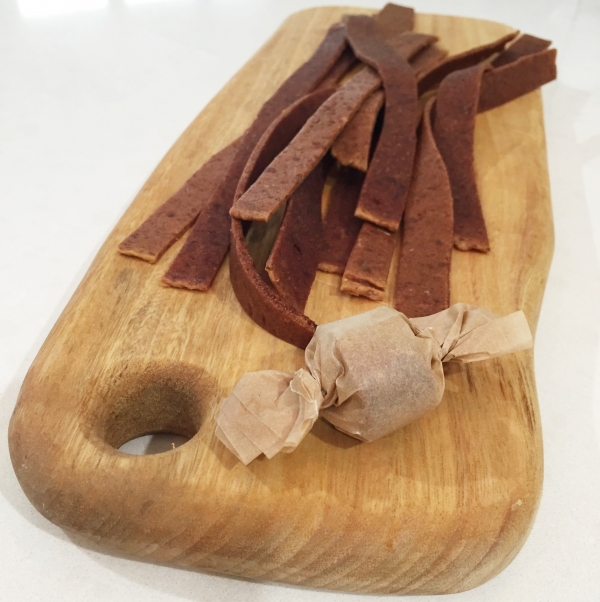
Adapted and inspired by the craft of Amy Sue, these delightful liquorice wheels taste like the real deal and send your kitchen into a frenzy with the adorable liquorice aroma that sets your patience to the test.  With another dehydrator recipe, you will be left with your mouth watering whilst these nutritious treats take time […]

Print Recipe
Liquorice Wheels
Votes: 0
Rating: 0
You:
Rate this recipe!
Prep Time 40 Minutes
Cook Time 12 Hours
Servings
Prep Time 40 Minutes
Cook Time 12 Hours
Servings
Votes: 0
Rating: 0
You:
Rate this recipe!
Instructions
  1. Prepare 3-4 dehydrator trays with teflex sheets and put them aside.
  2. Remove the pits from your dates (this is easier when they are at room temperature).
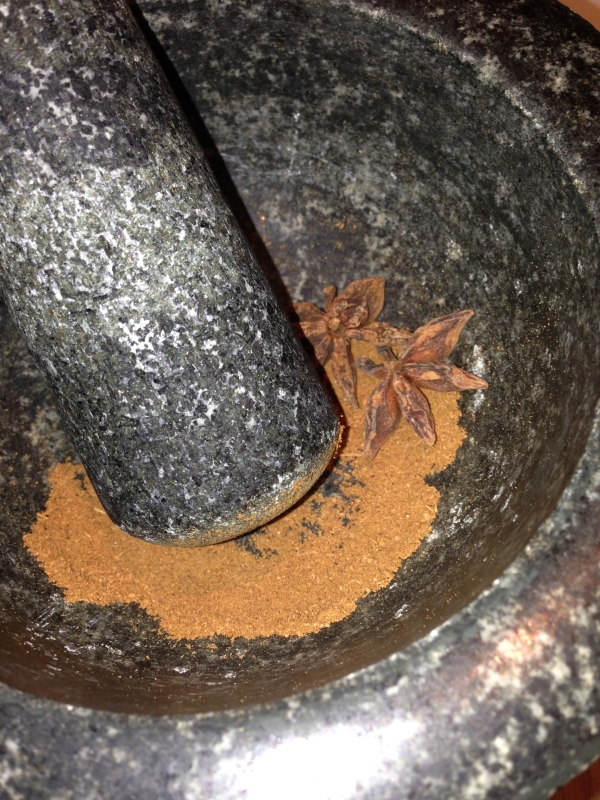
  3. Grind your star anise with a mortar and pestle to a very fine powder (or use anise spice ready prepared).
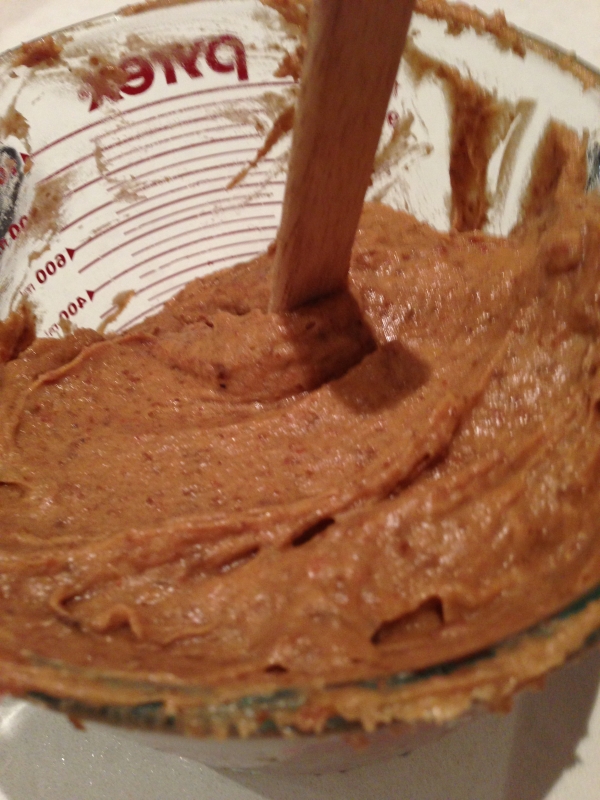
  4. Add the dates to the food processor or thermomix and add the water and vanilla extract. Process the dates until they form a smooth paste. You may need to run a spoon down the sides a few times to ensure there is an even blend during the processing. When a smooth paste has formed, add the ground anise spice and briefly blend again to ensure it is all mixed evenly.
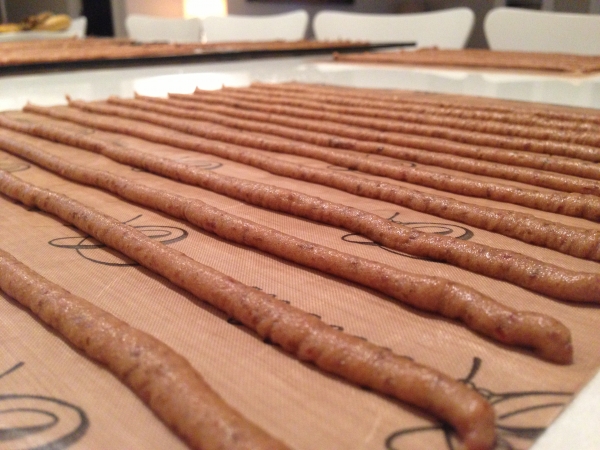
  5. Add the paste into a piping bag to create long smooth tube like lines. Keep the nozzle end close to the sheets to avoid creating wiggly lines. You may need a little practice first to see what I mean but don't worry if they are not perfect, they are still going to taste great and once they can be smoothed out slightly during the coiling process.
  6. Place the trays in the dehydrator at 115 degrees for approximately 12 hours or until they are ready for shaping but not completely done. Make sure you do not over do it. Some may need to dehydrate less than this and others may need to dehydrate a little longer.
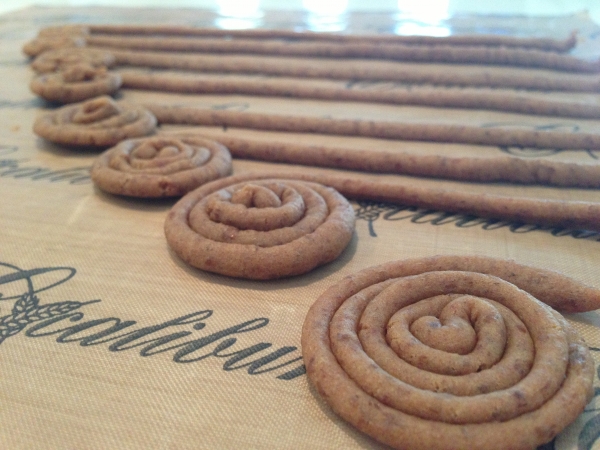
  7. When the liquorice is pliable enough to shape into coils, gently roll them on the dehydrator sheet to un-stick them from the sheet. Start shaping your coils by starting from one end continue to curl them flat on the dehydrator sheet. (They are a little easier to do this if you take the sheet off the tray and lay the sheet flat on the bench).
  8. When the coils are tightly bound, place them onto the dehydrator mesh sheet (without the teflex sheet) to complete the drying process at the same temperature for another 8 hours. The time may differ at times requiring more or less time on different occasions. You know they are ready when they are dry and not sticky.
  9. Don't over dry them to the point that unwinding the coil causes the wheel to break.
  10. Individually wrap your liquorice wheels in baking paper and pin with a staple. If you want to get fancy, you can add your own label and put them in a special bag to give as a special gift made with love.
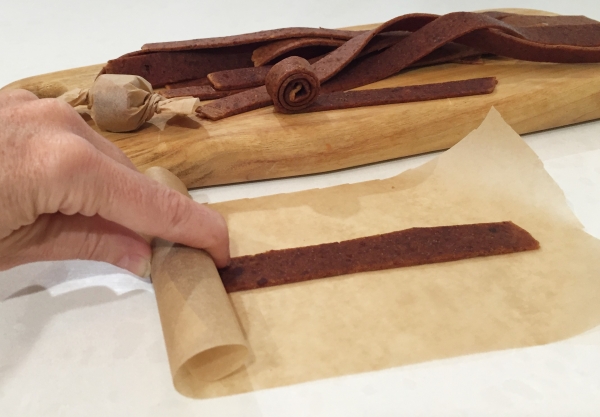
  11. Alternatively you can make the same recipe in one flat leather slab and cut them with scissors and roll them up. I call these Liquorice Leather Rolls. These take much less time and are easy to wrap and roll. 🙂

Easter Bunny Bites 

Crunchy Nut Seed Fruit Combo Bites or Bars

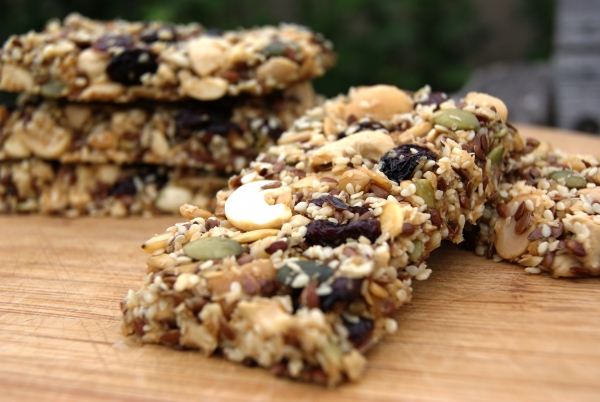
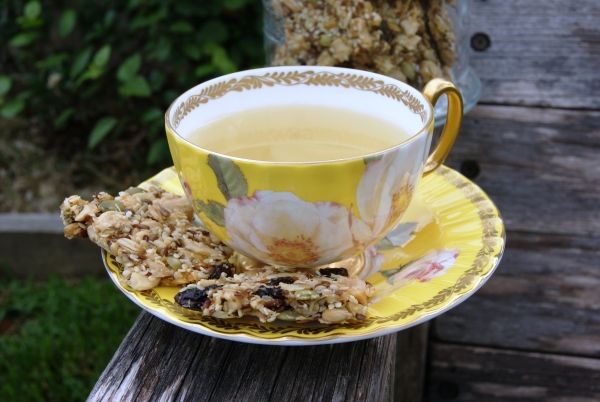
This recipe is a favourite and can resemble a crunchy nut and seed fruit bar or equivalent bite sized snack. When I make the bars, I tend to spread the ingredients into a thickness similar to a museli bar but when I like to make smaller bite sized pieces, I spread the ingredients further to […]

Print Recipe
Crunchy Nut Seed Fruit Combo Bites or Bars
Votes: 1
Rating: 5
You:
Rate this recipe!
Servings
Ingredients
Servings
Ingredients
Votes: 1
Rating: 5
You:
Rate this recipe!
Instructions
  1. You may wish to lightly grind some of the nuts to break them up a little but they can be left as they are
  2. Soak all seeds and nuts overnight and rinse them under filtered water in a sieve
  3. Combine and mix all ingredients with your hands or a big spoon in a bowl
  4. The flax seed may need a little more draining in a sieve before you add them to the remaining of the ingredients. These will work as a binding agent to keep all your ingredients together.
  5. When all is combined simply spread the ingredients on a dehydrator sheet (1 cm thick) and Dry at 135 degrees F or 57 ◦C for 20-24 hrs
  6. You may dehydrate for longer if you want a crispier result or intend to make thicker nut/seed bars
  7. When completed, simply break into bite size snacks or cut specific portions with a knife. You may also wish to break it up further to make a muesli mix for breakfast with your yoghurt.
  8. You can explore any nut fruit and seed combo that you desire. Enjoy!

Raw Vanilla Hearts

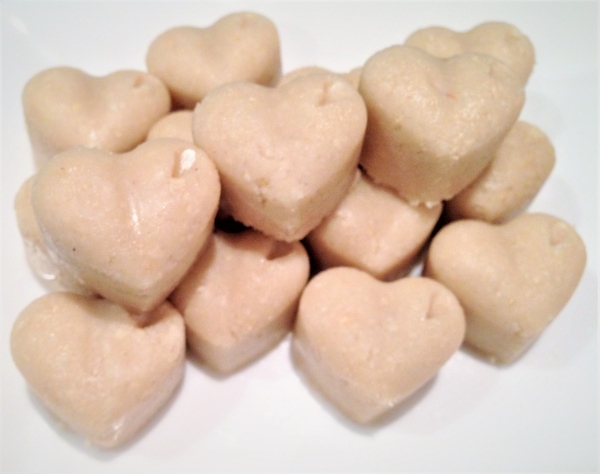
This recipe is a great white chocolate alternative and is quick and easy to make requiring no baking what-so ever. Print Recipe Raw Vanilla Hearts This is a recipe for the Introduction Diet from Stage 6 onward. Votes: 0 Rating: 0 You: Rate this recipe! Course Baking at home, Deserts, Egg free recipes Cuisine Full […]

Print Recipe
Raw Vanilla Hearts
This is a recipe for the Introduction Diet from Stage 6 onward.
Votes: 0
Rating: 0
You:
Rate this recipe!
Prep Time 10
Passive Time 30
Servings
Prep Time 10
Passive Time 30
Servings
Votes: 0
Rating: 0
You:
Rate this recipe!
Instructions
  1. Place all ingredients into a food processor or thermomix and mix or pulse until all lumps are completely removed and the mixture becomes smooth for moulding
  2. Using heart silicon moulds or any other shape, press the mixture with your finger tips into the moulds until leveled.
  3. Place in the fridge to set. This can take up to half an hour or longer. Simply pop them out and store in the fridge when complete.

Almond Flour Replacement/Alternatives

Almond flour is commonly used in many of the GAPS baking recipes, however these recipes can be substituted with other flours made from seeds. Almond Flour Replacement/Alternatives • Sunflower seeds ground into flour (remember to soak them first for 12 hours) • Pumpkin seeds ground into flour (remember to soak them first for 12 hours) […]

Print Recipe
Almond Flour Replacement/Alternative
Appropriate for the introduction diet from stage 6 onward
Votes: 0
Rating: 0
You:
Rate this recipe!
Servings
Ingredients
Servings
Ingredients
Votes: 0
Rating: 0
You:
Rate this recipe!
Instructions
  1. Sunflower seeds need to be soaked in order to activate them. Once activated they can be dehydrated to remove the moisture and then ground into a flour in the thermomix or food processor.
  2. Pepitas (also known as pumlin seeds) need to be soaked in order to activate them. Once activated they can be dehydrated to remove the moisture and then ground into a flour in the thermomix or food processor.

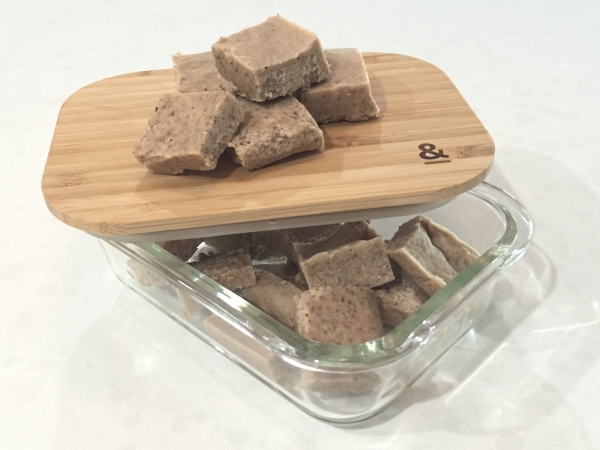
Coconut Fudge Slice

This recipe is useful as a reward system for children who are fussy eaters on the intro diet, it is smooth and has the texture of chocolate as it melts in their mouth. About 50% of fatty acids found in coconut oil is Lauric Acid which is one of the ingredients found in human breast […]

Print Recipe
Coconut Fudge Slice
This recipe is appropriate for stage one on the intro diet for fussy eaters only.
Votes: 0
Rating: 0
You:
Rate this recipe!
Prep Time 5 minutes
Passive Time 1 hour
Servings
peices
Ingredients
Basic Fudge Recipe
Other Variations
Prep Time 5 minutes
Passive Time 1 hour
Servings
peices
Ingredients
Basic Fudge Recipe
Other Variations
Votes: 0
Rating: 0
You:
Rate this recipe!
Instructions
  1. Place all ingredients into the food processor and blend until all well combined and creamy
  2. line a glass pyrex dish with bleach free baking paper and pour the ingredients into the dish
  3. Place dish into the freezer for 45 minutes to an hour so that it hardens quickly and doesn't separate
  4. Remove from freezer and store in the fridge
  5. Cut small square portions as desired

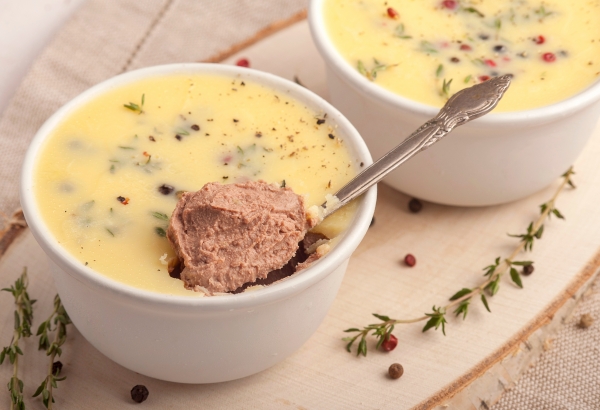
Organic Chicken liver pate

Organ meats are recognised as a ‘top GAPS nutrient dense food‘ and to ensure you are nourishing your body adequately this recipe will allow you to get your daily portions to optimise healing.  Many people having tasted liver on it’s own before (like myself) may feel that it is not on their fabourite go to […]

Print Recipe
Organic Chicken liver pate
Votes: 5
Rating: 4.2
You:
Rate this recipe!
Servings
Ingredients
Soaking Solution
  • 2 Cups Kefir if you have a food allergy to dairy kefir, lemon juice or apple cider vinegar work great too.
Chicken Liver Pate
Servings
Ingredients
Soaking Solution
  • 2 Cups Kefir if you have a food allergy to dairy kefir, lemon juice or apple cider vinegar work great too.
Chicken Liver Pate
Votes: 5
Rating: 4.2
You:
Rate this recipe!
Instructions
Preparation and Soaking
  1. After you have frozen the liver for two weeks prepare your liver by soaking it. Simply add the liver to a glass bowl and pour the kefir over the top making sure it is all covered and place it in the fridge for 4 hours or overnight. This will help to remove any impurities, tenderise the liver and improve the flavor of the liver.
  2. When soaking is complete, wash the liver to remove the kefir with filtered water.
Liver Pate
  1. Heat oil/fat in pan and add onion, celery and garlic and sauté for 1 minute
  2. Add liver and sauté till opaque
  3. Add herbs if selected and let cool
  4. Transfer to the blender and remaining oil/fat and blend till smooth
  5. Transfer to glass container and refrigerate
  6. Add melted ghee or lard over the top to create a skin to preserve the colour. Sprinkle a little herbs over the top for garnish if you wish.
  7. Alternatively transfer mixture to ice cube trays and freeze
Recipe Notes

Clinical Notes

Another way to supplement with liver if you do not like the flavour of pate is to freeze it raw and cut them into small capsule sizes and swallow them whole like a capsule.  This way you will not taste the liver as it is swallowed whole.  If you do this option, be sure to freeze the liver for two weeks first.

Apple Puree

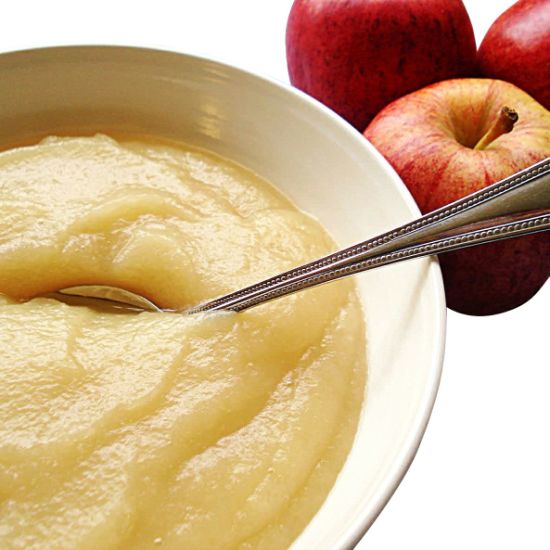
Apple Pure is introduced in the Introduction Diet on stage 5.  Apple Pure for GAPS is an easy way to disguise fats.  GAPS is a high fat diet so we want to add fats to everything and apple puree is a good way to deliver it. We usually add duck fat, ghee or coconut oil.  […]

Print Recipe
Apple Puree
This recipe is appropriate for the GAPS Introduction Diet from stage 5 onward
Votes: 0
Rating: 0
You:
Rate this recipe!
Prep Time 5-10 Minutes
Cook Time 15-20 Minutes
Servings
People
Ingredients
Fruit
Other
Prep Time 5-10 Minutes
Cook Time 15-20 Minutes
Servings
People
Ingredients
Fruit
Other
Votes: 0
Rating: 0
You:
Rate this recipe!
Instructions
  1. Peel and core the ripe apples and slice thinly into your stainless steel cook pot. An apple slinky is great at doing this job.
  2. Add the water and cook the apples on low whilst stirring occasionally. You may place the lid on top to create steam in the cooking process.
  3. When the apples have become soft, take the pan off the stove and mash with a vegetable masher.
  4. Add a couple of tablespoons of ghee or duck fat or coconut fat (depending on what you have introduced) and blend with the apple.
  5. Store the stewed apples in the fridge.
Recipe Notes

Clinical Notes

Start to introduce with a few spoonful’s  a day and gradually increase the amount if there are no reactions.

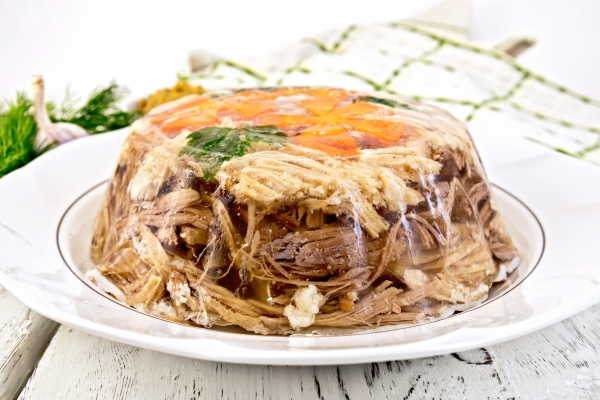
Meat Jelly Slice

This dish is a traditionally known remedy for digestive problems and is famous for its healing powers and nourishing components such as gelatine, glucosamine, glycoproteins, phospholipids etc… A highly recommended recipe of Dr Natasha’s for healing tummies. Print Recipe Meat Jelly Slice This recipe is appropriate for stage two onward Votes: 0 Rating: 0 You: […]

Print Recipe
Meat Jelly Slice
This recipe is appropriate for stage two onward
Votes: 0
Rating: 0
You:
Rate this recipe!
Prep Time 45 minutes
Cook Time 5 hours
Passive Time 1 hour
Servings
people
Ingredients
Prep Time 45 minutes
Cook Time 5 hours
Passive Time 1 hour
Servings
people
Ingredients
Votes: 0
Rating: 0
You:
Rate this recipe!
Instructions
  1. Bring 2 litres of water to boil and place pigs trotters into the pot. Boil the trotters for a further 5 minutes and then remove the trotters from the pot whilst discarding the water. (this is to clean and prepare the trotters).
  2. Bring a new pot to boil with 3 litres of water with all 4 pigs trotters added (ensuring that they are completely covered).
  3. Add pepper, salt, onion, leaks and bay leaves and cook on a low heat with the lid on for 5 hours in total.
  4. By the 3rd Hour; add the chicken legs and bring to the boil and lower the heat again. Make sure to keep the meat covered by the broth and top up water if needed (but not too much - only enough to cover.
  5. Continue to cook with the lid slightly to the side to allow for some evaporation of the stock so that you can establish the right amount of broth for the perfect batch. Too much water will not allow the broth to solidify whilst too little can make it too hard.
  6. By the 4th Hour; add remaining vegetables (onion, garlic, carrot and leaks) except for the additional 3 garlic cloves and additional 2 carrots to be set aside and used later. Cook for the final hour. After an hour, the broth should appear thick and the meat tender and soft. Turn off the heat and remove from the stove.
  7. Strain all the meat cuts, trotters and vegetables from the stock through a sieve and set them aside (ensuring to catch the stock in a pyrex jug under the colander for later use).
  8. Return the stock to the stove with the two additional freshly sliced carrots and three large whole garlic cloves added and bring to a boil and then simmer until the carrots are cooked but not too soft.
  9. Whilst the carrots are cooking let the trotters and chicken legs cool. Once they are cool, remove any bones and unwanted parts from the pigs trotters and and set aside the pulled meat. Remove and throw away the bones and the cooked vegetable, peppercorns and bay leaf remains.
  10. After the carrots and garlic have been cooked in the stock, strain them from the stock (ensuring to catch the stock in a pyrex jug under the colander) and set them aside.
  11. Strain the broth again through a cheese cloth and set aside.
  12. Slice the cooked garlic cloves into slithers and add them to a deep glass dish with the sliced cooked carrots. You can improvise by adding a few fresh sliced shallots parsley or fennel sprigs at this stage.
  13. Chop the meat collected from the pigs trotters and chicken legs and add them to the glass dish on top of the carrots and garlic.
  14. Pour the reserved stock over the top to ensure that all the meat is covered.
  15. Place meat jelly into the fridge to set overnight.
Recipe Notes

Serving

This can be cut into slices and served cold with salad or vegetables with a cup of meat stock.  It is important to always remember to eat protein with vegetables.

Points

You may alternatively use small bowls or cups to set and serve your meat jelly.

You may use other meats such as fish (salmon) or beef and lamb to create this meal.


GAPS Staple Casserole

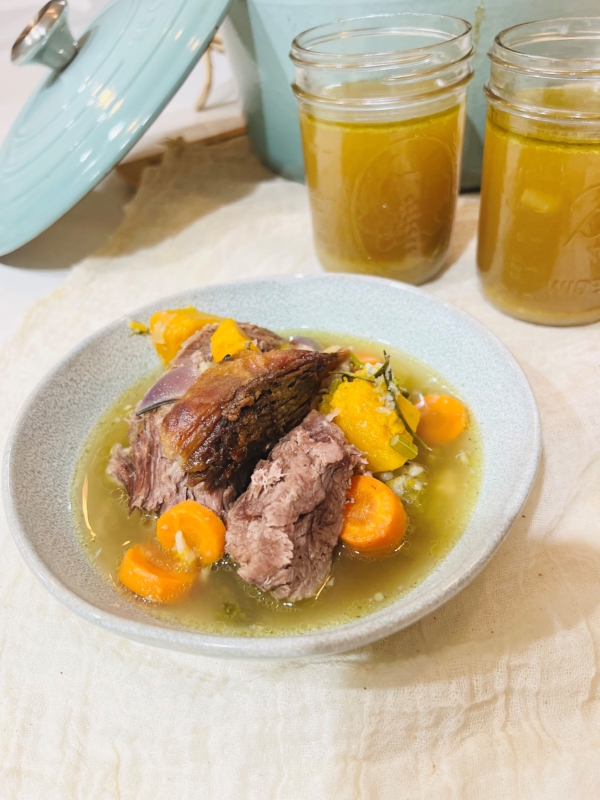
This recipe is referred to by Dr Natasha Campbell-McBride as the ‘Italian Meat Casserole’ and we believe it is a staple dish that is easy to cook with it’s versatility in what can be used. It is a slow cooked method in the oven that produces a lovely tender meat that falls off the bone […]

Print Recipe
GAPS Staple Casserole
Votes: 1
Rating: 5
You:
Rate this recipe!
Prep Time 35 Minutes
Cook Time 4-6 hrs
Servings
People
Ingredients
Meat and Stock
  • 1 Lamb Shoulder See notes for other meat options
  • 1 Litre Filtered water Approcimate: this is dependant upon how bif the pot is and the size of the lamb
Herbs & Spices
Vegetables
  • 6-8 Cloves Raw Garlic Crushed - See notes caution
  • 1 Whole Onion Large - See notes caution
  • 2 Whole Celery sticks Finely diced - Only use celery on Full GAPS Diet
  • 2 Whole Carrots Finely diced - See notes caution
  • 1/2 Whole Pumpkin Cubed - See notes caution
  • 1/2 Head of Cauliflower or Brocoli - Cut and remove all stalks - See notes caution
Special Equipment
Votes: 1
Rating: 5
You:
Rate this recipe!
Instructions
  1. Heat the oven to 140 - 160 degrees Celsius. Place your meat joint or other selection of meat into an oval cast iron pot and fill 2/3 with filtered water. Be sure not to cover the meat joint completely with water, because the exposed part at the top of the meat produces a lovely tasting stock for drinking. This recipe should allow you to save a few jars of stock when you are done.
  2. If tolerated (see recipe notes) dice some onion and celery and crush some garlic and saute in a separate pan with a little lamb fat or duck fat and add to the pot. It is often nice to salt the top of the lamb and add some of the sauteed ingredients on top as well as surrounding the lamb in the stock.
  3. Add salt, dried herbs, bay leaves and a sprig of rosemary. Cover with the pot with the lid and cook on very low heat for 4-6 hours (125 – 140 degrees Celsius).
  4. After 4 or 5 hours add a variety of chopped vegetables. We have made some suggestions for you above that work nicely but feel free to experiment with seasonal organic vegetables. At this time it is essential to leave the lid off in the final stages of cooking and increase the temperature to 180 degrees celcius and cook for a further 40-50 minutes.
  5. When cooked, serve the meat and vegetables and use the stock (strained through a sieve) for a warm drink with your meal. Keep left over stock in the fridge or freezer for later meals or stock drinks.
Recipe Notes

Alternative Recipe Options

You can use any of the following meats (joint meats are easier to digest than muscle meats) Try to use a broad range of different meats each time you cook this meal.

  • Shoulder of lamb
  • Joint of pork
  • Joint of beef
  • Pheasant
  • Quail
  • Venison
  • Whole chicken
  • Turkey legs
  • Lamb shanks

You may experiment by adding a variety of vegetables keeping a broad range in your diet, however make sure you are ready for them - Refer to clinical notes.

The fat content of these meals need to be quite high: the more fresh animal fats you consume the faster the recovery.  Be sure to add fermented vegetables with every serving.  If you are still in the introduction stage, avoid spices at this stage and only use herbs, salt, and bay leaves.  This meal is easy to cook and provides you with a variety of options to choose from.  If you make a large batch, this meal is easily frozen and defrosted and heated in a glass Pyrex dish with a glass lid in the oven.  Cooking several of these meals and freezing them will allow you to have a break in the kitchen.

This method can be achieved with a slow cooker

Clinical Notes:

Introducing new food: If and when you introduce a new food, your patient’s symptoms of diarrhoea return, or pain or any other digestive symptom is experienced, then wait a week and try again after some more healing has taken place because this indicates that they are not ready for this food.

Avoid vegetables and consume only the meat and stock from this recipe if the patient is experiencing profuse diarrhoea.  Vegetables should be added gradually until well tolerated and digestion improves.

*This recipe is appropriate for the GAPS Introduction Diet Stage Two - onward