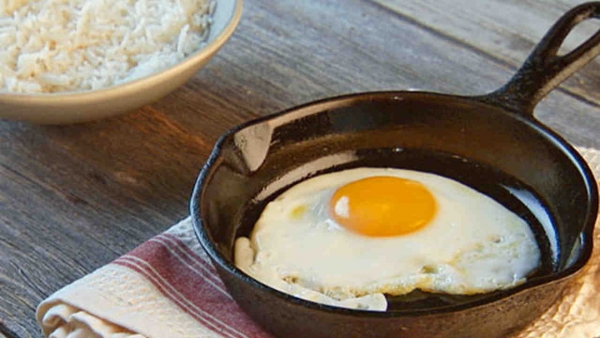
Fried Egg

How do you like your eggs? The GAPS Introduction Diet introduces soft boiled eggs first in stage two followed by scrambled or fried in stage 3. Relatively simple this recipe can be adjusted to suit the individual in terms of sunny side up and sunny side down, however the important thing to remember is to […]

Print Recipe
Fried Egg
This recipe is appropriate for the Introduction Diet from stage 3 onward.
Votes: 0
Rating: 0
You:
Rate this recipe!
Servings
Ingredients
Servings
Ingredients
Votes: 0
Rating: 0
You:
Rate this recipe!
Instructions
  1. Add the ghee to the fry pan and set on medium heat. Do not allow the ghee to burn
  2. I recommend cracking the egg into a small bowl first, and then pouring that gently into the pan. Make sure to pour slowly, letting the whites find their placement for 1 or 2 seconds before letting the yolk slip into the middle of the pan. Of course, you’re welcome to just crack and pour the egg directly into the pan.
  3. Cook the egg until the whites are cooked and the egg yolk is still runny. That is an official GAPS egg. We want the yolks to be runny to maximise the nutrition from the egg. You can flip the egg if you wish to have a sunny side down, however be careful not to over cook the yolk. Sunny side up will allow you to monitor the cooking of the yolk much better.

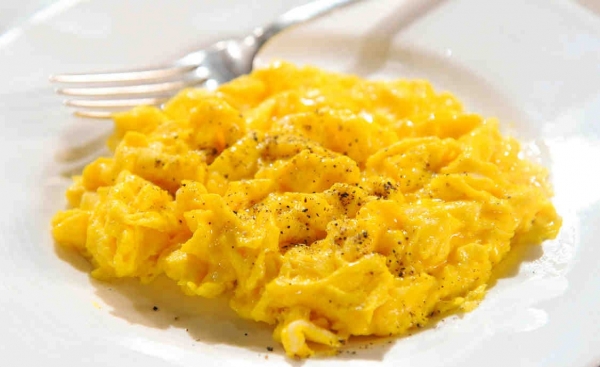
Scrambled Eggs

The GAPS Introduction Diet introduces scrambled eggs or fried eggs in stage three.  This is a simple and very quick recipe requiring very little preparation.  The ingredients contain only egg with a little ghee for cooking, however for more fluffier eggs, you can add a couple of tablespoons of sour cream or kefir. Print Recipe […]

Print Recipe
Scrambled Eggs
This recipe is appropriate for the GAPS Introductions Diet from stage 3 onward
Votes: 1
Rating: 4
You:
Rate this recipe!
Prep Time 2 minutes
Cook Time 3 minutes
Servings
people
Ingredients
Prep Time 2 minutes
Cook Time 3 minutes
Servings
people
Ingredients
Votes: 1
Rating: 4
You:
Rate this recipe!
Instructions
  1. Crack the eggs into a glass bowl
  2. Use a fork to beat eggs together.
  3. Melt ghee or duck fat in a fripan over low heat. Don't allow the ghee to burn.
  4. Add egg mixture and gently pull eggs to the center of the pan and let the liquid parts run out under the perimeter.
  5. Cook, continually moving eggs with the metal spatula, just until eggs are set. This will take approximately 1 to 3 minutes.
  6. Season with salt and pepper; serve hot with a little parsley.
Recipe Notes

Clinical Notes

When on the Full GAPS Diet, if digestion has improved you may introduce onion and celery to the mixture as well.

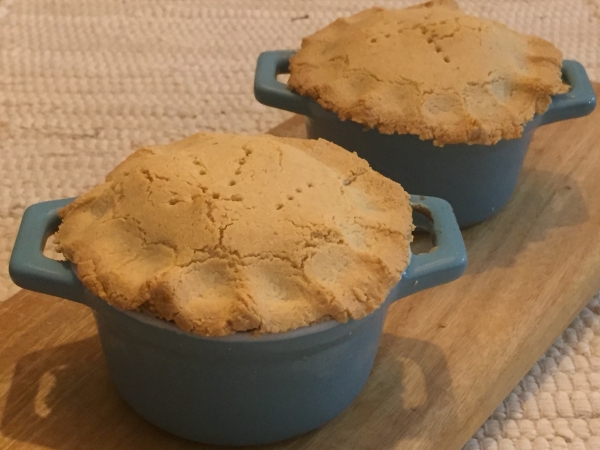
Chicken Vegetable Pie

You will need 4 mini pie pots (size 4cm width opening from the top) This is a delicious meal on it’s own, served with a salad and fermented vegetables on the side.  It is a great winter warmer for all the family. Print Recipe Chicken Vegetable Pie Votes: 0 Rating: 0 You: Rate this recipe! […]

Print Recipe
Chicken Vegetable Pie
Votes: 0
Rating: 0
You:
Rate this recipe!
Course Main Dishes
Cuisine Full GAPS Diet
Prep Time 20 Mins
Cook Time 40 Mins
Passive Time 45 Mins
Servings
Pies
Ingredients
Pie Filling
Course Main Dishes
Cuisine Full GAPS Diet
Prep Time 20 Mins
Cook Time 40 Mins
Passive Time 45 Mins
Servings
Pies
Ingredients
Pie Filling
Votes: 0
Rating: 0
You:
Rate this recipe!
Instructions
Pie Pasty Prep
  1. Preheat the oven to 150 Degrees Celsius
  2. Place all pie pastry ingredients into a bowl and kneed with your hands, massaging and squeezing the ingredients until it forms a tight ball. You can also get this effect very quickly if you place all ingredients in a thermomix for 20 seconds on speed 4.
  3. Roll the dough flat so that it is approximately 1cm thick. Cut out sections of the dough to fill 4 mini pie pots (size 4cm width opening from the top) and press them into the bottom and side walls with your fingers. Make sure to leave enough dough to make the lids.
  4. With the remaining pastry and cut offs, roll out the dough again and cut out 4 lids.
  5. Place the bottoms of the pie crust pressed into the pie pots into the oven and cook for 15 - 20 minutes. Place the lids into the fridge for later.
Preparing the Filling
  1. Bring to boil the chicken breast in two cups of chicken stock.
  2. When chicken is cooked, remove the chicken and dice it up into small bite sized pieces for the pie.
  3. In a separate fry pan, saute the onion and garlic.
  4. Chop pumpkin and carrots to small bite sized pieces. Cut the heads from the broccolini and add them to the chicken stock in the pot along with the carrot and pumpkin pieces..
  5. Also add the onion and garlic along with the chicken to the chicken stock.
  6. Add all remaining chicken filling ingredients and bring to the boil and then reduce the heat to a simmer on a low heat for 45 minutes.
Putting it all together
  1. When all ingredients are cooked and ready, remove from the stoce and prepare the pie bottoms for filling.
  2. Evenly scoop the chicken pie filling into each pie pot crust filling.
  3. take the pie crust filling lids from the fridge and place them over the top of each pot. Pinch the sides of the pastry to connect the base of the pie with the pie tops. alternatively you can use a fork to do this.
  4. Spear the tops of the pie with a fork and place the pots on a tray in the oven. Cook for 20 minutes ( or until lightly golden brown) at 150 Degrees Celcius.
  5. Remove and let cool for ten minutes before serving.

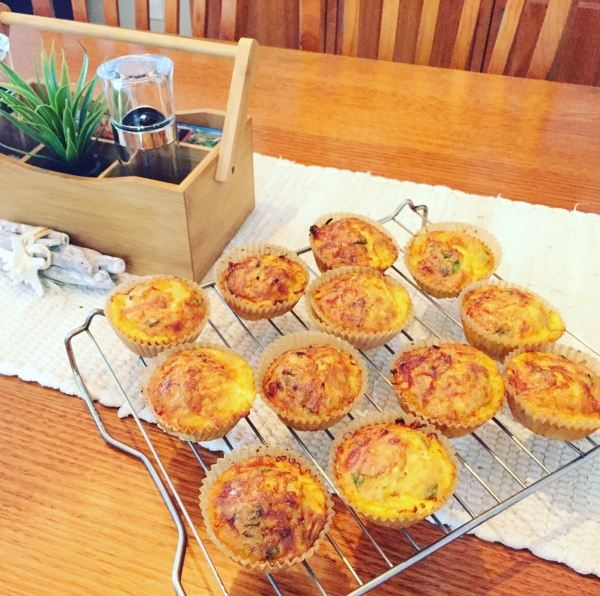
Bacon and Egg Pies

This recipe is great for both school or work lunch ideas.  They are supper easy to make and can be frozen for a later time. They do not last very long in our home and rarely get to the freezer unless I hide them. Selecting the right bacon is important: GAPS does not recommend smoked […]

Print Recipe
Bacon and Egg Pies
This recipe is appropriate for people following the Full GAPS Diet (not intro)
Votes: 1
Rating: 5
You:
Rate this recipe!
Prep Time 10 Minutes
Cook Time 30 Minutes
Servings
Pies
Ingredients
Prep Time 10 Minutes
Cook Time 30 Minutes
Servings
Pies
Ingredients
Votes: 1
Rating: 5
You:
Rate this recipe!
Instructions
  1. Preheat the oven to 175 Degrees Celcius
  2. Dice both the onion and bacon.
  3. Saute the onion and bacon in a fry pan with ghee and set aside.
  4. In a glass bowl, add the eggs and whisk the eggs until well mixed.
  5. Dice shallots and grate the cheddar cheese.
  6. Add the shallots, almond flour, salt and cheddar cheese.
  7. When the bacon and onion has cooled a little, add them to the mixture and mix all ingredients well.
  8. Line a muffin tray with regular 12 sized bleach free muffin cups and spoon the ingredients into all the cups evenly.
  9. Cook in the oven at 175 Degrees Celsius for 30 minutes or until browned on the top.
  10. After 30 minutes, remove from the oven and place on a cooling tray. When cooled, store in an airtight container in the fridge or freeze for later. These defrost easily overnight in the fridge.

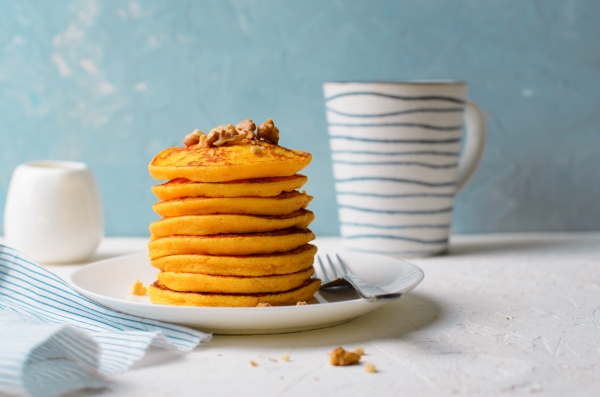
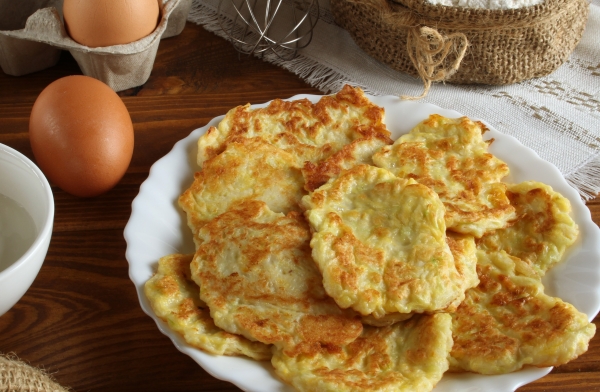
Nut Butter Pancakes

This recipe is introduced on stage 3 and in week 8 and 9 on the GAPS Baby Diet – Introducing Solids for Baby.  It is simple to make and most children love them.  They can be served with a little honey or a spread of ghee and avocado.  This is easy to pack into school […]

Print Recipe
Nut Butter Pancakes
This recipe is appropriate for the GAPS Introduction Diet from Stage 3 onward
Votes: 0
Rating: 0
You:
Rate this recipe!
Prep Time 10 Minutes
Servings
People
Ingredients
  • 1 Cup Nut Butter Homemade almond, peanut, cashew etc
  • 3 Whole Eggs Organic and pasture raised
  • 3 Tbsp Pumpkin Or squash or zucchini
  • 2-3 Tbsp Ghee Or coconut oil if dairy not introduced
Prep Time 10 Minutes
Servings
People
Ingredients
  • 1 Cup Nut Butter Homemade almond, peanut, cashew etc
  • 3 Whole Eggs Organic and pasture raised
  • 3 Tbsp Pumpkin Or squash or zucchini
  • 2-3 Tbsp Ghee Or coconut oil if dairy not introduced
Votes: 0
Rating: 0
You:
Rate this recipe!
Instructions
  1. Process nut butter, eggs and winter squash in the food processor
  2. Melt ghee or other fat in the pan and spoon pancake sized portions in the pan.
  3. Gently fry and make sure not to burn
Recipe Notes

Clinical Notes

If you find that the introduction of nuts (nut butter) is too soon, you may try the Nut Free Flourless Chicken Pancakes more suitable. Some people may need to try introducing nuts much later in the diet than others, however this recipe is a good place to start when you feel that the time is right and you can make baked items from seeds as an alternative.

Nut Free Flour-less Chicken Pancakes

This recipe is introduced on stage 3 as a replacement for the Nut Butter Pancakes for people who can not tollerate nuts. It can also be adapted in week 8 and 9 on the GAPS Baby Diet – Introducing Solids for Baby. It is simple to make and most children and adults find them enjoyable. […]

Print Recipe
Nut Free Flour-less Chicken Pancakes
This recipe is appropriate for the Introduction Diet from Stage 3 on wards
Votes: 0
Rating: 0
You:
Rate this recipe!
Prep Time 15 Minutes
Servings
People
Ingredients
Prep Time 15 Minutes
Servings
People
Ingredients
Votes: 0
Rating: 0
You:
Rate this recipe!
Instructions
  1. Using a food processor, blend all ingredients together until completely smooth. The mixture will look like thick pancake batter
  2. Heat the pan and melt some ghee or duck fat to grease the pan
  3. Pour spoonfuls of the batter into the pan. The batter may need to be spread out a bit with the spoon so that it is not too thick
  4. Watch to see tiny bubbles form on the top before flipping them over but be sure not to cook to high or they will burn
  5. Serve warm or cold with a slice of avocado or just as they are
Recipe Notes

Alternatives

When you have progressed through the stages, you may add onion, grated carrot and zucchini for extra flavour. Other ingredients to consider when making this recipe are equal amounts of organic nut butter, eggs and squash (as directed in the introduction diet).

When on the full GAPS diet you may wish to add spring onion shallots, carrot and zucchini to the recipe to make fritters.  Later when cucumbers are tollerated, you can enjoy these with a nice homemade tzatziki dip.

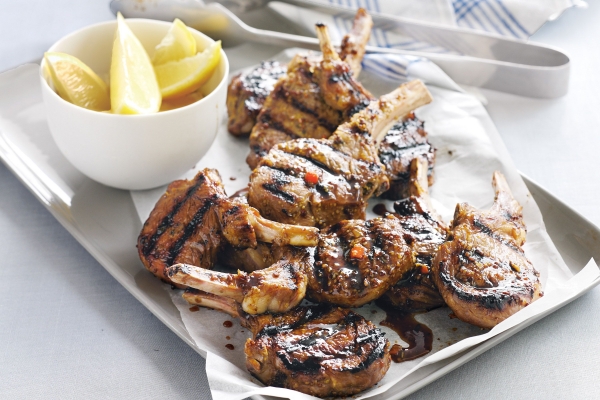
Grilled Meats: Lamb Cutlets

The GAPS Introduction Diet introduces roast meats and grilling in stage 4.  The first three stages of the GAPS Diet requires easy to digest foods and that is why the meats are soft and slow cooked in casseroles and soups.  When the digestion system shows signs of improvement, people following the GAPS Introduction Diet can […]

Print Recipe
Grilled Meats: Lamb Cutlets
This recipe is appropriate for the Introduction Diet from stage 4 onward
Votes: 0
Rating: 0
You:
Rate this recipe!
Prep Time 10 Minutes
Cook Time 10 Minutes
Servings
People
Ingredients
Meat
Vegetables
Meat Stock and Fats
Prep Time 10 Minutes
Cook Time 10 Minutes
Servings
People
Ingredients
Meat
Vegetables
Meat Stock and Fats
Votes: 0
Rating: 0
You:
Rate this recipe!
Instructions
  1. Grill your lamb cutlets on a pre-heated BBQ grill, fry pan or under the grill in the oven on medium to high.
  2. If cooking on a BBQ grill, cook the lamb for 3-4 minutes each side or until cooked to your liking. Cooking under the oven grill or fry pan may require different time frames so you will need to estimate a time for this based on how they cook on the inside. Try not to over cook them and test by cutting a small piece with a knife. A slight pink colour inside is perfect.
  3. Boil and cook remaining chosen vegetables in a pot with stock until well cooked.
  4. Drizzle olive oil (1-2 tablespoons) over your ready served vegetables.
  5. Serve with a cup of homemade meat stock and some lemon wedges on the side.
Recipe Notes

Clinical Notes

When digestion has improved over time, you can add chili or other garnished herbs to the cutlets for added flavour.

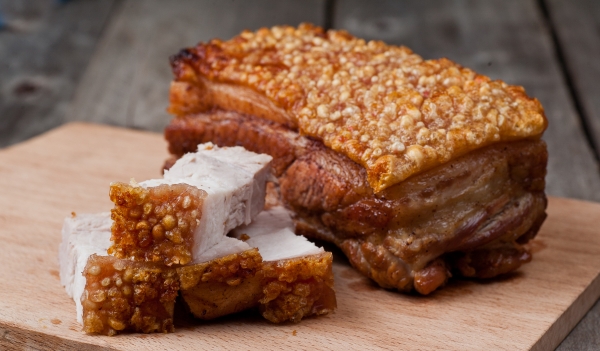
Roast Pork Belly

This meal is a delicious and nutritious favourite in our home.  It can be added in stage four when roasts and grilling is added to the GAPS Introduction Diet. It is very important for a GAPS person to have plenty of natural fats in every meal from meats, butter, ghee, coconut and cold pressed olive […]

Print Recipe
Rost Pork Belly
This recipe is appropriate for the GAPS Introduction Diet from stage 4 onward.
Votes: 0
Rating: 0
You:
Rate this recipe!
Prep Time 10 Minutes
Cook Time 60 Minutes
Passive Time 50 Minutes
Servings
People
Ingredients
Meat and Stock
Fats
Vegetables
Prep Time 10 Minutes
Cook Time 60 Minutes
Passive Time 50 Minutes
Servings
People
Ingredients
Meat and Stock
Fats
Vegetables
Votes: 0
Rating: 0
You:
Rate this recipe!
Instructions
  1. Pre heat oven to 180 – 200 degrees Celsius
  2. Place the pork belly in a baking dish with the rind fat (crackle top) side up.
  3. With your hands, rub lard all over the pork. This is where your hands get messy. Shake a generous amount of salt on the top pork rind and continue to rub and massage more lard and salt until the rind is well covered. Lightly give it one more sprinkle of salt on the top. The salt is what allows the rind to crackle.
  4. Place the pork in the oven at 200 degrees Celsius for 30 minutes to allow the rind to crackle and then turn it down to 180 degrees Celsius and cook for 2 - 2 and a half hours pending in size.
  5. Cut the onions in half and roast them with the punpkin along side the pork.
  6. Cook some other seasonal vegetables in some homemade meat stock for approximately 20 minutes before the pork is finished.
  7. Remove the baking tray with the pork and vegetables from the oven and set them aside on paper towel to soak up excess dripping.
  8. Drain any excess dripping from the baking tray into your dripping tray to store for later use in the fridge.
  9. To make a very tasty gravy leave one tablespoon of dripping, one onion half and one to two pieces of pumpkin remaining in the bottom of the pan that the pork was roasting in and mix with the flat of a fork to make a delicious gravy on the stove at a low heat (you can add pepper to taste).
  10. Strain the cooked vegetables and set aside the meat stock to serve as a hot beverage with your meal.
  11. Serve this delicious pork belly with roasted pumpkin and other seasonal vegetables. Stewed apple can also be eaten with this meal.

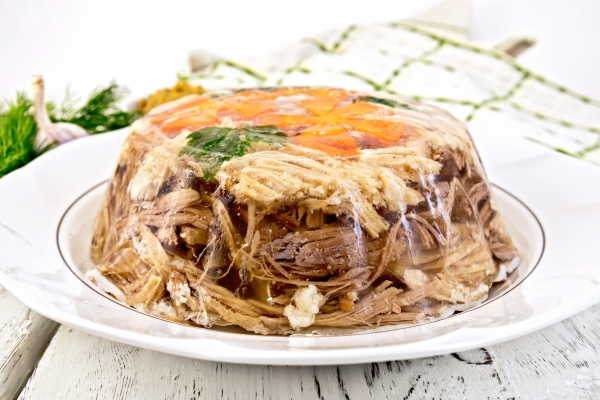
Meat Jelly Slice

This dish is a traditionally known remedy for digestive problems and is famous for its healing powers and nourishing components such as gelatine, glucosamine, glycoproteins, phospholipids etc… A highly recommended recipe of Dr Natasha’s for healing tummies. Print Recipe Meat Jelly Slice This recipe is appropriate for stage two onward Votes: 0 Rating: 0 You: […]

Print Recipe
Meat Jelly Slice
This recipe is appropriate for stage two onward
Votes: 0
Rating: 0
You:
Rate this recipe!
Prep Time 45 minutes
Cook Time 5 hours
Passive Time 1 hour
Servings
people
Ingredients
Prep Time 45 minutes
Cook Time 5 hours
Passive Time 1 hour
Servings
people
Ingredients
Votes: 0
Rating: 0
You:
Rate this recipe!
Instructions
  1. Bring 2 litres of water to boil and place pigs trotters into the pot. Boil the trotters for a further 5 minutes and then remove the trotters from the pot whilst discarding the water. (this is to clean and prepare the trotters).
  2. Bring a new pot to boil with 3 litres of water with all 4 pigs trotters added (ensuring that they are completely covered).
  3. Add pepper, salt, onion, leaks and bay leaves and cook on a low heat with the lid on for 5 hours in total.
  4. By the 3rd Hour; add the chicken legs and bring to the boil and lower the heat again. Make sure to keep the meat covered by the broth and top up water if needed (but not too much - only enough to cover.
  5. Continue to cook with the lid slightly to the side to allow for some evaporation of the stock so that you can establish the right amount of broth for the perfect batch. Too much water will not allow the broth to solidify whilst too little can make it too hard.
  6. By the 4th Hour; add remaining vegetables (onion, garlic, carrot and leaks) except for the additional 3 garlic cloves and additional 2 carrots to be set aside and used later. Cook for the final hour. After an hour, the broth should appear thick and the meat tender and soft. Turn off the heat and remove from the stove.
  7. Strain all the meat cuts, trotters and vegetables from the stock through a sieve and set them aside (ensuring to catch the stock in a pyrex jug under the colander for later use).
  8. Return the stock to the stove with the two additional freshly sliced carrots and three large whole garlic cloves added and bring to a boil and then simmer until the carrots are cooked but not too soft.
  9. Whilst the carrots are cooking let the trotters and chicken legs cool. Once they are cool, remove any bones and unwanted parts from the pigs trotters and and set aside the pulled meat. Remove and throw away the bones and the cooked vegetable, peppercorns and bay leaf remains.
  10. After the carrots and garlic have been cooked in the stock, strain them from the stock (ensuring to catch the stock in a pyrex jug under the colander) and set them aside.
  11. Strain the broth again through a cheese cloth and set aside.
  12. Slice the cooked garlic cloves into slithers and add them to a deep glass dish with the sliced cooked carrots. You can improvise by adding a few fresh sliced shallots parsley or fennel sprigs at this stage.
  13. Chop the meat collected from the pigs trotters and chicken legs and add them to the glass dish on top of the carrots and garlic.
  14. Pour the reserved stock over the top to ensure that all the meat is covered.
  15. Place meat jelly into the fridge to set overnight.
Recipe Notes

Serving

This can be cut into slices and served cold with salad or vegetables with a cup of meat stock.  It is important to always remember to eat protein with vegetables.

Points

You may alternatively use small bowls or cups to set and serve your meat jelly.

You may use other meats such as fish (salmon) or beef and lamb to create this meal.


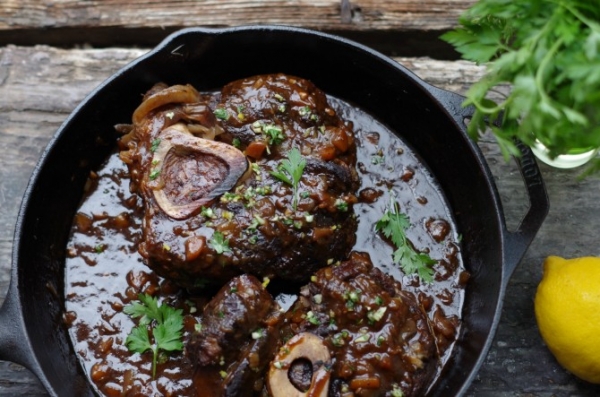
Osso Buco

This recipe can be cooked in a slow cooker or in the oven.  I prefer to cook this in a slow cooker but it depends if you wish to brown the meat at the end a little in the oven by removing the lid and turning it up for the last half an hour.  This […]

Print Recipe
Osso Buco
This recipe is stage two appropriate & onward
Votes: 0
Rating: 0
You:
Rate this recipe!
Prep Time 15 minutes
Cook Time 6-8 hours
Servings
people
Ingredients
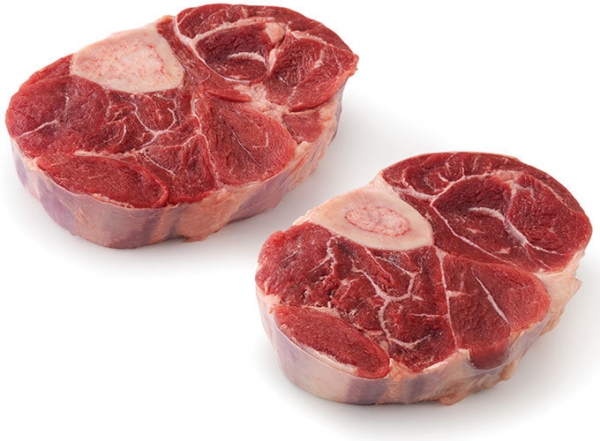
  • 6-8 cuts Beef Osso buco cuts These are cuts of meat with the marrow bone in the centre
  • 2 whole Onions Diced
  • 6 cloves garlic Crushed
  • 1-2 whole Carrots Diced
  • 1-2 whole Zucchini Diced
  • 2-3 whole Tomatoes Diced
  • 2 tbs olive oil
  • 1/4 tsp Thyme Optional
  • 1/4 tsp Oregano Optional
  • 1 inch piece Ginger root Finely grated (weigh the peeled ginger on a food scale before grating or mincing to determine the correct measurement for the recipe)
  • 1 inch peice Tumeric root Finely grated (weigh the peeled tumeric on a food scale before grating or mincing to determine the correct measurement for the recipe)
  • 2 tbs Tomato paste Organic and sugar free (no additives)
  • 3 Bayleaves
  • 1 cup Meat Stock
  • 3 sprigs Fresh Parsley For garnish
  • 1 Lemon Cut into quarters for serving
Votes: 0
Rating: 0
You:
Rate this recipe!
Instructions
  1. Chop onions and crush garlic and combine them with tomatoes, tumeric, ginger, thyme, oregano, olive oil and tomato paste in food processor. Blend mixture until all ingredients are well diced and results in a thick paste.
  2. Place the lemon aside for serving later and add osso buco cuts, in the crock pot or slow cooker and add all other prepared chopped vegetables and ingredients including the bay leaves and cup of meat stock.
  3. Cook slow on low for several hours until the meat begins to fall off the bones. This can be achieved in the oven for 4 hours (covered with lid) on a low heat 160 Degrees Celsius or during the day in a slow cooker for 6 – 8 hours on low.
  4. If you are cooking this recipe in the oven and wish to brown the meat a little and create a more caramelised flavour, you may remove the lid and turn the oven up to 200 Degrees Celsius at the end of the cooking time for the last half an hour.
  5. Serve on some homemade cauliflower mash and or with a slice of lemon on the side.
Recipe Notes

Serve

Serve this healing nutrient dense meal with a warm cup of stock to drink on the side.

Fermented Fish

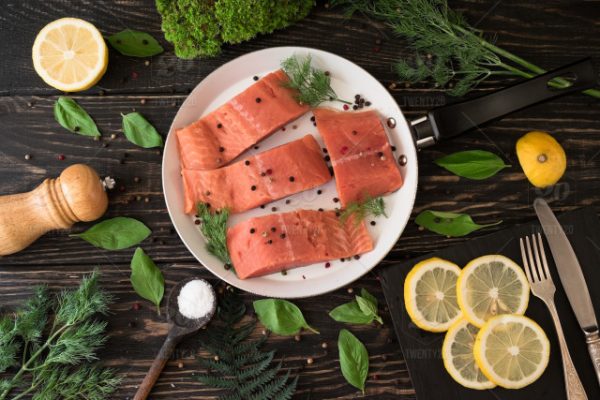
This is a very easy and nutritious probiotic meal to prepare. Avoid Farmed Fish Farmed fish are generally not native to the area and if they escape (which they do) they create disease among native fish, pollute the native species gene pool and compete for food and spawning sites. Some 50,000 salmon are farmed in […]

Print Recipe
Fermented Fish
This recipe is appropriate for the GAPS Introduction Diet Stage Two - onward
Votes: 4
Rating: 4.25
You:
Rate this recipe!
Prep Time 25 Mins
Passive Time 3 Days
Servings
Litre jar
Ingredients
Prep Time 25 Mins
Passive Time 3 Days
Servings
Litre jar
Ingredients
Votes: 4
Rating: 4.25
You:
Rate this recipe!
Instructions
  1. Skin the fish and remove the bones, cut into mouth size pieces.
  2. Put the pieces of the fish into the jar mixing with slightly crushed peppercorns, a few slices of white onion (optional), coriander seeds, bay leaves and dill seeds or dill herb.
  3. In a separate jug add ½ litre of water and dissolve 1 tablespoon of sea salt and 3-4 tablespoons of your homemade whey. Pour this brine into the jar with the fish until the fish is completely covered; if the fish is not covered just add more water.
  4. Close the jar tightly and leave to ferment for 3-5 days at a room temperature, then store in the fridge.
  5. This fish does not keep long, so consume in the next few days. Serve with avocado, lemons and onions.
Recipe Notes

Alternative Options

Another way to ferment fish: buy some fresh sardines (also works for herring and mackerel), de-scale the fish, cut the heads off and clean the belly out. Put into a suitable size glass jar or a stainless steel pan. Add 1-2 cups of whey, 1-2 tablespoons of salt (per 1 litre), a teaspoon of black pepper corns (freshly crushed), 10 bay leaves and ½ a teaspoon of coriander seeds (freshly crushed). Top up with water so the fish is completely covered with water, you may want to float a small plate on top of the fish to keep it submerged in the brine. Cover the pan or put the lid on the jar and let it ferment for 3-5 days at a room temperature. When the fish is ready take the meat off the bones, cut into bite-size pieces and serve with avocado, fresh dill and some chopped red onion.

GAPS Staple Casserole

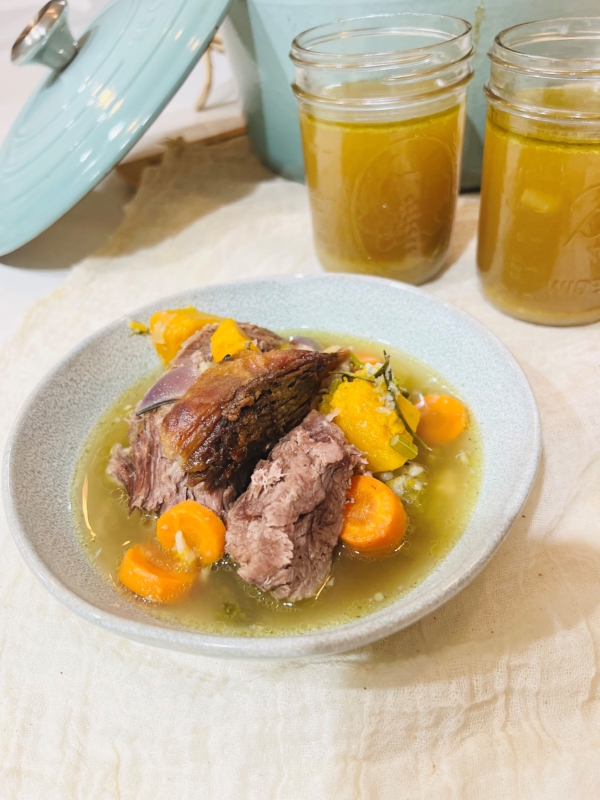
This recipe is referred to by Dr Natasha Campbell-McBride as the ‘Italian Meat Casserole’ and we believe it is a staple dish that is easy to cook with it’s versatility in what can be used. It is a slow cooked method in the oven that produces a lovely tender meat that falls off the bone […]

Print Recipe
GAPS Staple Casserole
Votes: 1
Rating: 5
You:
Rate this recipe!
Prep Time 35 Minutes
Cook Time 4-6 hrs
Servings
People
Ingredients
Meat and Stock
  • 1 Lamb Shoulder See notes for other meat options
  • 1 Litre Filtered water Approcimate: this is dependant upon how bif the pot is and the size of the lamb
Herbs & Spices
Vegetables
  • 6-8 Cloves Raw Garlic Crushed - See notes caution
  • 1 Whole Onion Large - See notes caution
  • 2 Whole Celery sticks Finely diced - Only use celery on Full GAPS Diet
  • 2 Whole Carrots Finely diced - See notes caution
  • 1/2 Whole Pumpkin Cubed - See notes caution
  • 1/2 Head of Cauliflower or Brocoli - Cut and remove all stalks - See notes caution
Special Equipment
Votes: 1
Rating: 5
You:
Rate this recipe!
Instructions
  1. Heat the oven to 140 - 160 degrees Celsius. Place your meat joint or other selection of meat into an oval cast iron pot and fill 2/3 with filtered water. Be sure not to cover the meat joint completely with water, because the exposed part at the top of the meat produces a lovely tasting stock for drinking. This recipe should allow you to save a few jars of stock when you are done.
  2. If tolerated (see recipe notes) dice some onion and celery and crush some garlic and saute in a separate pan with a little lamb fat or duck fat and add to the pot. It is often nice to salt the top of the lamb and add some of the sauteed ingredients on top as well as surrounding the lamb in the stock.
  3. Add salt, dried herbs, bay leaves and a sprig of rosemary. Cover with the pot with the lid and cook on very low heat for 4-6 hours (125 – 140 degrees Celsius).
  4. After 4 or 5 hours add a variety of chopped vegetables. We have made some suggestions for you above that work nicely but feel free to experiment with seasonal organic vegetables. At this time it is essential to leave the lid off in the final stages of cooking and increase the temperature to 180 degrees celcius and cook for a further 40-50 minutes.
  5. When cooked, serve the meat and vegetables and use the stock (strained through a sieve) for a warm drink with your meal. Keep left over stock in the fridge or freezer for later meals or stock drinks.
Recipe Notes

Alternative Recipe Options

You can use any of the following meats (joint meats are easier to digest than muscle meats) Try to use a broad range of different meats each time you cook this meal.

  • Shoulder of lamb
  • Joint of pork
  • Joint of beef
  • Pheasant
  • Quail
  • Venison
  • Whole chicken
  • Turkey legs
  • Lamb shanks

You may experiment by adding a variety of vegetables keeping a broad range in your diet, however make sure you are ready for them - Refer to clinical notes.

The fat content of these meals need to be quite high: the more fresh animal fats you consume the faster the recovery.  Be sure to add fermented vegetables with every serving.  If you are still in the introduction stage, avoid spices at this stage and only use herbs, salt, and bay leaves.  This meal is easy to cook and provides you with a variety of options to choose from.  If you make a large batch, this meal is easily frozen and defrosted and heated in a glass Pyrex dish with a glass lid in the oven.  Cooking several of these meals and freezing them will allow you to have a break in the kitchen.

This method can be achieved with a slow cooker

Clinical Notes:

Introducing new food: If and when you introduce a new food, your patient’s symptoms of diarrhoea return, or pain or any other digestive symptom is experienced, then wait a week and try again after some more healing has taken place because this indicates that they are not ready for this food.

Avoid vegetables and consume only the meat and stock from this recipe if the patient is experiencing profuse diarrhoea.  Vegetables should be added gradually until well tolerated and digestion improves.

*This recipe is appropriate for the GAPS Introduction Diet Stage Two - onward