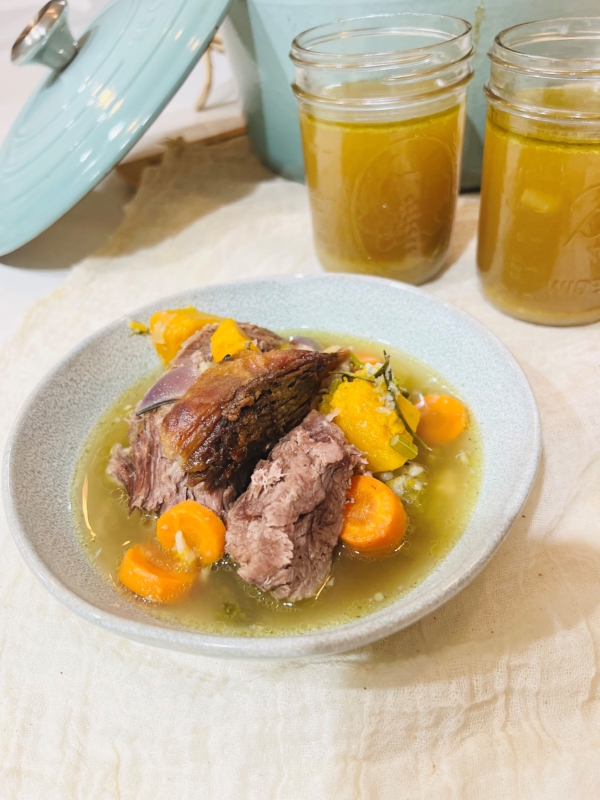
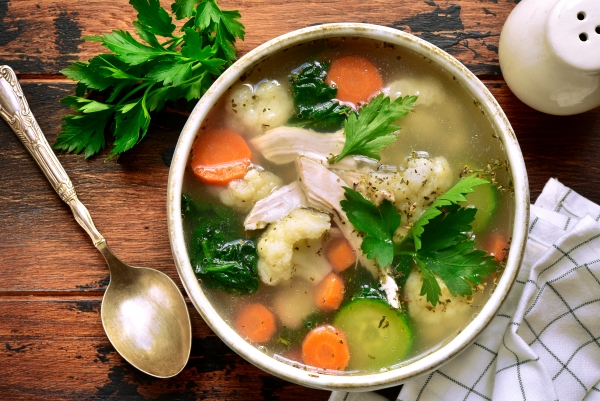
GAPS Basic Healing Soup

*Please refer to our meat stock recipes to create the base for this soup.  This soup recipe can be adapted to make any meat, poultry or fish and vegetable combination soup made from previously prepared meat stocks.  For the purpose of this recipe, we will be cooking the chicken and vegetable soup but you may […]
Print Recipe
GAPS Basic Healing Soup
*This meat stock recipe is appropriate for the GAPS Introduction Diet Stage One - onward *You will need previously prepared homemade meat stock for this recipe: refer to our meat stock recipes for this.
Votes: 1
Rating: 5
You:
Rate this recipe!
Prep Time 50 Minutes
Cook Time 3 Hours
Servings
Litre batch
Ingredients
Vegetables
Meat & Stock
  • 1 Litre Chicken Meat Stock Refer to our meat stock recipes: or locate the link to our Chicken Meat Stock Recipe below in the notes
  • 1 Whole Chicken This was used to make the meat stock recipe and put aside to make this recipe. Alternatively just add a new chicken.
Votes: 1
Rating: 5
You:
Rate this recipe!
Instructions
  1. Bring some of the meat stock to boil, add chopped or sliced vegetables: onions, carrots, broccoli, cauliflower, courgettes, marrow, squash, pumpkin, spinach etc. and simmer for 25-35 minutes. When on the introduction diet, you can choose any combination of available vegetables avoiding very fibrous ones, such as all varieties of cabbage and celery. All particularly fibrous parts of vegetables need to be removed, such as skin and seeds on pumpkins, zucchini and squash, remove stalk from broccoli and cauliflower and any other parts that look too fibrous.
  2. If you made your own chicken stock and saved the chicken meat for other recipes, dice the meat that you set aside and place them in the pot with the vegetables. (if you did not save the meat from your stock recipe - cook a new fresh chicken according to the recommendations shown in the stock recipe first and then pull all the meat and skin from the chicken and dice it into small pieces and add to the vegetables). Otherwise continue to cook the vegetables and meats until the vegetables are soft. Approximately 1 hour on simmer.
  3. When vegetables are well cooked, add the crushed garlic, bring to boil and turn the heat off. We want the garlic to be added at the end to be only slightly cooked to receive maximum immune benefits from it.
  4. If you are cooking for children who are fussy eaters or for babies starting out on solids, you can blend the soup which will make it easier. This recipe will generally keep in the fridge for 5 days but can also be frozen.
Recipe Notes

Click Here for the Chicken Meat Stock Recipe Link

Serving for GAPS

Serve the soup with a drizzle of cold pressed extra virgin olive oil on top (1-2 tbl sp).  Add sauerkraut or juice to the soup when ready to eat or eat  1 – 2 table spoons sauerkraut at the beginning of the meal.

Never add sauerkraut, its juice or olive oil directly to any hot food as this will kill the probiotic bacteria, enzymes and minor component nutrients.  Always wait for the food to cool at a temperature you can eat it before adding them.  The general rule is:  if you can put your finger in it, then it’s ready.  Refer to the introduction diet for the progressive introduction of sauerkraut and olive oil.

The ratio of stock, meat and vegetables is individual and dependent upon the size of the batch you wish to make.

Clinical Notes:

The introduction diet is primarily designed for people suffering with diarrhoea and that is why the chosen vegetables are low in fibre.  If you have chosen to follow the introduction diet because of leaky gut and food allergies but are more susceptible to constipation, it is important to add more fibrous vegetables like cabbage and celery.  Don’t avoid cutting off stems from broccoli etc and leave the skins and seeds on vegetables like zucchini.  You may even decide to serve up some well cooked beetroot with your soup.

Hints

  • Cut vegetables and meat into small neat sized pieces unless you plan to blend or puree it for smaller children.

Other suggested and allowable ingredients

  • Fresh or dried Italian or French mushrooms can be added to pork, lamb or beef soup to enhance the flavour. Dried mushrooms can be crushed by hand before adding to the soup
  • Chopped parsley, coriander, oregano or dill
  • A spoonful of yoghurt or sour cream (creme fraiche)
  • Red onion
  • Spring onion
  • Cooked ground liver
  • Boiled eggs (yolk still runny)
  • Raw or cooked beetroots
  • Other herbs and spices (only when digestion has started to show improvements)


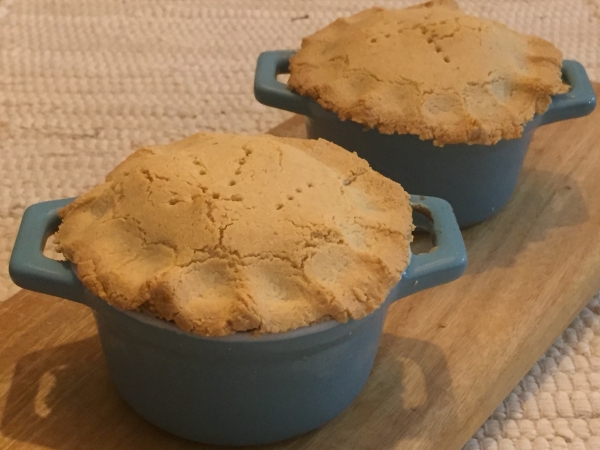
Chicken Vegetable Pie

You will need 4 mini pie pots (size 4cm width opening from the top) This is a delicious meal on it’s own, served with a salad and fermented vegetables on the side.  It is a great winter warmer for all the family. Print Recipe Chicken Vegetable Pie Votes: 0 Rating: 0 You: Rate this recipe! […]

Print Recipe
Chicken Vegetable Pie
Votes: 0
Rating: 0
You:
Rate this recipe!
Course Main Dishes
Cuisine Full GAPS Diet
Prep Time 20 Mins
Cook Time 40 Mins
Passive Time 45 Mins
Servings
Pies
Ingredients
Pie Filling
Course Main Dishes
Cuisine Full GAPS Diet
Prep Time 20 Mins
Cook Time 40 Mins
Passive Time 45 Mins
Servings
Pies
Ingredients
Pie Filling
Votes: 0
Rating: 0
You:
Rate this recipe!
Instructions
Pie Pasty Prep
  1. Preheat the oven to 150 Degrees Celsius
  2. Place all pie pastry ingredients into a bowl and kneed with your hands, massaging and squeezing the ingredients until it forms a tight ball. You can also get this effect very quickly if you place all ingredients in a thermomix for 20 seconds on speed 4.
  3. Roll the dough flat so that it is approximately 1cm thick. Cut out sections of the dough to fill 4 mini pie pots (size 4cm width opening from the top) and press them into the bottom and side walls with your fingers. Make sure to leave enough dough to make the lids.
  4. With the remaining pastry and cut offs, roll out the dough again and cut out 4 lids.
  5. Place the bottoms of the pie crust pressed into the pie pots into the oven and cook for 15 - 20 minutes. Place the lids into the fridge for later.
Preparing the Filling
  1. Bring to boil the chicken breast in two cups of chicken stock.
  2. When chicken is cooked, remove the chicken and dice it up into small bite sized pieces for the pie.
  3. In a separate fry pan, saute the onion and garlic.
  4. Chop pumpkin and carrots to small bite sized pieces. Cut the heads from the broccolini and add them to the chicken stock in the pot along with the carrot and pumpkin pieces..
  5. Also add the onion and garlic along with the chicken to the chicken stock.
  6. Add all remaining chicken filling ingredients and bring to the boil and then reduce the heat to a simmer on a low heat for 45 minutes.
Putting it all together
  1. When all ingredients are cooked and ready, remove from the stoce and prepare the pie bottoms for filling.
  2. Evenly scoop the chicken pie filling into each pie pot crust filling.
  3. take the pie crust filling lids from the fridge and place them over the top of each pot. Pinch the sides of the pastry to connect the base of the pie with the pie tops. alternatively you can use a fork to do this.
  4. Spear the tops of the pie with a fork and place the pots on a tray in the oven. Cook for 20 minutes ( or until lightly golden brown) at 150 Degrees Celcius.
  5. Remove and let cool for ten minutes before serving.

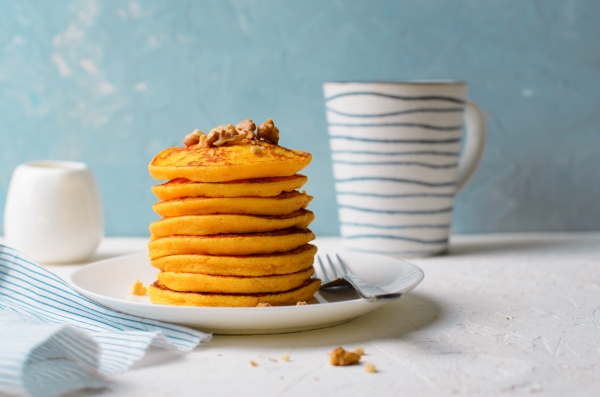
Nut Butter Pancakes

This recipe is introduced on stage 3 and in week 8 and 9 on the GAPS Baby Diet – Introducing Solids for Baby.  It is simple to make and most children love them.  They can be served with a little honey or a spread of ghee and avocado.  This is easy to pack into school […]

Print Recipe
Nut Butter Pancakes
This recipe is appropriate for the GAPS Introduction Diet from Stage 3 onward
Votes: 0
Rating: 0
You:
Rate this recipe!
Prep Time 10 Minutes
Servings
People
Ingredients
  • 1 Cup Nut Butter Homemade almond, peanut, cashew etc
  • 3 Whole Eggs Organic and pasture raised
  • 3 Tbsp Pumpkin Or squash or zucchini
  • 2-3 Tbsp Ghee Or coconut oil if dairy not introduced
Prep Time 10 Minutes
Servings
People
Ingredients
  • 1 Cup Nut Butter Homemade almond, peanut, cashew etc
  • 3 Whole Eggs Organic and pasture raised
  • 3 Tbsp Pumpkin Or squash or zucchini
  • 2-3 Tbsp Ghee Or coconut oil if dairy not introduced
Votes: 0
Rating: 0
You:
Rate this recipe!
Instructions
  1. Process nut butter, eggs and winter squash in the food processor
  2. Melt ghee or other fat in the pan and spoon pancake sized portions in the pan.
  3. Gently fry and make sure not to burn
Recipe Notes

Clinical Notes

If you find that the introduction of nuts (nut butter) is too soon, you may try the Nut Free Flourless Chicken Pancakes more suitable. Some people may need to try introducing nuts much later in the diet than others, however this recipe is a good place to start when you feel that the time is right and you can make baked items from seeds as an alternative.

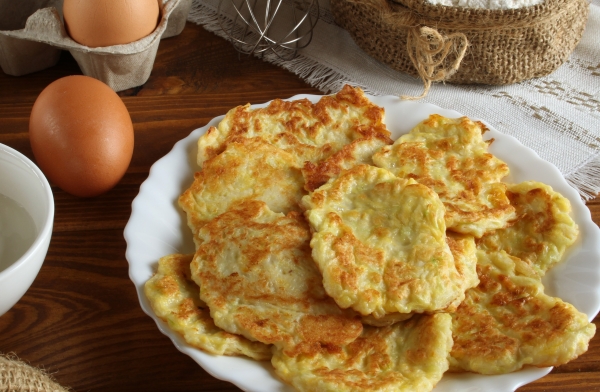
Nut Free Flour-less Chicken Pancakes

This recipe is introduced on stage 3 as a replacement for the Nut Butter Pancakes for people who can not tollerate nuts. It can also be adapted in week 8 and 9 on the GAPS Baby Diet – Introducing Solids for Baby. It is simple to make and most children and adults find them enjoyable. […]

Print Recipe
Nut Free Flour-less Chicken Pancakes
This recipe is appropriate for the Introduction Diet from Stage 3 on wards
Votes: 0
Rating: 0
You:
Rate this recipe!
Prep Time 15 Minutes
Servings
People
Ingredients
Prep Time 15 Minutes
Servings
People
Ingredients
Votes: 0
Rating: 0
You:
Rate this recipe!
Instructions
  1. Using a food processor, blend all ingredients together until completely smooth. The mixture will look like thick pancake batter
  2. Heat the pan and melt some ghee or duck fat to grease the pan
  3. Pour spoonfuls of the batter into the pan. The batter may need to be spread out a bit with the spoon so that it is not too thick
  4. Watch to see tiny bubbles form on the top before flipping them over but be sure not to cook to high or they will burn
  5. Serve warm or cold with a slice of avocado or just as they are
Recipe Notes

Alternatives

When you have progressed through the stages, you may add onion, grated carrot and zucchini for extra flavour. Other ingredients to consider when making this recipe are equal amounts of organic nut butter, eggs and squash (as directed in the introduction diet).

When on the full GAPS diet you may wish to add spring onion shallots, carrot and zucchini to the recipe to make fritters.  Later when cucumbers are tollerated, you can enjoy these with a nice homemade tzatziki dip.

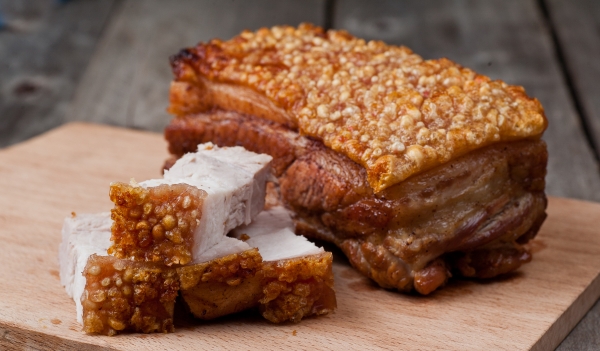
Roast Pork Belly

This meal is a delicious and nutritious favourite in our home.  It can be added in stage four when roasts and grilling is added to the GAPS Introduction Diet. It is very important for a GAPS person to have plenty of natural fats in every meal from meats, butter, ghee, coconut and cold pressed olive […]

Print Recipe
Rost Pork Belly
This recipe is appropriate for the GAPS Introduction Diet from stage 4 onward.
Votes: 0
Rating: 0
You:
Rate this recipe!
Prep Time 10 Minutes
Cook Time 60 Minutes
Passive Time 50 Minutes
Servings
People
Ingredients
Meat and Stock
Fats
Vegetables
Prep Time 10 Minutes
Cook Time 60 Minutes
Passive Time 50 Minutes
Servings
People
Ingredients
Meat and Stock
Fats
Vegetables
Votes: 0
Rating: 0
You:
Rate this recipe!
Instructions
  1. Pre heat oven to 180 – 200 degrees Celsius
  2. Place the pork belly in a baking dish with the rind fat (crackle top) side up.
  3. With your hands, rub lard all over the pork. This is where your hands get messy. Shake a generous amount of salt on the top pork rind and continue to rub and massage more lard and salt until the rind is well covered. Lightly give it one more sprinkle of salt on the top. The salt is what allows the rind to crackle.
  4. Place the pork in the oven at 200 degrees Celsius for 30 minutes to allow the rind to crackle and then turn it down to 180 degrees Celsius and cook for 2 - 2 and a half hours pending in size.
  5. Cut the onions in half and roast them with the punpkin along side the pork.
  6. Cook some other seasonal vegetables in some homemade meat stock for approximately 20 minutes before the pork is finished.
  7. Remove the baking tray with the pork and vegetables from the oven and set them aside on paper towel to soak up excess dripping.
  8. Drain any excess dripping from the baking tray into your dripping tray to store for later use in the fridge.
  9. To make a very tasty gravy leave one tablespoon of dripping, one onion half and one to two pieces of pumpkin remaining in the bottom of the pan that the pork was roasting in and mix with the flat of a fork to make a delicious gravy on the stove at a low heat (you can add pepper to taste).
  10. Strain the cooked vegetables and set aside the meat stock to serve as a hot beverage with your meal.
  11. Serve this delicious pork belly with roasted pumpkin and other seasonal vegetables. Stewed apple can also be eaten with this meal.

GAPS Staple Casserole

This recipe is referred to by Dr Natasha Campbell-McBride as the ‘Italian Meat Casserole’ and we believe it is a staple dish that is easy to cook with it’s versatility in what can be used. It is a slow cooked method in the oven that produces a lovely tender meat that falls off the bone […]

Print Recipe
GAPS Staple Casserole
Votes: 1
Rating: 5
You:
Rate this recipe!
Prep Time 35 Minutes
Cook Time 4-6 hrs
Servings
People
Ingredients
Meat and Stock
  • 1 Lamb Shoulder See notes for other meat options
  • 1 Litre Filtered water Approcimate: this is dependant upon how bif the pot is and the size of the lamb
Herbs & Spices
Vegetables
  • 6-8 Cloves Raw Garlic Crushed - See notes caution
  • 1 Whole Onion Large - See notes caution
  • 2 Whole Celery sticks Finely diced - Only use celery on Full GAPS Diet
  • 2 Whole Carrots Finely diced - See notes caution
  • 1/2 Whole Pumpkin Cubed - See notes caution
  • 1/2 Head of Cauliflower or Brocoli - Cut and remove all stalks - See notes caution
Special Equipment
Votes: 1
Rating: 5
You:
Rate this recipe!
Instructions
  1. Heat the oven to 140 - 160 degrees Celsius. Place your meat joint or other selection of meat into an oval cast iron pot and fill 2/3 with filtered water. Be sure not to cover the meat joint completely with water, because the exposed part at the top of the meat produces a lovely tasting stock for drinking. This recipe should allow you to save a few jars of stock when you are done.
  2. If tolerated (see recipe notes) dice some onion and celery and crush some garlic and saute in a separate pan with a little lamb fat or duck fat and add to the pot. It is often nice to salt the top of the lamb and add some of the sauteed ingredients on top as well as surrounding the lamb in the stock.
  3. Add salt, dried herbs, bay leaves and a sprig of rosemary. Cover with the pot with the lid and cook on very low heat for 4-6 hours (125 – 140 degrees Celsius).
  4. After 4 or 5 hours add a variety of chopped vegetables. We have made some suggestions for you above that work nicely but feel free to experiment with seasonal organic vegetables. At this time it is essential to leave the lid off in the final stages of cooking and increase the temperature to 180 degrees celcius and cook for a further 40-50 minutes.
  5. When cooked, serve the meat and vegetables and use the stock (strained through a sieve) for a warm drink with your meal. Keep left over stock in the fridge or freezer for later meals or stock drinks.
Recipe Notes

Alternative Recipe Options

You can use any of the following meats (joint meats are easier to digest than muscle meats) Try to use a broad range of different meats each time you cook this meal.

  • Shoulder of lamb
  • Joint of pork
  • Joint of beef
  • Pheasant
  • Quail
  • Venison
  • Whole chicken
  • Turkey legs
  • Lamb shanks

You may experiment by adding a variety of vegetables keeping a broad range in your diet, however make sure you are ready for them - Refer to clinical notes.

The fat content of these meals need to be quite high: the more fresh animal fats you consume the faster the recovery.  Be sure to add fermented vegetables with every serving.  If you are still in the introduction stage, avoid spices at this stage and only use herbs, salt, and bay leaves.  This meal is easy to cook and provides you with a variety of options to choose from.  If you make a large batch, this meal is easily frozen and defrosted and heated in a glass Pyrex dish with a glass lid in the oven.  Cooking several of these meals and freezing them will allow you to have a break in the kitchen.

This method can be achieved with a slow cooker

Clinical Notes:

Introducing new food: If and when you introduce a new food, your patient’s symptoms of diarrhoea return, or pain or any other digestive symptom is experienced, then wait a week and try again after some more healing has taken place because this indicates that they are not ready for this food.

Avoid vegetables and consume only the meat and stock from this recipe if the patient is experiencing profuse diarrhoea.  Vegetables should be added gradually until well tolerated and digestion improves.

*This recipe is appropriate for the GAPS Introduction Diet Stage Two - onward