Entries by GAPS Diet Australia

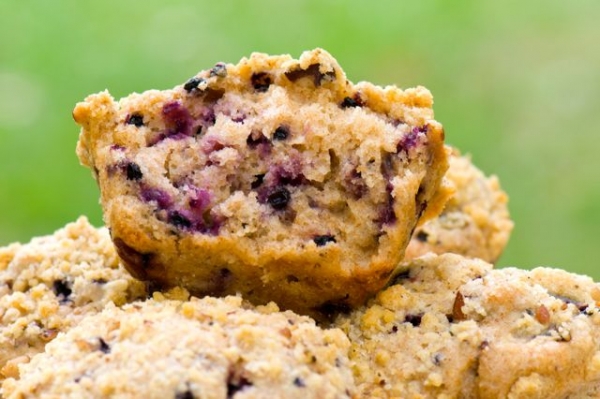
Apple & Black Elderberry Muffin Crumble Tops

This is a great Breakfast muffin or snack for morning tea. This recipe contains Black Elderberries so it is filled with beneficial immune properties well known to support GAPS conditions. Black Elderberry bushes have been found in many parts of the world and grow very well as a native bush right here in Australia. The […]

Print Recipe


Apple & Black Elderberry Muffin Crumble Tops

These delicious treats are suitable from Stage 6 on wards.

Votes: 0
Rating: 0
You:
Rate this recipe!

Prep Time 20 Minutes
Cook Time 25-30 Minutes

Servings
Muffins


Ingredients
Mini Muffin Ingredients

Topping

Prep Time 20 Minutes
Cook Time 25-30 Minutes

Servings
Muffins


Ingredients
Mini Muffin Ingredients

Topping

Votes: 0
Rating: 0
You:
Rate this recipe!


Instructions
  1. Peal and cut 4-5 apples into squares and stew them with a tablespoon of water. When cooked remove half a cup of the stewed apples to make the apple crumble topping. (put the remaining stewed apples aside).

  2. Add the half a cup of stewed apple squares to the remaining crumble mixture and mix together and set aside.

  3. Preheat oven to 150 degrees Celsius

  4. With the remaining stewed apple (which will be approximately 1 - 1.5 cups of stewed apples) mash and mix until the apple mixtures is a smooth pure texture.

  5. In a new bowl, add the almond flour, eggs, apple pure, honey, coconut oil and vanilla extract and mix with a hand held electric beater or thermomix. When well combined, add the bicarbonate of soda and lemon juice and mix again for a further 20 seconds or so. This will aid as a raising agent.

  6. Add the elderberries to the cake mixture and stir them in with a wooden spoon.

  7. Pour the mixture into muffin papers placed into a muffin tin.

  8. When the mixture is settled in the muffin papers, add the prepared topping ingredients on top and place into the preheated oven.

  9. Muffins will take approximately 25-30 minutes to cook. Keep an eye on them as almond flour is easy to burn (Don’t cook them in too high temperatures).

  10. Remove from the oven when cooked and allow to cool on a cooling tray. Serve with yoghurt, kefir or sourcream


Recipe Notes

Clinical Notes As with all stages of the GAPS diet, baked goods should only make up a small percentage of the diet and that the focus should be on healing nourishing foods, broths and juices.

Elderflower Champagne

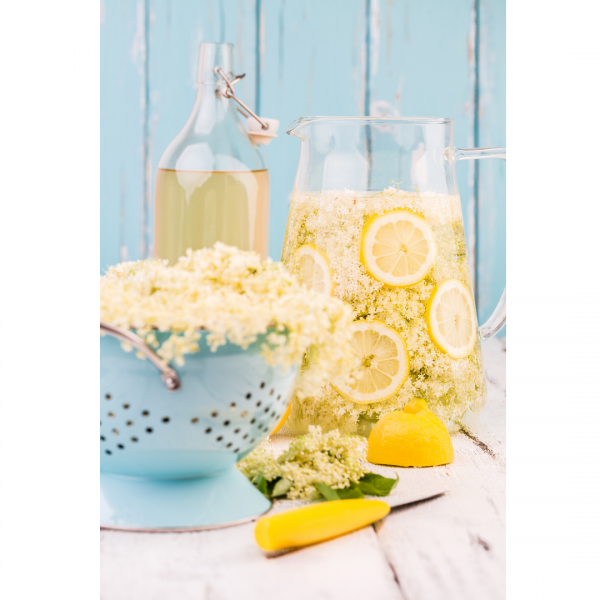
This is a refreshing probiotic immune boosting beverage made through wild fermentation. Made with the white-colored flowers of the elderberry shrub (Sambucus nigra or S. canadensis), elderflower champagne is a naturally bubbly, lightly alcoholic beverage with a delicate taste. It’s worth noting that this fermented elderflower beverage isn’t technically champagne because it doesn’t contain the grape […]


Print Recipe


Elderflower Champagne

Full GAPS

Votes: 0
Rating: 0
You:
Rate this recipe!

Prep Time 10 minutes
Cook Time 20 minutes

Servings
Litres


Ingredients

Prep Time 10 minutes
Cook Time 20 minutes

Servings
Litres


Ingredients

Votes: 0
Rating: 0
You:
Rate this recipe!


Instructions
  1. Prepare the flowers
    Do not wash the elderberry flowers. There is a natural yeasts on the flowers that will initiate the fermentation process. Just shake off any insects and remove any sticks and leaves from the cluster bunch completely!! ONLY use the flowers themselves as the leaves and branch can be poisonous.

  2. Place the honey in a very large bowl and pour in the boiling water. Stir until the honey or sugar has completely dissolved.

  3. Add the cold water. Stir in the vinegar or lemon juice and the elderberry flowers.
    Optional: I like to slice some round lemons pieces to add to the mixture.

  4. Cover with a clean dishtowel or cheesecloth and let the mixture sit at room temperature for 48 hours, stirring at least twice a day. By the end of these two days, you should see signs of fermentation: the top of the liquid will look frothy and bubbly, especially when you stir it. If the liquid is remains completely still after 48 hours, add a teaspoon of water kefir grains and wait another 48 hours, stirring occasionally, before proceeding to the next step. (the room temperature and the amount of beneficial yeast on the flowers plays a part in this process which is why you may or may not need the kefir grains) In most cases I like to add them any way, especially in the colder months).

  5. After 48 - 84 hours, pour the fermenting elderflower champagne through a finely meshed sieve to strain out the flowers (and lemon rind, if using). Use a funnel to help transfer the brew into clean plastic soda-type bottles with screw tops or thick ceramic or beer bottles with rubber flip tops. Do not use corked wine bottles because elderflower champagne is quite capable of popping out the corks or worse—exploding the bottles. Leave at least an inch of headspace between the surface of the liquid and the rims of the bottles. Secure the tops.

  6. Leave at room temperature for a week, “burping” (opening briefly) the bottles at least once a day. After the week at room temperature, move them to the refrigerator, but keep “burping” the bottles occasionally for another week.

  7. When ready to serve I like to add in fresh lemons, oranges and mint leaves. It is a lovely beverage.


Recipe Notes


  • Elderflower champagne will keep in the refrigerator for several months.
  • The earlier you drink it, the yeastier it will taste. Wait at least 2 weeks from bottling if you want it at its best.
  • Sugar can be used in the fermentation process and don't worry, the sugar content will be consumed during fermentation.  The honey version takes slightly longer to ferment out than the sugar version.
  • The final drink should be fizzy and lightly sweet.


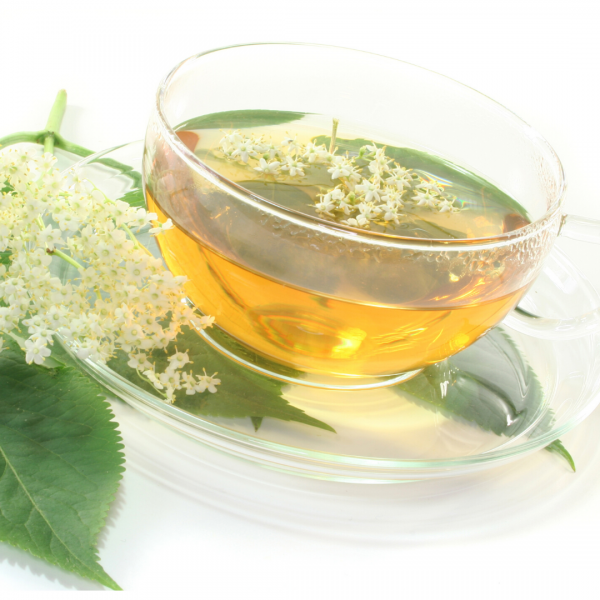
Elderflower Tea

Elderflowers contain wonderful immune properties. They are used for swollen sinuses (sinusitis), colds, influenza (flu), swine flu, bronchitis, diabetes, and constipation. It is also used to increase urine production (as a diuretic), to increase sweating (as a diaphoretic), and to stop bleeding. … Elderflower water is used in eye and skin lotions. Elderberry flowers can […]


Print Recipe


Elderflower Tea

Votes: 1
Rating: 5
You:
Rate this recipe!

Prep Time 3 minutes
Passive Time 7-10 minutes

Servings
people


Ingredients

Prep Time 3 minutes
Passive Time 7-10 minutes

Servings
people


Ingredients

Votes: 1
Rating: 5
You:
Rate this recipe!


Instructions
  1. Add 1 tablespoon dried elderberry flowers in a tea pot and fill up with boiling water. Elderberry flowers can be dried easily by hanging them or by drying them in the dehydrator.

  2. Let steep for 7 to 10 minutes.

  3. Strain and sweeten with raw honey to taste.


Recipe Notes

Elderflowers contain wonderful immune properties. They are used for swollen sinuses (sinusitis), colds, influenza (flu), swine flu, bronchitis, diabetes, and constipation. It is also used to increase urine production (as a diuretic), to increase sweating (as a diaphoretic), and to stop bleeding. ... Elderflower water is used in eye and skin lotions.

Elderberry flowers can be dried easily by hanging them or by drying them in the dehydrator in preparation to store them for tea making.

WHAT DOES IT TASTE LIKE? It's Floral, But It's Nothing Like Lavender Or Rose. Yes, there's that slightly herby flavor you'd get from edible flowers, but elderflower's sweeter than you'd expect - and a little musky. It's closer to lychee in flavor, and it has a crisp, palate-cleansing finish.


Christmas Cookie Dough

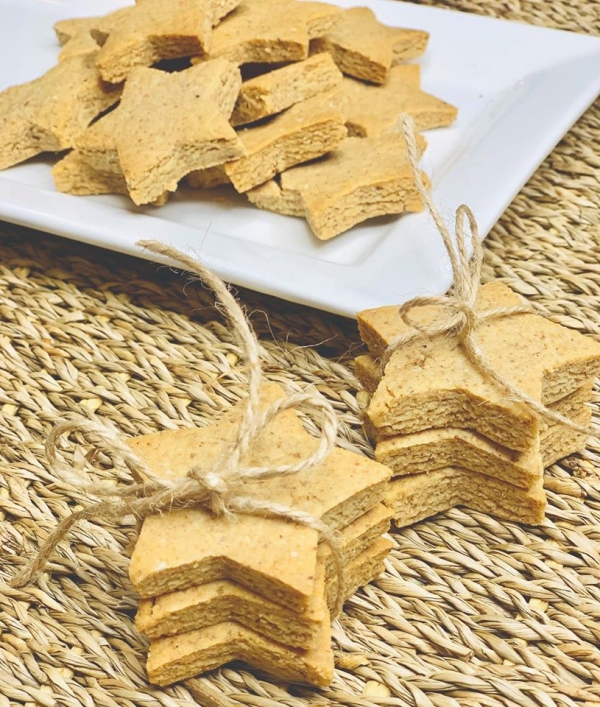
Print Recipe Basic GAPS Cookie Dough Suitable from Stage 6 onwards You can make little faces on these cookies with a variety of different expressions and call them emotion cookies or you can make small gingerbread men for Christmas. Votes: 2 Rating: 5 You: Rate this recipe! Course Baking at home, Dairy free recipes, Deserts, […]


Print Recipe


Basic GAPS Cookie Dough

Suitable from Stage 6 onwards
You can make little faces on these cookies with a variety of different expressions and call them emotion cookies or you can make small gingerbread men for Christmas.

Votes: 2
Rating: 5
You:
Rate this recipe!

Prep Time 10 Minutes
Cook Time 10 Minutes

Servings
Cookies


Ingredients

Prep Time 10 Minutes
Cook Time 10 Minutes

Servings
Cookies


Ingredients

Votes: 2
Rating: 5
You:
Rate this recipe!


Instructions
  1. Pre-heat oven to 150 degrees Celsius for 10 minutes (no hotter)

  2. Mix all ingredients in a bowl with a spoon, followed by massaging the contents in the bowl into a ball. Depending on the consistency of the mixture, add more nut butter or coconut oil if it is too dry or more nut flour if it is too moist. You want to create a cookie dough so keep mixing and squeezing the contents with your hands so that the mixture can be pressed and ready for rolling.

  3. When you have rolled the cookie mixture into a ball on the bench top, push down with the palms of your hands to flatten it a little and then use a rolling pin to roll out the dough into a flat surface approximately ¾ cm thick.

  4. Use a cookie cutter of your choice to make Christmas shaped biscuits. We have chosen stars, but you can make ginger bread shapes or any other Christmas shape you prefer.

  5. Place the tray in the preheated oven at no more than 150 degrees Celsius for 10 minutes, keeping a close eye on them to ensure they do not burn. Almond flour burns easily so do not cook any higher than 150 degrees Celsius.

  6. Remove the tray from the oven after 10 minutes and let the cookies cool on the tray before trying to pick them up as they will be soft and may crumble. If left to cool, they will become firmer.

Raw Milk Kefir

The GAPS ‘dairy introduction structure‘ promotes introducing whey first followed by yoghurt and then Kefir.  When introducing any of these, we do it methodically by first conducting the ‘food sensitivity test‘ first, followed by adding small amounts at a time added to other food to ensure they are well tolerated. This approach is used because […]


Print Recipe


Raw Milk Kefir

Votes: 0
Rating: 0
You:
Rate this recipe!

Servings

Servings

Votes: 0
Rating: 0
You:
Rate this recipe!

Food Sensitivity Test

Introducing Dairy The GAPS ‘dairy introduction structure’ promotes introducing whey first followed by yoghurt and then Kefir. When introducing any of these, we do it methodically by first conducting the ‘food sensitivity test’ first, followed by adding small amounts at a time added to other food to ensure they are well tolerated. This approach is […]


Print Recipe


Food Sensitivity Test

Votes: 2
Rating: 3.5
You:
Rate this recipe!

Servings

Votes: 2
Rating: 3.5
You:
Rate this recipe!

Dairy Introduction Structure

Introducing Dairy The GAPS ‘dairy introduction structure’ promotes introducing whey first followed by yoghurt and then Kefir. When introducing any of these, we do it methodically by first conducting the ‘food sensitivity test’ first, followed by adding small amounts at a time added to other food to ensure they are well tolerated. This approach is […]


Print Recipe


Dairy Introduction Structure

Votes: 0
Rating: 0
You:
Rate this recipe!

Servings

Votes: 0
Rating: 0
You:
Rate this recipe!

Raw Dairy Milk Yoghurt – Creme Fraiche & Whey

This recipe is primarily a yoghurt recipe, however we will continue with a second set of instructions to produce some whey which should be introduced first on the introduction diet.  Using the same instructions here to make yoghurt, you can also make what Dr Natasha refers to as Creme Fraiche (sour Cream) This is in- […]


Print Recipe


Raw Dairy Yoghurt

This recipe is appropriate from stage one onward - HOWEVER, yoghurt should be introduced after whey has been introduced. Follow the steps on the introduction diet stage one

Votes: 4
Rating: 3.25
You:
Rate this recipe!

Cook Time 24 - 30 Hours

Servings


Ingredients
Ingredients

Equipment
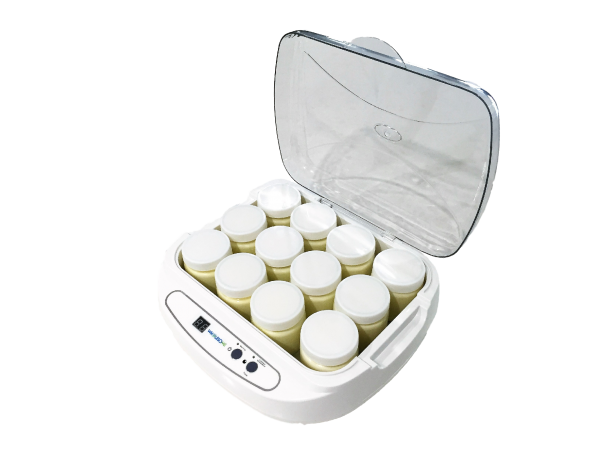
  • 1 Yoghurt Maker I suggest the 'Wholesome me’ Yoghurt Maker as it is specifically designed for GAPS
  • 1 Milk thermometer If making yoghurt with pasturised milk
  • 1 Saucepan Only required for heating if you are not making raw yoghurt
  • 1 2 Litre Pyrex Jug For mixing the starter and pouring into jars

Yoghurt Culture Starter Options - SELECT ONE FROM BELOW
  • Cultured yoghurt starter powder (measure as per product instructions - add more for thicker result) GAPS Diet Australia have two options: Custom Probiotics Starter #2 (GAPS) and Gi Pro Starter (SCD)
  • 2-3 Synbiotic powder 3 scoops per one litre of milk (GutBiome Brand)
  • 1/3 Cup Homemade yoghurt as a starter per litre of milk

Votes: 4
Rating: 3.25
You:
Rate this recipe!


Instructions
Yoghurt
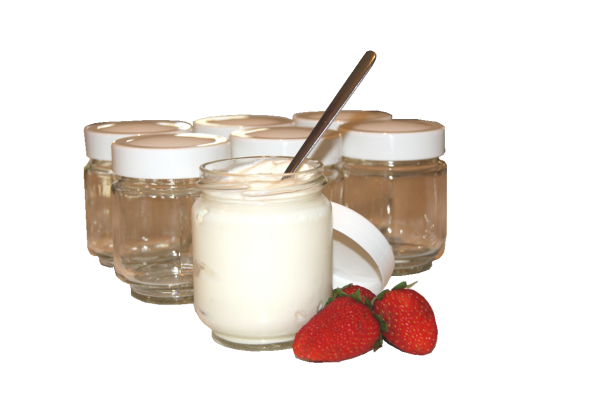
  1. Steralise all your equipment such as the pyrex jug, whisk and yoghurt making jars/container.

  2. Pour your milk in a large jug. I like to use a two litre sized pyrex jug.

  3. Add your yoghurt culture starter option to the milk. Please refer to the yoghurt culture starter options listed above.  If you are using a powdered culture or synbiotic powder, be sure to first stir the powder into 15mls of milk in a separate sterilised cup first to ensure that the starter does not clump and then add this to the remaining milk and stir well. It is important to stir the starter well so that it blends and mixes with all the milk to produce a good yoghurt.  You can do this slowly and gradually with a whisk.

    (If you are not making raw yoghurt and you have heated the milk first, make sure that it cools down to a temperature between 38˚C and 45˚C before adding the culture).

  4. After the starter culture has been added and mixed well to the milk, it is ready to pour into the yoghurt maker jars or glass dish. When this is done place them into the yoghurt maker.

  5. Set the timer for the desired incubation period and ferment the yoghurt for 24 hours (minimum) or more at a temperature range between 38˚C and 45˚C.

    24 hour fermentation will allow the yoghurt to be virtually lactose and casein free and make proteins more digestible). The longer the ferment, the stronger and more tart the taste will become but the more beneficial it will be.

  6. When the fermentation is complete, transfer the yoghurt to the fridge to set for 6 hours before consuming.

  7. GAPS Yoghurt will produce a lovely creamy layer on top. This is easily mixed into the yoghurt or you can scoop it off and enjoy it as is.

Sweetening
  1. Fruit and honey are good natural sweetener options to add flavour. *Be sure not to add any fruit to the yoghurt before fermentation as this may allow mould or harmful bacteria to proliferate. 

Storage
  1. Keeps for several weeks in the fridge

Thickening Tips
  1. Raw yogurt will not naturally become as thick as traditional yogurt and may present with some whey. If you would like your yogurt to be thicker, try dripping it through a cheesecloth for a few hours to remove some of the whey (see below instructions).  Store the whey in the fridge and use for culturing or adding to dishes as per the introduction diet.

Dripping Your Whey
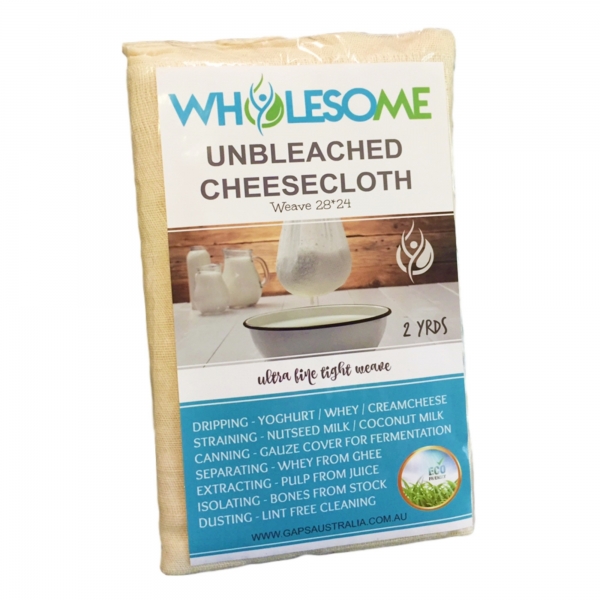
  1. With a large (bleach free) cheese cloth, line a stainless steel colander. Sometimes you will need to double or triple lay the cheese cloth for desired result. This means folding it over a couple of times to make it less pour’s which will slow down the dripping process and collect more cream cheese.

  2. Place the colander over a large glass bowl and pour your yoghurt into the cheesecloth lining the colander. This will allow the whey to drip through the cheese cloth and collect in the glass bowl underneath. Alternatively you can hang the cheesecloth from a kitchen cupboard handle and let it drip into a glass bowl underneath it.

  3. Cover the colander with a tea towel and leave it for a few hours. The result will establish a liquid in the glass bowl (whey) and remaining residue in the lined colander will resemble cottage cheese.

  4. Pour the whey into a clean glass jar with a tight lid to use with the GAPS introduction stages and keep it in the refrigerator. The whey can also be used as a starter for fermenting different foods, such as vegetables, fish, seeds and nuts (when your patient is ready to have them). Depending on how long you leave your yoghurt dripping, you can make cottage cheese or use these steps to make a thicker yoghurt. Both the yoghurt and the cheese can be used for baking, adding to salads and soups and as deserts with honey and fruit.


Recipe Notes

If you can not find raw milk

If you are unable to find raw milk, be sure to select organic full cream milk from grass fed cows and follow these steps at the beginning of the recipe.

1. Pour milk into a large saucepan and very slowly bring the pasturised milk close to boiling (approximately 80-90°C) in a stainless steel saucepan & stir occasionally. (Try not to boil too fast as it may burn) By bringing the milk close to boiling point (no higher than 80°C) you destroy any bacteria which may be lingering in the milk that can interfere with the fermentation process. It is important not to boil the milk as it will change its taste. (Boiling point is set at 100°C).

2.Take the saucepan off the stove and set aside to cool down.  You can cool it down faster by filling your sink with cold water and ice and submerging the base of the saucepan in the cold water. Keep an eye on the thermometer until it reaches between 38-45°C.

3. After the milk has cooled to 38-45°C, you may add your yoghurt starter. If you are using a powdered culture or synbiotic starter, be sure to first stir the powder into 15mls of milk in a separate sterilised cup to ensure that the starter does not clump and then add it to the remaining milk and stir well. It is important to stir the starter well so that it blends and mixes with the all the milk.  You can do this slowly and gradually with a whisk. IMPORTANT: Make sure you add the yoghurt or starter after it has cooled down between 38 – 45˚C and not any hotter or it will kill the beneficial bacteria.  When the culture is mixed well, pour the milk into a glass pyrex jug because the spout on the jug will make easier to pour into the yoghurt making jars.

Continue with the remaining cooking instructions from this recipe from step 4 onward.

IMPORTANT: Make sure you add the yoghurt or starter after it has cooled down between 38 – 45˚C and not any hotter or it will kill the beneficial bacteria.

If you can't use Dairy

If you have a true dairy allergy, you may make yoghurt with nut milk or coconut milk.  Please refer to our recipes on how to make these.

What yoghurt maker is best?

The Wholesome me yoghurt maker was specifically designed for GAPS

Introducing Raw Vegetables

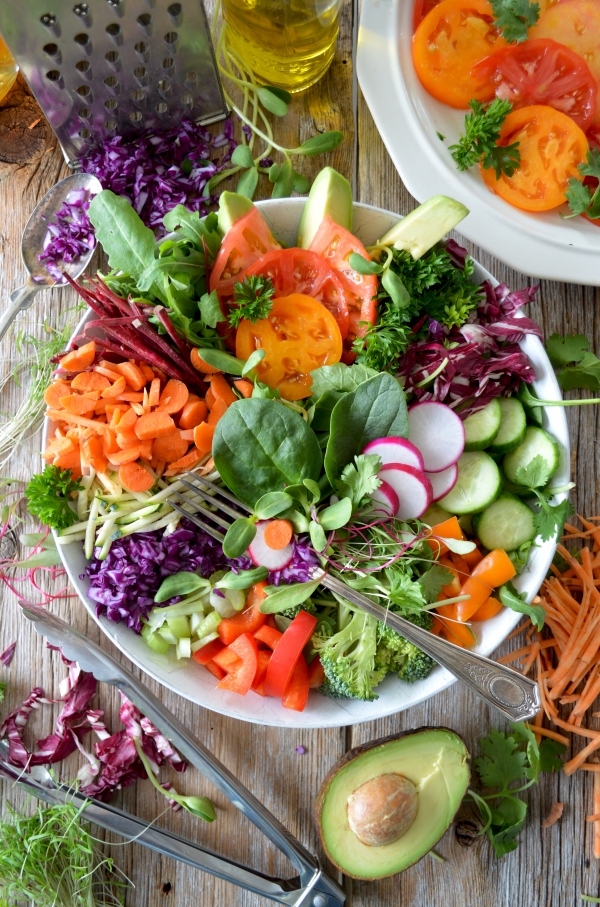
Introducing Raw Vegetables in Stage 5 of the GAPS Introduction Diet Intervention instructions: Add raw vegetables starting from the following: 1. Softer parts of lettuce and cucumber 2. When the above two vegetables are well tolerated, start adding other raw vegetables such as carrot, tomato, onion, cabbage, capsicum, celery etc. Points • Refer to Clinic […]


Print Recipe


Introducing Raw Vegetables

This recipe is appropriate for the GAPS Introduction Diet from stage Five onward

Votes: 0
Rating: 0
You:
Rate this recipe!

Servings

Votes: 0
Rating: 0
You:
Rate this recipe!


Recipe Notes

Clinical Notes

Monitor stools: If diarrhoea returns or becomes a new concern, your patient is not ready for this food and should remain on the step prior for longer.

Fried Egg

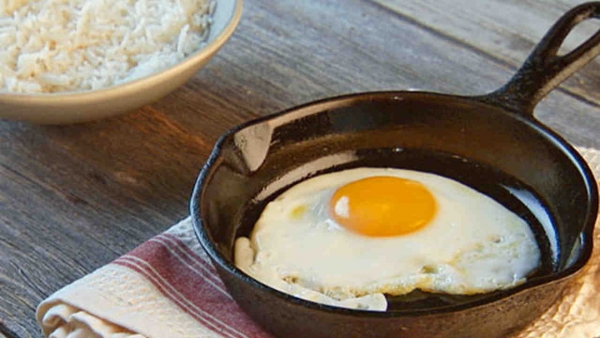
How do you like your eggs? The GAPS Introduction Diet introduces soft boiled eggs first in stage two followed by scrambled or fried in stage 3. Relatively simple this recipe can be adjusted to suit the individual in terms of sunny side up and sunny side down, however the important thing to remember is to […]


Print Recipe


Fried Egg

This recipe is appropriate for the Introduction Diet from stage 3 onward.

Votes: 0
Rating: 0
You:
Rate this recipe!

Servings


Ingredients

Servings


Ingredients

Votes: 0
Rating: 0
You:
Rate this recipe!


Instructions
  1. Add the ghee to the fry pan and set on medium heat. Do not allow the ghee to burn

  2. I recommend cracking the egg into a small bowl first, and then pouring that gently into the pan. Make sure to pour slowly, letting the whites find their placement for 1 or 2 seconds before letting the yolk slip into the middle of the pan. Of course, you’re welcome to just crack and pour the egg directly into the pan.

  3. Cook the egg until the whites are cooked and the egg yolk is still runny. That is an official GAPS egg. We want the yolks to be runny to maximise the nutrition from the egg. You can flip the egg if you wish to have a sunny side down, however be careful not to over cook the yolk. Sunny side up will allow you to monitor the cooking of the yolk much better.

Scrambled Eggs

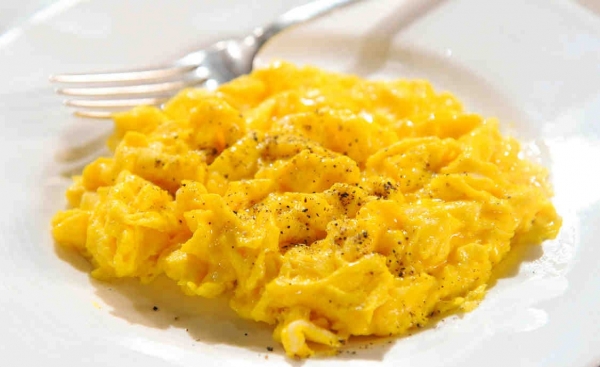
The GAPS Introduction Diet introduces scrambled eggs or fried eggs in stage three.  This is a simple and very quick recipe requiring very little preparation.  The ingredients contain only egg with a little ghee for cooking, however for more fluffier eggs, you can add a couple of tablespoons of sour cream or kefir. Print Recipe […]


Print Recipe


Scrambled Eggs

This recipe is appropriate for the GAPS Introductions Diet from stage 3 onward

Votes: 1
Rating: 4
You:
Rate this recipe!

Prep Time 2 minutes
Cook Time 3 minutes

Servings
people


Ingredients

Prep Time 2 minutes
Cook Time 3 minutes

Servings
people


Ingredients

Votes: 1
Rating: 4
You:
Rate this recipe!


Instructions
  1. Crack the eggs into a glass bowl

  2. Use a fork to beat eggs together.

  3. Melt ghee or duck fat in a fripan over low heat. Don't allow the ghee to burn.

  4. Add egg mixture and gently pull eggs to the center of the pan and let the liquid parts run out under the perimeter.

  5. Cook, continually moving eggs with the metal spatula, just until eggs are set. This will take approximately 1 to 3 minutes.

  6. Season with salt and pepper; serve hot with a little parsley.


Recipe Notes

Clinical Notes

When on the Full GAPS Diet, if digestion has improved you may introduce onion and celery to the mixture as well.

Guacamole

Serve ripe avocado daily with every bowl of soup and with meats and fish. Avocados are a great source of vitamins C, E, K, and B-6, as well as riboflavin, niacin, folate, pantothenic acid, magnesium, and potassium. They also provide lutein, beta-carotene, and omega-3 fatty acids. Although most of the calories in an avocado come […]


Print Recipe


Guacamole

This recipe is appropriate from stage three onward

Votes: 0
Rating: 0
You:
Rate this recipe!

Servings


Ingredients

Servings


Ingredients

Votes: 0
Rating: 0
You:
Rate this recipe!


Instructions
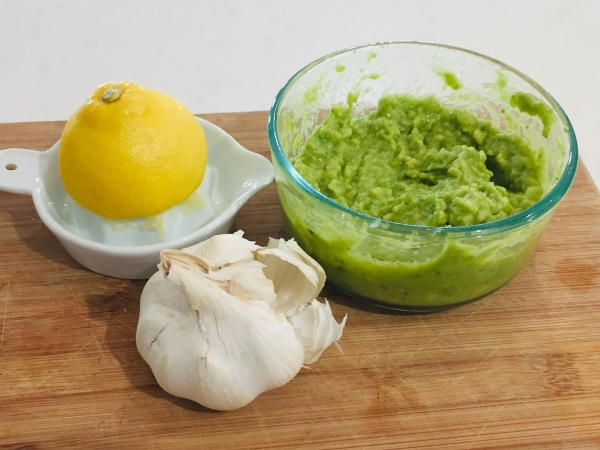
  1. Slice the avocado down the middle and around the seed. Remove the seed and scoop the avocado out of it's skin and place into a small bowl.

  2. Crush the garlic with a garlic crusher and add it to the avocado. You may want to start with a small amount of garlic as raw garlic can have quite a bite, however one of the best foods for the immune system so I like to have at least 4 cloves.

  3. Add the lemon juice and crush all the ingredients together with the back of a fork or use a potato masher. When the texture is smooth to your liking, store in the fridge. The lemon juice will help preserve the colour for a while and it should last a couple of days in the fridge.

Cooking the perfect GAPS egg

Eggs are the easiest food to digest and their nourishment has been compared to breast milk because it can be absorbed almost 100 percent without needing digestion.  Egg yolks provide many amino acids, vitamins (B1, B2, B6, B12, A, D & biotin), essential fatty acids, magnesium and zinc among many others.  Eggs are particularly high […]


Print Recipe


Cooking the perfect GAPS Egg

Eggs are appropriate for the introduction diet from stage 2 onward and for the GAPS Baby Diet Protocol from stage 4 onward

Votes: 2
Rating: 3.5
You:
Rate this recipe!

Prep Time 1 minutes
Cook Time 3-5 minutes

Servings


Ingredients
  • 1 egg organic free range

Prep Time 1 minutes
Cook Time 3-5 minutes

Servings


Ingredients
  • 1 egg organic free range

Votes: 2
Rating: 3.5
You:
Rate this recipe!


Instructions
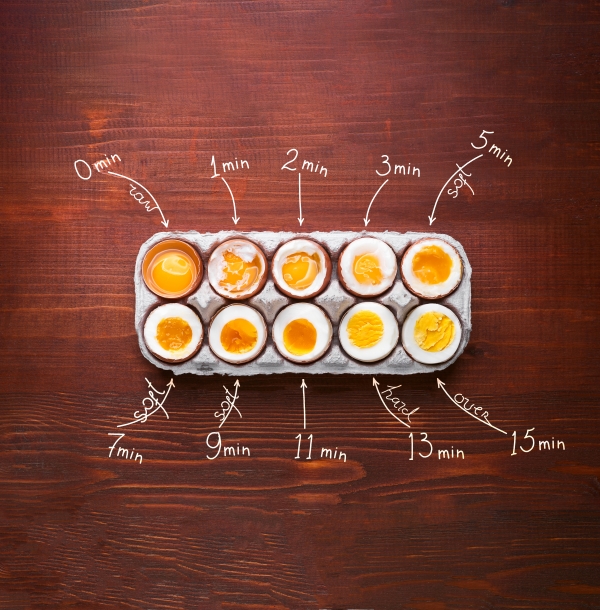
  1. Cook the egg so that the egg white is cooked and the egg yolk is still runny. This may require your own testing on the stove because every stove type will generate different heat and some are more immediate than others. Once you have achieved the desired egg, try to remember the time it took to cook it and you will have the perfect egg every time.

  2. For the perfect GAPS egg to ensure teh white is cooked and egg yolk runny, we recommend 3-5 minutes as shown on the egg cooking time chart.

  3. Peal the egg shell under cold water whilst it is still hot but not too hot to touch. This makes for an easier way to peal the egg with out breakage, otherwise put it in an egg cup, slice off the top and scoop it out.

  4. Add an egg to every bowl of soup.

Sauerkraut

Sauerkraut is a condiment suggested to be eaten as a side dish whenever meat is consumed and especially at the end of the day when the body’s enzyme storage is depleted having already been expended on previous meals earlier in the day.  The evening meal is often the most difficult for people who suffer from […]


Print Recipe


Sauerkraut

This recipe is appropriate for the introduction diet from stage One onward

Votes: 0
Rating: 0
You:
Rate this recipe!

Servings
Litre


Ingredients
Sauerkraut

Sauerkraut Equipment
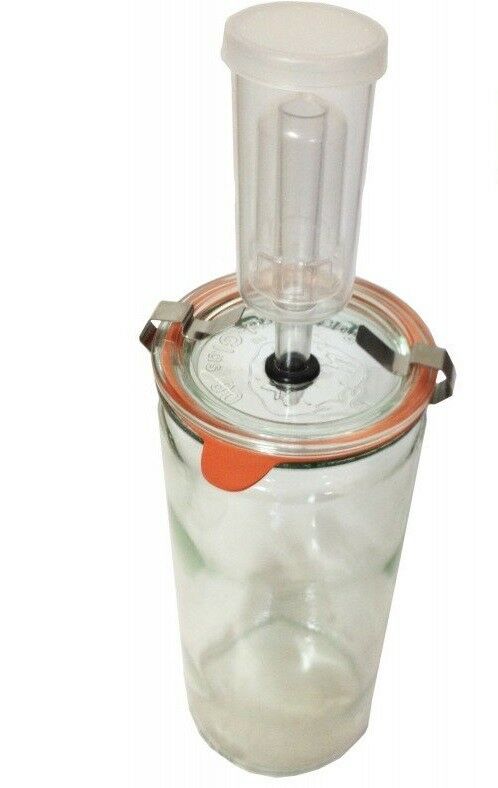
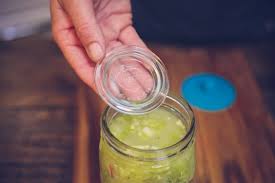
  • 1 Fermentation Vessel A glass jar or crock with a weight to hold the vegetables submerged under the brine and an airlock system with a release valve to allow air to escape whilst creating an anaerobic environment. Refer to Weck images below
  • 1 Mandolin For slicing cabage (or use a knife)

Votes: 0
Rating: 0
You:
Rate this recipe!


Instructions
  1. Thinly slice or shred the cabbage with a knife or mandolin. I like to use a mandolin.

  2. Place the shredded cabbage in a large glass bowl and add the dill (optional).

  3. For Wild Fermentation, add a generous amount of salt to the cabbage and mix it through with your hands to allow an overall coverage. Let it sit for 15 – 20 minutes to allow the salt to draw out some of the cabbage juice naturally. 5-8grams - (max 15grams) per 1kg cabbage.
    HINTS: Salt allows the cabbage to sweat so that juices can be extracted to create the brine.

    For Cultured fermentation, add the commercial culture starter as per packet instructions.

  4. Mix, massage and knead the ingredients with your hands. Bruising the cabbage this way allows the cabbage to extract a natural brine solution. Keep kneading until you have squeezed a substantial amount of juice from the mixture. Sometimes this may take 10-20 minutes.
    HINTS: It is beneficial to have someone with strong hands to do the kneading & massaging.

  5. Place mixture into the selected fermenting vessel and pack and push the mixture down so that the cabbage is compacted in the bottom and the juice is sitting on the top of the cabbage with a minimum of 4 - 5cm’s or 2 inches. It is important to push the cabbage down firmly so that no air is trapped and the cabbage is completely submerged in and under its own brine juice.
    HINTS: If for any reason the cabbage is not submerged under enough of its own juices, you may need to add a small amount of filtered water with more salt (15 gms of salt to 1 ltr).

  6. Place the weight on the top of the cabbage to keep all the cabbage submerged. Push the weight down and you will see more juice rise to the top. It is very important to ensure that all the sauerkraut is submerged under its own juice. If any bits of cabbage float up to the surface, remove them throughout the fermentation process to prevent them from going moldy.

  7. If you use a canning jar with a rubber ring top, and close the lid, be sure to burp it a few times in the first few days to release the pressure.

    If using the weck airlock system which has it's own release valve allowing gasses to escape without letting air into the jar, place the rubber ring around the top and clamp down the lid with the attached release valve to the top. Store in a dark place for one to two weeks (ie pantry).

  8. The sauerkraut may be consumed and ready to eat after 5-7 days but it matures better with age so it is good to wait the full two weeks unless the outside temperature is hot which will speed up the fermentation process.

  9. The sauerkraut may be stored in the fridge after 1-2 weeks of fermentation. If there is any scum or mold development on the top – remove this. The kraut remaining under the juice will be fine.


Recipe Notes

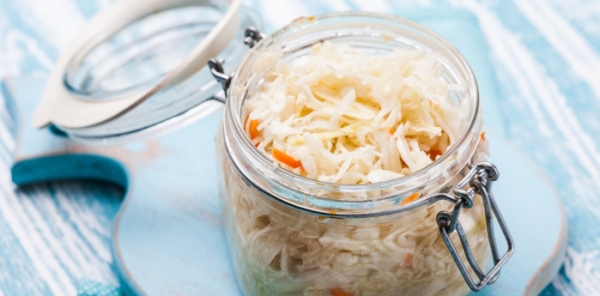
Optional: It is also nice to add a little grated carrot to your sauerkraut.

Fish Stock

Compared to the other stocks, fish stock is easier to make because there is no roasting or long cooking times required. The DHA and EPA make this stock more beneficial than other meat stock. These Omega-3 fatty acids are the most important nutrients for brain function. Fish stock will produce it’s own gelatin and other […]


Print Recipe


Fish Stock

*This fish stock recipe is appropriate for the GAPS Introduction Diet Stage One - onward

Things you may need: Wide Mouthed Mason Stock Storage Jars, 6-8L Stainless Steel Cooking Pot, Stainless Steel colander, straining spoon and Cheesecloth.

Votes: 0
Rating: 0
You:
Rate this recipe!

Prep Time 30 Minutes
Cook Time 2-4 Hours
Passive Time 30 Minutes

Servings
3 litre pot


Ingredients
Basic Ingredients

Fish Meat and Bone

Prep Time 30 Minutes
Cook Time 2-4 Hours
Passive Time 30 Minutes

Servings
3 litre pot


Ingredients
Basic Ingredients

Fish Meat and Bone

Votes: 0
Rating: 0
You:
Rate this recipe!


Instructions
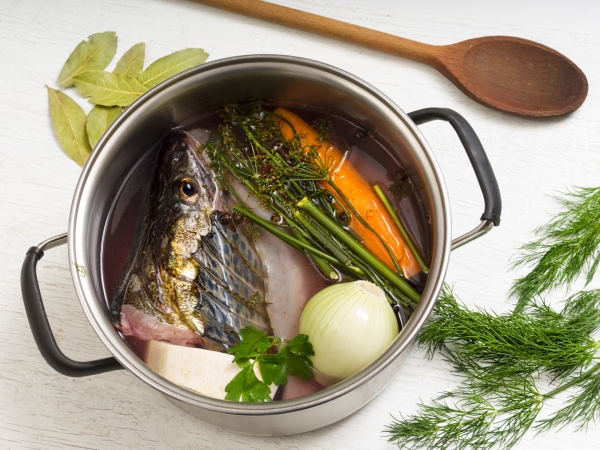
  1. Place the fish bones, heads and fins into a large pot and fill it up with 3 litres of filtered water.

  2. Add the onion and garlic to the pot, along with the bay leaf, black pepper corns and salt.

  3. Add the fennel, parsley and juice from the lemon.

  4. Add the apple cider vinegar and bring to a boil. Skim off any scum that rises to the top.
    Reduce the heat, cover and simmer for at least 2 - 4 hours.

  5. After cooking for the recommended time above, remove the bones and any meat by straining the stock ingredients through a sieve and discard all the vegetables and bones caught in the sieve.

  6. Strain the remaining stock with a cheesecloth to remove all remaining small bones, pepper corns and any vegetables that were added. Discard any tiny bones, fins, heads and vegetables added.

  7. Store the stock in wide mouthed freezer safe mason jars in the fridge or freezer. The meat stock will keep well in the fridge for at least 7 days or it can be frozen for several months.


Recipe Notes

For Best Storage

Storing your stock properly will be key!  In the fridge it lasts up to 7 days so it is best to purchase freezer safe storage containers to keep you stock on hand.  I recommend purchasing a dozen or more Wide Mouthed Freezer Safe Mason Jars. These will allow you to have stock on hand within minutes because the wide opening allows the stock to slide straight out after running the bottom of the jar under hot tap water for a few minutes to loosen it up.   This can be added directly to the cook pot for use.  If you freeze in other glass jars, the stock will not slide out and you will have to wait for it to defrost.  Other glass jars are not freezer safe and you can easily destroy an entire batch with glass cracking in the freezer or from the change in temperature when running them under hot water to loosen them.  These jars are supplied at our Online GAPS Shop

Fish Stock Selections & Preparation

Fish frames with fish heads intact, including skin and fins (no fish meat required).

The fish flesh contained in the heads of the fish will produce the necessary gelatin and essential minerals for this recipe.  If you use the whole fish including the fish flesh to make the stock, the fish will fall apart and begin to disintegrate into the stock, clouding the stock and making it messy.  The meat is better saved for an enjoyable meal separately.  And of course this is very resourceful, sustainable and satisfying to get use out of every part of the animal you’re eating.

If you are aiming to make a tasty fish stock, select bones from white fish such as bass, cod and flat fish. Bones from oily fish such as salmon, mackerel or tuna are very fatty (which is ideal for GAPS) but they can impart a greasy and unpleasant taste for people who are getting used to fish stock.  Having said this, fatty fish are preferred sources for the GAPS diet.

The fish bones must be cleaned of any blood and gills as these will impart a nasty, bitter taste and cloud up your stock. Fish heads add a lot of flavour and contain a lot of gelatine which will give body to your stock, but make sure they are thoroughly cleaned (and always remove the gills). A good way of cleaning the bones is to run them under a cold tap and leave them to soak in the water to allow impurities to float the surface (which you can then skim and discard).

Hints & Facts:

  • Add 1/4 a cup of apple cider vinegar to help draw out minerals from the bones and into the stock such as calcium potassium and magnesium. Some people may not be ready to add this during intro.
  • If you choose fatty fish like mackerel or salmon, make sure they are not farmed or preserved in any way.
  • Gelatin is the substance extracted by boiling bones, fins and heads.

Contrary to popular belief meat, fish and organ meats like liver and kidney have the highest contents of vitamins, amino acids nourishing fats, many minerals and other nutrients which we need in order to be adequately nourished.

Clinical Notes:

Low fibre is the aim initially (especially for people who have profuse watery diarhoea), however if you are more prone to constipation, you can add onion, celery and cabbage to the stock for more flavour.

https://shop.gapsaustralia.com.au/freezer-safe-mason-stock-storage-jar-475ml/

Pork Meat Stock

It is important to understand the difference between meat and bone broth. Meat stock and bone broth are two different things. Simply put, meat stock is made over a few hours with raw bones and meat, where as bone broth is made with old cooked bones and cooked over 12 – 24 hours or more. […]


Print Recipe


Pork Meat Stock

Remember, a rich meat stock is what we are seeking to make on the introduction stages, not bone broth until you graduate to the Full GAPS Diet Program.

*This meat stock recipe is appropriate for the GAPS Introduction Diet Stage One - onward

Things you may need: Wide Mouthed Mason Stock Storage Jars, 6-8L Stainless Steel Cooking Pot, Stainless Steel colander, straining spoon and Cheesecloth.

Votes: 2
Rating: 4
You:
Rate this recipe!

Prep Time 30 Minutes
Cook Time 3-6 Hours
Passive Time 30 Minutes

Servings
4 litre pot


Ingredients
Basic Ingredients

Pork Meat Joints: Your meat joint must contain bones with marrow, soft tissue and bones with meat still attached to it - Select at least 3-4 items from this group below

Prep Time 30 Minutes
Cook Time 3-6 Hours
Passive Time 30 Minutes

Servings
4 litre pot


Ingredients
Basic Ingredients

Pork Meat Joints: Your meat joint must contain bones with marrow, soft tissue and bones with meat still attached to it - Select at least 3-4 items from this group below

Votes: 2
Rating: 4
You:
Rate this recipe!


Instructions
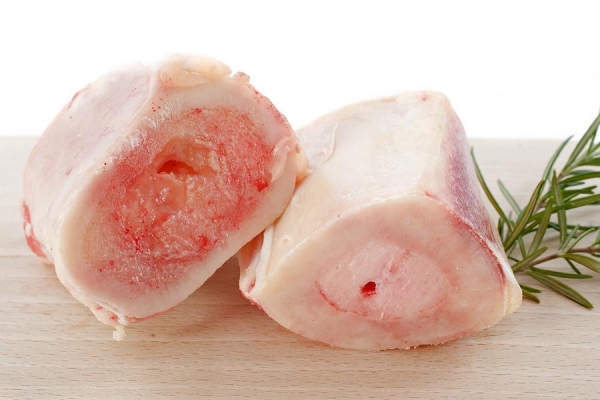
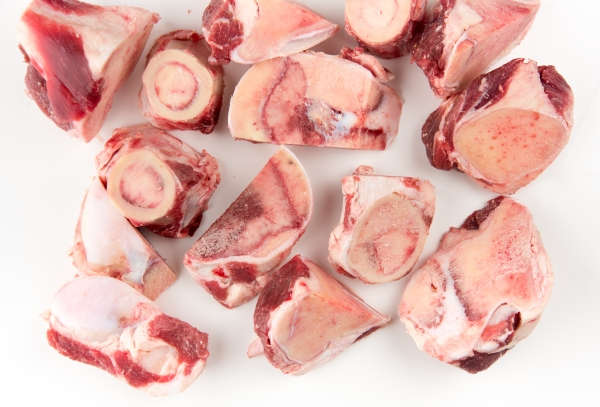
  1. Your selected meat joint must contain bones with marrow, soft tissue and bones with meat still attached to it. Ask your butcher to cut some large tubular marrow bones so that the marrow can be easily accessed like that shown in the image.

  2. Lightly brown the meat cuts in lard or ghee in a frypan or . This creates added flavour to the stock. Do not cook it, just lightly sear it with a sprinkle of salt to create flavour.

  3. Place the bones and meat joints into a large pot and fill it up with 4 litres of filtered water.

  4. Cut the onions into halves or quarters and add them to the pot along with roughly chopped carrots and crushed garlic cloves. If you are following the introduction diet stages, we recommend you avoid the fibrous vegetables such as celery at this time.

  5. Add salt to taste at the beginning of cooking and about a teaspoon of black peppercorns.

  6. Add apple cider vinegar and fresh oregano.

  7. Bring to a boil and skim and skim off any scum that rises to the top. Then reduce the heat and leave on the stove at a low simmer for about 3–6 hours.
    If you are cooking in the oven, cook at 150°C for 3 hours.
    If using crock pot, cook on high for 2 hours, then on low for 6 -8 hours.

    This is the measured cooking time frame to make your nutrient meat stock. Bone stock without the meat cuts are usually longer. The longer you cook the bone stock the more nutrients and the softer the bones become for fishing out marrow.

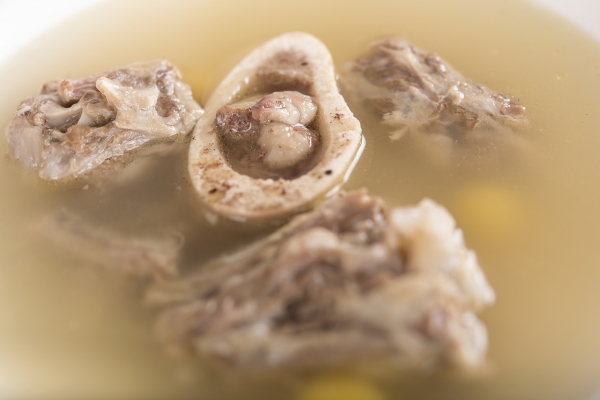
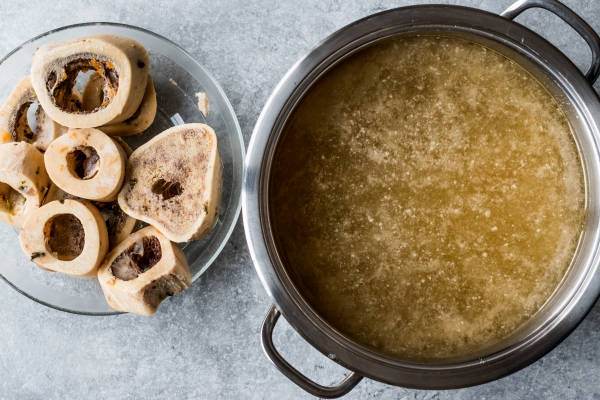
  8. After cooking for the recommended time above, remove the meat, marrow and bones by straining the stock ingredients through a sieve. You can do this by collecting the stock under the strainer into a larger pot. Strip off all the meat and soft tissues from the bones as best as you can and extract the bone marrow out of the large tubular bones while they are still warm: to do that bang the bone on a thick wooden chopping board. The gelatinous soft tissues around the bones and the bone marrow provide some of the best healing remedies for the gut lining and these should be put aside with the meat that has been stripped from the bones to add later to soups or as a meal. It is also ok for the patient to eat the marrow and soft tissue direct from the bones.

  9. Strain the remaining stock with a cheesecloth to remove all remaining small bones, pepper corns and any vegetables that were added. Discard any tiny bones and vegetables added.

    Store the stock in wide mouthed freezer safe mason jars in the fridge or freezer. The meat stock will keep well in the fridge for at least 7 days or it can be frozen.

    The bones can be frozen and later used again to make bone broth.


Recipe Notes

If you wish to make bone broth/stock later, you can keep the bones by storing them in the freezer and cook the ingredients for longer to extract more nutrients from the bones.  Refer to our Bone Broth Recipe to make this but remember not to introduce bone broth until you are on Full GAPS Diet or simply continue with the nutritious meat and gelatin stocks.

For Best Storage

Storing your stock properly will be key! In the fridge it lasts up to 7 days so it is best to purchase freezer safe storage containers to keep you stock on hand. I recommend purchasing a dozen or more Wide Mouthed Freezer Safe Mason Jars. These will allow you to have stock on hand within minutes because the wide opening allows the stock to slide straight out after running the bottom of the jar under hot tap water for a few minutes to loosen it up. This can be added directly to the cook pot for use. If you freeze in other glass jars, the stock will not slide out and you will have to wait for it to defrost. Other glass jars are not freezer safe and you can easily destroy an entire batch with glass cracking in the freezer or from the change in temperature when running them under hot water to loosen them. These jars are supplied at our Online GAPS Shop

Butcher supplies for meat stock

The ratio of ingredients is individual and dependant on the size of the batch you wish to make but keep in mind that some stock should be reserved for drinking and some for making your batch for soup.  The remainder of your ingredients will depend on what type of meat stock you are making.  Here is a list of bone selections you can ask for at your organic butcher shop.

Beef, Lamb, Pork or Game Selections

  • Large tubular marrow bones
  • Gelatinous meats
  • Meaty rib bones
  • Osso Buco cuts
  • Knuckle bones
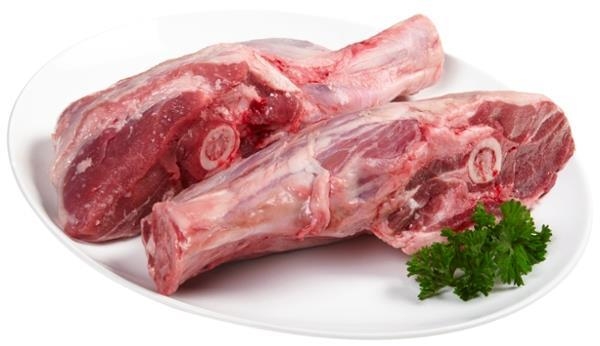
  • Shanks
  • Neck bones
  • Tail bones
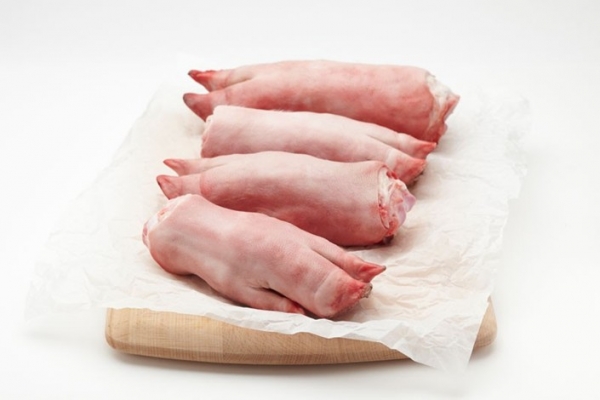
  • Trotters
  • Joints
  • Ears

Poultry Selections

  • Whole chicken & extra chicken frames
  • Feet from one chicken
  • Gizards & giblets
  • Spatchcock
  • Pheasants
  • Pigeon
  • Goose
  • Duck

Fish Selections

  • Fish frames with heads (no fish meat)
  • Skins
  • Fins

Hints & Facts:

  • Add 1/4 a cup of apple cider vinegar to help draw out minerals from the bones and into the stock such as calcium potassium and magnesium. Some people may not be ready to add this during intro.
  • Choose fatty fish like mackerel or salmon. But make sure they are not farmed or preserved in any way.
  • Gelatine as the substance extracted by boiling bones, hoofs, trotters and soft animal tissues from gelatinous meats.
  • The celery sticks should be avoided for patients in the introductions diet stages.  These can be added later on full gaps for added stock flavour.  They can be freshly cut as shown in the instructions or sauteed in a pan with onion and garlic prior to adding to the pot  for added flavour.

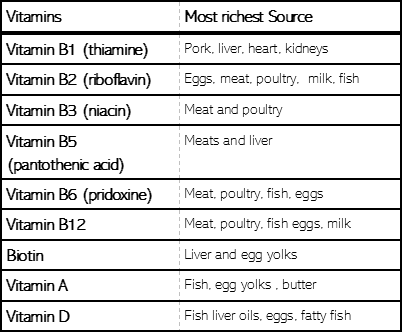
Contrary to popular belief meat, fish and organ meats like liver and kidney have the highest contents of vitamins, amino acids nourishing fats, many minerals and other nutrients which we need in order to be adequately nourished.

Charting the highest source of essential nutrients

Clinical Notes:

Low fibre is the aim initially (especially for people who have profuse watery diarhoea), however if you are more prone to constipation, you can add onion, celery and cabbage to the stock for more flavour.


GAPS Basic Healing Soup

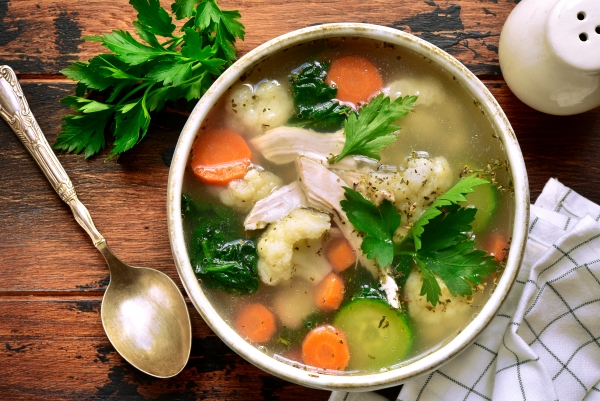
*Please refer to our meat stock recipes to create the base for this soup.  This soup recipe can be adapted to make any meat, poultry or fish and vegetable combination soup made from previously prepared meat stocks.  For the purpose of this recipe, we will be cooking the chicken and vegetable soup but you may […]


Print Recipe


GAPS Basic Healing Soup

*This meat stock recipe is appropriate for the GAPS Introduction Diet Stage One - onward
*You will need previously prepared homemade meat stock for this recipe: refer to our meat stock recipes for this.

Votes: 1
Rating: 5
You:
Rate this recipe!

Prep Time 50 Minutes
Cook Time 3 Hours

Servings
Litre batch


Ingredients
Vegetables
  • 3 Whole Onions
  • 8 Cloves garlic Crushed. This should be added towards the end of cooking
  • 1 Whole Cauliflower Cut into parts - do not include stems
  • 1 Whole Broccoli Cut into parts - do not include stems
  • 6 Whole Squash Cut into cubes or sliced
  • 2 Whole Zucchini Cut into cubes or sliced
  • 1 Whole Pumpkin Cut into cubes
  • 1 Tsp Fresh tumeric Grated
  • 4 Carrots Diced or sliced
  • 2 Stalks Spinach Roughly chopped

Meat & Stock
  • 1 Litre Chicken Meat Stock Refer to our meat stock recipes: or locate the link to our Chicken Meat Stock Recipe below in the notes
  • 1 Whole Chicken This was used to make the meat stock recipe and put aside to make this recipe. Alternatively just add a new chicken.

Votes: 1
Rating: 5
You:
Rate this recipe!


Instructions
  1. Bring some of the meat stock to boil, add chopped or sliced vegetables: onions, carrots, broccoli, cauliflower, courgettes, marrow, squash, pumpkin, spinach etc. and simmer for 25-35 minutes. When on the introduction diet, you can choose any combination of available vegetables avoiding very fibrous ones, such as all varieties of cabbage and celery. All particularly fibrous parts of vegetables need to be removed, such as skin and seeds on pumpkins, zucchini and squash, remove stalk from broccoli and cauliflower and any other parts that look too fibrous.

  2. If you made your own chicken stock and saved the chicken meat for other recipes, dice the meat that you set aside and place them in the pot with the vegetables. (if you did not save the meat from your stock recipe - cook a new fresh chicken according to the recommendations shown in the stock recipe first and then pull all the meat and skin from the chicken and dice it into small pieces and add to the vegetables). Otherwise continue to cook the vegetables and meats until the vegetables are soft. Approximately 1 hour on simmer.

  3. When vegetables are well cooked, add the crushed garlic, bring to boil and turn the heat off. We want the garlic to be added at the end to be only slightly cooked to receive maximum immune benefits from it.

  4. If you are cooking for children who are fussy eaters or for babies starting out on solids, you can blend the soup which will make it easier. This recipe will generally keep in the fridge for 5 days but can also be frozen.


Recipe Notes

Click Here for the Chicken Meat Stock Recipe Link

Serving for GAPS

Serve the soup with a drizzle of cold pressed extra virgin olive oil on top (1-2 tbl sp).  Add sauerkraut or juice to the soup when ready to eat or eat  1 – 2 table spoons sauerkraut at the beginning of the meal.

Never add sauerkraut, its juice or olive oil directly to any hot food as this will kill the probiotic bacteria, enzymes and minor component nutrients.  Always wait for the food to cool at a temperature you can eat it before adding them.  The general rule is:  if you can put your finger in it, then it’s ready.  Refer to the introduction diet for the progressive introduction of sauerkraut and olive oil.

The ratio of stock, meat and vegetables is individual and dependent upon the size of the batch you wish to make.

Clinical Notes:

The introduction diet is primarily designed for people suffering with diarrhoea and that is why the chosen vegetables are low in fibre.  If you have chosen to follow the introduction diet because of leaky gut and food allergies but are more susceptible to constipation, it is important to add more fibrous vegetables like cabbage and celery.  Don’t avoid cutting off stems from broccoli etc and leave the skins and seeds on vegetables like zucchini.  You may even decide to serve up some well cooked beetroot with your soup.

Hints

  • Cut vegetables and meat into small neat sized pieces unless you plan to blend or puree it for smaller children.

Other suggested and allowable ingredients

  • Fresh or dried Italian or French mushrooms can be added to pork, lamb or beef soup to enhance the flavour. Dried mushrooms can be crushed by hand before adding to the soup
  • Chopped parsley, coriander, oregano or dill
  • A spoonful of yoghurt or sour cream (creme fraiche)
  • Red onion
  • Spring onion
  • Cooked ground liver
  • Boiled eggs (yolk still runny)
  • Raw or cooked beetroots
  • Other herbs and spices (only when digestion has started to show improvements)


Duck Dripping

Duck fat is an old time cooking staple in Southwest France and a secret ingredient of chefs use worldwide. Incredibly tasty with a silky mouth-feel, duck fat enhances anything it is used to cook with. The great thing about rendering your own duck fat is that you end up with a batch of cracklings—delicious to […]


Print Recipe


Duck Dripping

Rendered Animal Fats: Stage one appropriate onward

Votes: 0
Rating: 0
You:
Rate this recipe!

Prep Time 15-20 Minutes
Cook Time 1-2 Hours

Servings
Cup


Ingredients

Prep Time 15-20 Minutes
Cook Time 1-2 Hours

Servings
Cup


Ingredients

Votes: 0
Rating: 0
You:
Rate this recipe!


Instructions
Option one Dripping
  1. From one whole organic duck, remove the fat and skin and set aside. The duck meat and bones can be frozen and used in a later recipe. Alternatively you can ask your butcher for duck or chicken skins.

  2. Preheat the oven to 180 degrees Celsius and bake your duck fat on top of the dripping rack with the oven pan placed beneath to catch all the fat dripping.

  3. When all the fat is cooked in approximately two hours, remove from the heat and allow to cool a little before filtering through a stainless steel strainer. Discard the fat and pour the dripping into heat tempered glass jars like the ball mason wide mouthed jars - see link for supplies below. Be careful not to pour into regular glass jars to avoid the risk of breakage.

Option 2 Rendering
  1. From one whole organic duck, remove the fat and skin and set aside. The duck meat and bones can be frozen and used in a later recipe. Alternatively you can ask your butcher for duck or chicken skins.

  2. Cut skin and fat into medium pieces and put into a medium heavy-bottomed pot. Add ½ cup water and simmer over medium heat until water evaporates and skin pieces are crisp and have released all their fat, about 1 hour.

  3. Remove from the heat and allow to cool a little before filtering through a stainless steel strainer. Discard the fat and pour the dripping into heat tempered glass jars like the ball mason wide mouthed jars - see link for supplies below. Be careful not to pour into regular glass jars to avoid the risk of breakage.


Recipe Notes

Storage: Store in Ball mason wide mouthed freezer safe jars.  These are heat tempered and will not crack when you pour the lard into them.

This fat can also be made using chicken skins: just ask your butcher for a bag of chicken skins.  This can also be rendered on a low heat in a slow cooker whilst also producing tasty crunchy chicken skins for snacks.  Kids love em.

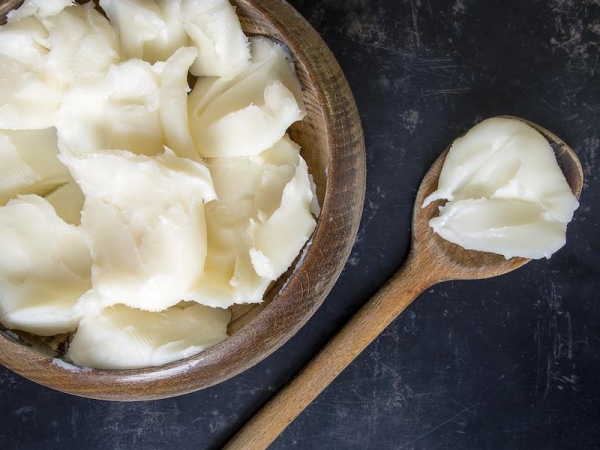
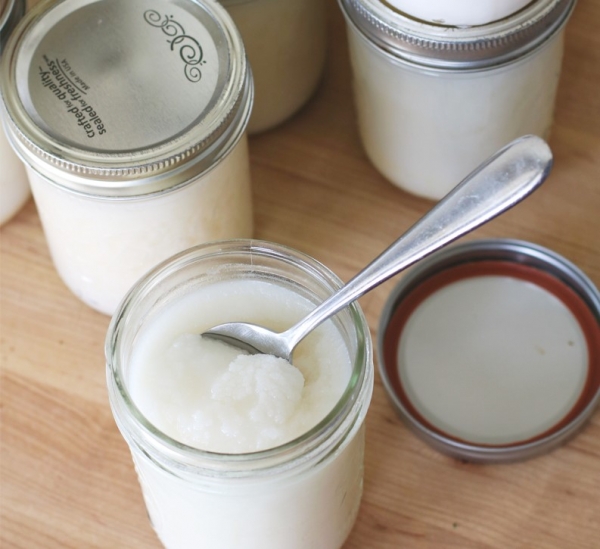
Lard & Tallow

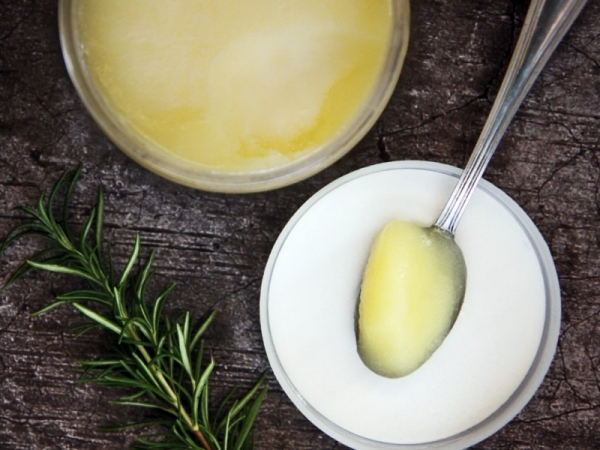
Rendering animal fats are very simple – in this recipe we will provide three ways to render lard and tallow/suet ►Lard from Pork FAT ►Tallow & Suet from Beef or Lamb FAT Ask your butcher for a big bag of any of the above animal fats (preferably organic) ► Dripping from a Duck, or Goose […]


Print Recipe


Lard & Tallow

Rendered Animal Fats: Stage one appropriate onward

Votes: 0
Rating: 0
You:
Rate this recipe!

Prep Time 15-20 Minutes
Cook Time 2-4 Hours

Servings
Mills


Ingredients
Option 1: Dripping in the oven - You will need a large oven tray with a dripping rack
  • 1 Kg Raw Pork Fat Alternatives: Tallow (beef or lamb fat) cut off any excess meats

Option 2: Rendering in the oven - You will need a large oven tray

Option 3: Slow Cook Render - You will need a slow cooker
  • 1 kg Raw Pork Fat Alternatives: Tallow (beef or lamb fat) cut off any excess meats

Votes: 0
Rating: 0
You:
Rate this recipe!


Instructions
Option One: Oven Dripping
  1. Preheat the oven to 120 - 130 degrees Celsius.

  2. Trim off any meat still attached to the fat - we only want the fat. A little bit of meat left on the fat is harmless as it will drop out during the rendering process, however it will change the flavour.

  3. Place the fat pieces on your dripping rack and sit your dripping rack on or inside your oven pan.

  4. Render the fat for approximately 2-3 hours. The liquid fat will drip from the large piece of fat into the bottom pan.

  5. Remove from the heat and allow to cool a little before filtering through a stainless steel strainer. Discard the fat and pour the lard into heat tempered glass jars like the ball mason wide mouthed jars - see link for supplies below. Be careful not to pour into regular glass jars to avoid the risk of breakage.

Option Two: Oven Render
  1. Preheat the oven to 120 degrees Celsius.

  2. Trim off any meat still attached to the fat - we only want the fat. A little bit of meat left on the fat is harmless as it will drop out during the rendering process, however it will change the flavour.

  3. Cut your lard or tallow into small pieces (approximately 1 inch cubes) and place into your oven dish.

  4. Pour the water into the oven dish, this will reduce the lard or tallow from burning on the edges and the water will evaporate during the process.

  5. Place the oven dish inside and cover with a lid.

  6. Render for approximately 2 – 2 ½ hours whilst attending to it by stirring occasionally with a steel spoon. The fat cubes will gradually release its fat in liquid form whilst becoming crisp and shriveled. If you notice that the water has not yet evaporated, you can increase the temperature to 165 degrees Celsius and keep it uncovered for ten minutes.

  7. Remove from the heat and allow to cool a little before filtering through a stainless steel strainer. Discard the fat and pour the lard into heat tempered glass jars like the ball mason wide mouthed jars - see link for supplies below. Be careful not to pour into regular glass jars to avoid the risk of breakage.

Option 3: Slow Cooker
  1. Trim off any meat still attached to the fat - we only want the fat. A little bit of meat left on the fat is harmless as it will drop out during the rendering process, however it will change the flavour.

  2. Chop your fat into tiny small pieces. Alternatively you can mince the fat in a food processor or thermomix, however it is important to note that your fat will need to be frozen before you mince it or it will result in a slimy mess and clog the blades.
  3. Place the fat into your slow cooker. Turn it onto the lowest temperature and cook for 3 - 4 hours.

  4. Cooking times will vary depending on temperature, volume and size of the fat pieces but a general rule is to cook until you have small browned cracklings in a bath of clear fat.

  5. Remove from the heat and allow to cool a little before filtering through a stainless steel strainer. Discard the fat and pour the lard into heat tempered glass jars like the ball mason wide mouthed jars - see link for supplies below. Be careful not to pour into regular glass jars to avoid the risk of breakage.


Recipe Notes

Storage: Store in Ball mason wide mouthed freezer safe jars.  These are heat tempered and will not crack when you pour the lard into them.

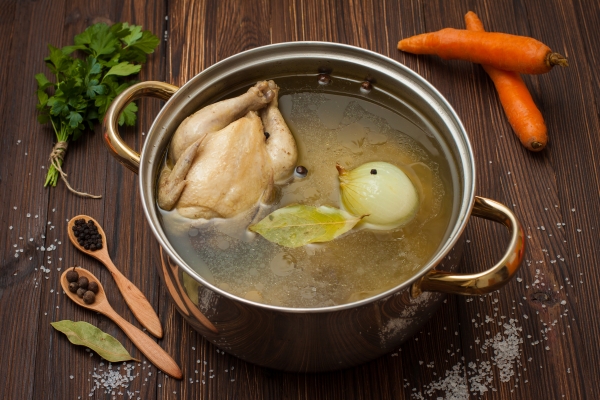
Chicken Meat Stock

It is important to understand the difference between meat and bone broth. Meat stock and bone broth are two different things. Simply put, meat stock is made over a few hours with raw bones and meat, where as bone broth is made with old cooked bones and cooked over 12 – 24 hours or more. […]


Print Recipe


Chicken Meat Stock

Remember, a rich meat stock is what we are seeking to make on the introduction stages, not bone broth until you graduate to the Full GAPS Diet Program.

*This meat stock recipe is appropriate for the GAPS Introduction Diet Stage One - onward.

Things you may need: Wide Mouthed Mason Stock Storage Jars, 6-8L Stainless Steel Cooking Pot, Stainless Steel colander, straining spoon and Cheesecloth.

Votes: 1
Rating: 5
You:
Rate this recipe!

Prep Time 40 Minutes
Cook Time 1.5 -3 Hours
Passive Time 30 Minutes

Servings
4 litre pot


Ingredients
Basic ingredients

Chicken or other Poultry Stock
  • 1-2 Whole chicken
  • 4-6 Chicken Feet Highly recommended: This helps make the stock more gelatinous
  • 2-4 Chicken frames You can ask your butcher for a bag of these. Sometimes they give them away.
  • 2-4 Chicken gizzards Also known as giblets which is the secondary stomach – offal

Votes: 1
Rating: 5
You:
Rate this recipe!


Instructions
  1. Place chicken frames, feet, gizzards and whole chicken into a large pot and fill it up with 4 Litres of filtered water, add natural unprocessed salt to your taste at the beginning of cooking and about a teaspoon of black peppercorns, roughly crushed (optional – pepper sometimes too hot for children). Apple cider vinegar can be added at this point if you are using it.

  2. Add fresh oregano and peppercorns.

  3. Bring to boil on the stove and skim and discard any floating scum on the top. Cover and simmer on a low heat for 1 ½ -3 hours.
    If you are using a crock pot, cook for 1 hour on high, then 6 hours on low.

  4. After cooking for the recommended time, remove the meat and bones by straining the stock ingredients through a sieve. You can do this by collecting the stock under the strainer into a larger pot or large pyrex jug. Strip off all the meat and soft tissues from the bones as best as you can and put aside. The gelatinous soft tissues around the bones and the bone marrow provide some of the best healing remedies for the gut lining and these should be put aside with the meat that has been stripped from the bones to add later to the soup. It is also good for the patient to eat the marrow and soft tissue direct from the bones as a meal.

  5. Strain the remaining stock with a cheesecloth to remove all remaining small bones, pepper corns and any vegetables that were added. Discard any tiny bones and vegetables added. Store the stock in wide mouthed freezer safe mason jars in the fridge or freezer. The meat stock will keep well in the fridge for at least 7 days or it can be frozen.


Recipe Notes

If you wish to make bone broth/stock later, you can keep the bones by storing them in the freezer and cook the ingredients for longer to extract more nutrients from the bones.  Refer to our Bone Broth Recipe to make this but remember not to introduce bone broth until you are on Full GAPS Diet or simply continue with the nutritious meat and gelatin stocks.

For Best Storage

Storing your stock properly will be key! In the fridge it lasts up to 7 days so it is best to purchase freezer safe storage containers to keep you stock on hand. I recommend purchasing a dozen or more Wide Mouthed Freezer Safe Mason Jars. These will allow you to have stock on hand within minutes because the wide opening allows the stock to slide straight out after running the bottom of the jar under hot tap water for a few minutes to loosen it up. This can be added directly to the cook pot for use. If you freeze in other glass jars, the stock will not slide out and you will have to wait for it to defrost. Other glass jars are not freezer safe and you can easily destroy an entire batch with glass cracking in the freezer or from the change in temperature when running them under hot water to loosen them. These jars are supplied at our Online GAPS Shop

Butcher supplies for meat stock

The ratio of ingredients is individual and dependant on the size of the batch you wish to make but keep in mind that some stock should be reserved for drinking and some for making your batch for soup.  The remainder of your ingredients will depend on what type of meat stock you are making.  Here is a list of bone selections you can ask for at your organic butcher shop.

Beef, Lamb, Pork or Game Selections

  • Large tubular marrow bones
  • Gelatinous meats
  • Meaty rib bones
  • Osso Buco cuts
  • Knuckle bones
  • Shanks
  • Neck bones
  • Tail bones
  • Trotters
  • Joints
  • Ears

Poultry Selections

  • Whole chicken & extra chicken frames
  • Feet from one chicken
  • Gizards & giblets
  • Spatchcock
  • Pheasants
  • Pigeon
  • Goose
  • Duck

Fish Selections

  • Fish frames with heads (no fish meat)
  • Skins
  • Fins

Hints & Facts for fish stock:

  • Add 1/4 a cup of apple cider vinegar to help draw out minerals from the bones and into the stock such as calcium potassium and magnesium. Some people may not be ready to add this during the introduction diet stages.
  • Choose fatty fish like mackerel or salmon. But make sure they are not farmed or preserved in any way.
  • Gelatine as the substance extracted by boiling bones, hoofs, trotters and soft animal tissues from gelatinous meats.
  • The celery sticks should be avoided for patients in the introductions diet stages.  These can be added later on full gaps for added stock flavour.  They can be freshly cut as shown in the instructions or sauteed in a pan with onion and garlic prior to adding to the pot  for added flavour.

Contrary to popular belief meat, fish and organ meats like liver and kidney have the highest contents of vitamins, amino acids nourishing fats, many minerals and other nutrients which we need in order to be adequately nourished.

Charting the highest source of essential nutrients

Clinical Notes:

Low fibre is the aim initially (especially for people who have profuse watery diarhoea), however if you are more prone to constipation, you can add onion, celery and cabbage to the stock for more flavour.


Lamb Meat Stock

It is important to understand the difference between meat and bone broth. Meat stock and bone broth are two different things. Simply put, meat stock is made over a few hours with raw bones and meat, where as bone broth is made with old cooked bones and cooked over 12 – 24 hours or more. […]


Print Recipe


Lamb Meat Stock

Remember, a rich meat stock is what we are seeking to make on the introduction stages, not bone broth until you graduate to the Full GAPS Diet Program.

*This meat stock recipe is appropriate for the GAPS Introduction Diet Stage One - onward.

Things you may need: Wide Mouthed Mason Stock Storage Jars, 6-8L Stainless Steel Cooking Pot, Stainless Steel colander, straining spoon and Cheesecloth.

Votes: 0
Rating: 0
You:
Rate this recipe!

Prep Time 30 Minutes
Cook Time 3-6 Hours
Passive Time 30 Minutes

Servings
4 litre pot


Ingredients
Basic Ingredients

Lamb Meat Joints: Your meat joint must contain bones with marrow, soft tissue and bones with meat still attached to it - Select at least 3-4 items from this group below
  • 4-6 Lamb neck bones Number selected for these are dependant on what is available
  • 4 Lamb shanks Number selected for these are dependant on what is available
  • 1 Lamb shoulder joint Number selected for these are dependant on what is available
  • 2-4 Lamb meaty rib bones Number selected for these are dependant on what is available

Votes: 0
Rating: 0
You:
Rate this recipe!


Instructions
  1. Your selected meat joint must contain bones with marrow, soft tissue and bones with meat still attached to it. Ask your butcher to cut some large tubular marrow bones so that the marrow can be easily accessed like that shown in the image.

  2. Lightly brown the meat cuts in tallow or ghee in a frypan or . This creates added flavour to the stock. Do not cook it, just lightly sear it with a sprinkle of salt to create flavour.

  3. Place the bones and meat joints into a large pot and fill it up with 4 litres of filtered water.

  4. Cut the onions into halves or quarters and add them to the pot along with roughly chopped carrots and crushed garlic cloves. If you are following the introduction diet stages, we recommend you avoid the fibrous vegetables such as celery at this time.

  5. Add salt to taste at the beginning of cooking and about a teaspoon of black peppercorns.

  6. Add apple cider vinegar and fresh oregano.

  7. Bring to a boil and skim off any scum that rises to the top. Then reduce the heat and leave on the stove at a low simmer for about 3–6 hours.
    If you are cooking in the oven, cook at 150°C for 3 hours.
    If using crock pot, cook on high for 2 hours, then on low for 6 hours.

    This is the measured cooking time frame to make your nutrient meat stock. Bone stock without the meat cuts are usually longer. The longer you cook the bone stock the more nutrients and the softer the bones become for fishing out marrow.

  8. After cooking for the recommended time above, remove the meat, marrow and bones by straining the stock ingredients through a sieve. You can do this by collecting the stock under the strainer into a larger pot. Strip off all the meat and soft tissues from the bones as best as you can and extract the bone marrow out of the large tubular bones while they are still warm: to do that bang the bone on a thick wooden chopping board. The gelatinous soft tissues around the bones and the bone marrow provide some of the best healing remedies for the gut lining and these should be put aside with the meat that has been stripped from the bones to add later to soups or as a meal. It is also ok for the patient to eat the marrow and soft tissue direct from the bones.

  9. Strain the remaining stock with a cheesecloth to remove all remaining small bones, pepper corns and any vegetables that were added. Discard any tiny bones and vegetables added.

    Store the stock in wide mouthed freezer safe mason jars in the fridge or freezer. The meat stock will keep well in the fridge for at least 7 days or it can be frozen.

    The bones can be frozen and later used again to make bone broth.


Recipe Notes

If you wish to make bone broth/stock later, you can keep the bones by storing them in the freezer and cook the ingredients for longer to extract more nutrients from the bones.  Refer to our Bone Broth Recipe to make this but remember not to introduce bone broth until you are on Full GAPS Diet or simply continue with the nutritious meat and gelatin stocks.

For Best Storage

Storing your stock properly will be key! In the fridge it lasts up to 7 days so it is best to purchase freezer safe storage containers to keep you stock on hand. I recommend purchasing a dozen or more Wide Mouthed Freezer Safe Mason Jars. These will allow you to have stock on hand within minutes because the wide opening allows the stock to slide straight out after running the bottom of the jar under hot tap water for a few minutes to loosen it up. This can be added directly to the cook pot for use. If you freeze in other glass jars, the stock will not slide out and you will have to wait for it to defrost. Other glass jars are not freezer safe and you can easily destroy an entire batch with glass cracking in the freezer or from the change in temperature when running them under hot water to loosen them. These jars are supplied at our Online GAPS Shop

Butcher supplies for meat stock

The ratio of ingredients is individual and dependant on the size of the batch you wish to make but keep in mind that some stock should be reserved for drinking and some for making your batch for soup.  The remainder of your ingredients will depend on what type of meat stock you are making.  Here is a list of bone selections you can ask for at your organic butcher shop.

Beef, Lamb, Pork or Game Selections

  • Large tubular marrow bones
  • Gelatinous meats
  • Meaty rib bones
  • Osso Buco cuts
  • Knuckle bones
  • Shanks
  • Neck bones
  • Tail bones
  • Trotters
  • Joints
  • Ears

Poultry Selections

  • Whole chicken & extra chicken frames
  • Feet from one chicken
  • Gizards & giblets
  • Spatchcock
  • Pheasants
  • Pigeon
  • Goose
  • Duck

Fish Selections

  • Fish frames with heads (no fish meat)
  • Skins
  • Fins

Hints & Facts:

  • Add 1/4 a cup of apple cider vinegar to help draw out minerals from the bones and into the stock such as calcium potassium and magnesium. Some people may not be ready to add this during intro.
  • Choose fatty fish like mackerel or salmon. But make sure they are not farmed or preserved in any way.
  • Gelatine as the substance extracted by boiling bones, hoofs, trotters and soft animal tissues from gelatinous meats.
  • The celery sticks should be avoided for patients in the introductions diet stages.  These can be added later on full gaps for added stock flavour.  They can be freshly cut as shown in the instructions or sauteed in a pan with onion and garlic prior to adding to the pot  for added flavour.

Contrary to popular belief meat, fish and organ meats like liver and kidney have the highest contents of vitamins, amino acids nourishing fats, many minerals and other nutrients which we need in order to be adequately nourished.

Charting the highest source of essential nutrients

Clinical Notes:

Low fibre is the aim initially (especially for people who have profuse watery diarhoea), however if you are more prone to constipation, you can add onion, celery and cabbage to the stock for more flavour.


Beef Meat Stock

It is important to understand the difference between meat and bone broth. Meat stock and bone broth are two different things. Simply put, meat stock is made over a few hours with raw bones and meat, where as bone broth is made with old cooked bones and cooked over 12 – 24 hours or more. […]


Print Recipe


Beef Meat Stock

Remember, a rich meat stock is what we are seeking to make on the introduction stages, not bone broth until you graduate to the Full GAPS Diet Program.

*This meat stock recipe is appropriate for the GAPS Introduction Diet Stage One - onward.

Things you may need: Wide Mouthed Mason Stock Storage Jars, 6-8L Stainless Steel Cooking Pot, Stainless Steel colander, straining spoon and Cheesecloth.

Votes: 0
Rating: 0
You:
Rate this recipe!

Prep Time 30 Minutes
Cook Time 3-6 Hours
Passive Time 30 Minutes

Servings
4 litre pot


Ingredients
Basic Ingredients

Beef Meat Joints: Your meat joint must contain bones with marrow, soft tissue and bones with meat still attached to it - Select at least 4-5 items from this group below

Prep Time 30 Minutes
Cook Time 3-6 Hours
Passive Time 30 Minutes

Servings
4 litre pot


Ingredients
Basic Ingredients

Beef Meat Joints: Your meat joint must contain bones with marrow, soft tissue and bones with meat still attached to it - Select at least 4-5 items from this group below

Votes: 0
Rating: 0
You:
Rate this recipe!


Instructions
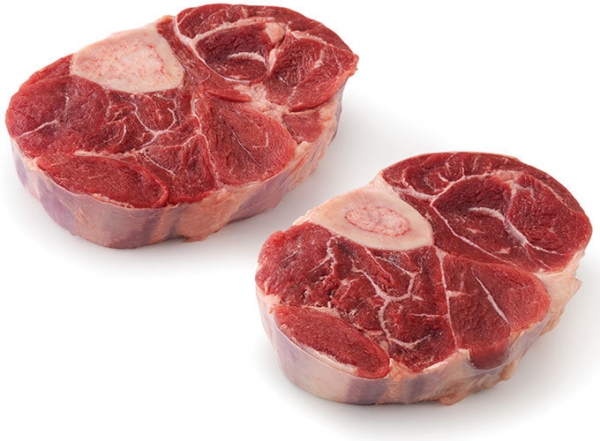
  1. Your selected meat joint must contain bones with marrow, soft tissue and bones with meat still attached to it. Osso Bucco cuts as shown in the image are perfect for this, along with the other meaty bones and joints listed in the recipe.

    Lightly brown the meat cuts in tallow or ghee in a frypan or . This creates added flavour to the stock. Do not cook it, just lightly sear it with a sprinkle of salt to create flavour.

  2. Place the bones and meat joints into a large pot and fill it up with 4 litres of filtered water.

  3. Cut the onions into halves or quarters and add them to the pot along with roughly chopped carrots and crushed garlic cloves. If you are following the introduction diet stages, we recommend you avoid the fibrous vegetables such as celery at this time.

  4. Add salt to taste at the beginning of cooking and about a teaspoon of black peppercorns.

  5. Add apple cider vinegar and fresh oregano.

  6. Bring to a boil and skim off any scum that rises to the top. Then reduce the heat and leave on the stove at a low simmer for about 3–6 hours.
    If you are cooking in the oven, cook at 150°C for 3 hours.
    If using crock pot, cook on high for 2 hours, then on low for 8–10 hours.

    This is the measured cooking time frame to make your nutrient meat stock. Bone stock without the meat cuts are usually longer. The longer you cook the bone stock the more nutrients and the softer the bones become for fishing out marrow.

  7. After cooking for the recommended time above, remove the meat, marrow and bones by straining the stock ingredients through a sieve. You can do this by collecting the stock under the strainer into a larger pot. Strip off all the meat and soft tissues from the bones as best as you can and extract the bone marrow out of the large tubular bones while they are still warm: to do that bang the bone on a thick wooden chopping board. The gelatinous soft tissues around the bones and the bone marrow provide some of the best healing remedies for the gut lining and these should be put aside with the meat that has been stripped from the bones to add later to soups or as a meal. It is also ok for the patient to eat the marrow and soft tissue direct from the bones.

  8. Strain the remaining stock with a cheesecloth to remove all remaining small bones, pepper corns and any vegetables that were added. Discard any tiny bones and vegetables added.

    Store the stock in wide mouthed freezer safe mason jars in the fridge or freezer. The meat stock will keep well in the fridge for at least 7 days or it can be frozen.

    The bones can be frozen and later used again to make bone broth.


Recipe Notes

If you wish to make bone broth/stock later, you can keep the bones by storing them in the freezer and cook the ingredients for longer to extract more nutrients from the bones.  Refer to our Bone Broth Recipe to make this but remember not to introduce bone broth until you are on Full GAPS Diet or simply continue with the nutritious meat and gelatin stocks.

For Best Storage

Storing your stock properly will be key! In the fridge it lasts up to 7 days so it is best to purchase freezer safe storage containers to keep you stock on hand. I recommend purchasing a dozen or more Wide Mouthed Freezer Safe Mason Jars. These will allow you to have stock on hand within minutes because the wide opening allows the stock to slide straight out after running the bottom of the jar under hot tap water for a few minutes to loosen it up. This can be added directly to the cook pot for use. If you freeze in other glass jars, the stock will not slide out and you will have to wait for it to defrost. Other glass jars are not freezer safe and you can easily destroy an entire batch with glass cracking in the freezer or from the change in temperature when running them under hot water to loosen them. These jars are supplied at our Online GAPS Shop

Butcher supplies for meat stock

The ratio of ingredients is individual and dependant on the size of the batch you wish to make but keep in mind that some stock should be reserved for drinking and some for making your batch for soup.  The remainder of your ingredients will depend on what type of meat stock you are making.  Here is a list of bone selections you can ask for at your organic butcher shop.

Beef, Lamb, Pork or Game Selections

  • Large tubular marrow bones
  • Gelatinous meats
  • Meaty rib bones
  • Osso Buco cuts
  • Knuckle bones
  • Shanks
  • Neck bones
  • Tail bones
  • Trotters
  • Joints
  • Ears

Poultry Selections

  • Whole chicken & extra chicken frames
  • Feet from one chicken
  • Gizards & giblets
  • Spatchcock
  • Pheasants
  • Pigeon
  • Goose
  • Duck

Fish Selections

  • Fish frames with heads (no fish meat)
  • Skins
  • Fins

Hints & Facts:

  • Add 1/4 a cup of apple cider vinegar to help draw out minerals from the bones and into the stock such as calcium potassium and magnesium. Some people may not be ready to add this during intro.
  • Choose fatty fish like mackerel or salmon. But make sure they are not farmed or preserved in any way.
  • Gelatine as the substance extracted by boiling bones, hoofs, trotters and soft animal tissues from gelatinous meats.
  • The celery sticks should be avoided for patients in the introductions diet stages.  These can be added later on full gaps for added stock flavour.  They can be freshly cut as shown in the instructions or sauteed in a pan with onion and garlic prior to adding to the pot  for added flavour.

Contrary to popular belief meat, fish and organ meats like liver and kidney have the highest contents of vitamins, amino acids nourishing fats, many minerals and other nutrients which we need in order to be adequately nourished.

Charting the highest source of essential nutrients

Clinical Notes:

Low fibre is the aim initially (especially for people who have profuse watery diarhoea), however if you are more prone to constipation, you can add onion, celery and cabbage to the stock for more flavour.


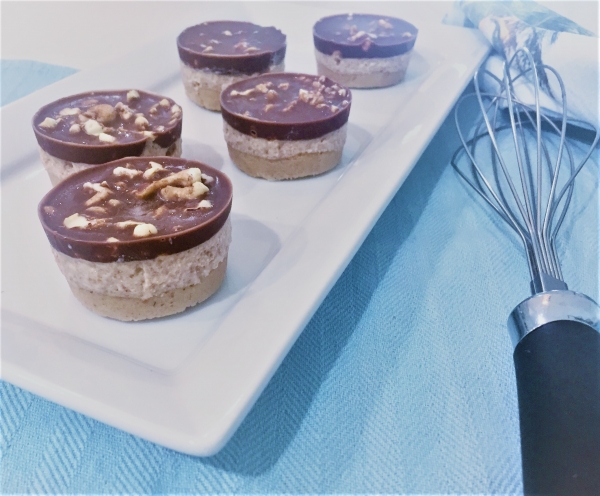
Cookies & Caramel Cream

Caramel Cream Barrels of pure joy.  Love at first Bite!!!  This little treat creates a burst of flavour to enjoy with the sound of a crack with the first bite followed by pure enjoyment.  Ok, I am in love with this little creation and hope you are too.  Enjoy.     Print Recipe Cookies & […]


Print Recipe


Cookies & Caramel Cream

This recipe is appropriate for people who are following the Full GAPS Diet.

Votes: 0
Rating: 0
You:
Rate this recipe!

Prep Time 1 Hour
Passive Time 4 - 6 Hours

Servings
Cups


Ingredients
Caramel Cream Filling

Nut Sprinkles

Prep Time 1 Hour
Passive Time 4 - 6 Hours

Servings
Cups


Ingredients
Caramel Cream Filling

Nut Sprinkles

Votes: 0
Rating: 0
You:
Rate this recipe!


Instructions
Biscuit Bottom
  1. Pre-heat oven to 150 degrees Celsius for 10 minutes (no hotter)

  2. Mix all ingredients in a bowl with a spoon, followed by massaging all the contents and squeezing the ingredients in your hands where you can feel the mixture starting to stick together and form shape. Depending on the consistency of the mixture, add more nut butter or coconut oil if it is too dry or more nut flour if it is too moist. You want to create a cookie dough so keep mixing and squeezing the contents with your hands so that the mixture can form a big ball ready for making smaller balls.

  3. When you have rolled the cookie mixture into a ball on the bench top, pinch a section of the dough and roll the section into a ball approximately 4cm in width. Continue this until you have 24 balls ready.

  4. Place each ball into mini round cardboard baking cups. These will be used as the mold for the entire cheesecake and they should be 5cm wide measured from the bottom.

  5. Press the first layer with your thumb by pushing the ball down flat to make a base in the bottom of the cup ensureing it reaches all the sides with good coverage.

  6. Place the baking cups onto a baking tray and place the tray in the preheated oven at no more than 150 degrees Celsius for 10 minutes, keeping a close eye on them to ensure they do not burn. Almond flour burns easily so do not cook any higher than 150 degrees Celsius.

  7. Remove the tray from the oven after 10 minutes and let the cookies cool for 5 minutes and then place them in the fridge for 15 minutes to cool whilst you prepare the next layer.

Caramel Cream Filling
  1. After soaking the Midjool dates for 20 minutes, add them to the thermomix or food processor with the remaining caramel Cream filling ingredients except for the gelatin powder and water.

  2. Mix on a medium to high speed to combine all the ingredients to make a smooth sauce like consistency whilst occasionally stopping to wipe down the sides with the spatula to ensure all the ingredients are blended together evenly.

  3. Place the gelatin powder in a small bowl or cup and add the warm water stiring well to make a consistency similar to apple sauce. Add this to the mixture in the thermomix and blend well.

  4. Remove the baking cups from the fridge and add a spoonful of the mixture until all the ingredients is evenly dispersed in each cup.

  5. With the back of a teaspoon, level out the cream centre so that it is reasonably flat and place the cups in the freezer for 15-20 minutes.

Nut Sprinkles
  1. Place the nuts in the thermomix or blender to chop into the size you prefer to add as a nut sprinkle layer. I like to make ours a little bit chunky. You can also chop them if you wrap them inside a tea towel and bang them with a wooden rolling pin.

  2. Sprinkle the nut mix evenly over the top of the coconut cream filling until distributed evenly in all 24 cups.

Chocolate Top
  1. Simmer some water on a low heat in a saucepan and place a glass bowl over the simmering water. I like to use a pyrex jug (size measures 4 cups) for this as it works nicely to pour the ingredients later.

  2. Add the cacao butter to the glass bowl and melt the cacao butter completely. (CAUTION: Keep the heat at a low temperature so that the steam does not cause any water residue within the glass bowl and make sure all your utensils and materials do not have any water on them because any water contaminating the mixture will cause lumps and clumps and spoil the smooth chocolate result).

  3. Once melted, turn off the heat and add the cocao powder gradually whilst stirring continuously with a bone dry whisk until mixed well with no lumps. Add honey and vanilla essence and continue to whisk. Let the chocoloate topping cool for 5 minutes.

  4. Pour chocolate mixture over the top and remember to allow some of the nuts to be exposed at the tops. This gives it character and encourages you not to over fill the top layer. Aim not to make the top layer too thick or it will make it difficult to bite into.

  5. Refrigerate for 4 - 6 hour to fully set.

  6. When all ingredients have set, you can tear the cardboard paper cups and slowly remove the cheesecake medallions from the cup casing to expose them for serving. I recommend you keep them in the baking cups until you are ready to serve or eat.

Kefir Grain Suppliers

Australian And New Zealand Kefir Grains The following people, generously offer to share their Kefir grains with people as their supply overpopulates and grows. Australia TAS     Wynyard   Mike Bucky  Milk Kefir Grains:   Express post shipping within Australia for $25.00     bukysoper@hotmail.com TAS     Launceston,  Christina Mathewson:  Milk and Water Kefir Grains     christinamathewson@yahoo.com.au VIC     ♥ […]

Healing Crisis Explained: Detox and Retracing

Detox & Retracing Why you feel worse when you implement an optimal nutrition program By Linda Paterson BHSc The more food is presented in its natural raw state in which it grows, without any modifications made to it, the easier it is to digest.  Food in its natural state maintains all its enzymes, amino acids, […]

Foods to Avoid

• Sugar and anything that contains it. • Molasses, maple syrup, corn syrup, any other syrup. • Aspartame in any form, it is a potent neurotoxin (brain toxin). • Sweets, cakes, biscuits, chocolates, ice – creams. • All alcoholic beverages. An adult can have good quality wine with meals occasionally but not beer or spirits. […]

Treating Eczema with the GAPS diet

About GAPS GAPS is a term that refers to Gut and Psychology Syndrome, which was first developed by Dr Natasha Campbell-McBride in response to the findings of years of experience working alongside people of all ages suffering with a variety of psychological and autoimmune conditions. The link between mental and physical health It has, for […]

Possible ADHD Treatments

Possible ADHD Treatments ADHD treatment: Where does one start to look?  ADHD is an abbreviation from Attention Deficit Hyperactivity Disorder, which is a condition that makes it hard for children, in particular, to manage and check the way that they act. ADHD treatment is needed by children that suffer with the condition, which is one […]

Autism Treatments that focus on the health of the Gut

Autism Treatments that focus on the health of the Gut Autism is a condition that affects children in the way that they behave, communicate, form relationships and understand the world. The number of children that are being diagnosed with this condition seems to be increasing which places an emphasis on early intervention. Autism Treatment tends […]

Autism ABA in treating children with Autism

Autism ABA in treating children with Autism Autism ABA refers to a course of treatment that involves therapy delivered to a child with Autism on a one to one basis. ABA stands for applied behavioural analysis and look to provide behavioural intervention to alter and improve the behaviour of a child with autism. Autism ABA […]

Changes to the Autism Diet

Changes to the Autism Diet There are many studies that exist today that look at the autism diet, which is the intake and digestive functioning of a child or adult with autism. The autism diet is thought to be a way of treating people with autism through the things that they eat. The idea is […]

What is GAPS

Gut and Psychology Syndrome and Gut and Physiology Syndrome       The term GAPS, abbreviated from Gut and Psychology Syndrome was created by Dr Natasha Campbell-McBride MD, MMedSci (neurology), MMedSci(human nutrition) in 2004 after working with hundreds of children and adults with neurological  and psychiatric conditions, such as autism spectrum disorders, ADD/ ADHD, schizophrenia, […]

GAPS Protocol

The GAPS Protocol is a three part program designed to heal the gut lining, restore the gut with beneficial flora and relieve the body of an excess toxic load.  The program incorporates a nutritional program supported by specific supplements with an emphasis on detoxification and reduction of exposure to environmental toxins.  The program requires persistence, […]

The GAPS Diet

The Full GAPS Diet By Dr Natasha Campbell-McBride Your patient needs to carry on completely avoiding starches and sugar for two years at least. It means avoiding all grains, sugar, potatoes, parsnips, yams, sweet potato and anything made out of them. The flour in your cooking and baking can be replaced with ground almonds (or […]

Detoxification Steps

   1st Step The first step involves removing the main source of toxicity which means cleaning up and restoring digestive health through the GAPS diet intervention protocol. Dr Campbell-McBride has a theory explaining how both salicylates and phenols have strong antioxidant and detoxifying abilities and therefore creating a detox reaction whilst flushing toxins from storage sites […]

Is your child a fussy eater?

Question: My child is a fussy eater and self limits his diet.  How am I able to get him to eat the GAPS food? This is one of the more common questions I am asked and understandably so.  This was my number one question too.  I sought answers everywhere including standing up at seminars and […]

Never Give Up on Your Child

My son Jake is 3 years old and has been diagnosed with high functioning Autism. He is an extremely intelligent and affectionate little boy who is incredibly capable in so many areas yet has extreme difficulties in others. More specifically, the boxes he ticks are the usual suspects of tantrums, melt downs, inappropriate public behavior […]

Linda Has Been There For Me

Seven weeks into the GAPS journey and there’s one thing for certain – our progress would have been much slower and a lot more confusing had we not consulted with Linda both one week prior to beginning the diet, and again for a recent follow up consultation.  There are so many questions I had as […]

GAPS Protocol Changed Our Life

Dear Linda, Last night I read the story you wrote about your son and what you went through. It is incredible to me now, particularly having read your story, how many others have been and are currently going through what we are going through. Every symptom of your sons was and is, identical to my […]

Linda Helped me Understand

“I was initially daunted when I read the Gaps book by Dr N. Campbell-McBride and could not see how I could implement so many aspects of the introductory diet on my own so I was relieved when I learnt that Linda offered a consultancy service to support and guide me through the process. I was […]

Latest News

Latest News The latest breaking News from around the industry!  Stay up to date with the latest trends and innovation in the marketplace. Latest News   Return regularly to keep in touch with the latest News.

GAPS Supplementation Criteria

 GAPS Supplementation Protocol.  Dr N. Campbell-McBride emphasises nutrition as the core intervention for the GAPS protocol and successful management of GAPS digestive disorders.  Supplements alone can not achieve the healing response that the GAPS diet does.  Too many supplements can irritate an already inflamed and damaged gut lining and interrupt with the healing process.  Whilst some supplements are important […]

Stage Progression

Healing Crisis A healing crisis usually occurs in stage one on day two or three.  During the first few days in implementing the GAPS protocol, the body begins cleaning up its toxins.  The healing crisis occurs when the pathogenic microbes die off and release their toxins.  These toxins are the cause of the GAPS patient’s […]

Video and Audio Download

  13th May 2009 The true connection between nutrition and brain function One Radio Network (sign up with One Radio Network for free to download the podcast) 14th September 2009  Gut flora and healing with animal foods One Radio Network(sign up with One Radio Network for free to download the podcast) 14th September 2009  The […]

GAPS Recommended Reading and Viewing

  The Following Books and DVD’s are recommended reading and viewing for GAPS   Gut and Psychology Syndrome (Dr Natasha Campbell-McBride) Cooking For GAPS DVD (Dr Natasha Campbell-McBride) Put Your Heart in Your Mouth (Dr Natasha Campbell-McBride) Breaking the Vicious Cycle: Intestinal health through diet (Elaine Gotchall) The GAPS Companion (Linda Paterson) Internal Bliss (International Nutrition) […]

Research links

GAPS Related Research Click on the below research links to view  Dr Andrew Wakerfield:  MMR vaccine findings on autism and other pervasive developmental disorders in children  Rush University Medical Centre are conducting a clinical trial for the  Specific Carbohydrate Diet to determine whether it changes the composition of gut flora. The Title of the Study: […]

Creating an Allergy Diet

More and more people are reporting that they are suffering from a form of food allergy. In practice, many of the people that report food allergies do not meet the criteria of a food allergy and so it is far more likely that they are suffering from a food intolerance. Food intolerances can take many […]

Establishing a Food Sensitivity Diet

Establishing a Food Sensitivity Diet Food sensitivity is what most of us would call a food allergy. A food sensitivity diet is one that looks to deal with these allergies in a practical way so that we can become more tolerant of certain food types that we think we have built up an intolerance of.  […]

GAPS and the Fussy Eater

GAPS and the Fussy Eater It is quite common for children with neuro-psychological conditions to be fussy eaters. GAPS, which refers to a relationship between the gut and the health of the brain and immune system, ties together all the health issues experienced by children and adults with psychiatric and psychological conditions. These health issues […]

Treatment with the Autoimmune Diet

Treatment with the Autoimmune Diet An autoimmune diet is one that looks to improve the symptoms associated with autoimmune diseases by looking at nutritional intake. Autoimmune diet advice may be given to people who suffer from diseases such as multiple sclerosis, rheumatoid arthritis, diabetes type one, celiac disease and other conditions. http://dsite.gapsaustralia.com/services/what-is-gaps/ How the body […]

Improving Diet for Eczema Sufferers

Improving Diet for Eczema Sufferers Understanding GAPS is about understanding the relationship between the way we live, the foods we eat, the health of our gut and our overall health. By overall health this is extended beyond our physical wellbeing to include our mental health too. Eczema is a common complaint amongst people with digestive […]

Creating an Improved Diet for Anxiety

Creating an Improved Diet for Anxiety Understanding psychiatric or psychological conditions like panic and anxiety can be difficult because they are so often intertwined with other condition. Pigeon-holing people and providing a single diagnosis is made hard by the fact that so many conditions overlap one another. How a Better Diet for Anxiety Could Help […]

GAPS and Eczema Relief

GAPS and Eczema Relief GAPS refers to the idea that psychiatric complaints as well as physical complaints originate in the gut and that therefore all of these complaints, including eczema relief can be targeted by focusing on the problems that have arisen in the gut. Digestive Problems and Eczema Relief Overwhelming research has shown that […]

The link between Depression Diet and Digestion

The link between Depression Diet and Digestion Gut and Psychology Syndrome describes a connection between the gut and the brain and suggests that the two go hand in hand whereby the gut affects the way the brain functions in terms of the levels of toxicity in our diet and in our daily lives. This syndrome […]

GAPS, Diet, Anorexia and Eating Disorders

GAPS, Diet, Anorexia and Eating Disorders Gut and Psychology Syndrome and Gut and Physiology Syndrome – both known as GAPS – refers to a condition whereby the way that the gut works is related to mental health and brain functioning of an individual. Diet, anorexia, and fussy eating in childhood along with digestive problems have […]

Common Questions

  1) Q: GAPS FIRST EDITION BOOK Dairy order: I noticed the order for dairy in the introduction diet is different to the order in the GAPS book first edition. The book explains a gradual introduction to dairy but the introduction diet allows yoghurt from the very beginning. A: Yes and I am glad you […]

A to Z GAPS

  B is for Beauty and Skin Treatment, the magic of kefir and coconut Many of our very expensive skin care products contain Alpha Hydroxy Acid (AHA) which was a revolutionary discovery for the beauty industry and a product found naturally in fruit acids as well as kefir in the form of lactic acid. The lactic acid […]

How toxic is your dentist?

One question I am often asked is how to avoid the chemicals at the dentist.  There is no need for a regular visits to the dentist whilst the person is working on healing, unless there is an identifiable problem that needs treatment.  If there is a need for urgent treatment, try to find a holistic […]

Belly Massage: to assist in the relief of constipation

Anyone can perform this nurturing and relaxing procedure. It aids digestion, assists in loosening faecal compaction, eases constipation, relieves colic, eases tension and helps regulate breathing.  To help your child’s bowels move, try the ‘ I love you’ technique for the large intestines. With follow the steps outlined below to first massage the small intestine […]

Greek Grandmother Power

From the moment I read Dr Natasha’s personal testimony of how she recovered her son from autism, there was never a doubt in my mind that I would implement the GAPS diet in our house for my son, aged four, diagnosed with autism. I read Dr Natasha’s book, made soup, sauerkraut, ghee, yoghurt and lard.  […]

I am truly thankful

Another day is over, my boys are asleep in their beds.  And as often happens to us all, it is a time to think of the day we have just had, and what a day. Tonight l sat down to a wonderful dinner with my family. We started with our drinks of chicken broth with sauerkraut […]

Healing Remedies for your teeth and gums: Natural Non Toxic Teeth Whitening

Commercial toothpaste most commonly contains many ingredients that are potentially harmful to our health and this is particularly concerning for individuals who have impaired detoxification systems. Some of the most sinister ingredients to watch out for include sodium fluoride, triclosan, sodium lauryl sulphate and propylene glycol. It is also worth mentioning other ingredients like artificial […]

After GAPS

GAPS and Onwards After completion of the GAPS program in approximately 2 –  2.5 years, Dr Natasha Campbell-McBride advises that GAPS patients need to continue taking probiotics indefinitely; however this does not need to be maintained with commercial sources.  Probiotic can be supplemented in the form of homemade fermented preparations such as yoghurts, kefir and […]