Print Recipe Nut and Seed Soaking Chart Votes: 0 Rating: 0 You: Rate this recipe! Course Baking at home, Miscellaneous Cuisine Full GAPS Diet, GAPS Baby: Introducing Solids, GAPS Introduction Stages, Stage 6 – onward Servings MetricUS Imperial Ingredients 2-3 Cups Organic Nuts or Seeds1 Tbs Celtic or Himalayan Sea Salt1 Litre Filtered water Course […]
Print Recipe
Nut and Seed Soaking Chart
Votes: 0
Rating: 0
You:
Rate this recipe!
|
|
Votes: 0
Rating: 0
You:
Rate this recipe!
|
Instructions
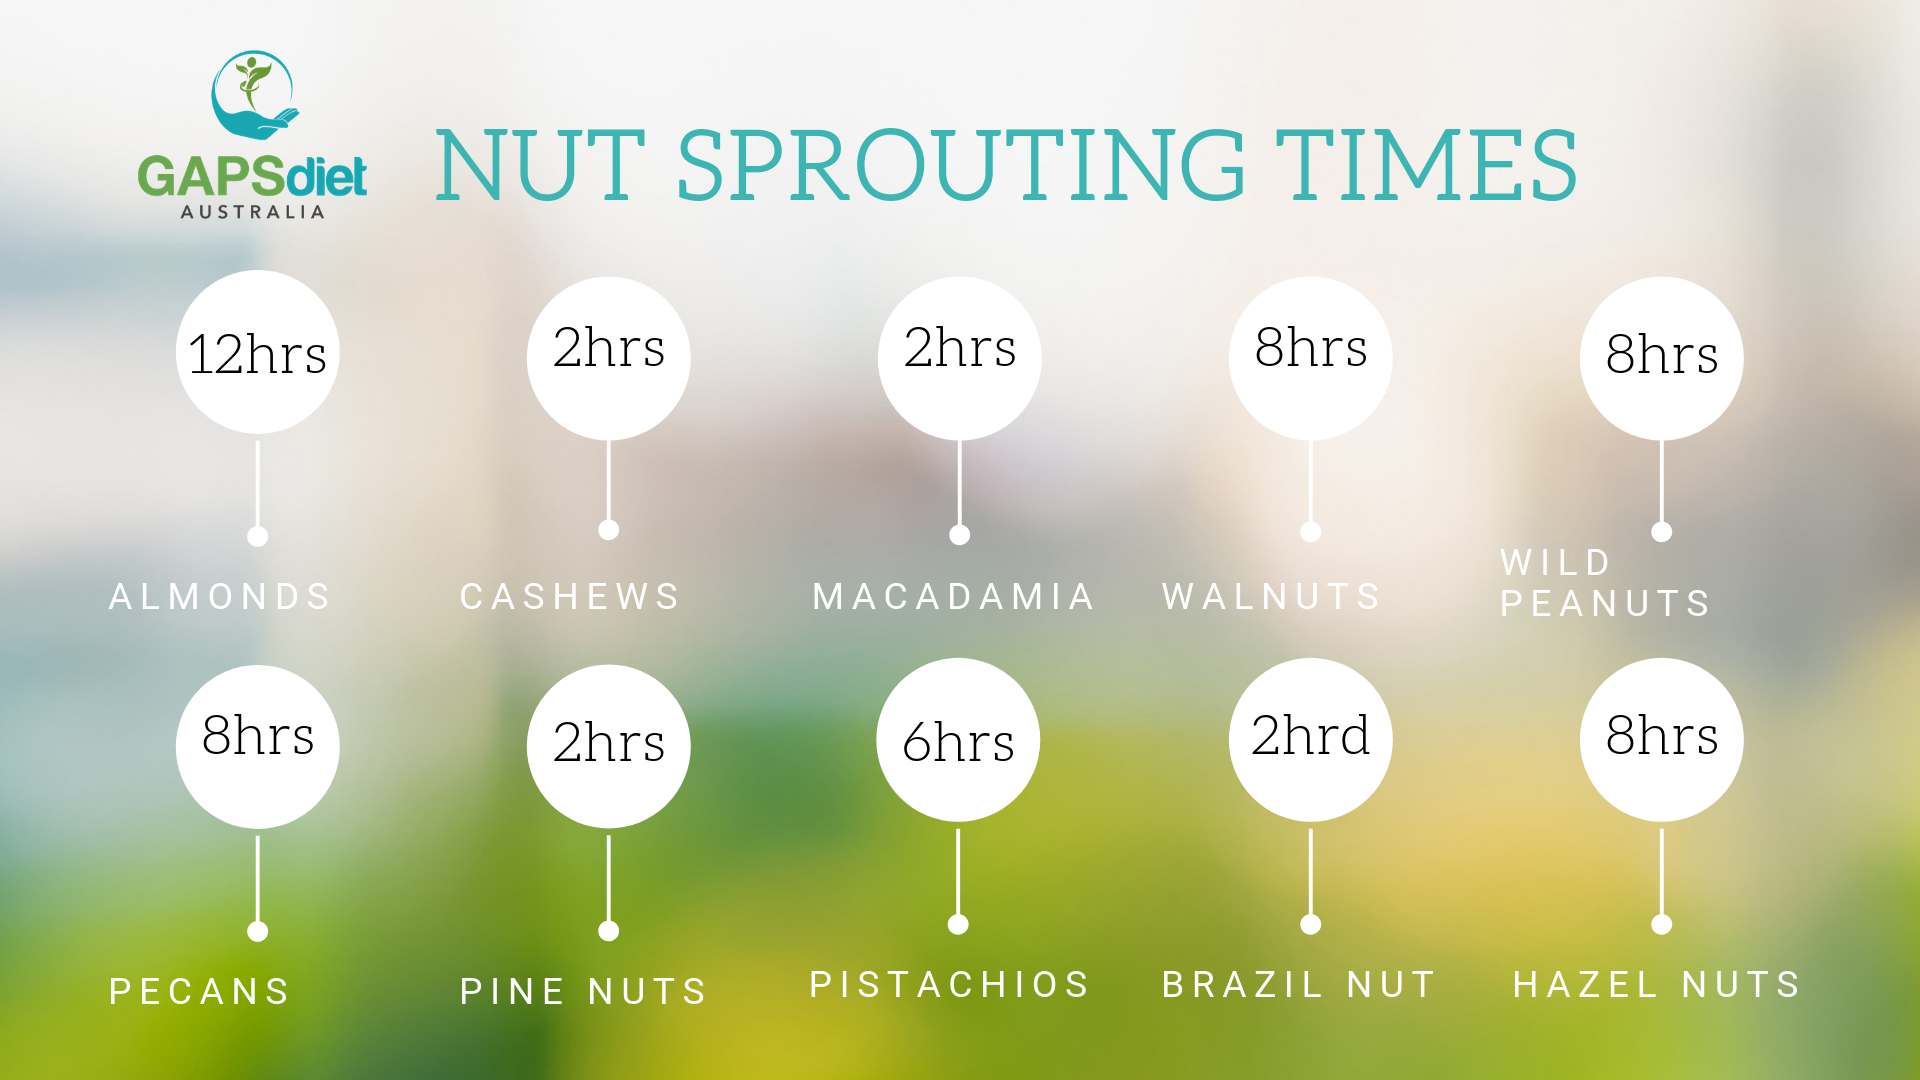
Almonds
12 Hours
1 tablespoon salt
Brazil Nuts
2 Hours
1 tablespoon salt
Cashews
2 Hours
1 tablespoon salt
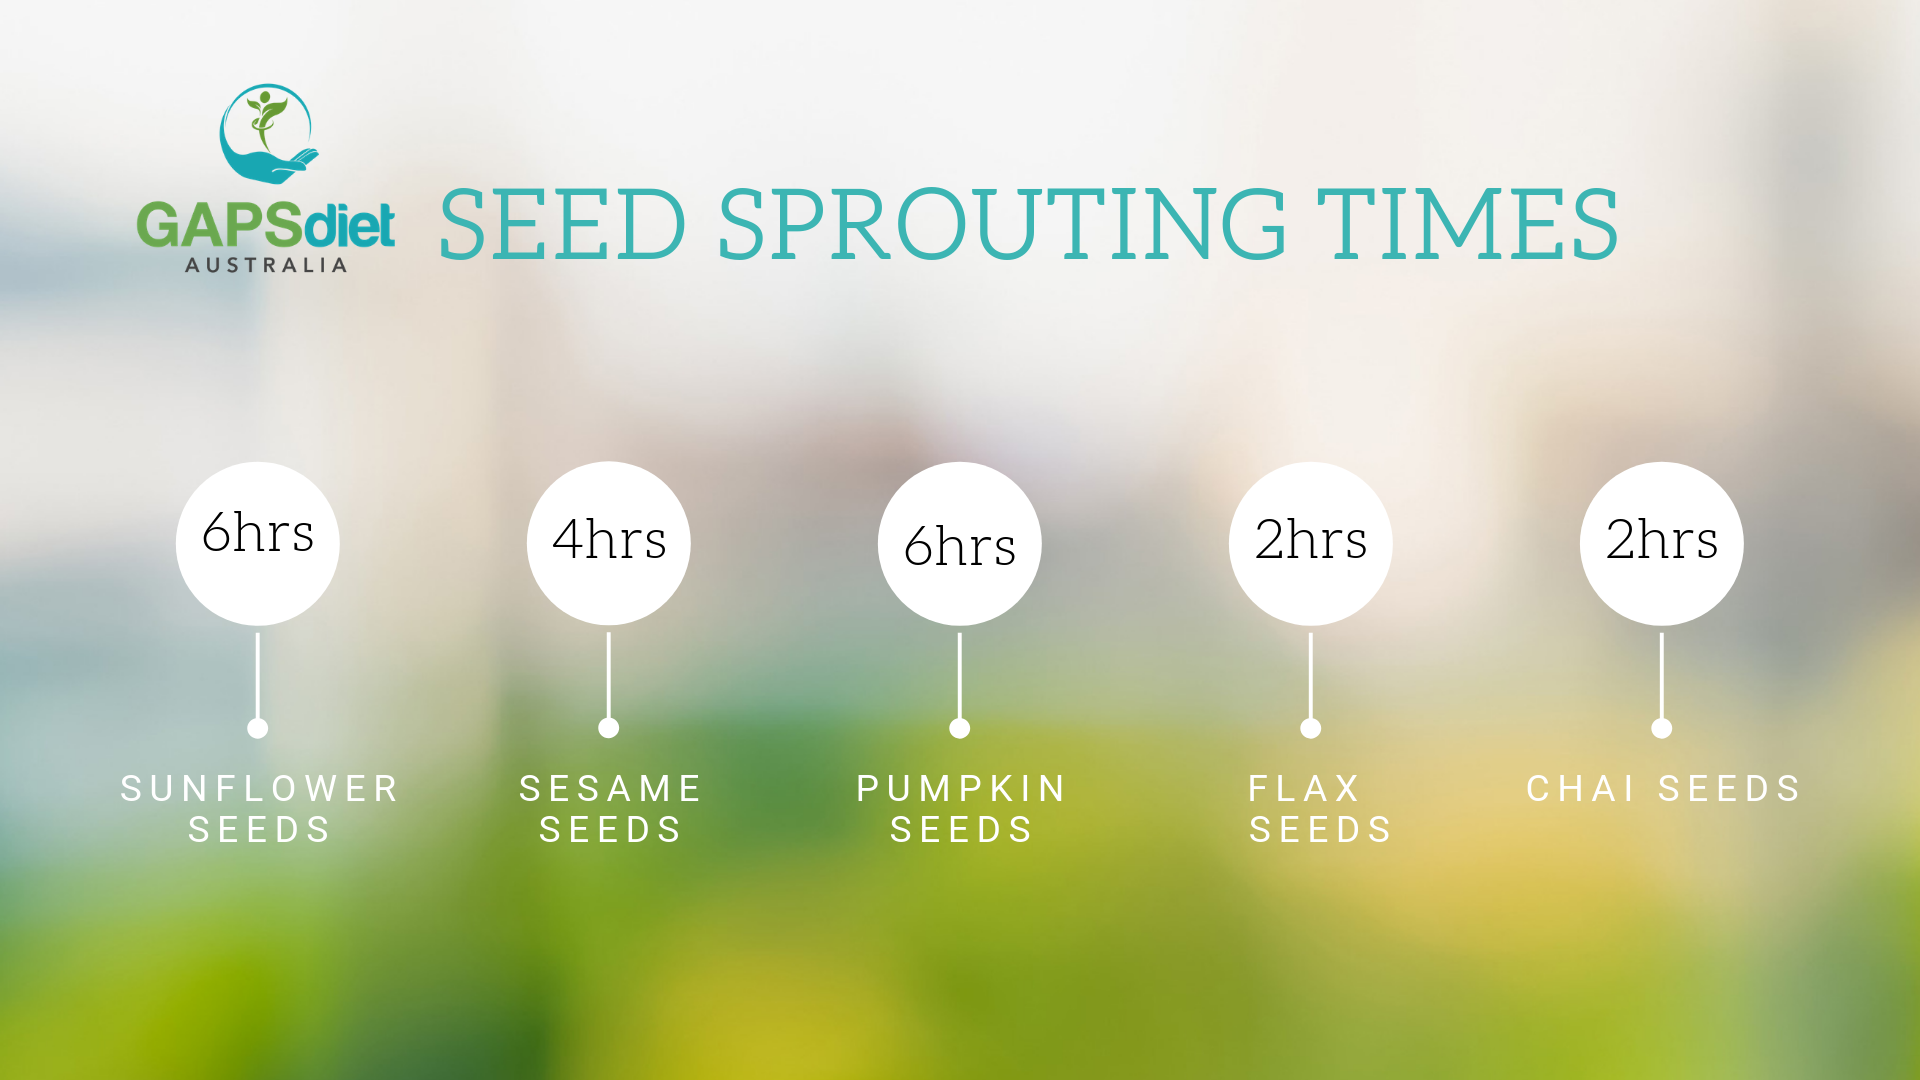
Chia Seeds
2 Hours
No salt
Flax Seeds
2 Hours
No salt
Hazel Nuts
8 Hours
1 tablespoon salt
Macadamia Nuts
2 Hours
1 tablespoon salt
Pecans
8 Hours
2 teaspoons salt
Pine Nuts
2 Hours
1 tablespoon salt
Pumpkin Seeds
6 Hours
2 tablespoons salt
Sesame Seeds un-hulled
6 Hours
1 tablespoon salt
Sunflower Seeds
4 Hours
2 tablespoons salt
Walnuts
8 Hours
2 teaspoons salt
Wild Peanuts
8 Hours
1 tablespoon salt
See other recipe 'Activating Nuts/Seeds for Flour' for instructions to soak and sprout seeds to make flour.
Recipe Notes
Clinical Notes
Nuts and Seeds are fibrous and should not be introduced for GAPS patients until digestive symptoms have shown some signs of improvement. The introduction diet provides a slow introduction to nuts by starting with nut butter followed by baking with nut flour and finally nuts for snacks themselves with encouragement to prepare them and chew them well. The sensitivity test is advised to be carried out first for those who suspect a true nut allergy, however there are many people who express their intolerance for nuts during the introduction diet who may need to determine themselves whether to wait until further healing takes place before introducing them.
Selecting organic nuts and seeds and preparing them by soaking and sometimes blanching them (skins removed) often makes all the difference for a GAPS patient to better tolerate them. Many GAPS patients have a toxic overload and cannot tolerate even the smallest amount of chemicals or pesticides in their system and this is why organic serves to be a better option.
In addition to crop chemicals, nuts and seeds contain their own toxic substances known as enzyme inhibitors and phytates (phytic acid). These toxins can play havoc in the digestive system, blocking nutrients such as calcium, magnesium, copper iron and especially zinc. Enzyme inhibitors in particular, are contained on the skins or surrounds of nuts and seeds and they are especially apparent in nuts with brown skins like almonds. Their purpose serves as a protective layer to naturally prevent animals and insects from consuming them so that they have the opportunity to germinate and sprout into a plant. Soaking nuts and seeds in warm salty water overnight will activate enzymes that neutralise enzyme inhibitors and also breakdown a large portion of phytic acid that allow the nutrients to be better absorbed in the digestive system. This soaking preparation process is often referred to as activating nuts and seeds.


")


")


